Vasa - 1:65 DeAgostini [COMPLETED BUILD]

Dear Friends,

I can honestly say I feel so blessed to count you all among my 'forum' friends. Your kind words of encouragement and well-wishes have meant so much to me. Thank you all!

Damian is doing extremely well. Some days are better than others, but all-in-all we feel like this particular challenge is now behind him (others remain, but God is good). Just to give you a glimpse of the little guy's fortitude: four days after having half of a lung removed, he crawled for the first time ever :D! Crazy, right?!?

The force is strong with this one...ROTF
May the force be with him and may the wind always be in his sails :)
 
But enough of all that...let's build a ship!

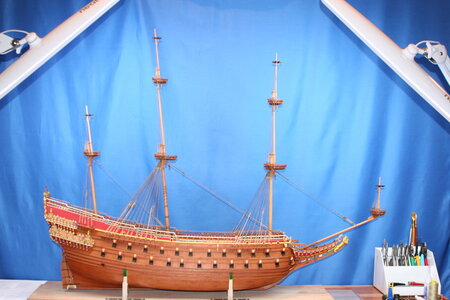
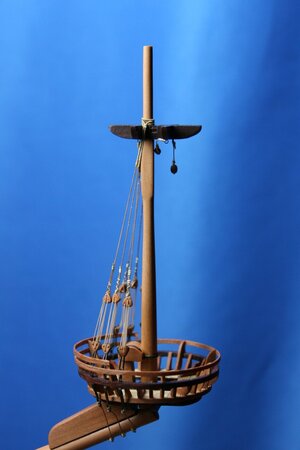
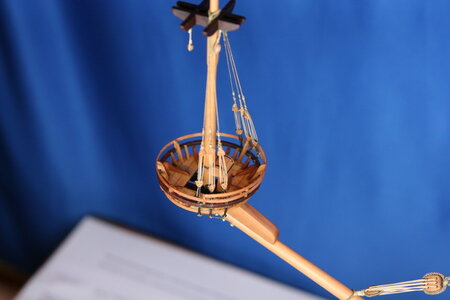
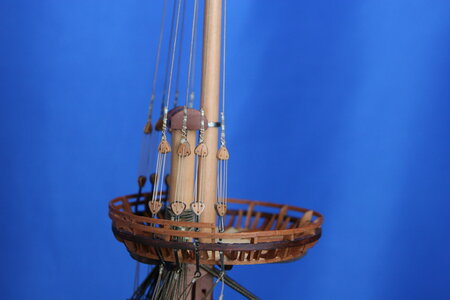
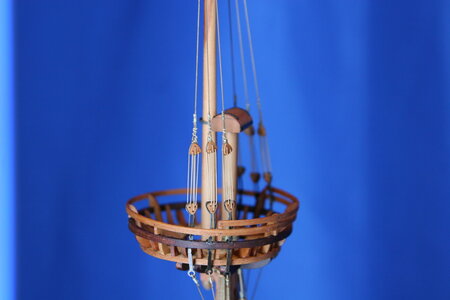
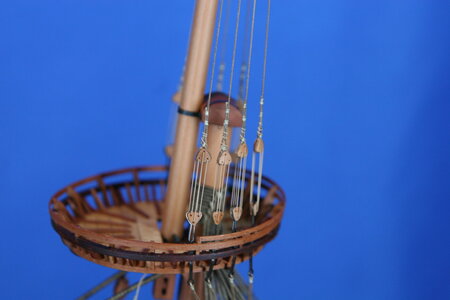
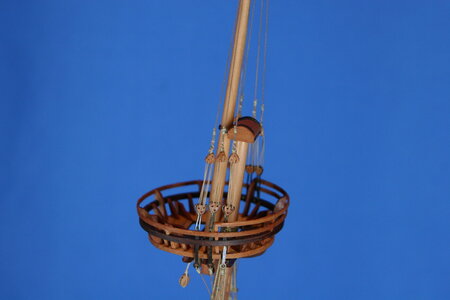
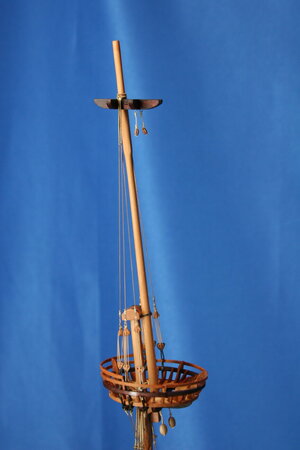
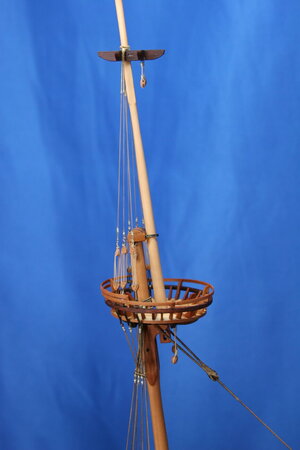
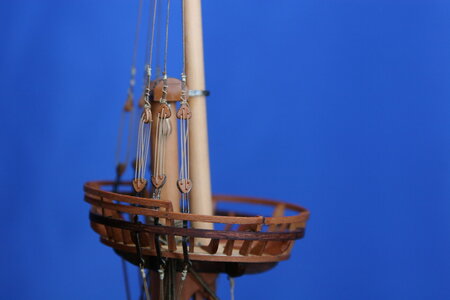
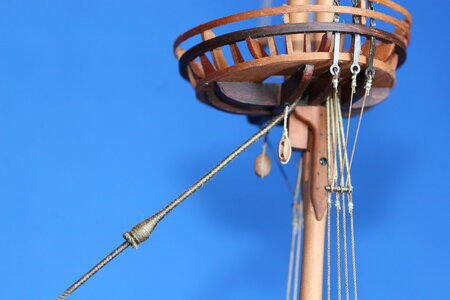
My Vasa continues to grow vertically. Since my last post I have added the top masts as well as the topgallant masts where appropriate.

As I have gone 'up' I have decreased the size of each component. Deadeyes have gone from 5mm to 4mm to 3mm. Shrouds have reduced in size as well (including the futtock shrouds). I have used a mash-up of the various 'tables' available adjusted for an early 17th century ship at 1:65 scale. If anyone is interested, I can send you the rope sizes I have used on each of the mast segments. I have also chosen to modestly simplify how I have the shrouds tied off at the deadeyes with each step down in size. This choice has nothing to do with historical accuracy - it was a concession to esthetics.

Here is the overall view of things:

IMG_7920.JPG

What follows is a somewhat random collection of images. First, the sprit mast:

IMG_7924.JPG IMG_7944.JPG

Next the fore topmast and topgallant:

IMG_7932.JPG IMG_7950.JPG

Next up, the main topmast and topgallant:

IMG_7952.JPG IMG_7954.JPG
IMG_7930.JPG

Finally, the mizzen topmast:

IMG_7922.JPG IMG_7940.JPG

In the days ahead I'll be researching the size and run of the various stays.

Thanks for visiting!
 
But enough of all that...let's build a ship!

My Vasa continues to grow vertically. Since my last post I have added the top masts as well as the topgallant masts where appropriate.

As I have gone 'up' I have decreased the size of each component. Deadeyes have gone from 5mm to 4mm to 3mm. Shrouds have reduced in size as well (including the futtock shrouds). I have used a mash-up of the various 'tables' available adjusted for an early 17th century ship at 1:65 scale. If anyone is interested, I can send you the rope sizes I have used on each of the mast segments. I have also chosen to modestly simplify how I have the shrouds tied off at the deadeyes with each step down in size. This choice has nothing to do with historical accuracy - it was a concession to esthetics.

Here is the overall view of things:

View attachment 296918

What follows is a somewhat random collection of images. First, the sprit mast:

View attachment 296920 View attachment 296926

Next the fore topmast and topgallant:

View attachment 296923 View attachment 296928

Next up, the main topmast and topgallant:

View attachment 296929 View attachment 296930
View attachment 296922

Finally, the mizzen topmast:

View attachment 296919 View attachment 296925

In the days ahead I'll be researching the size and run of the various stays.

Thanks for visiting!
Finally, you got your crow’s nests taking center stage! You put a lot of work into them. They deserve it.
 
Dear Friends,

I can honestly say I feel so blessed to count you all among my 'forum' friends. Your kind words of encouragement and well-wishes have meant so much to me. Thank you all!

Damian is doing extremely well. Some days are better than others, but all-in-all we feel like this particular challenge is now behind him (others remain, but God is good). Just to give you a glimpse of the little guy's fortitude: four days after having half of a lung removed, he crawled for the first time ever :D! Crazy, right?!?

The force is strong with this one...ROTF
Thank you, Lord!
 
But enough of all that...let's build a ship!

My Vasa continues to grow vertically. Since my last post I have added the top masts as well as the topgallant masts where appropriate.

As I have gone 'up' I have decreased the size of each component. Deadeyes have gone from 5mm to 4mm to 3mm. Shrouds have reduced in size as well (including the futtock shrouds). I have used a mash-up of the various 'tables' available adjusted for an early 17th century ship at 1:65 scale. If anyone is interested, I can send you the rope sizes I have used on each of the mast segments. I have also chosen to modestly simplify how I have the shrouds tied off at the deadeyes with each step down in size. This choice has nothing to do with historical accuracy - it was a concession to esthetics.

Here is the overall view of things:

View attachment 296918

What follows is a somewhat random collection of images. First, the sprit mast:

View attachment 296920 View attachment 296926

Next the fore topmast and topgallant:

View attachment 296923 View attachment 296928

Next up, the main topmast and topgallant:

View attachment 296929 View attachment 296930
View attachment 296922

Finally, the mizzen topmast:

View attachment 296919 View attachment 296925

In the days ahead I'll be researching the size and run of the various stays.

Thanks for visiting!
I'm loving your work Paul. Your tops are so much better than the kit tops I went with. I have been tempted to scratch build my tops but alas I shall continue on with the kits version.
 
But enough of all that...let's build a ship!

My Vasa continues to grow vertically. Since my last post I have added the top masts as well as the topgallant masts where appropriate.

As I have gone 'up' I have decreased the size of each component. Deadeyes have gone from 5mm to 4mm to 3mm. Shrouds have reduced in size as well (including the futtock shrouds). I have used a mash-up of the various 'tables' available adjusted for an early 17th century ship at 1:65 scale. If anyone is interested, I can send you the rope sizes I have used on each of the mast segments. I have also chosen to modestly simplify how I have the shrouds tied off at the deadeyes with each step down in size. This choice has nothing to do with historical accuracy - it was a concession to esthetics.

Here is the overall view of things:

View attachment 296918

What follows is a somewhat random collection of images. First, the sprit mast:

View attachment 296920 View attachment 296926

Next the fore topmast and topgallant:

View attachment 296923 View attachment 296928

Next up, the main topmast and topgallant:

View attachment 296929 View attachment 296930
View attachment 296922

Finally, the mizzen topmast:

View attachment 296919 View attachment 296925

In the days ahead I'll be researching the size and run of the various stays.

Thanks for visiting!
Good morning Paul. I finally had some time to go through and look at your progress in some detail. Your rigging knots, blocks, tie offs are all so incredibly neat and well done. I pity the poor sailors on your Vasa who have to keep everything “just like that”. Mutiny for sureROTF. Luckily she sank;). Seriously outstanding as always. Cheers Grant
 
Hello everyone! My name is Paul and I have been thinking about building the Vasa for a really, really long time. It would seem the time has finally come!

There are plenty of logs out there for the Swedish warship Vasa. So why another one?

Two reasons: 1) I need help! I have only built one other ship to scale (the Mamoli Roter Lowe more than 35 years ago!). But, I have read lots of build logs on various forums and, as a general rule, the participants are genuine and helpful. I have found this oddly encouraging – maybe with help I could actually get this thing done?

Which brings me to my related second reason: 2) the vast majority of build logs are posted by skilled and accomplished builders (rightly so – putting your stuff out there for others to see should be inspirational rather than tragic). But those same experienced artists know what they know and often do things without even thinking about it. Which also means they don’t struggle (at least anymore) with things that a novice will struggle with. Perhaps a log posted by someone less experienced will help others who are likewise less experienced (or, at least, give everyone something to laugh about).

I’m not sure this build log will gain any traction, but I’ll give it a shot and see if anyone shows up. I should mention that I still work for a living so progress might be slow. But I’m willing to put in the time to do this thing right so I would welcome anyone with an interest to pull up a chair and see me through this build.
Hello Paul,
Like you I was a beginner at ship building and started with kit and came across the same concern when building the ship, with regard to plank overlap at the stern. Looking at drawing of both the model and also in a reference book on building wooden ship, details later, I found that the side planking overlaps the stern planing on the corners. If you really wish to know how a wooden sailing ship was built then I recommend you obtain or borrow a copy of the following book:-
'The Master Shipwright's Secrets" written by Richard Endsor. Publisher:- Osprey Publishing, Published 2020; ISBN: HB978 1 4728 3838
The book has numerous fold out diagrams of the interior and exterior of a 17th century wooden warship similar to the Vasa with section views showin the hull construction and the placement of elaborate ccarvings especially around the stern. This shows the side planking goint right up the the stern of the ship and overlapping the stern planking. On top of the ends of the side planks are places the wooden carvings that were then guilded for decoration.
As a ship modeller this book is probably the most detailed and explicit to illustrate the building of a wooden sailing warship.
If you cannot get this book let me know ant I will try to get the key diagrams to you.

Best wishes
Derek Payne, STAFFORD England.
Thank you, Derek. When I get a chance I'll look for that book - it sounds very helpful.
 
Work continued today on the standing rigging.

For the record...I spent the ENTIRE DAY on our beloved hobby and only finished two stays (the main and fore topmast stays). I know what you're thinking...I could have done two stays in about an hour, two tops... I won't argue the point.

Based on today's progress I did some quick calculations and the following things will happen before I'm done with the standing rigging:
  • Dean (@Dean62) will complete two airplanes, a model of the Batmobile, and the Millenium Falcon which he'll bash by adding 14,600 boltheads
  • Stephan (@Steef66) will custom fabricate three more modeling tools and publish logs on how you can make each one spending no more than 12 euros on AliExpress
  • Kurt (@DARIVS ARCHITECTVS) will complete, tear out, and then rebuild the stern section of his ship twice
  • Heinrich (@Heinrich) will retire from teaching and start his new career at Kolderstok
  • Shota (@shota70) will sell all of his remaining kits so he can buy tools for a scratch build that he will carve from a 1 meter by 2 meter chunk of boxwood that Maarten (@Maarten) will mill for him out of his personal stockpile (that he cut from his neighbor's yard while they were on holiday)
  • Marc (@Hubac’s Historian) will define finally 'tumblehome' so I can stop wondering if he's referring to a drinking game
I've got many (many) more but I think I've offended enough people at this point ROTF ROTF ROTF .

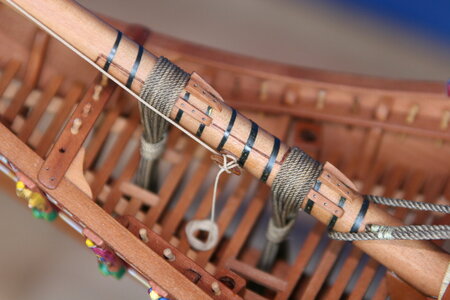
Here's the main topmast mouse (there's another one just like it on the fore topmast) and some futtock shrouds:

IMG_7981.JPG

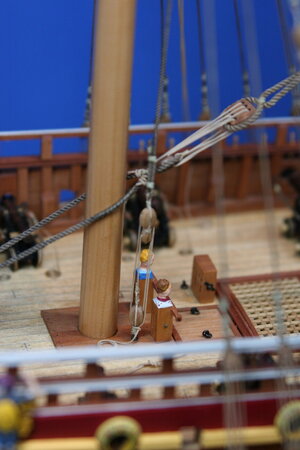
The main topmast stay terminates in a tackle at the base of the foremast (several out of focus images because I'm lousy at taking pictures):

IMG_7967.JPG

IMG_7969.JPG

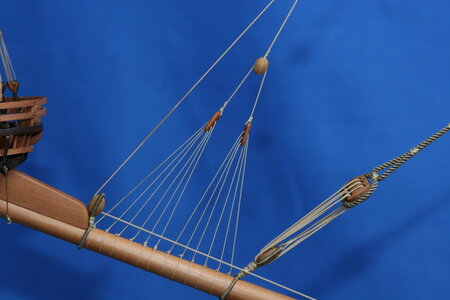
The fore topmast stay terminates with a complex arrangement of lines at the bowsprit. For the life of me I can't imagine why crows feet would be needed when tying to a robust hunk of wood like the bowsprit. Anyway, most everyone does their Vasa this way so I did too (and Anderson says this is correct as well):

IMG_7975.JPG

Getting these lines equally snug was just about the most stressful thing I have done on this ship. I used a double hitch to tie off the lines as I could find no guidance. Oh, and I made the euphroes from a scrap piece of pear:

IMG_7957.JPG

The tensioning line for the crows feet runs through a block at the knee for the spritmast top and then runs back to a cleat I added:

IMG_7971.JPG

And that, dear friends, took about 10 hours. I have no idea why.

In a sea of fabulous build logs I am humbled that you would visit my shipyard.
 
Work continued today on the standing rigging.

For the record...I spent the ENTIRE DAY on our beloved hobby and only finished two stays (the main and fore topmast stays). I know what you're thinking...I could have done two stays in about an hour, two tops... I won't argue the point.

Based on today's progress I did some quick calculations and the following things will happen before I'm done with the standing rigging:
  • Dean (@Dean62) will complete two airplanes, a model of the Batmobile, and the Millenium Falcon which he'll bash by adding 14,600 boltheads
  • Stephan (@Steef66) will custom fabricate three more modeling tools and publish logs on how you can make each one spending no more than 12 euros on AliExpress
  • Kurt (@DARIVS ARCHITECTVS) will complete, tear out, and then rebuild the stern section of his ship twice
  • Heinrich (@Heinrich) will retire from teaching and start his new career at Kolderstok
  • Shota (@shota70) will sell all of his remaining kits so he can buy tools for a scratch build that he will carve from a 1 meter by 2 meter chunk of boxwood that Maarten (@Maarten) will mill for him out of his personal stockpile (that he cut from his neighbor's yard while they were on holiday)
  • Marc (@Hubac’s Historian) will define finally 'tumblehome' so I can stop wondering if he's referring to a drinking game
I've got many (many) more but I think I've offended enough people at this point ROTF ROTF ROTF .

Here's the main topmast mouse (there's another one just like it on the fore topmast) and some futtock shrouds:

View attachment 298153

The main topmast stay terminates in a tackle at the base of the foremast (several out of focus images because I'm lousy at taking pictures):

View attachment 298149

View attachment 298150

The fore topmast stay terminates with a complex arrangement of lines at the bowsprit. For the life of me I can't imagine why crows feet would be needed when tying to a robust hunk of wood like the bowsprit. Anyway, most everyone does their Vasa this way so I did too (and Anderson says this is correct as well):

View attachment 298152

Getting these lines equally snug was just about the most stressful thing I have done on this ship. I used a double hitch to tie off the lines as I could find no guidance. Oh, and I made the euphroes from a scrap piece of pear:

View attachment 298148

The tensioning line for the crows feet runs through a block at the knee for the spritmast top and then runs back to a cleat I added:

View attachment 298151

And that, dear friends, took about 10 hours. I have no idea why.

In a sea of fabulous build logs I am humbled that you would visit my shipyard.
What's your thought on me cause I want to hear this one lol. Also beautiful work so far, I feel I don't have no chance of doing anything close to you.
 
Paul, great work!
By the way, since you started this build…I have built 2 ships, started a 3rd, and am 3/4 done with an airplane! :p
All had extensive bolts added to make sure nothing will fall off! ;)
And if you guys don’t stop making everything out of pear wood, there will be a worldwide shortage!!! There are plenty of other beautiful wood species to work with, even in the modeling world! :p
 
Back
Top