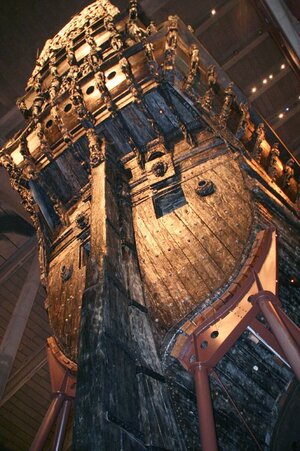
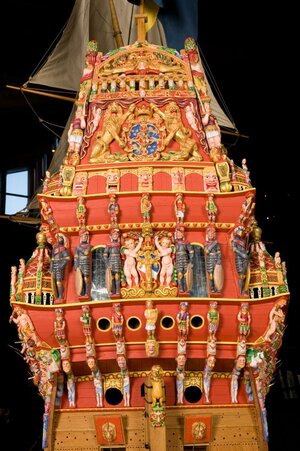
Vasa - 1:65 DeAgostini [COMPLETED BUILD]

Paul
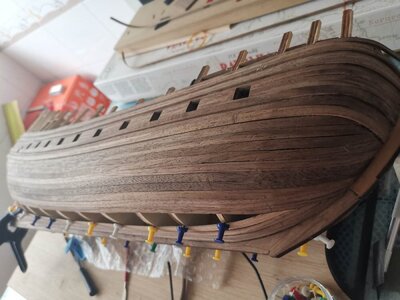
I use normal A4 printer paper.Envisage you are making the plank from the paper.Cut a strip an inch wide and place on the hull where the plank sits.Roughly mark the curve of the existing plank on the paper then remove and cut the curve using scissors.Continue trial fitting and trimming until the paper butts up tight against the last plank.You can the mark the other edge of the template to suit the plank width.I deliberately cut the plank a couple of mm wide to along for final shaping.
Yes this takes time but the results are worth it.Picture below of my Nuestra Señora,got so far edge bending but then had to cut from sheet due to the tight curves.

Kind Regards

Nigel


]View attachment 195784
That is EXACTLY what I envisioned in my mind but could not accomplish. I'll give it a go, Nigel. Thank you for taking the time to help me out.
Another question: I don't see any taper at all. What happens as you move more inboard toward the keel? Have you finished this hull and can you show me what that looks like?
 
Paul

No,that is how the model sits now, too many projects........

This hull is planked in a contemporary dockyard model style, the rules are different to that of real planking and VERY different to Vasa.I simply used the pic to illustrate how to overcome the issue.

The paper does work and you can screw it up and start again before committing to wood.Some use tape but that never worked for me.

Kind Regards

Nigel
 
Hey Dean,
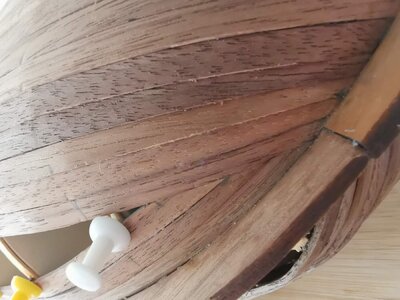
The problem I am having is the opposite of what you think it is. The natural flow of the strake is away from the sternpost/keel in an upward direction. I have been forcing the strips to bend down. See the following taped-on strake lying fully flat against the hull:

View attachment 195738

The tension doesn't come out of the wood until between the second and third gun port. As I move closer to the keel (inboard) that vertical flow will increase even more.

I don't know if this is what everyone faces (and I'm just a knucklehead) or if it the characteristic bluff bow on the Vasa that is amplifying the issue for me. Since this is my first real build I have no frame of reference. The DeAg instructions are of no help (nor is their 'official build' log) since they recommend planking the veneer the same as the primary hull which means terminating a whole pile of planks at the apex of the curve in dagger points (about 6 or 7 planks converge into an area the size of a dime about four inches from the sternpost). At this point I'm still operating under the "I'm a knucklehead" hypothesis but I'm beginning to wonder - I know of another log where someone was trying to build this same kit and the effort was abandoned at this point of the build.

This picture also captures some of the gaps that developed between planks as the glue set under tension... Sigh...
@dockattner ...
I would start at the keel and move upwards to meet what you already have in place. Be sure to make your garboard plank go full width to the keel at the bow. The boards want to curve upwards, so they will lay down nicely. Problem solved hopefully!
ps - you will have a row (or two?) where what you have now and the rows from the keel going up meet, that will end in a point. But the Vasa had those type boards if I remember correctly.
You could also encourage the upward bend at the end of your rows at the bow, by adding a small narrow stealer (triangle) right above the garboard plank at the bow keel. That will start the upward curve on the second and all subsequent rows. Just a thought. As this would most likely be my approach, so the boards are bending naturally the way they want to. But I’m like electricity...I take the path of least resistance! ;)
 
Last edited:
@dockattner ...
I would start at the keel and move upwards to meet what you already have in place. Be sure to make your garboard plank go full width to the keel at the bow. The boards want to curve upwards, so they will lay down nicely. Problem solved hopefully!
ps - you will have a row (or two?) where what you have now and the rows from the keel going up meet, that will end in a point. But the Vasa had those type boards if I remember correctly.
You could also encourage the upward bend at the end of your rows at the bow, by adding a small narrow stealer (triangle) right above the garboard plank at the bow keel. That will start the upward curve on the second and all subsequent rows. Just a thought. As this would most likely be my approach, so the boards are bending naturally the way they want to. But I’m like electricity...I take the path of least resistance! ;)
Too late Dean! I just ripped off a bunch of bow planks o_O. Of course I don't know if my new effort will improve on the first (same builder after all) so maybe I'll get to try out your suggestion in the end!
 
Paul

The second planking looks fabulous.

The best solution to your problem is to cut the planks from veneer sheet.Soak the veneer in water first then cut with a scalpel oversize to a paper template.
Allow the plank to dry and then finally shape using a sanding stick and trial fitting.Pear veneer cuts like paper when wet using a sharp scalpel and is a joy to work with.

Kind Regards

Nigel
An alternative to using water (which causes the wood fibers to expand) is to try isopropyl alcohol which works faster than water, even at room temperatures, and does not create the swelling problem which later shrinks again. . . at least from my use of it in the past and still for the future. Just a thought to experiment with. Rich (PT-2)
 
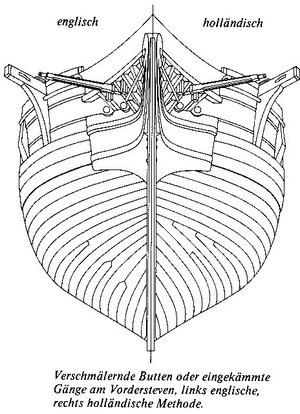
@NMBROOK Nigel the problem is that on your build the planking follows a straight line - which in your case if of course - correct. But the Vasa is in essence a Dutch ship - hence the illustration below. The problem with Doc's planking seems to be caused by the multiple scarph joints at the beginning which makes the line too straight instead of allowing a natural upwards curve.

compare_english_dutch_planking.jpg

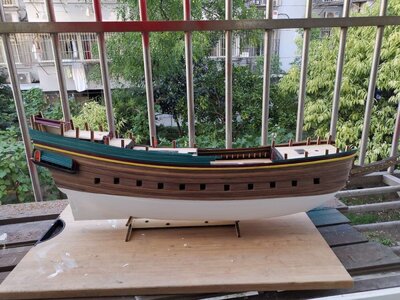
WeChat Image_20200813115526.jpg

Notice the upwards sweep at the bow and stern of a Dutch ship's planking.

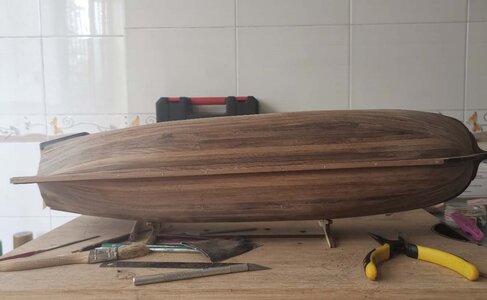
Build 366.jpg

All one-length planking with two exceptions at the stern where the curvature and length of the plank necessitated butt joints.

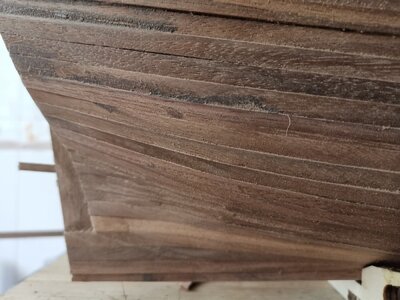
Build 367.jpg

Planks were narrowed at the stern - but as you can clearly see - no stealers! And this was single-hull planking.
 
I'm confident you are all sitting on the edges of your seats wondering how this epic drama will resolve itself ;). So, here's an update.

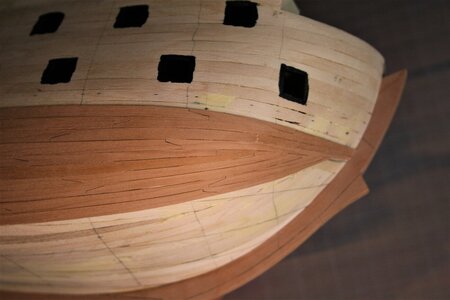
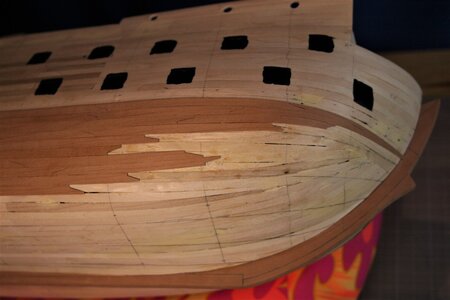
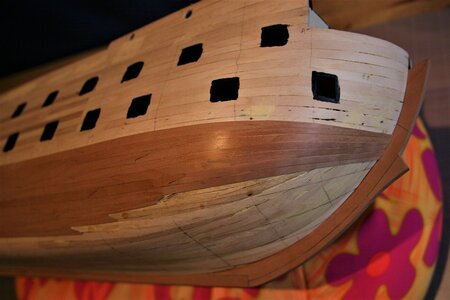
This is what I started with:

IMG_5712.JPG

Again, my problem wasn't that it looked bad (well, other than the gaps in between the strakes). But that the technique I was using could not continue - the vertical bending I was attempting was creating a 'clinker' effect that was getting worse and worse the deeper I got into the curvature of the hull.

I was intrigued by the suggestion made by @NMBROOK: use veneer and cut each plank as a custom piece. I had veneer from when I covered the keel, sternpost, and stem so I decided to give it a shot. Naturally the first step was to remove the offending planks (yes, I did cry a little bit but it was not pathetic sobbing - more of a manly sort of crying).

IMG_5713.JPG

Following Nigel's instructions I made a paper template and transferred that to my pear veneer. I carefully cut out and shaped each piece and voila:

IMG_5719.JPG

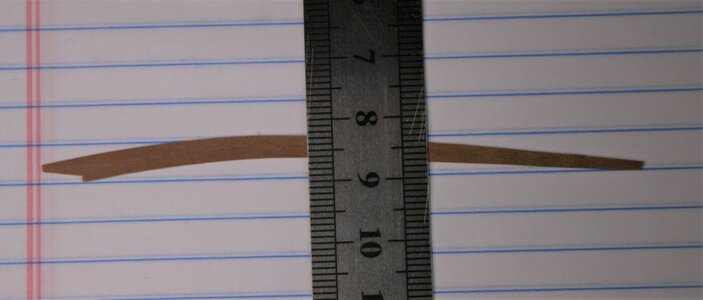
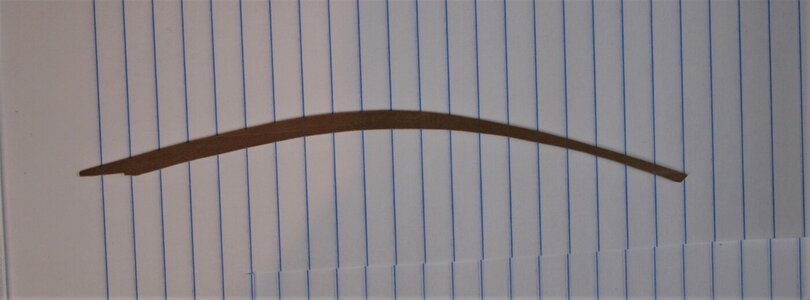
If someone stumbles across this build log who is as new at this as I am here are some pictures of two lath strips - the first picture is the third strip from the top and the second picture is the seventh strip from the top (the last one placed at the bottom). I was stunned to see the amount of vertical change necessary to lay a strip that looks straight on the hull!

IMG_5715.JPG

IMG_5717.JPG

I believe I have captured the Dutch planking style as defended by @Heinrich (albeit without the run of drop planks) - but more importantly I can now continue planking the hull until I run into my next problem!

Thanks to everyone who offered suggestions - you are all a fine bunch.

These two photographs should explain better what I mean.

View attachment 195850

View attachment 195851
As you can see it is perfectly possible for the planks to butt up against the stern.
Thank you Heinrich - you are skilled beyond my wildest dreams! I see it, so I believe it - I just couldn't do it!

My wife discovered my shortcomings many years ago but she stills loves me so I guess I'll need to live with my failings just as she does!
 
Last edited:
I'm confident you are all sitting on the edges of your seats wondering how this epic drama will resolve itself ;). So, here's an update.

This is what I started with:

View attachment 195852

Again, my problem wasn't that it looked bad (well, other than the gaps in between the strakes). But that the technique I was using could not continue - the vertical bending I was attempting was creating a 'clinker' effect that was getting worse and worse the deeper I got into the curvature of the hull.

I was intrigued by the suggestion made by @NMBROOK - use veneer and cut each plank as a custom piece. I had veneer from when I covered the keel, sternpost, and stem so I decided to give it a shot. Naturally the first step was to remove the offending planks (yes, I did cry a little bit but it was not pathetic sobbing - more of a manly sort of crying).

View attachment 195853

Following Nigel's instructions I made a paper template and transferred that to my pear veneer. I carefully cut out and shaped each piece and voila:

View attachment 195856

If someone stumbles across this build log who is as new at this as I am here are some pictures of two lath strips - the first picture is the third strip from the top and the second picture is the seventh strip from the top (the last one placed at the bottom). I was stunned to see the amount of vertical change necessary to lay a strip that looks straight on the hull!

View attachment 195854

View attachment 195855

I believe I have captured the Dutch planking style as defended by @Heinrich (albeit without the run of drop planks) - but more importantly I can now continue planking the hull until I run into my next problem!

Thanks to everyone who offered suggestions - you are all a fine bunch.


Thank you Heinrich - you are skilled beyond my wildest dreams! I see it, so I believe it - I just couldn't do it!

My wife discovered my shortcomings many years ago but she stills loves me so I guess I'll need to live with my failings just as she does!
I believe that technique is called spiling. Basically transferring curves to a straight plank. I have avoided this technique thus far, mainly due to the fact it requires a wider than normal plank. With thick boards you can soak and heat to edge bend, so you don’t need to do any spiling. But veneer, as you found out, is not so cooperative when it comes to edge bending. It will tolerate some, especially on the tapered section that is not as wide. But you chose to take on a difficult task with your ship.
In the end you will succeed and I commend you for your effort, stubbornness and success! ;)
Much appreciated Dean. Spiling huh? Very exotic sounding. You correctly point out that this technique requires material that was not included in the kit - but fortunately I had pear veneer sheet on hand. The color is slightly different but not much can be done about that. It's actually pretty easy to do and enormously satisfying. Takes a bit of time but so does fitting drop planks (and countless scarf joints!). In the end I was able to get around a problem so I'm mighty pleased with all the support I received from folks on the SOS forum.
 
Hey Dockattner, I was browsing Sovereign of the Seas; Die Skulpturen des Britischen Königsschiffes von 1637 when I came across a picture you might find useful.

View attachment 197053
Awesome, Kurt! Thank you for sharing this image. It is interesting in that it shows the 'outer' soldiers facing port and starboard rather than to the rear of the ship. There is also a minor controversy over how many of the soldiers carried spears - this image shows four...
 
Awesome, Kurt! Thank you for sharing this image. It is interesting in that it shows the 'outer' soldiers facing port and starboard rather than to the rear of the ship. There is also a minor controversy over how many of the soldiers carried spears - this image shows four...
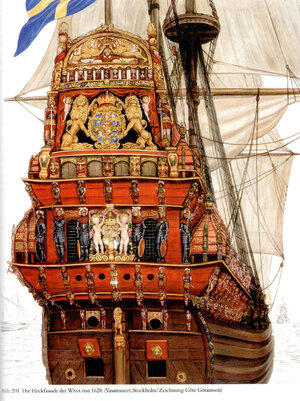
The Wasa has a square tuck, with the stern and sides meeting at a sharp angle all the way down to the keel, and the figures that adorn the edge of the stern face outward, port and starboard, being mounted on the sides of the hull where it meets the transom. Higher up on where the stern gallery meets the side gallery, the figures are angled at 30 degrees with respect to the side and rear.

c8b2f98395356bfa75e60551ecdd2e1a.jpg

On the Wasa, there are only 5 figures standing, with one conspicuously missing. It's probable that it was broken off and not recovered, your fourth spearman. It is interesting to note that the model displayed at the Wasa Museum does not show spears in the hands of the second figures in from outboard on either side, only two spearmen. That leaves you wondering if the arms of those figures were meant to hold spears as the picture in the previous post, or not. I assume you have these pictures and more from the Wasa Museum. If you don't let me know so I can send these and more to you for your reference.
21b084095f04fc21bf629224b2e580d1.jpg


402597a4ca548e12133375e6ba1f1d48.jpg
 
Last edited:
Back
Top