Great job Paul...looks like you did some dry brushing for more detail.If you are new (newer) to this build log of the Swedish warship Vasa (viewership has increased somewhat over time - I believe it's sort of like how people slow down to look at an accident on the side of the road: Ooo - that's gonna be expensive, or I never saw something like that before, or even, I'm not sure there are any survivors honey...) I'll mention that I am attempting to represent the ship based on the most recent findings at the museum in Stockholm. Specifically, I am painting all the decorations rather than presenting them as gilded. And there are hundreds of decorations - so every once in a while I need to stop doing normal kit building stuff and paint tiny metal bits.
Today I tackled some figures that will adorn the galleon at the bow of the ship. Half of these little guys go on the port, and half on the starboard. To get a sense of scale I am reposting my earlier picture of my work table. To the right of my magnifier lamp you can see a green foam thing - today's project is pegged there.
View attachment 209853
Here they are before spraying them with matte poly (still on their holder-sticks)...
View attachment 209854
And the final product ready to be bagged...
View attachment 209855
Like me - they look better from far away than they do close up. Some turned out better than others - but I gave it my best shot. They represent about ten hours of work.
As always, thanks so much for checking out my build log. You're a fine bunch!
-

Win a Free Custom Engraved Brass Coin!!!
As a way to introduce our brass coins to the community, we will raffle off a free coin during the month of August. Follow link ABOVE for instructions for entering.
-

PRE-ORDER SHIPS IN SCALE TODAY!
The beloved Ships in Scale Magazine is back and charting a new course for 2026!
Discover new skills, new techniques, and new inspirations in every issue.
NOTE THAT OUR FIRST ISSUE WILL BE JAN/FEB 2026
You are using an out of date browser. It may not display this or other websites correctly.
You should upgrade or use an alternative browser.
You should upgrade or use an alternative browser.
Vasa - 1:65 DeAgostini [COMPLETED BUILD]
- Thread starter dockattner
- Start date
- Watchers 147
least can do it spell "fowl" "foul" correctlly
didnt think it was that bad... fgowl foul... bad hand\
Thanks Kurt, Jan, Dean and everyone else for the likes. These painted bits are an unusual feature of this kit and one I need to grow into. Your encouragements are encouraging!
Good job Paul. Congrats.If you are new (newer) to this build log of the Swedish warship Vasa (viewership has increased somewhat over time - I believe it's sort of like how people slow down to look at an accident on the side of the road: Ooo - that's gonna be expensive, or I never saw something like that before, or even, I'm not sure there are any survivors honey...) I'll mention that I am attempting to represent the ship based on the most recent findings at the museum in Stockholm. Specifically, I am painting all the decorations rather than presenting them as gilded. And there are hundreds of decorations - so every once in a while I need to stop doing normal kit building stuff and paint tiny metal bits.
Today I tackled some figures that will adorn the galleon at the bow of the ship. Half of these little guys go on the port, and half on the starboard. To get a sense of scale I am reposting my earlier picture of my work table. To the right of my magnifier lamp you can see a green foam thing - today's project is pegged there.
View attachment 209853
Here they are before spraying them with matte poly (still on their holder-sticks)...
View attachment 209854
And the final product ready to be bagged...
View attachment 209855
Like me - they look better from far away than they do close up. Some turned out better than others - but I gave it my best shot. They represent about ten hours of work.
As always, thanks so much for checking out my build log. You're a fine bunch!

Last edited:
Thanks Bilal. Builders like you inspire me to try my best!Good kob Paul. Congrats.
Theoretically I'm supposed to be painting - but recently I read a post on another build log about how a rudder was being added fairly late in a ship's construction and as the ship was turned on its side to install the rudder... parts started falling off the ship. The story was told in a funny way and I laughed as I read it. And then I looked at the instructions for my Vasa and sure enough - the rudder was to be added quite late. Hmm...
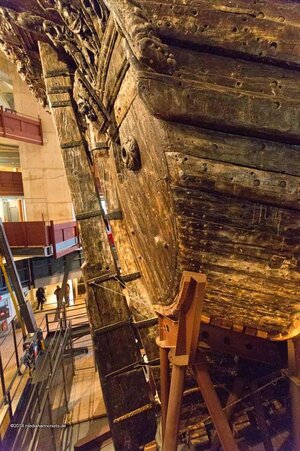
First: here in the goal...
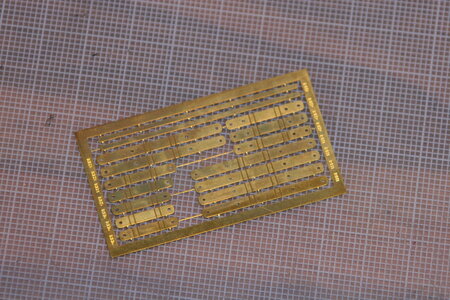
The kit provided brass was out of scale and unsuitable...
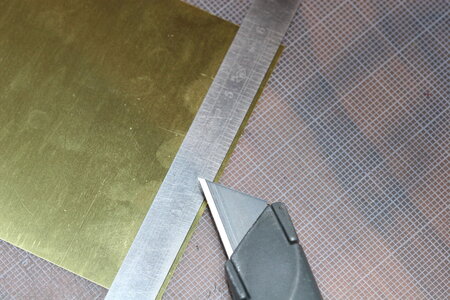
So I cut my own from 0.5 mm brass sheet stock...
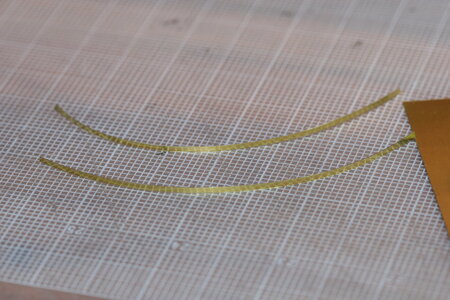
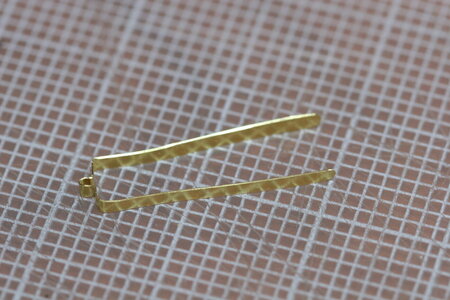
And then shaped the strips into each half of the hinge (there are seven):
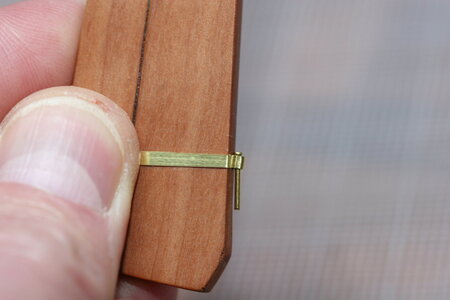
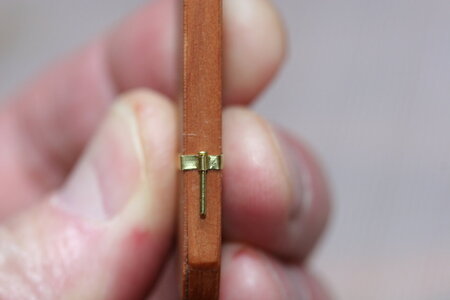
And added a pin...
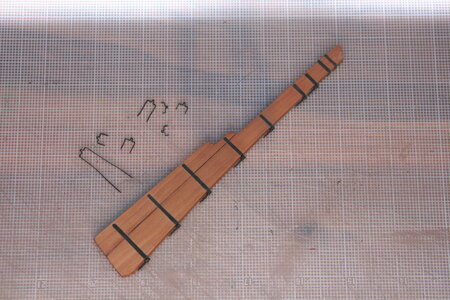
After completing all the hinges and reshaping the pins I blackened them...
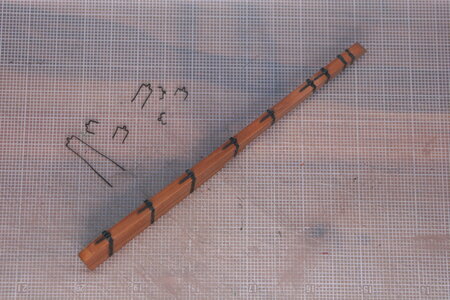
And without further ado - here is the final product...
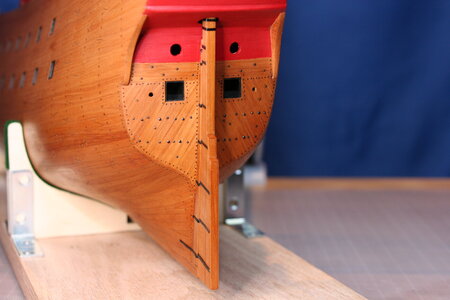
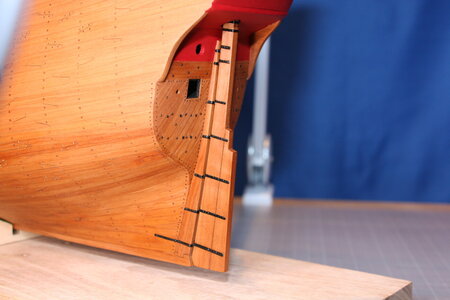
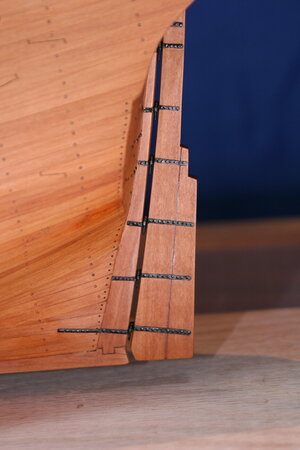
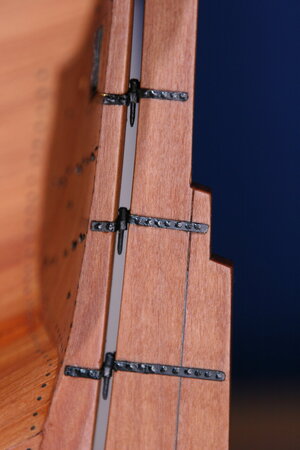
I won't make a claim for kit-bashing - but this little project sure was fun.
But now it's back to painting...
As always, thanks for stopping by friends!
First: here in the goal...

The kit provided brass was out of scale and unsuitable...

So I cut my own from 0.5 mm brass sheet stock...


And then shaped the strips into each half of the hinge (there are seven):

And added a pin...


After completing all the hinges and reshaping the pins I blackened them...


And without further ado - here is the final product...


I won't make a claim for kit-bashing - but this little project sure was fun.
But now it's back to painting...
As always, thanks for stopping by friends!
Last edited:
Nice job Paul! Like those nails!Theoretically I'm supposed to be painting - but recently I read a post on another build log about how a rudder was being added fairly late in a ship's construction and as the ship was turned on its side to install the rudder... parts started falling off the ship. The story was told in a funny way and I laughed as I read it. And then I looked at the instructions for my Vasa and sure enough - the rudder was to be added quite late. Hmm...
First: here in the goal...
View attachment 210526
The kit provided brass was out of scale and unsuitable...
View attachment 210533
So I cut my own from 0.5 mm brass sheet stock...
View attachment 210527 View attachment 210528
And then shaped the strips into each half of the hinge (there are seven):
View attachment 210529
And added a pin...
View attachment 210532 View attachment 210531
After completing all the hinges and reshaping the pin I blackened them...
View attachment 210534 View attachment 210535
And without further ado - here is the final product...
View attachment 210536
View attachment 210537
View attachment 210538
View attachment 210539
I won't make a claim for kit-bashing - but this little project sure was fun.
But now it's back to painting...
As always, thanks for stopping by friends!
I like the way it is now, whether it supposes to be painted or not, and great job on pintles and gudgeons
| Pintles and Gudgeons |
| Pintles and Gudgeons comprise the hinging mechanism on outboard-mounted Rudders. Pintles always incorporate a Pin, Gudgeons always have a hole for a Pin, either may be attached to the rudder or to the Transom. In standard configuration, Pintles are attached to the Rudder, and Gudgeons are attached to the Transom. Less common are Pintles that attach to the Transom, referred to as Transom Pintles, the Gudgeons they are used with (attached to the Rudder) are known as Rudder Gudgeons. It is not uncommon for a boat to use only Gudgeons with removable Hinge Pins connecting 2 Transom Gudgeons with a Rudder Gudgeon between. |
Yes, Dean, they are your technique. But you are better at them than I am! But thanks for the lesson regardless.Nice job Paul! Like those nails!
I think you did a great job! Consistency in size takes a lot of practice. Knowing how much glue to put on the pin, how much to dab on the object you are adding them to, and finally when to add more glue on the pin. But what you have looks like old cast iron bolts, which I think is a great look.Yes, Dean, they are your technique. But you are better at them than I am! But thanks for the lesson regardless.
Not to mention, the fabrication of the hinges is great too! Good job all around.
I’m glad my log was good for a few laughs! I guess there’s no substitute for experience. Some of these issues should be obvious after we’ve built a few. But it’s fun to laugh about our foibles in the mean time.
You know - I agree with you here. My vision was hand-worked strips of metal and hand-worked nails. I think I accidently accomplished both!I think you did a great job! Consistency in size takes a lot of practice. Knowing how much glue to put on the pin, how much to dab on the object you are adding them to, and finally when to add more glue on the pin. But what you have looks like old cast iron bolts, which I think is a great look.
Not to mention, the fabrication of the hinges is great too! Good job all around.
After I added the rudder I realize how fragile it is. I think I might add some temporary reinforcements. I'm a long way from the finish line and I am fully capable of destroying something I worked pretty hard on. My life goal is to vicariously learn through the struggles of others - sadly I have not mastered that skill. But I do take the experience and suggestions of others seriously - thanks for contributing to my journey my friend!!!I’m glad my log was good for a few laughs! I guess there’s no substitute for experience. Some of these issues should be obvious after we’ve built a few. But it’s fun to laugh about our foibles in the mean time.
That’s what friends are for.
And by the way—nice fabrication of the hinges. Mine were a bit thick and didn’t have the definition in the bends yours did.
My temporary solution. I kept on banging the rudder while moving the hull around.After I added the rudder I realize how fragile it is. I think I might add some temporary reinforcements. I'm a long way from the finish line and I am fully capable of destroying something I worked pretty hard on. My life goal is to vicariously learn through the struggles of others - sadly I have not mastered that skill. But I do take the experience and suggestions of others seriously - thanks for contributing to my journey my friend!!!
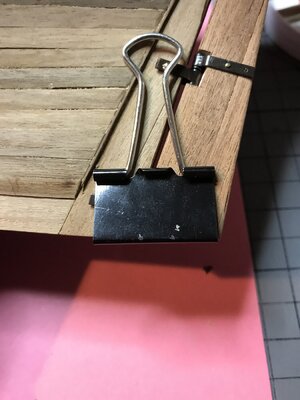
Jan
Do you have something like a build slip to keep it stable?My temporary solution. I kept on banging the rudder while moving the hull around.
View attachment 210568
Jan
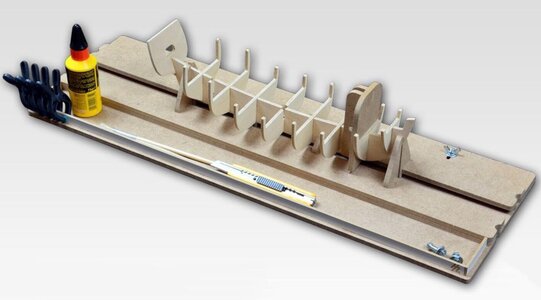
Last edited:
Hi Paul
You did an awesome job on the rudder. As you mentioned, I would highly recommend you stabilize the rudder. I knocked mine so hard while spinning it around once that it broke the tiller arm off the top of the rudder. That connection is enclosed inside a housing that I now have to break apart to fix.
You did an awesome job on the rudder. As you mentioned, I would highly recommend you stabilize the rudder. I knocked mine so hard while spinning it around once that it broke the tiller arm off the top of the rudder. That connection is enclosed inside a housing that I now have to break apart to fix.
I do. A board with two saddles. But I also seem to need to take it out all the time to work on. My hinge system is pretty fragile (the rudder even turns!), and it will be safe enough as long as I am painting metal bits, but that can't go on forever (though I just reorganized the decorative pieces and I might be wrong about the forever thing). I do like Jan's solution - I think I'll borrow it from him.Do you have something like a build slip to keep it stable?
Hey Vic I just noticed you're from San Antonio. Pretty place. Alamo. Riverwalk. Well, that about covers it... I been there a few times for orthodontic meetings.


