Kurt Konrath
Kurt Konrath
What was the old saying "Rome wasn't built in a day" which means keep plugging at it when you can and you will be done one day without knowing it.
 |
As a way to introduce our brass coins to the community, we will raffle off a free coin during the month of August. Follow link ABOVE for instructions for entering. |
 |
 |
The beloved Ships in Scale Magazine is back and charting a new course for 2026! Discover new skills, new techniques, and new inspirations in every issue. NOTE THAT OUR FIRST ISSUE WILL BE JAN/FEB 2026 |
 |

Thanks, Chris! I read in your log that you were going to include some figures in your diorama. Looking forward to seeing how your build progresses! Neat idea.Great painting Paul. I need to do a bunch of figures for the Fly. Hope I can do as well as you have.
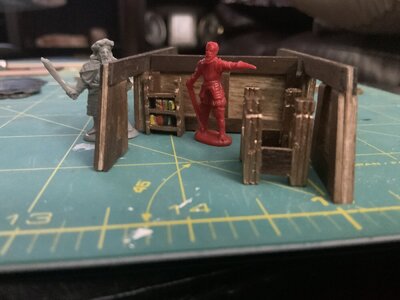
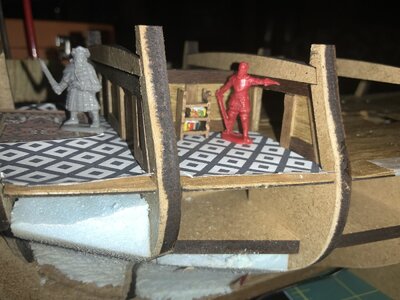
Houston we have a problem! So I was worried that 1/72 scale figures would look a bit small on a 1/64 scale ship. Looks like all the figures were modeled on giants. Turns out the height of the Quarter deck over the main deck works out to just over 4 feet??? I know the space was tight but this just seems wrong. My figures would be just over 5 feet tall, which seems about right. The bookcase seems right though.Thanks, Chris! I read in your log that you were going to include some figures in your diorama. Looking forward to seeing how your build progresses! Neat idea.
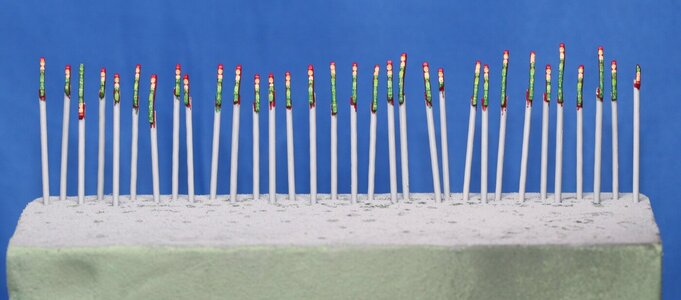
After my work on the rudder I returned to the painting party hoping some of you would have arrived with your collection of tiny paint brushes. Alas, no one showed up...
Rather than posting the completion of each grouping I spared your inbox and will simply post this week's work (maybe it's been longer) in a single post. Here we go...
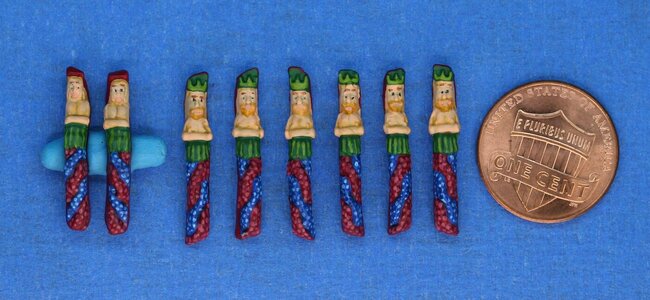
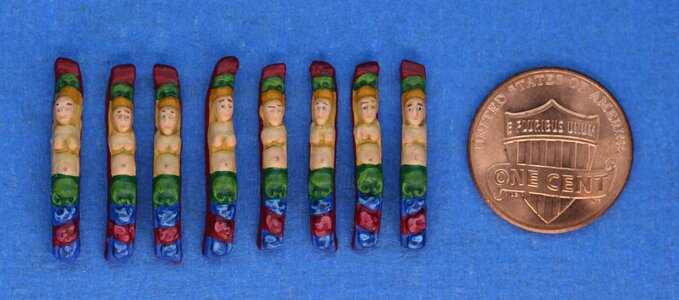
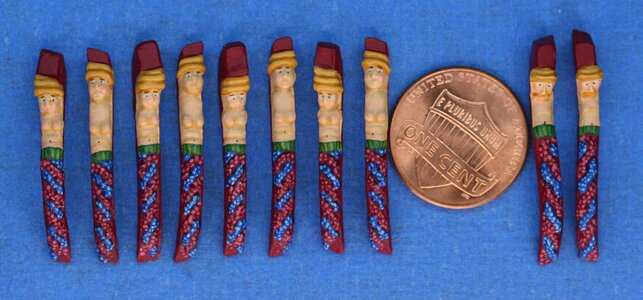
These little guys will appear next on the stern of the ship (the one with the harp is the center figure):
View attachment 211760
I have no idea where these little guys go (worth noting is that some of the castings are worse than others - I elected to simply use what was provided rather than turning my workshop in a kit factory):
View attachment 211761
There merry fellows will be displayed on the aft galleries:
View attachment 211763
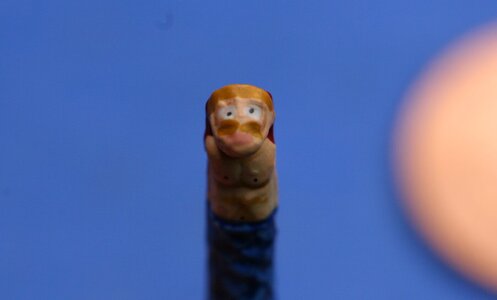
And this lonely figure will be on the stern flanked by doves (pigeons?). As you can see, he is not a fan of birds:
View attachment 211762
These complex pieces (they are shaped like the letter V which is not captured well in the photo) festoon the turrets that top the aft galleries:
View attachment 211764
Again, I'm not certain where this tiny crown goes:
View attachment 211765
This is the Swedish swim team (again, on the aft galleries):
View attachment 211766
And these holiday-ready tree-looking things flank the swim team:
View attachment 211767
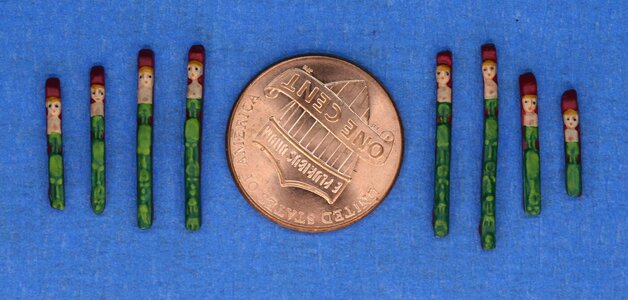
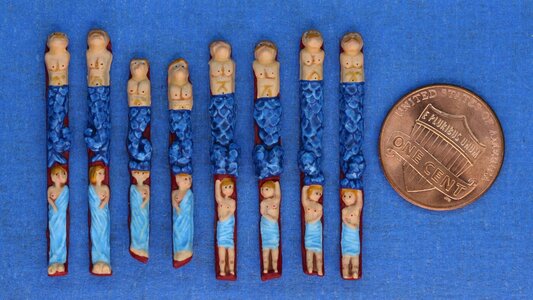
And the final two images form two sets of four each - and they are also a part of the gallery decorations:
View attachment 211768
View attachment 211769
If you are not all that impressed with my painting skills I understand and completely agree. But painting these TINY figures is actually quite enjoyable. I will return to actual ship building eventually. But I still have some level of enthusiasm for this art project, so I think I will keep at it for a while.
If you are keeping score at home (of course you are!) I have painted exactly 301 individual pieces to date. Hundreds remain, so if you are contemplating a Vasa build in this style one day you better start finding suppliers of micro-brushes. And begin weaning yourself off the caffeine.
I appreciate how you continue to take the time away from your own builds to keep watch on my progress. I am grateful for your encouragement.
Just looking at that picture is mind-numbing. Worse is knowing that someone had to paint all those decorations. Worst of all is knowing that the painter needs to be ME! Good thing I enjoy the process!
Hi Andre. I am reluctant to make a claim for knowing how to do something I am only now learning but since you asked here is the approach I am using. As I understand it really skilled miniature painters will shade using full strength paints and layer colors to create highlights and shadows (and I do try to do this if the piece I am working on is large enough). But in most cases I have chosen, instead, to use "washes" and "dry-brushing." A wash is a watered down paint that you 'float' into the recesses. If the base color is blue I'll create a wash with a darker blue and place that darker blue into the spots I want to shade - the really watery paint will travel in the direction of your brush so wherever you want it to be darker you pull the paint into that place with the brush tip. Dry-brushing works best to add highlights - and especially if the casting has pronounced contours. You put just a tiny bit of full-strength paint on a stiff paint brush - wipe off the excess on a paper towel, and then with a flicking back and forth motion add some highlights. The smaller the scale the less effective these techniques are (and as a result I have not been doing much dry-brushing). There are lots of tutorials on the internet. Just search for "how to use a wash (or dry-brushing) when painting miniatures" or something similar. Good luck!Paul, your painting looks wonderful. Just curious...how do you get the shading in a color on your miniatures? I'm wondering how when I get to painting the stern decoration on my Vanguard.
Hi Paul. Thanks very much for the information and for the tip with tutorials on the internet. I have a way to go before doing the actual painting but will experiment in the meantime. Currently working on planking the upper gun deck. Hope to post some photos soon. AndreHi Andre. I am reluctant to make a claim for knowing how to do something I am only now learning but since you asked here is the approach I am using. As I understand it really skilled miniature painters will shade using full strength paints and layer colors to create highlights and shadows (and I do try to do this if the piece I am working on is large enough). But in most cases I have chosen, instead, to use "washes" and "dry-brushing." A wash is a watered down paint that you 'float' into the recesses. If the base color is blue I'll create a wash with a darker blue and place that darker blue into the spots I want to shade - the really watery paint will travel in the direction of your brush so wherever you want it to be darker you pull the paint into that place with the brush tip. Dry-brushing works best to add highlights - and especially if the casting has pronounced contours. You put just a tiny bit of full-strength paint on a stiff paint brush - wipe off the excess on a paper towel, and then with a flicking back and forth motion add some highlights. The smaller the scale the less effective these techniques are (and as a result I have not been doing much dry-brushing). There are lots of tutorials on the internet. Just search for "how to use a wash (or dry-brushing) when painting miniatures" or something similar. Good luck!
No no they are not only miniatures actually hundreds of mini mini miniatures. It’s not an easy job to paint in detail all those little stuff. I admire your patience Paul. Congrats again.“painting miniatures"
And you will have to locate and glue each one of them in place! But I am sure you will enjoy the challenge, and the process.Just looking at that picture is mind-numbing. Worse is knowing that someone had to paint all those decorations. Worst of all is knowing that the painter needs to be ME! Good thing I enjoy the process!
Well the circus may not be in town, but looks like the clowns and such are on the ship!
Been following your log dock and you’re doing a great job.Well the circus may not be in town, but looks like the clowns and such are on the ship!
Way too much fancy ornamentation to look good, but I guess it was to show it was for the people not the king.
Great tip, Bill. Thanks for sharing it! I do have some gilded pieces to shade - I'll give it a try.Been following your log dock and you’re doing a great job.
Re. shading I paint over the figure with artist oil colour Raw Umber then wipe it off. I’ve never done it on coloured figures but works great on brass or gold painted parts as well on the hull to bring out the seams in the planks.
Keep it up. Enjoy your log.
Bill

Hello Bill,WOW Can I ask you what the red glue is that you use
Thanks
Bill
