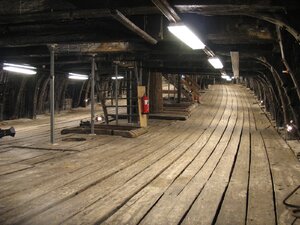
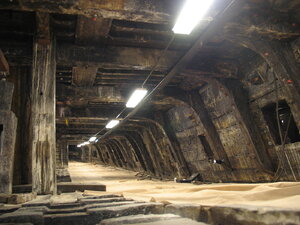
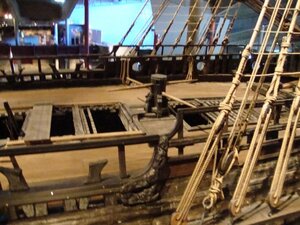
heheh the admiral would send me to the dog house
-

Win a Free Custom Engraved Brass Coin!!!
As a way to introduce our brass coins to the community, we will raffle off a free coin during the month of August. Follow link ABOVE for instructions for entering.
-

PRE-ORDER SHIPS IN SCALE TODAY!
The beloved Ships in Scale Magazine is back and charting a new course for 2026!
Discover new skills, new techniques, and new inspirations in every issue.
NOTE THAT OUR FIRST ISSUE WILL BE JAN/FEB 2026
You are using an out of date browser. It may not display this or other websites correctly.
You should upgrade or use an alternative browser.
You should upgrade or use an alternative browser.
Vasa - 1:65 DeAgostini [COMPLETED BUILD]
- Thread starter dockattner
- Start date
- Watchers 148
Just a quick update: I have begun the first layer of hull planking. DeAg is very specific in how this is to be done and makes a special point of saying: follow our rules because you will be making measurements based on the placement of these hull planks. Anyway, I am following the instructions for this first layer but will need to revisit that idea for the second layer.
Progress is very slow...
I also took another builder's advice and began some painting of metal bits. I chose some relatively simple (inconspicuous) castings to begin with: decorative rings that will accent where cannon barrels pass through the hull on the upper decks. My theory was that these would hardly be noticed and if I messed them up it wouldn't be a disaster. I learned that this painting project will be very challenging - far beyond my skill level. I struggled with these simplest of pieces and have grown in my respect for the painting I have seen others do on this ship model!
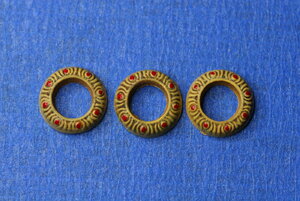
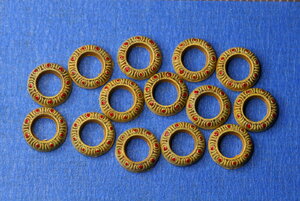
Onward! And thanks for looking in!
Progress is very slow...

I also took another builder's advice and began some painting of metal bits. I chose some relatively simple (inconspicuous) castings to begin with: decorative rings that will accent where cannon barrels pass through the hull on the upper decks. My theory was that these would hardly be noticed and if I messed them up it wouldn't be a disaster. I learned that this painting project will be very challenging - far beyond my skill level. I struggled with these simplest of pieces and have grown in my respect for the painting I have seen others do on this ship model!


Onward! And thanks for looking in!
Last edited:
For the small Vasa decorations you can buy something like these brushes with archival ink:
Get also a set of Markers with Archival ink. They came in a sort of point sizes. Some very small !!
Paint all the small details with them, let the archival ink dry very well and cover with clear Poly (the one of your preference)
Go to your local craft store. Buy 1 marker and a Brush pen (like the Amazon example) and try them on a piece is photetched brass or whatever you want to use to test them.
You will see how precise you will be under the magnifier.
Cheers
Daniel
Thanks, Daniel. I'll check those out. I appreciate the tip!For the small Vasa decorations you can buy something like these brushes with archival ink:
Get also a set of Markers with Archival ink. They came in a sort of point sizes. Some very small !!
Paint all the small details with them, let the archival ink dry very well and cover with clear Poly (the one of your preference)
Go to your local craft store. Buy 1 marker and a Brush pen (like the Amazon example) and try them on a piece is photetched brass or whatever you want to use to test them.
You will see how precise you will be under the magnifier.
Cheers
Daniel
Having spent nearly 8 hours yesterday laying hull planks (the product of which was only 6 lines of planking on each side of the ship  ) I decided to do some painting today. I had a free afternoon so I chose the lion's heads that festoon the gun port covers. Here is what I ended up with:
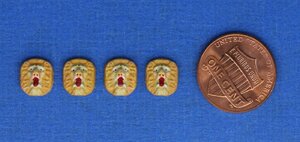
I'm considering whether I need to add some shading to the recessed areas of the mane. I added some very subtle highlights but feel like the whole thing comes across as a bit monochromatic. Since I'm not an experienced miniatures painter I'm struggling with technique. And after painting 57 (!!!) of these bad boys I needed to take a break before I ruined anything...
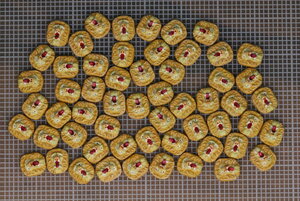
Thanks for checking out my build log and feel encouraged to share your suggestions for improving my work!

I'm considering whether I need to add some shading to the recessed areas of the mane. I added some very subtle highlights but feel like the whole thing comes across as a bit monochromatic. Since I'm not an experienced miniatures painter I'm struggling with technique. And after painting 57 (!!!) of these bad boys I needed to take a break before I ruined anything...

Thanks for checking out my build log and feel encouraged to share your suggestions for improving my work!
This is going to be really good to follow !!
Thanks, Donnie. I appreciate the encouragement. I'm in over my head but hopefully more experienced builders (like yourself) will rally around my build. I certainly need the help!This is going to be really good to follow !!
Last edited:
WOW! The lions are spectacular. You may try bring out the detail with a light wash of diluted brown paint for to enhance the shadows. Do a test piece first and see if you like the effect. You want it to be subtle. I noticed that modelers often add washes to add darkness to areas to simulate the effect of ambient occlusion and depth. For some reason, the way light plays on a model is different somehow. If you spend as much time on the rest of the ship as you have with the lions, you'll have a real work of art when it's finished. The trick is not running out of patience.Having spent nearly 8 hours yesterday laying hull planks (the product of which was only 6 lines of planking on each side of the ship) I decided to do some painting today. I had a free afternoon so I chose the lion's heads that festoon the gun port covers. Here is what I ended up with:
View attachment 179834
I'm considering whether I need to add some shading to the recessed areas of the mane. I added some very subtle highlights but feel like the whole thing comes across as a bit monochromatic. Since I'm not an experienced miniatures painter I'm struggling with technique. And after painting 57 (!!!) of these bad boys I needed to take a break before I ruined anything...
View attachment 179835
Thanks for checking out my build log and feel encouraged to share your suggestions for improving my work!
Hi Doc I agree that a LIGHT wash will enhance the mane and add interest and also a little variety
Well, it was back to placing hull planks today. I am getting better at shaping the strakes but there is still some flaw in my approach that leads to small to midsized gaps between wood strips - especially in areas of convex curves. Wood putty will be my friend...
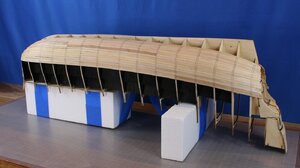
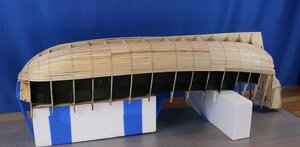
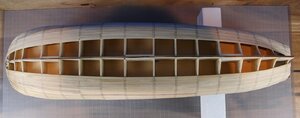
Things I have learned:


Things I have learned:
- Embrace the process - progress is slow and perfection is a vapor that cannot be captured.
- Back-bevel the lath strips (thanks, Kurt) so they fit more snuggly along their length.
- When adjusting planks adjust only one side (I'm using the top side since I am presently working from top down). Doing this preserves a virgin edge for the next plank to align to. I figured this out a little too late...
- Don't only glue the plank to the frames - also glue it to the adjacent plank.
- Get better clamps - or use pins/nails the next time...
- A long soak in water helps - but lath strips break anyways.
- The strip that breaks is always the one you have invested the most time in. Always.
- It is not your spouse's fault when the strip breaks - don't take it out on her/him when she/he asks how things are going.
- There is something oddly satisfying about seeing the hull take shape under your own hands.
Patience 
I used very thin 7mm push pins with a pin pushing tool and left the pins in the model, since if you push hard enough the heads bury themselves in the plank and don't protrude.Well, it was back to placing hull planks today. I am getting better at shaping the strakes but there is still some flaw in my approach that leads to small to midsized gaps between wood strips - especially in areas of convex curves. Wood putty will be my friend...
View attachment 179953
View attachment 179954
View attachment 179955
Things I have learned:
What else should I have learned?
- Embrace the process - progress is slow and perfection is a vapor that cannot be captured.
- Back-bevel the lath strips (thanks, Kurt) so they fit more snuggly along their length.
- When adjusting planks adjust only one side (I'm using the top side since I am presently working from top down). Doing this preserves a virgin edge for the next plank to align to. I figured this out a little too late...
- Don't only glue the plank to the frames - also glue it to the adjacent plank.
- Get better clamps - or use pins/nails the next time...
- A long soak in water helps - but lath strips break anyways.
- The strip that breaks is always the one you have invested the most time in. Always.
- It is not your spouse's fault when the strip breaks - don't take it out on her/him when she/he asks how things are going.
- There is something oddly satisfying about seeing the hull take shape under your own hands.
Use warm water when soaking planks, and apply an electric hot iron to steam the planks. If you don't have one, buy one or suffer the sound of *SNAP* at the bow curves until you run out of wood.
Now that you have planked to the turn of the bilge, start planking from the keel and move outboard.
Don't get lazy and make any dagger planks (planks ending in a sharp point) when the hole starts to close and the ends get narrow. Now is a good time to practice cutting and laying drop planks. You'll need to know how to do this efficiently on the final layer, and you will have to learn to judge when it's time to use a drop plank when the ends of your planking need to get down to 50% of a plank width.
Heed what vintagemodeler just said. And don't yell at your wife when you hear *SNAP*, or she'll *SNAP* your head off.
Last edited:
Very good work and also the a very good learning curve  we should never stop to learn and often it is trial and error

So we should also accept sometimes the "Error" - we should not make the same errors twice.....
BTW: What is the reason, that you marked the location of bulkheads on the outside of the first planking?
 we should never stop to learn and often it is trial and error
So we should also accept sometimes the "Error" - we should not make the same errors twice.....
BTW: What is the reason, that you marked the location of bulkheads on the outside of the first planking?
Hi Uwe, thanks for checking in. I have no idea why I marked the frames on the outside of the first planking!Very good work and also the a very good learning curvewe should never stop to learn and often it is trial and error
So we should also accept sometimes the "Error" - we should not make the same errors twice.....
BTW: What is the reason, that you marked the location of bulkheads on the outside of the first planking?
I guess I assumed I would need that information later but since you're asking I guess the answer is that I won't. See - I really am new at this!
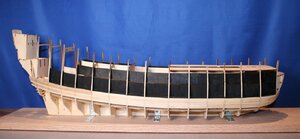
For the record, I don't like the way I have been told in the instructions to plank the hull. They very explicitly say: follow our pattern because you'll need these specific plank locations for measuring something later (I assume for gun ports?). The problem with the layout they suggest is that it includes planks that end at a spear point in the middle of the curve forming the bow of the ship. No drop planks. But in 1628 the Dutch contractors hired to build the ship would have used drop planks, right? I have looked ahead and see the instructions call for repeating this planking pattern in the second layer. See the following image from the instructions:
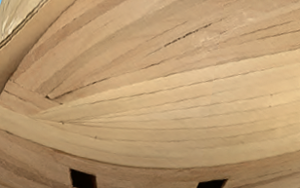
That's incorrect isn't it? I'm a long way from doing the second planking but I sure could use some advice here! I've looked at pictures of the original vessel at the museum and it's hard to see the planking pattern on that part of the ship.
Last edited:
I have not much time today, to clarify this more in detail - but you are right, that the instruction is wrong - usually every line of planks have to end in the keel.Hi Uwe, thanks for checking in. I have no idea why I marked the frames on the outside of the first planking!
I guess I assumed I would need that information later but since you're asking I guess the answer is that I won't. See - I really am new at this!
For the record, I don't like the way I have been told in the instructions to plank the hull. They very explicitly say: follow our pattern because you'll need these specific plank locations for measuring something later (I assume for gun ports?). The problem with the layout they suggest is that it includes planks that end at a spear point in the middle of the curve forming the bow of the ship. No drop planks. But in 1628 the Dutch contractors hired to build the ship would have used drop planks, right? I have looked ahead and see the instructions call for repeating this planking pattern in the second layer. See the following image from the instructions:
View attachment 180993
That's incorrect isn't it? I'm a long way from doing the second planking but I sure could use some advice here! I've looked at pictures of the original vessel at the museum and it's hard to see the planking pattern on that part of the ship.
The Vasa was somehow very very special, because they often did not follow normal regulations, f.e they shaped tapered the ending of a plank sharp and did not use stealers or butt joints in the planking
I do not know, if you can see the photos in this german forum (without beeing a member), but a very good friend of mine visited two years ago Stockholm and made a lot of detailed photos of the Vasa

Forum für historischen Schiffsmodellbau und Geschichte
Projektorientierte Quellensammlung und Datenbank für historischen Schiffsmodellbau und Geschichte
 www.segelschiffsmodellbau.com
also these photos will help

Forum für historischen Schiffsmodellbau und Geschichte
Projektorientierte Quellensammlung und Datenbank für historischen Schiffsmodellbau und Geschichte
 www.segelschiffsmodellbau.com
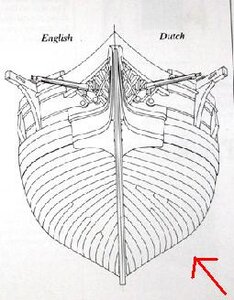
Dagger planks are evil. Your kit instructed you to use them for simplicity. Do not be afraid to question a feature in the instructions, make changes based on your research, or add details when building a kit. Sometimes you can compare differences between kits made by two different companies and find start differences, and you can choose which feature you want to use. Often, you will change details and add things based on books on ships you collect and read. My ship had major changes, and you can bet that you will find errors in the instructions for your kit. That's why the reading and research usually take longer than the building. Wouldn't it be nice to find a model kit that got everything right? They don't exist, unless the ship is late period and well documented like HMS Victory. Records on ship construction in the 1600's was pretty much nonexistent. That's pretty sad, when you want to build an accurate representation of that glorious Baroque galleon, and you simply can't. Trust your own research. If you want more info, ask fellow forum members and you'll get fast answers.

Last edited:
FANTASTIC UWE! I knew enough German to get myself registered. These images are amazing - far better than anything I have seen on the internet. They will be immeasurably valuable. I am in your debt and thanks to your friend for posting these.I have not much time today, to clarify this more in detail - but you are right, that the instruction is wrong - usually every line of planks have to end in the keel.
The Vasa was somehow very very special, because they often did not follow normal regulations, f.e they shaped tapered the ending of a plank sharp and did not use stealers or butt joints in the planking
I do not know, if you can see the photos in this german forum (without beeing a member), but a very good friend of mine visited two years ago Stockholm and made a lot of detailed photos of the Vasa

Forum für historischen Schiffsmodellbau und Geschichte
Projektorientierte Quellensammlung und Datenbank für historischen Schiffsmodellbau und Geschichtewww.segelschiffsmodellbau.com
also these photos will help

Forum für historischen Schiffsmodellbau und Geschichte
Projektorientierte Quellensammlung und Datenbank für historischen Schiffsmodellbau und Geschichtewww.segelschiffsmodellbau.com
Last edited:
Pretty much sums up the Hobby!!Very good work and also the a very good learning curvewe should never stop to learn and often it is trial and error
View attachment 180992
So we should also accept sometimes the "Error" - we should not make the same errors twice.....
BTW: What is the reason, that you marked the location of bulkheads on the outside of the first planking?


