Vasa - 1:65 DeAgostini [COMPLETED BUILD]

Hi Paul,
It took some time to come to your build-log of the Vasa. There is so much to see on the SoS. And there is so much to see in yours!
You are doing a great job. Hat off and I sat my chair for the rest of the build.
Regards, Peter
 
Hi Paul,
It took some time to come to your build-log of the Vasa. There is so much to see on the SoS. And there is so much to see in yours!
You are doing a great job. Hat off and I sat my chair for the rest of the build.
Regards, Peter
Hi Peter, I agree that there is more to see on this forum than time allows. I noticed you working your way through my build log. I have long been a fan - your work is inspiring, especially the Lee!
 
First of all my thanks to everyone who has shared likes and encouraging comments. It really does help.

Let me see if I can address a few questions:

@Dematosdg - I just used a PVA that dries clear Daniel. The black is an illusion though there would be no reason you couldn't dab a little paint on the nail heads. No one does this better than @Dean62 https://shipsofscale.com/sosforums/threads/yuanqing-bluenose-pof-dean.6738/post-155789. That said, you can find black PVA glue or you can tint your own.

@DARIVS ARCHITECTVS - thank you for asking this question Kurt. I'm not sure I can fully answer your question since I haven't thought that all the way through. But having now been prompted...

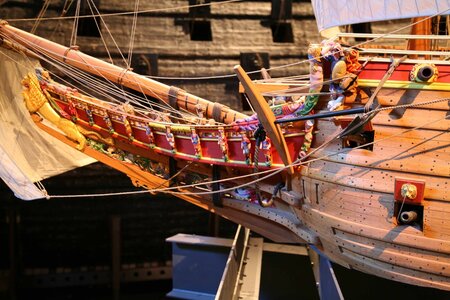
The museum ship shows these ports fully raised against the wale (or at least nearly so) as does the 1:10:

View attachment 235084View attachment 235083

I gather from your question and the posted image of the Victory that this might have been unusual?

Perhaps the tension can be resolved in the notion that the Wasa was commissioned by King Gustav to be the show-pony of the Swedish Navy. Well, you can't be the show-pony with your skirt pulled down below your knees (I just made that up ;) ). To show the best assets of these port covers the lid would need to be fully open (who even puts lion heads on gun port covers anyway?!?).

As a side note - I have learned that most gun port covers use combo blocks and tackle to make it easier to lift the heavy covers. No such advantage was provided to the Wasa crew - brute force or teamwork was their only remedy.

Kurt, thank you very much for asking your question. Without your help and the help of many others I would have tossed this model into Stockholm Harbor long ago. If this build is soaked in anything - it is soaked in humility. As I have mentioned before I simply do not know what I do not know. I am eager for correction and guidance. Let 'er rip everyone - I need your help when you see things that are off.
How far you opened the gun ports varied. Even on one ship, the crew would open the gun ports and slightly different angles. If you look at paintings form the time, you can decide for yourself which angle looks good to you, although having the full sized gun port lids lay back so far that they contact the wales or the hull does not seem to be shown in paintings I have seen. The picture of the Victory with ports open a little more than 90 degrees is very common. Higher angles are also common. Your point about making the lions visible is taken, but I don't think that is a strong reason to open the lids until they contact the hull. The lids are probably raised short of that.
 
Hi Paul amazing standard the gunports are fantastic the detail on the lion heads is unbelievable at such a small scale. It's just occurred to me that from the inside with the lids closed the lions would be upside down. Are the hinges glued to the lids if so what did you use?
 
Hi Paul amazing standard the gunports are fantastic the detail on the lion heads is unbelievable at such a small scale. It's just occurred to me that from the inside with the lids closed the lions would be upside down. Are the hinges glued to the lids if so what did you use?
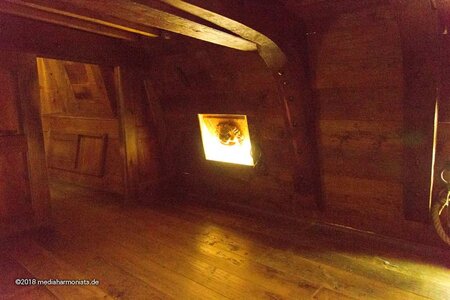
Hey Tony, Thanks for your kind words. Yes, the lion heads will be upside down when viewed inboard by the crew. Here's a low res picture from a display at the museum:

Stockholm-180325_9581.jpg

I attached the hinges with CA but that may have been a poor choice. It's pretty easy to snap them off...
 
Great work on the gun ports Paul. This model is going to be exemplary.

I recall when I did mine, I laid a length of LED lighting internally in the hull. The lighting (when it’s dark), can be seen through the gun ports, rear windows and gratings and makes a nighttime display more effective. Installing lighting is something that needs thinking about early, while you have access, if you wanted to do it.

PeterG
Thanks Peter. My goals have evolved as I have been working on my version. In retrospect installing lights would have been a nice idea - but that ship has sailed!
 
Fair enough Paul. This build is so big with so many options, time constraints and concern for research to get the details right, we cannot possibly cover all bases. Going with the progress you seem to be able to achieve, it will be a wonderful model.

PeterG
 
Fair enough Paul. This build is so big with so many options, time constraints and concern for research to get the details right, we cannot possibly cover all bases. Going with the progress you seem to be able to achieve, it will be a wonderful model.

PeterG
Thanks, Peter. The research aspect is something I (like you) enjoy, but it also leads to frustration for me. Sometimes I am simply incapable of reproducing what I see because of scale (or because of skill). But what really frustrates me is remembering seeing something I would have liked to reproduce (maybe a part but more often a technique) and when I go back and try to find it (on other build logs, or on the museum forum, or wherever) I can't find it again. I have started to create a topical library of images but a little too late for some bits and pieces.

As a character flaw I have no problem going back and fixing something as long as I am still working on it - but despise going back and fixing something I thought was completed. I wish I had @oldflyer's proven willingness to make it right regardless of the emotional cost.

I am amazed by the way the Vasa kits can deviate so dramatically from one another as well as from the mother ship. It is a rare privilege to be able to actually look at what you are trying to reproduce and I would love to build from a kit that honored what we know and see. It would be majestically expensive but I would have paid the price. Lacking that I'll just do the best I can...

You are building a wonderful rendition of a ship I have come to love - thanks for leading the way!
 
Once again, great work Paul. You're attention to detail says as much about you and your standards as it does the final product. If I had to paint all those fine details on all of those little lions' heads it would take a week for my vision to refocus!! ROTF I look forward to each new post of yours!
Cheers,
Ken
 
Thanks, again, to everyone who has posted likes and encouragement.

Just a small update. As advertised, I worked on something simple: the two anchors I will display on the completed model. Ordinarily I preview my postings with a picture of what I'm building from the museum ship. In this case I could show you anchor iron but not anchor stocks. The stocks did not survive their rest on the harbor floor.

So, standing in is the following image from the 1:10 model:

gIMG_6283.jpg

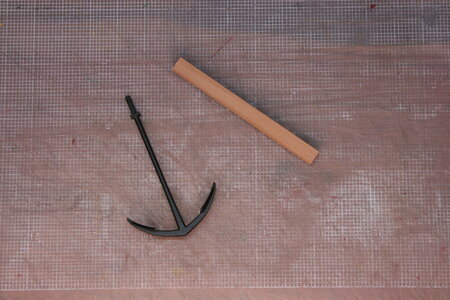
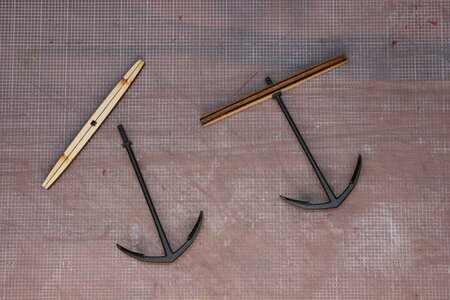
Here is the DeAg interpretation (hmm...):

IMG_6766.JPG

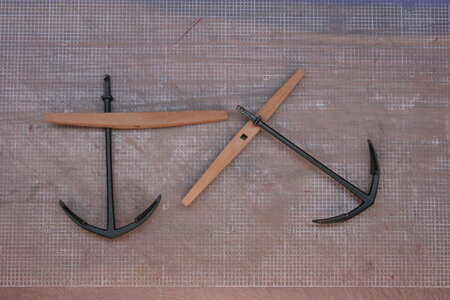
I started over by selecting from my treasured supply of Russian pear wood - in this case a 6x6 mm stick:

IMG_6767.JPG

Next, I did some preliminary shaping with a spindle sander and files...

IMG_6769.JPG

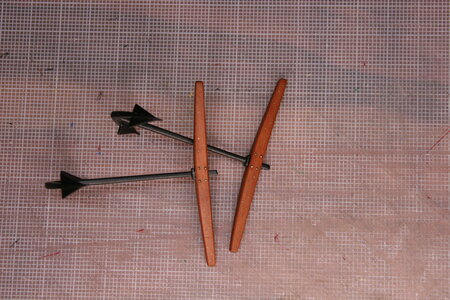
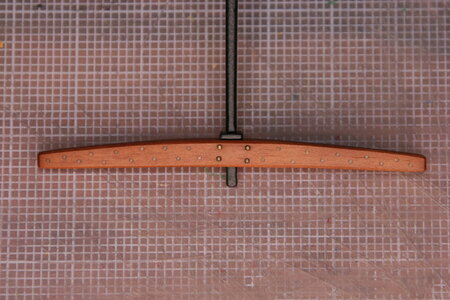
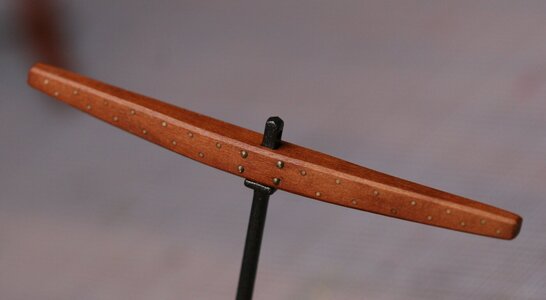
Finally, I added some trenails, a few bolts, and cleaned everything up:

IMG_6770.JPG
IMG_6772.JPG

I'm no @Thomas Marocke with a file - but these turned out OK.

IMG_6778 (2).JPG

I'll add a ring and wrap it in rope eventually.

Thanks so much for stopping by!
 
Thanks, again, to everyone who has posted likes and encouragement.

Just a small update. As advertised, I worked on something simple: the two anchors I will display on the completed model. Ordinarily I preview my postings with a picture of what I'm building from the museum ship. In this case I could show you anchor iron but not anchor stocks. The stocks did not survive their rest on the harbor floor.

So, standing in is the following image from the 1:10 model:

View attachment 235606

Here is the DeAg interpretation (hmm...):

View attachment 235607

I started over by selecting from my treasured supply of Russian pear wood - in this case a 6x6 mm stick:

View attachment 235608

Next, I did some preliminary shaping with a spindle sander and files...

View attachment 235609

Finally, I added some trenails, a few bolts, and cleaned everything up:

View attachment 235610
View attachment 235611

I'm no @Thomas Marocke with a file - but these turned out OK.

View attachment 235613

I'll add a ring and wrap it in rope eventually.

Thanks so much for stopping by!
I've seen a lot of stocks made of two pieces, Paul. Nails or bolts would hold the two pieces together and bands of rope or metal were also used. I'm by no means an expert--just sharing some things I've seen. Was the Vasa different in that regard?
 
Back
Top