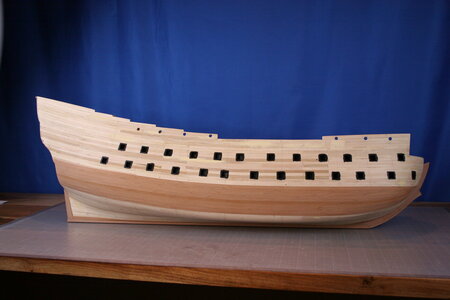
Vasa - 1:65 DeAgostini [COMPLETED BUILD]

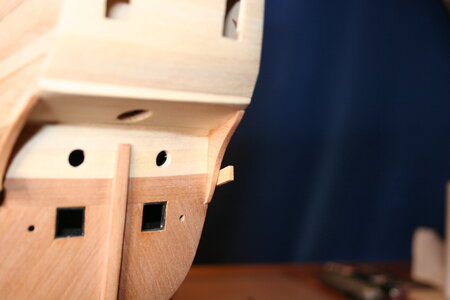
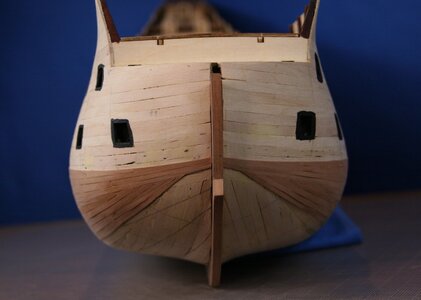
Looking good, I see you used the angle on the transom, 52 degrees I think? Don’t forget you still have to sand the veneer level. Although it’s thin and fairly uniform in thickness, it is still a good idea.
Thanks, Dean. Yes, sanding remains to be completed but I need to veneer the little wing walls first. And I'm sorry but I don't know the angle - its my visual approximation of the mother ship's transom.

vasa-museum.jpg
 
Thanks, Dean. Yes, sanding remains to be completed but I need to veneer the little wing walls first. And I'm sorry but I don't know the angle - its my visual approximation of the mother ship's transom.

View attachment 194706
Doc,
My advice would be to sand the transom first, that way the area where the wing walls intersect it will be flat already. Otherwise you could end up with a gap where those boards meet (wing walls & transom) and it will be too late to do anything other than use filler in the resulting crack or void.
Good tip Dean. So that's what I did:

IMG_5701.JPG
 
Here begins the story of failure...
Having delayed planking the hull for as long as I could I decided to "give 'er a go"...
First, I laid in a temporary lower wale (thanks for this tip @Maarten) to establish the flow of the hull planks:

IMG_5704.JPG

IMG_5705.JPG

Next, having abandoned my foolish notion that I would be able to simply run ship-length strips (thanks, @Dean62 for gently pointing out what everyone on this forum already knew but never occurred to me).

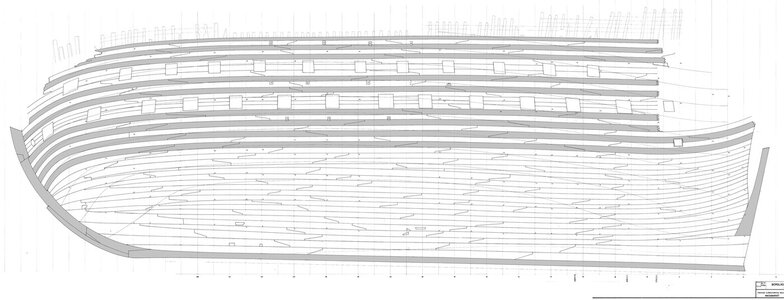
I have a planking diagram that shows that the builders clearly did not use uniform plank lengths - so neither did I. To scale my planks are roughly 14 to 24 feet (give or take). Also noteworthy (in the image below) is that planks terminated when the piece of lumber terminated (thus maximizing material) instead of terminating on frames. Indeed, when the Vasa was constructed she was fabricated hull first with frames added later (or along the way).

Plank expansion BB.jpg

Please also notice that there are no butt joints - all joints are scarf joints - seemingly placed randomly (again - maximize material available). The scarf joints point both directions - and you will see that little effort was made to stagger the joints. Indeed, in several locations you will see scarf joints stacked vertically.

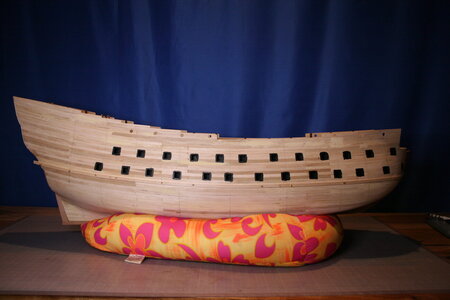
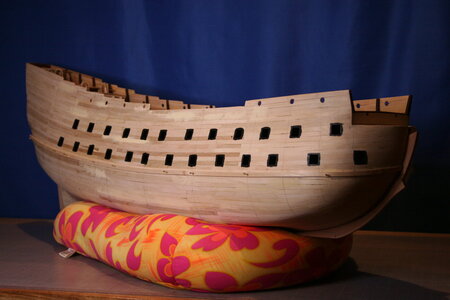
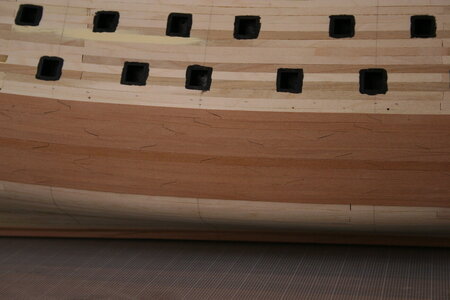
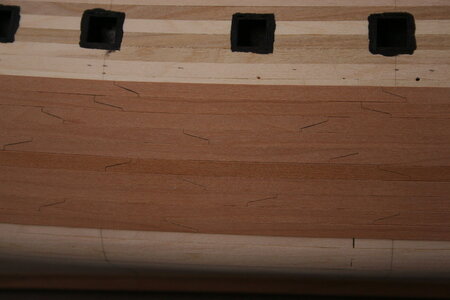
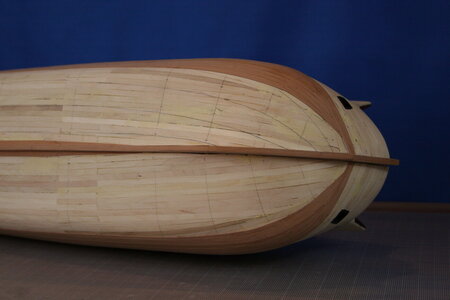
So, here is the product to date:

IMG_5706.JPG
IMG_5707.JPG
IMG_5708.JPG

But I have now hit a reef.
The material can no longer sustain the vertical bending I am doing at the bow (notwithstanding @Maarten's brilliant suggestion that I could judiciously use CA while the PVA was drying to force thin veneer strips to bend vertically). While that worked beautifully and everything was going along swimmingly the curvature of the hull in combination with the bluff nose of the ship has conspired against me and I can no longer proceed using that technique.

Indeed I have made quite a mess of it:

IMG_5709.JPG
IMG_5710 (2).JPG

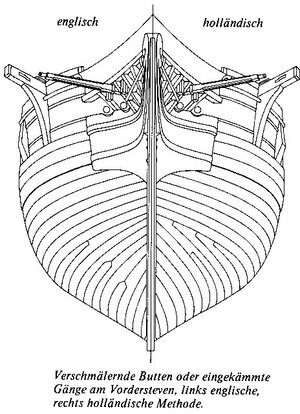
Even the generally accepted Dutch planking technique (note the run of drop planks) has run out of steam...

compare_english_dutch_planking.jpg

Plus, despite my best efforts (and I think you know by now I try hard), I can see several places where there are spaces between planks at the bow. The wood simply could not take the vertical flexion I was asking of it.

The only path forward that I can see is to abandon the desire to have every plank terminate on the stem/keel. Aargh!
Please help!
 
Last edited:
Here begins the story of failure...
Having delayed planking the hull for as long as I could I decided to "give 'er a go"...
First, I laid in a temporary lower wale (thanks for this tip @Maarten) to establish the flow of the hull planks:

View attachment 195659

View attachment 195660

Next, having abandoned my foolish notion that I would be able to simply run ship-length strips (thanks, @Dean62 for gently pointing out what everyone on this forum already knew but never occurred to me).

I have a planking diagram that shows that the builders clearly did not use uniform plank lengths - so neither did I. To scale my planks are roughly 14 to 24 feet (give or take). Also noteworthy (in the image below) is that planks terminated when the piece of lumber terminated (thus maximizing material) instead of terminating on frames. Indeed, when the Vasa was constructed she was fabricated hull first with frames added later (or along the way).

View attachment 195667

Please also notice that there are no butt joints - all joints are scarf joints - seemingly placed randomly (again - maximize material available). The scarf joints point both directions - and you will see that little effort was made to stagger the joints. Indeed, in several locations you will see scarf joints stacked vertically.

So, here is the product to date:

View attachment 195661
View attachment 195662
View attachment 195663

But I have now hit a reef.
The material can no longer sustain the vertical bending I am doing at the bow (notwithstanding @Maarten's brilliant suggestion that I could judiciously use CA while the PVA was drying to force thin veneer strips to bend vertically). While that worked beautifully and everything was going along swimmingly the curvature of the hull in combination with the bluff nose of the ship has conspired against me and I can no longer proceed using that technique.

Indeed I have made quite a mess of it:

View attachment 195664
View attachment 195665

Even the generally accepted Dutch planking technique (note the run of drop planks) has run out of steam...

View attachment 195666

Plus, despite my best efforts (and I think you know by now I try hard), I can now see several places where there are spaces between planks at the bow. The wood simply could not take the vertical flexion I was asking of it.

The only path forward that I can see is to abandon the desire to have every plank terminate on the sternpost/keel. Aargh!
Please help!
You’re doing a really good job, however I would have kept full width boards at the bow for at least the first 3-4 boards, then only taper about 1/4 board width until you hit the keel. But you started out tapering right away and rather aggressively. But I know they bend laterally better the thinner they are.
At this point I think you might be able to recover if you can get some full width boards for a couple of rows until you hit the keel. Hope that makes sense.
Or you will have to put some stealers (triangle pieces) at the bow to get your rows to end at the keel.
Test fit a piece...taking your next row and curve it around naturally into the keel and see what the resulting uncovered area looks like. That will tell you what you need to do to get there. Most likely will be multiple stealers to fill in that area. Regardless I fear you will have abandon standard practice in the area to get your rows to terminate at the keel. I doubt anyone is going to notice as much as you.
Hopefully I have given you some options you can work with.
Although not in this situation I am learning or trying to grasp the issues and alternatives for when I may be in the same situation. I have never worked with veneer so I am not familiar with the lateral bending techniques that may have been tried. I am sure that it will be a fine build when past this setback. Good luck. Rich (PT-2)
 
You’re doing a really good job, however I would have kept full width boards at the bow for at least the first 3-4 boards, then only taper about 1/4 board width until you hit the keel. But you started out tapering right away and rather aggressively. But I know they bend laterally better the thinner they are.
At this point I think you might be able to recover if you can get some full width boards for a couple of rows until you hit the keel. Hope that makes sense.
Or you will have to put some stealers (triangle pieces) at the bow to get your rows to end at the keel.
Test fit a piece...taking your next row and curve it around naturally into the keel and see what the resulting uncovered area looks like. That will tell you what you need to do to get there. Most likely will be multiple stealers to fill in that area. Regardless I fear you will have abandon standard practice in the area to get your rows to terminate at the keel. I doubt anyone is going to notice as much as you.
Hopefully I have given you some options you can work with.
Hey Dean,
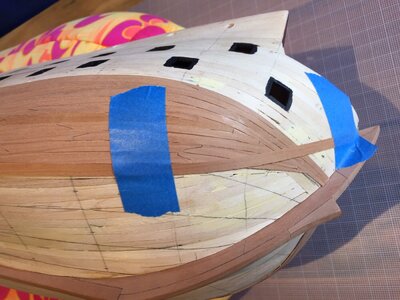
The problem I am having is the opposite of what you think it is. The natural flow of the strake is away from the stem/keel in an upward direction. I have been forcing the strips to bend down. See the following taped-on strake lying fully flat against the hull:

IMG_1577.jpg

The tension doesn't come out of the wood until between the second and third gun port. As I move closer to the keel (inboard) that vertical flow will increase even more.

I don't know if this is what everyone faces (and I'm just a knucklehead) or if it the characteristic bluff bow on the Vasa that is amplifying the issue for me. Since this is my first real build I have no frame of reference. The DeAg instructions are of no help (nor is their 'official build' log) since they recommend planking the veneer the same as the primary hull which means terminating a whole pile of planks at the apex of the curve in dagger points (about 6 or 7 planks converge into an area the size of a dime about four inches from the stem). At this point I'm still operating under the "I'm a knucklehead" hypothesis but I'm beginning to wonder - I know of another log where someone was trying to build this same kit and the effort was abandoned at this point of the build.

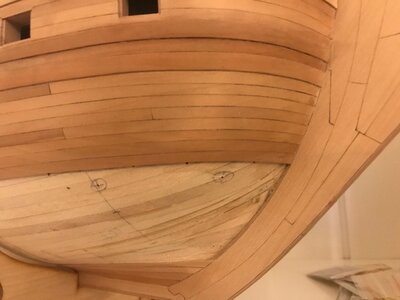
This picture also captures some of the gaps that developed between planks as the glue set under tension... Sigh...
 
Last edited:
Paul

The second planking looks fabulous.

The best solution to your problem is to cut the planks from veneer sheet.Soak the veneer in water first then cut with a scalpel oversize to a paper template.
Allow the plank to dry and then finally shape using a sanding stick and trial fitting.Pear veneer cuts like paper when wet using a sharp scalpel and is a joy to work with.

Kind Regards

Nigel
 
Methinks you might be overly critical of your efforts. I am not expert but you should be able to get the area filled in using any direction of wood, tapering and filling then just put putty in the cracks, sand and tah dah you can sand smooth and paint. No one will ever know. Seems a waste to stop after so much awesome effort. I applaud your efforts with scarf joints. WOW, that is a lot of effort. I have used butt on bulkhead and never concerned myself with the length of the plank. I tip my hat and encourage you to try again.
 
Paul

The second planking looks fabulous.

The best solution to your problem is to cut the planks from veneer sheet.Soak the veneer in water first then cut with a scalpel oversize to a paper template.
Allow the plank to dry and then finally shape using a sanding stick and trial fitting.Pear veneer cuts like paper when wet using a sharp scalpel and is a joy to work with.

Kind Regards

Nigel
Hmmm. I do have pear veneer. How do I make the paper template? It would have to be held to the curve of the bow. Wouldn't that introduce distortions? Or is that why the piece would need to be cut oversized? I'm greatly intrigued by your suggestion so please help me envision this process Nigel. It would be time-consuming but could be just the solution I need!
 
Doc. Back to basics. did you taper the planks at the bow and if you did - by how much?
 
The loose plank lies perfectly for the Hollandische method and you CAN plank the hull with a one-piece length of wood.
 
Paul
I use normal A4 printer paper.Envisage you are making the plank from the paper.Cut a strip an inch wide and place on the hull where the plank sits.Roughly mark the curve of the existing plank on the paper then remove and cut the curve using scissors.Continue trial fitting and trimming until the paper butts up tight against the last plank.You can the mark the other edge of the template to suit the plank width.I deliberately cut the plank a couple of mm wide to along for final shaping.
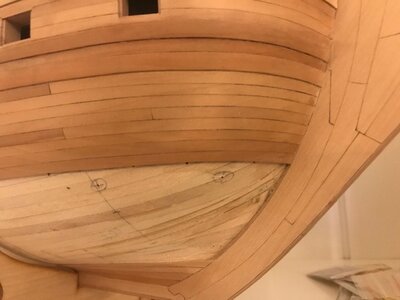
Yes this takes time but the results are worth it.Picture below of my Nuestra Señora,got so far edge bending but then had to cut from sheet due to the tight curves.

Kind Regards

Nigel

IMG_1869.jpg
 
The loose plank lies perfectly for the Hollandische method and you CAN plank the hull with a one-piece length of wood.
Thanks for the 1 length plank endorsement. I was feeling a bit lazy with all the builds using specific shorter plank lengths. I have only the one build I'm working on now but tended to start a plank at the bow or keel and finish on a bulkhead about 2/3 of the way to the opposite end. Any adjustment and tapering were done on the finishing plank. I also would stagger the bulkhead where the butt landed so they were not all lined up.
Paul, whatever method you choose yell and swear a bit then get back at it. I've scared my dogs a few times with the yelling and cursing when something is not going as planned.
 
Paul
I use normal A4 printer paper.Envisage you are making the plank from the paper.Cut a strip an inch wide and place on the hull where the plank sits.Roughly mark the curve of the existing plank on the paper then remove and cut the curve using scissors.Continue trial fitting and trimming until the paper butts up tight against the last plank.You can the mark the other edge of the template to suit the plank width.I deliberately cut the plank a couple of mm wide to along for final shaping.
Yes this takes time but the results are worth it.Picture below of my Nuestra Señora,got so far edge bending but then had to cut from sheet due to the tight curves.

Kind Regards

Nigel


]IMG_1869.jpg
 
The loose plank lies perfectly for the Hollandische method and you CAN plank the hull with a one-piece length of wood.
Thanks for the 1 length plank endorsement. I was feeling a bit lazy with all the builds using specific shorter plank lengths. I have only the one build I'm working on now but tended to start a plank at the bow or keel and finish on a bulkhead about 2/3 of the way to the opposite end. Any adjustment and tapering were done on the finishing plank. I also would stagger the bulkhead where the butt landed so they were not all lined up.
Paul, whatever method you choose yell and swear a bit then get back at it. I've scared my dogs a few times with the yelling and cursing when something is not going as planned. o_O Alien:mad: I am a bit of a looney but most of the time enjoying this hobby.
 
Paul
I use normal A4 printer paper.Envisage you are making the plank from the paper.Cut a strip an inch wide and place on the hull where the plank sits.Roughly mark the curve of the existing plank on the paper then remove and cut the curve using scissors.Continue trial fitting and trimming until the paper butts up tight against the last plank.You can the mark the other edge of the template to suit the plank width.I deliberately cut the plank a couple of mm wide to along for final shaping.
Yes this takes time but the results are worth it.Picture below of my Nuestra Señora,got so far edge bending but then had to cut from sheet due to the tight curves.

Kind Regards

Nigel


]View attachment 195784
Nice work. I will keep this method in mind for my next build, HMS Fly.
 
Back
Top