VASA 490 Build Log - Billing Boats, 1:75 [Completed Build]

both is possible, The Oxford dictionary uses the word Cross-jack, but I see in lot of books, especially the old ones Cro-jack or Crotchet or crojick.
The name comes from the Dutch they call it Kruis-ra and kruis-zeil (cross-yard and cross-sail) where Jack comes from is for me a riddle. But you see it use often in names like flag-jack or jackstay. Here is an old book where the name Croff jeck (ss was written in old language whit ff)
Crossjack is more descriptive to me, Cro-jack used as a contraction per @DARIVS ARCHITECTVS Kurts information also seems logical but not as descriptive.
Its purpose however is completely understandable.
 
Crossjack is more descriptive to me, Cro-jack used as a contraction per @DARIVS ARCHITECTVS Kurts information also seems logical but not as descriptive.
Its purpose however is completely understandable.
The Swedish name is also derived from the Dutch, krysmärssegel, "cross topsail" for the mizzen topsail, for example. Swedish maritime language went through a major transformation in the 1620s, as older Norse terms were discarded in favor of Dutch words.

Fred
 
The Swedish name is also derived from the Dutch, krysmärssegel, "cross topsail" for the mizzen topsail, for example. Swedish maritime language went through a major transformation in the 1620s, as older Norse terms were discarded in favor of Dutch words.

Fred
This kind of information just adds to the enjoyment of this hobby. Thank you Dr. Hocker.
 
Crossjack is more descriptive to me, Cro-jack used as a contraction per @DARIVS ARCHITECTVS Kurts information also seems logical but not as descriptive.
Its purpose however is completely understandable.
More descriptive:

Crossjack: that stick which the corners of the mizzen topsail are tied to so they don't flap in the wind and look stupid. - Model Ships for Dummies
 
Good afternoon.
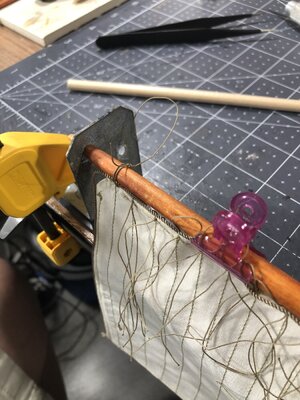
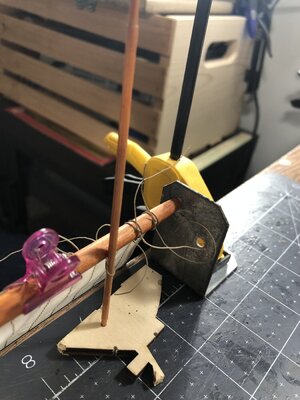
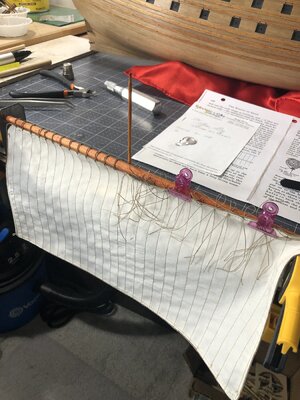
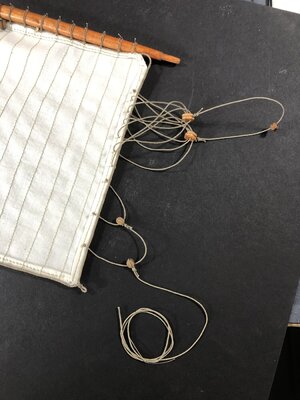
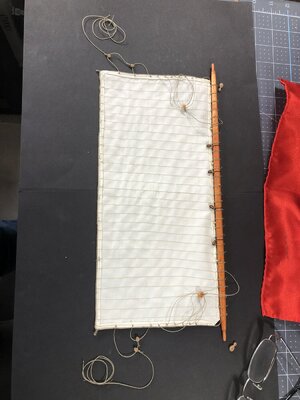
Moving on to the main sail I began with the oh so fun (not) roband attachment. I realized the larger lower sails have a double configuration per roband so after a while (read long time), I figured out how to jig this up for the most efficient way to construct. I threaded the ropes thru the bolt rope even before setting the unit into its jig. I now realize I should have used the doubles on the lateen yard but too late now and I'll just leave it the way it is.

IMG_2124.jpgIMG_2129.jpgIMG_2130.jpg

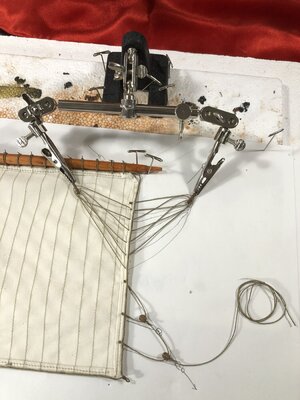
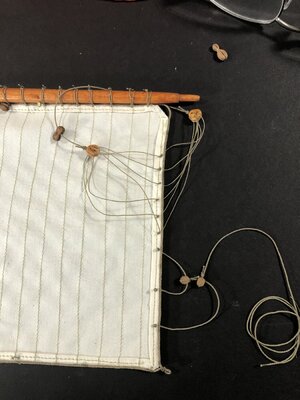
Next, I set the Bowlines and you see my first attempt at the Martinets. The line size relation between the two just looked way off, the martinets line looked too big, and my attaching scheme just didn't set right. I had 4-hole handmade euphroes in this set up as well.

IMG_2131.jpgIMG_2134.jpg

So, I redid the martinets using a smaller 0.50mm rope instead of the 0.70mm, replaced the euphroes with a set of modified deadeyes, and glued two 5mm single sheaves together to act as a sister block on the bridal. In lieu of Fred Hockers use of euphroes I decided to use Anderson's version of deadeyes in the bridal set.
If you look closely, you can see the buntline guides at the foot of the sail.

IMG_2138.jpgIMG_2139.jpg

You may notice I did not set cringles or reinforcement patches at the bowline attachment. This is because I intend to partially furl this sail and I did not want to contend with the extra edge stiffness those items would undoubtedly create. I still have pendants to set on the ends but have to wait on an order of 7mm blocks which I ran out of.

Thanks for checking in and happy modeling to you all.
 
A very neat job! Good call leaving off the linings and bowline cringles for a furled sail. The smaller line looks good on the martnets - the holes in the original euphroes suggest the legs of the martnets are only about 12 mm in diameter. This would be almost invisible at scale, about 1½ times a human hair!

Fred
Thank you, sir. I know that when it comes to scale, I'm all over the place. So, for me anyway its best to look at size relationships and try not to get too out of wack.
 
Beautiful work Daniel - the thinner rope gives much more visual cohesion to the overall picture and if it carries Fred's approval, then that is the cherry on top. It is a good call to leave the sail as pliable as possible to ease in the furling process. Great planning, my friend.
 
Good afternoon.
Moving on to the main sail I began with the oh so fun (not) roband attachment. I realized the larger lower sails have a double configuration per roband so after a while (read long time), I figured out how to jig this up for the most efficient way to construct. I threaded the ropes thru the bolt rope even before setting the unit into its jig. I now realize I should have used the doubles on the lateen yard but too late now and I'll just leave it the way it is.

View attachment 325060View attachment 325061View attachment 325062

Next, I set the Bowlines and you see my first attempt at the Martinets. The line size relation between the two just looked way off, the martinets line looked too big, and my attaching scheme just didn't set right. I had 4-hole handmade euphroes in this set up as well.

View attachment 325063View attachment 325064

So, I redid the martinets using a smaller 0.50mm rope instead of the 0.70mm, replaced the euphroes with a set of modified deadeyes, and glued two 5mm single sheaves together to act as a sister block on the bridal. In lieu of Fred Hockers use of euphroes I decided to use Anderson's version of deadeyes in the bridal set.
If you look closely, you can see the buntline guides at the foot of the sail.

View attachment 325065View attachment 325066

You may notice I did not set cringles or reinforcement patches at the bowline attachment. This is because I intend to partially furl this sail and I did not want to contend with the extra edge stiffness those items would undoubtedly create. I still have pendants to set on the ends but have to wait on an order of 7mm blocks which I ran out of.

Thanks for checking in and happy modeling to you all.
Good morning Daniel. Freaking amazing- sail making and accurate rigging there of excellence. Another level here Daniel. Magic my friend. Cheers Grant
 
Beautiful work Daniel - the thinner rope gives much more visual cohesion to the overall picture and if it carries Fred's approval, then that is the cherry on top. It is a good call to leave the sail as pliable as possible to ease in the furling process. Great planning, my friend.
Thank you, Heinrich, at this point I'm hoping that I can in fact furl this sail into the shape I have in mind. That remains to be seen.
 
Great work Daniel. Really impressed by the detail of your sails. Changing things such as rigging to get a better relative rope thickness in scale can be very frustrating but I applaud you in doing so - It looks much better with the thinner lines.

I had to make those same decisions regarding the use of euphroes and blocks but on the end went with Anderson’s advice. It turned out alright in the end and only you and I (and maybe a few experts) will know. I always appreciate when Dr Hocker expresses an opinion as he says ‘this is my opinion or view etc’. He always clarifies by adding ‘this item did not survive or was incomplete etc’. By saying this, we can conclude what an expert thinks and it really helps in our decisions for the ship builds.

Great work Daniel and congratulations on a persistent and clean build. Not far to go….

Best Regards

PeterG
 
Thank you so much Peter. I relied heavily on your photos (and still am) as well for this process. I know you are getting close to the finish too.
 
Good afternoon, everyone.
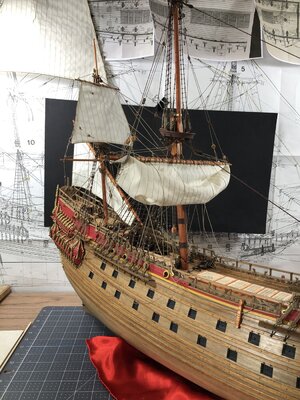
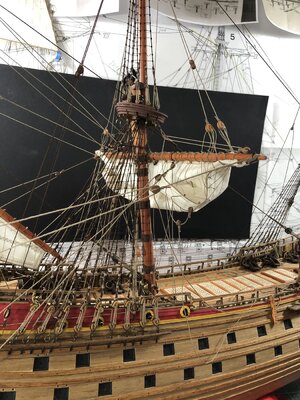
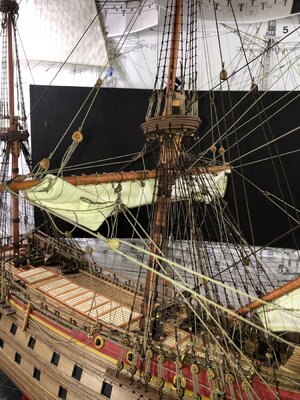
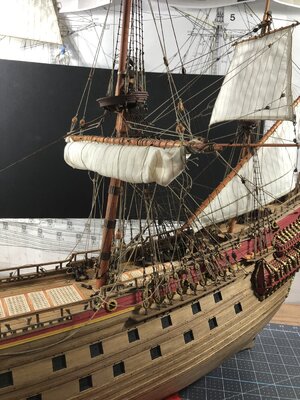
I wanted to post this update on my attempt at partial furling of the main sail. The rigging is becoming very crowded from the main mast back, rigging for the topsail and top gallant looks to be extremely challenging. While there are endless configurations for the furled shape, I am relieved it is possible to overcome the stiffness at the edges and using the ropes and pulleys actually works as intended.

IMG_2144.jpgIMG_2145.jpg

You will see on the next set of pictures I tried furling up even more but decided I liked the first attempt above better. See what you think and if your inclined, please comment on your preference too.


IMG_2150.jpgIMG_2151.jpg

Thanks for taking a look, hope you enjoy.
 
Back
Top