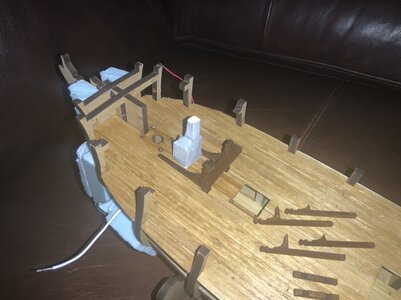
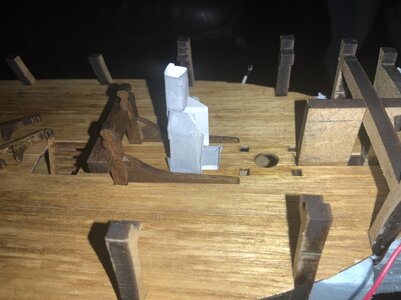
If I am looking at this correctly as your having laid down each deck plank on it's own, it is a very tight and precise execution with tight butt joints as well. RichProgress on deck pieces. I like the walnut so I’m leaving it natural with a light stain and then a clear topcoat sealer. Ladders below deck are done and glued in. Now for the creation of the stove, not a Brodie as this was built prior to that. I will also start working on the aft cabins, furniture and other detail pieces.
View attachment 208753View attachment 208754View attachment 208755
-

Win a Free Custom Engraved Brass Coin!!!
As a way to introduce our brass coins to the community, we will raffle off a free coin during the month of August. Follow link ABOVE for instructions for entering.
-

PRE-ORDER SHIPS IN SCALE TODAY!
The beloved Ships in Scale Magazine is back and charting a new course for 2026!
Discover new skills, new techniques, and new inspirations in every issue.
NOTE THAT OUR FIRST ISSUE WILL BE JAN/FEB 2026
You are using an out of date browser. It may not display this or other websites correctly.
You should upgrade or use an alternative browser.
You should upgrade or use an alternative browser.
Victory Models HMS Fly 1/64 Diorama by TechTrek
- Thread starter TechTrek
- Start date
- Watchers 20
-
- Tags
- amati fly victory models
The stove looks exactly like the one on Alert I am assembling now. I think it fits really well.Here’s a quick paper mockup of the stove. Size looks good. Found a couple of things I want to adjust on my template.
What scale is your Alert? Here is the prototype in paper. The oven door locations are wrong on this one, they’ve been corrected in the final template. The actual stove will be on 2mm feet on a 2mm brick platform.The stove looks exactly like the one on Alert I am assembling now. I think it fits really well.
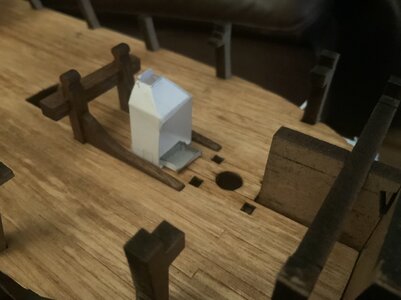
For a "quick" mockup it is very well done assuring your production in brass. RichWhat scale is your Alert? Here is the prototype in paper. The oven door locations are wrong on this one, they’ve been corrected in the final template. The actual stove will be on 2mm feet on a 2mm brick platform.
View attachment 208918
Really impressive Chris. What CAD software do you use? I use TurboCAD.
Hello, Chris. The scale of our group build Alert is 1:48. I encourage you and all members to check out our group build logs. Yes, they are dedicated to a specific model, but they have a wealth of information you may incorporate one day into your build. Click on the 'Group builds' to reveal.What scale is your Alert? Here is the prototype in paper. The oven door locations are wrong on this one, they’ve been corrected in the final template. The actual stove will be on 2mm feet on a 2mm brick platform.

Here is how the stove looks in the Alert kit.
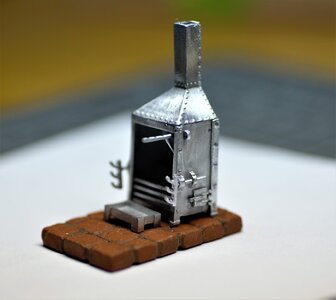
That is exactly the style of stove I am creating. I'm guessing the Alert kit comes with the parts and you assemble. Where the rotisserie?Hello, Chris. The scale of our group build Alert is 1:48. I encourage you and all members to check out our group build logs. Yes, they are dedicated to a specific model, but they have a wealth of information you may incorporate one day into your build. Click on the 'Group builds' to reveal.
View attachment 208979
Here is how the stove looks in the Alert kit.
View attachment 208981
I'm using Fusion360.Really impressive Chris. What CAD software do you use? I use TurboCAD.
Yes, the kit has parts to assemble. The parts are cast metal and have lots of details. The rotisserie is coming soon...That is exactly the style of stove I am creating. I'm guessing the Alert kit comes with the parts and you assemble. Where the rotisserie?
For anyone interested here is the final version of the stove template. I've added tabs for the chimney to slip over. The top box is the chimney, the bottom box is the insert to make the oven and the notched corner box is the catchment tray that slips under the rotisserie and bottom grill to catch drippings and ashes. The pic can be scaled up or down to fit the build. Just change the scale when printing until you get the right size. I've also attached the STL file which can be sent to a 3D printer. The thickness is 1.5mm at my 1/64 scale size.
Here's a link to the CAD file for anyone that wants to get a copy. 17th Century Firehearth
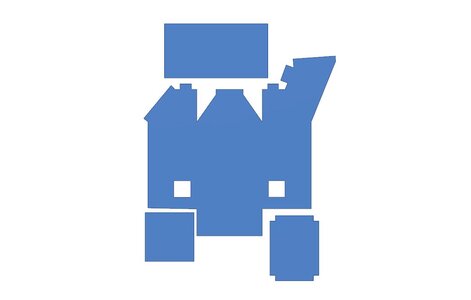
Here's a link to the CAD file for anyone that wants to get a copy. 17th Century Firehearth

Attachments
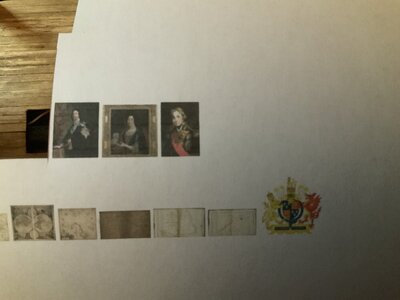
So now that I have my stove plan I switched to the stern. I’ve been thinking about the great cabin and seen a few other builds. I selected the flooring and bought a very expensive Persian rug. The portraits for the walls have been selected and a few other things. Also starting to organize all the charts.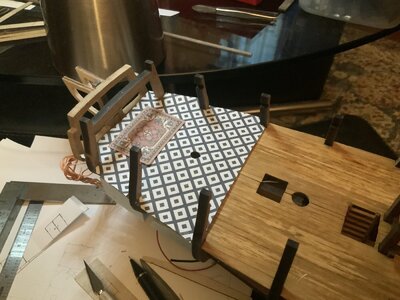
The cabin and stateroom walls are being created. I 1st did a paper template to check for fit then transferred the design to some thin plywood. I’ll add walnut trim to the walls and I’m starting to think about furniture now.
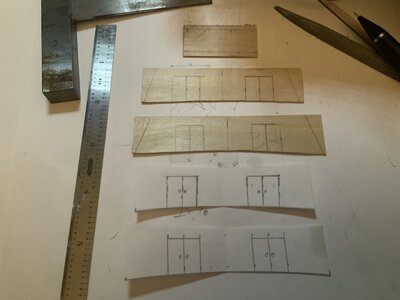
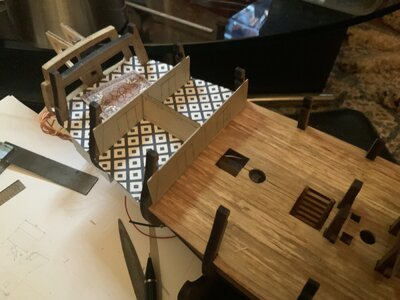


The cabin and stateroom walls are being created. I 1st did a paper template to check for fit then transferred the design to some thin plywood. I’ll add walnut trim to the walls and I’m starting to think about furniture now.


Wow, you will be making Alert's stove from brass sheet at that scale?
I am very keen to see the result.
I drew the stove on Sketchup using the AOTS plans, then converted it to an .stl file.
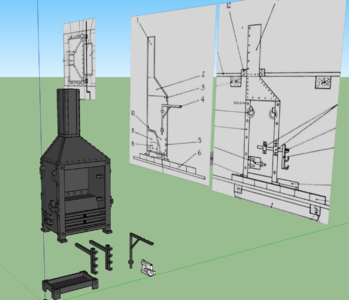
Below you can see the results of some side-trials and experiments I have been doing on the stove from resin printing.
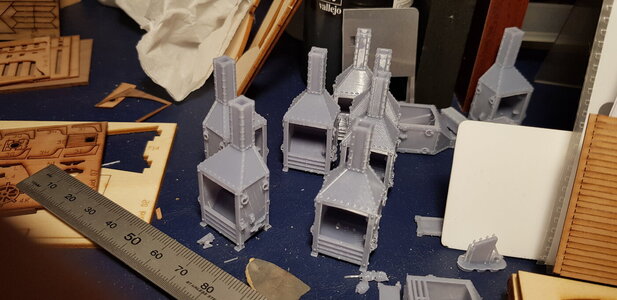
Been trying to get the whole stove to print in one piece but have not had the best of luck.
I'm still not happy with the current results.
I am very keen to see the result.
I drew the stove on Sketchup using the AOTS plans, then converted it to an .stl file.

Below you can see the results of some side-trials and experiments I have been doing on the stove from resin printing.

Been trying to get the whole stove to print in one piece but have not had the best of luck.
I'm still not happy with the current results.
I think my ability to bend copper sheet is better then trying to solder individual pieces together. I’ve also tried cleaning up pieces from a 3D printer and very small pieces are difficult. We’ll see how my theory translates into reality soon enough.Wow, you will be making Alert's stove from brass sheet at that scale?
I am very keen to see the result.
I drew the stove on Sketchup using the AOTS plans, then converted it to an .stl file.
View attachment 209105
Below you can see the results of some side-trials and experiments I have been doing on the stove from resin printing.
View attachment 209110
Been trying to get the whole stove to print in one piece but have not had the best of luck.
I'm still not happy with the current results.
Ok, here’s my partition walls ready to cleanup, stain, dry fit and put a finish on. Doors, hinges and door handles are next. I think I might try some fancy work on the uprights, I have some of those microscrapers.
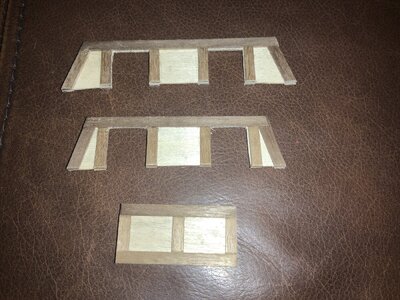
Here they are dry fit in place. I still need to add the bottom pieces after the scraping is done.
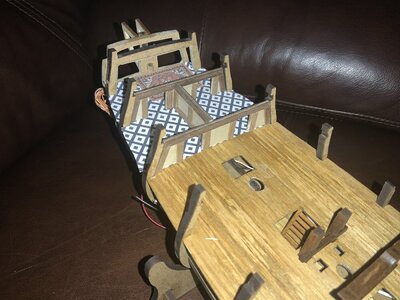

Here they are dry fit in place. I still need to add the bottom pieces after the scraping is done.

I'm really liking the detail you are bringing on this ship!
I think you should manage to bend. Looking forward to seeing the resultsWe’ll see how my theory translates into reality soon enough.
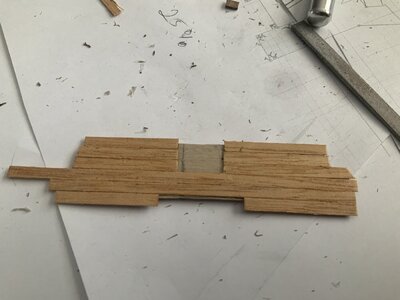
So I’ve been continuing with the stern details. Creating the bench seat with storage under the transom windows. There will be 2 levels to this feature. Here is the paper fitting and the start of the pieces.
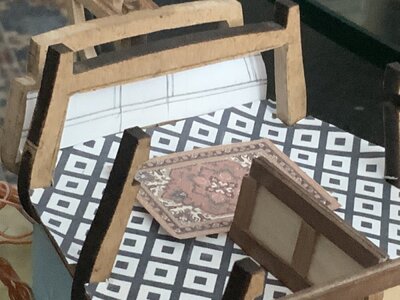
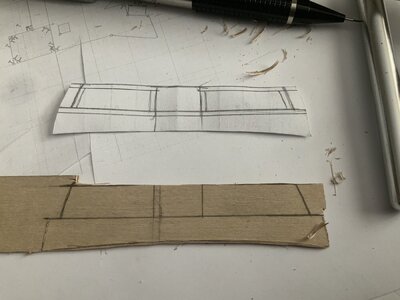
The 2 upper pieces will be separated from the lower piece and the top of the bench seating created with 2 hinged openings.
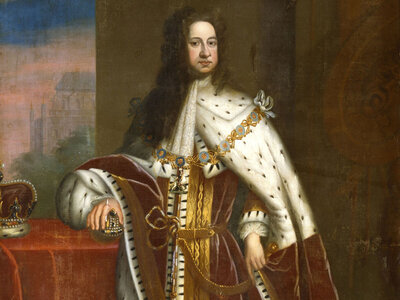
Here are the cabin partitions with all the trim completed. Who is that fine fellow in the portrait? Why it’s his Royal Highness King Charles of course. Soon to be replaced with this pic of George I, since that would have been the King when my ancestors highjacked the ship.
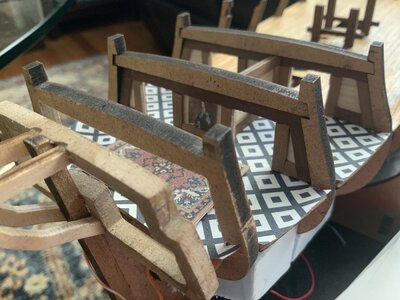


The 2 upper pieces will be separated from the lower piece and the top of the bench seating created with 2 hinged openings.

Here are the cabin partitions with all the trim completed. Who is that fine fellow in the portrait? Why it’s his Royal Highness King Charles of course. Soon to be replaced with this pic of George I, since that would have been the King when my ancestors highjacked the ship.


Soon to begin wiring of the lighting for the rooms. Will place cross beams between bulkheads 10-12 running bow to stern both Port and Starboard. These beams will be drilled in the same fashion as the beam below deck with the 1st LED light I installed. This is the where I’ll be installing them.
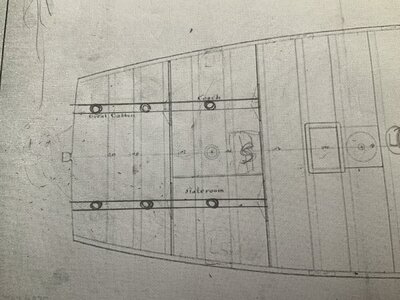
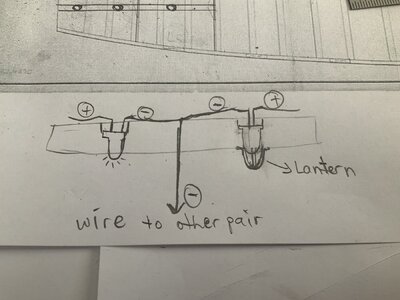
Here is the drawing of the LED installation in the cross beam. The left pic is just LED the right has a lantern roughed in. I’m still evaluating designs for my hanging lanterns.
The wires between lights will run along the tops of the bulkheads just below the Quarter deck. I’ll use black wire for all this wiring so hopefully it will blend into the background.

Here is the drawing of the LED installation in the cross beam. The left pic is just LED the right has a lantern roughed in. I’m still evaluating designs for my hanging lanterns.

The wires between lights will run along the tops of the bulkheads just below the Quarter deck. I’ll use black wire for all this wiring so hopefully it will blend into the background.
These open cabins are just so much fun! Thanks for sharing your vision and planning.Soon to begin wiring of the lighting for the rooms. Will place cross beams between bulkheads 10-12 running bow to stern both Port and Starboard. These beams will be drilled in the same fashion as the beam below deck with the 1st LED light I installed. This is the where I’ll be installing them.
View attachment 209273
Here is the drawing of the LED installation in the cross beam. The left pic is just LED the right has a lantern roughed in. I’m still evaluating designs for my hanging lanterns.
View attachment 209274
The wires between lights will run along the tops of the bulkheads just below the Quarter deck. I’ll use black wire for all this wiring so hopefully it will blend into the background.


