Victory Models Kit Revenge 1577 Race Built Galleon scale 1/64

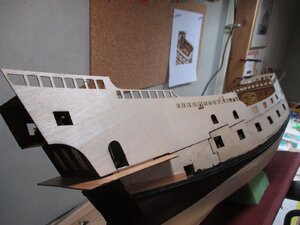
The next step is applying the upper hull templates. These templates form the widows, gun ports, side bulkheads, etc. The problem is, these templates are finicky to apply. There is very little structure to adequately (maybe easily) attach them. I decided to build up an underlying crib to provide a better structure to attach the templates. This is not without problems. This adds depth to the attachments which will change the relationships between the side templates and the cabin structures. Down the road a few steps this will require some creative extra planking and moulding coverups. This photo shows the crib on the forward cabin area for the forward upper hull template as an example. As I proceed I will show how all this turns out.

Once the upper hull templates are attached then I can plank the upper hull from the lower Wales up.
IMG_1615.jpeg
 
Last edited:
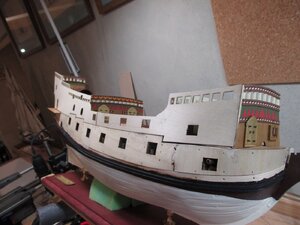
I managed to set the starboard side upper hull templates. From my previous post you can see where I had to shim the forward cabin area, the aft cabin area, and the edge of the main deck to get a solid surface to attach the template. The only area that I will need to fix later is the forward outer edge of the bow cabin bulkhead. You can see a white edge in the first photo. The next step is plank over the template from the lower wale up. The joints between templates are a problem for the planking as they do not transition smoothly. I discovered that using CA Gel and good clamping can force the template edges together enough to allow a fairly smooth lay down of the planks. I will go ahead and plank this side before I attach the templates on the port side. At this point everything looks really ugly!

IMG_1616.jpegIMG_1617.jpeg
 
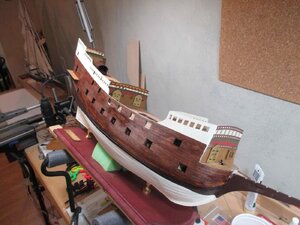
Got the planking done on the starboard side. The planks went over the uneven edges of the templates as long as I used CA Gel to clamp down on the edges with the plank. I decided to work the one side before I went to the other. I was undecided about a finish for the planking. I decided to "weather" or "age" the planking by staining with English Chestnut. It is still drying and I need to continue with light sanding and then a poly layer. Still having trouble getting a smooth stain due to the type wood supplied with the kit. But it gives the whole thing an aged look. Once the second Wales, gunport covers, and colour decorations are added the stained planks will blend better. I was going to plank all the way to the top of the quarter deck and forecastle deck bulwarks but the instructions indicated not to do that. So for now I stopped where the instructions indicated. The areas above the planking are painted antique white and will be covered with the colour decorations and moulding strips.

IMG_1620 1.jpg
 
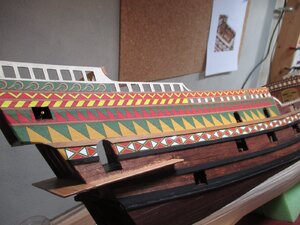
I went ahead and did a lot of work on the starboard side. Not nearly finished yet, but I wanted to see how the relationships worked out for the Wales, mouldings and decorative strips. This will give me lessons learned for the port side build. The second time around is always better...go figure! I did come across a major flaw in the plywood template. The second Wales is supposed to lay down on the lower edges of the lower gunports. The gunports were not cut correctly to accommodate this. I could not get an even run across the hull length for the second Wales on any of the gunport edges as per the plan set. So I had to change the way the Wales fit. In the photos you can see where the second wale (the one with the zig in it towards the bow) is about a 1/4 inch away from the lower edge of the gunports. This was my compromise position for the Wale. Next is adding all the mouldings across the decorative stripes and then go to the port side and do it all over again! All of the gunport covers, port covers, and doors will be done after the port side is built up. In these photos you can see how the choice of English Chestnut stain gives the hull planking a bit of a weathered look but is not overwhelming once Wales, mouldings, and decorative strips are added.

IMG_1621.jpeg


IMG_1622.jpeg
 
Looking really good, following your build with a lot of interest, please keep the updates coming. I am about to start Occre Revenge which will be my second ship after the Port Jackson Schooner.

Cheers
 
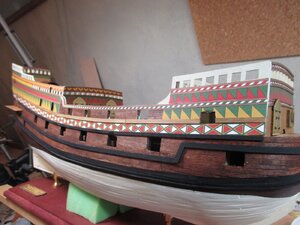
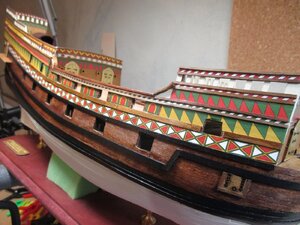
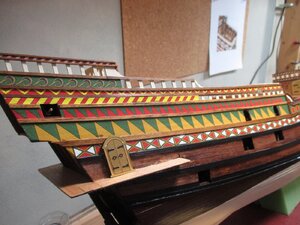
Here are photos of the starboard side with a lot of the hull decorations and moldings in place. This is a good idea of how the hull will look. Still have a lot of fine detail to add but this begins to show how it will look. I decided to model the lower gun ports with closed covers. So I framed out a cover and attached to see how it would look. I also added a door to the stern to see how that would look. The model instructions showed all the doors modelled as open but I am keeping them closed. So...at this point I will flip the model over and start on the port side...work it to this same level of detail...then return to adding the finishing details on both sides...still many hours of detail work to do to include a lot of stern structures and bow structures! This includes interior bulwark details and cap rails all around. Then a coat or two of poly to smooth out the finish. Good grief!

IMG_1624.jpeg

IMG_1625.jpeg
 
Yes...I am making progress on the first layer planking. Looks rough but actually it will sand out well enough to apply a nice second layer of walnut. As I said previously I used the planking material that came with the kit...it was a bit thicker than what I would prefer which makes it more difficult to lay down a smoother first layer. But almost done, then the sanding and a whee bit of filling. Just letting everyone know I am still fussing...

View attachment 158693
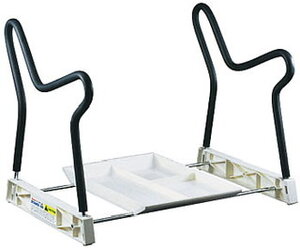
I keep looking at the black tubular foam padded support device that you use. It looks adaptable to a number of positions. Is that your own creation and how do you attach it to your work bench. Being newer to builds I am still looking at various ways of holding the hull for different purposes. Will you please post a photo or two of this device for me? Thanks for considering it. PT-2
 
This is a modeling stand that was made by Midwest back in the 80s and 90s called the “Midwest Stand-In Portable Workstation MID813.“ Unfortunately it is no longer in production as far as I can see. But maybe an in depth web search might turn one up. There are similar stands around. I use mine all the time. I attach mine to my bench with some big clamps. Useful for all the hull work as it cradles the hull nicely and raises it up about a foot above bench height. Once I get to masting and rigging I set the stand aside. I added extra foam padding.

15C5C5E4-CB68-47F9-9F14-7B3EEA487649.jpeg
 
This is a modeling stand that was made by Midwest back in the 80s and 90s called the “Midwest Stand-In Portable Workstation MID813.“ Unfortunately it is no longer in production as far as I can see. But maybe an in depth web search might turn one up. There are similar stands around. I use mine all the time. I attach mine to my bench with some big clamps. Useful for all the hull work as it cradles the hull nicely and raises it up about a foot above bench height. Once I get to masting and rigging I set the stand aside. I added extra foam padding.

View attachment 179111
I think that the basic tubing could be bent with some copper pipe and a pipe bender but the base is another matter. It does give some hints at something similar that could be cut out of plywood or if a person had a large "steaming tube" it could be fashioned from 1/2" lumber both of which would be heavier but could be set into a 3/4 inch plywood base in to drilled or plowed out slots. Thanks. PT-2
 
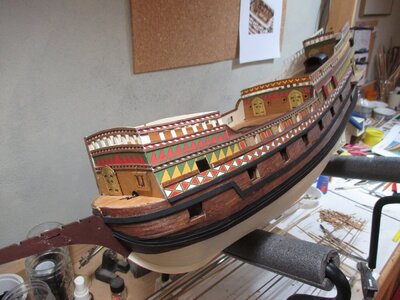
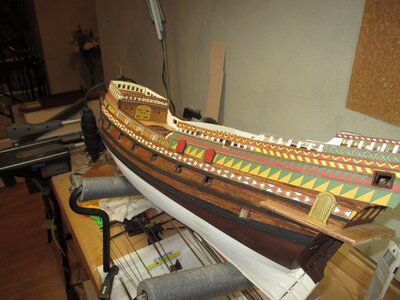
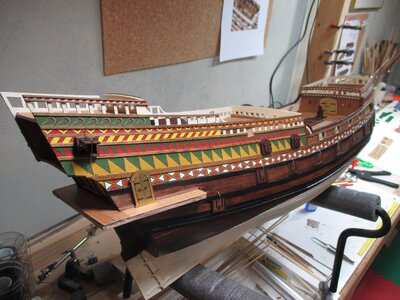
Good progress. I now have both the port and starboard hull sides near complete with planking, colour decorations, Wales, and mouldings. Lots of touchup details left, especially in trim or edge mouldings. I also need to apply a coat of poly. The next step are the port details on both sides. In addition, there are still a lot of hull details left to do including the bow and stern galleries and a lot of planking details on the inside of the deck bulwarks including cap rails. One would think that the two sides of the hull build would be close to the same. Not so much on this build. Both sides ended up being different. The differences show up in the relationships between the wale strips, ports, and colour decorations. It is a good thing people can not directly compare sides while it is on display...no mirrors allowed! :) I still have not decided if I should try to add mouldings to correct the differences or just leave them as is. The two major issues that affect the relationships between each side are differences in how the bulkheads are faired, and for this model the differences in the fitment of the plywood templates. I subscribe to the building method of doing each side separately to near complete and not try to go from side to side to duplicate the construction details. Either way, for now it is on to the gun port details.


IMG_1629.jpegIMG_1630.jpeg
 
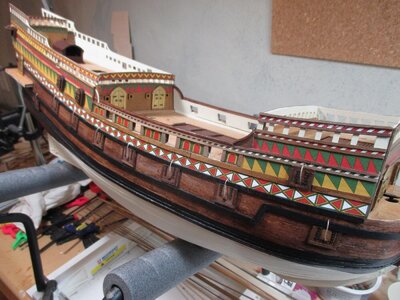
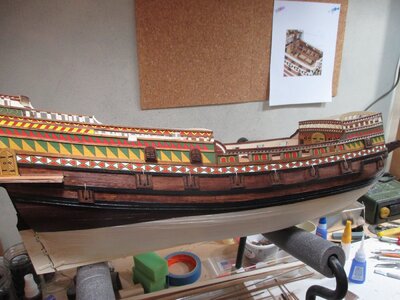
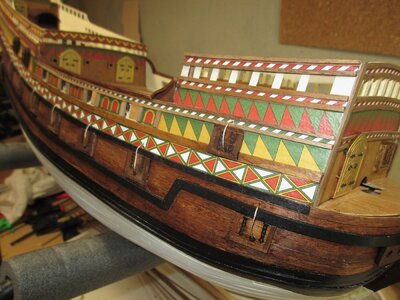
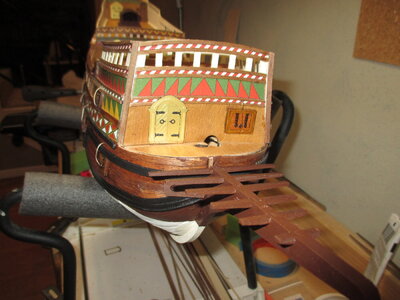
We are into the details on the outer hull which takes more time, making for longer periods between postings. Anyway, the starboard side is nearly complete except for adding rigging structures such as the channels. I decided to model the lower gun ports closed. The deck guns will be open and detailed. I still need to model the port side gun ports. Then the next steps are the bow and stern structures and fine tuning outer hull mouldings. Once the outer hull details are complete we start on the inner deck finishings which include planking the bulwarks, deck mouldings, cap rails, and framing the deck gun ports. So we are deep into the details of the hull and deck. We will rig out the main deck cannons before moving onto masting and rigging.

IMG_1633.jpegIMG_1634.jpegIMG_1635.jpegIMG_1637.jpeg
 
We are into the details on the outer hull which takes more time, making for longer periods between postings. Anyway, the starboard side is nearly complete except for adding rigging structures such as the channels. I decided to model the lower gun ports closed. The deck guns will be open and detailed. I still need to model the port side gun ports. Then the next steps are the bow and stern structures and fine tuning outer hull mouldings. Once the outer hull details are complete we start on the inner deck finishings which include planking the bulwarks, deck mouldings, cap rails, and framing the deck gun ports. So we are deep into the details of the hull and deck. We will rig out the main deck cannons before moving onto masting and rigging.

View attachment 189719View attachment 189720View attachment 189721View attachment 189722
it's looks beautiful
 
Very nice work. I’m working on the same kit, and am starting the masts. A little advice, be very careful with the Tops, the are very delicate and easily broken.
 
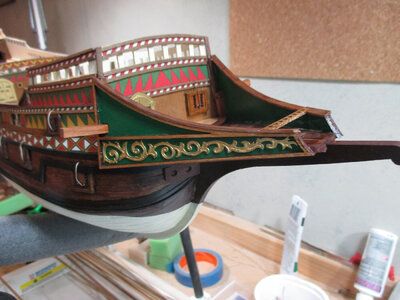
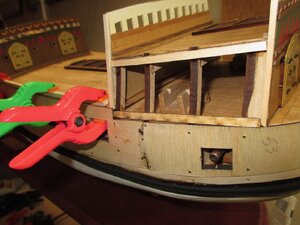
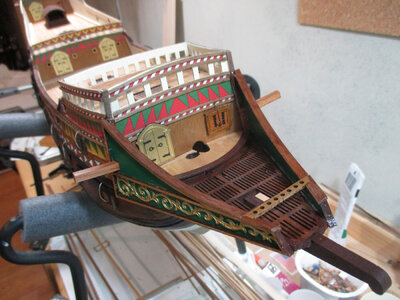
So I decided to take a break from building gun port lids for the port side. Easy but repetitive and boring. I picked up the bow structures instead. The first photo shows the under structure which supports the bow grid. Then the following two photos shows the bow structures completed. A nice diversion. So back to the port side gun port lids...

IMG_1639.jpgIMG_1642.jpegIMG_1643.jpeg
 
Back
Top