- Joined
- Jul 9, 2019
- Messages
- 497
- Points
- 323

Love the whipstaff (swing tiller). Any chance you could get me a close-up shot of the rowle (pivot joint).
 |
As a way to introduce our brass coins to the community, we will raffle off a free coin during the month of August. Follow link ABOVE for instructions for entering. |
 |
 |
The beloved Ships in Scale Magazine is back and charting a new course for 2026! Discover new skills, new techniques, and new inspirations in every issue. NOTE THAT OUR FIRST ISSUE WILL BE JAN/FEB 2026 |
 |

Love the whipstaff (swing tiller). Any chance you could get me a close-up shot of the rowle (pivot joint).
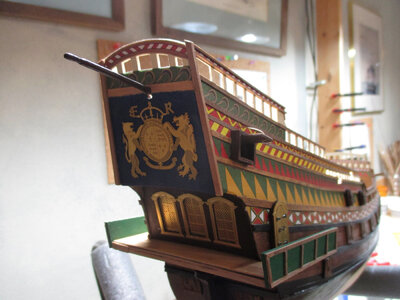
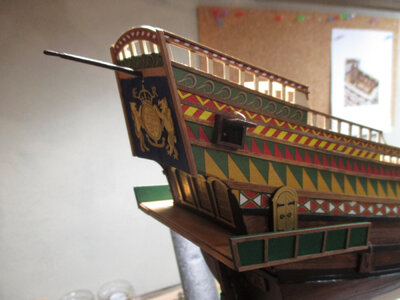
Being totally unfamiliar with the ship I am fascinated and wondering about the "captains walk" around the transom. ??? RichIt has been a whee bit since my last post. Got caught up in Admiral chores. Eric, that part of the tiller is now buried inside the hull. I can't get a view of it anymore. Sorry. There continues to be a lot of bright etched brass decorations to add, such as the scroll work on the side of the bow structures. A note on finishing the etched brass. There are several ways the bright work could be finished...doors could be painted brown, scroll work could be highlighted with colour, some have suggested painting the bright brass a more muted gold for a more realistic tone for the brightwork, etc. The large decoration on the stern transom could be coloured (and rightfully should have been to reflect the colours o the coat of arms) and then lightly sand the brass again to highlight the coloured areas. I chose to leave the bright work...well...bright.
These photos show some progress on the stern gallery walkway structures as well as the stern transom. The transom is in place. You can see how I left the transom decoration bright. You can also see the bright work on the stern gallery windows. The gallery walkway structures are still a work in progress. About half done. But I took a detour from working on the lower gun port covers. Plus I wanted to post some progress to let everyone know I was still working.
View attachment 200269View attachment 200270
So the captain's head outflow dumping must have abandoned the ship below the walkway ;-) RichPT-2/Rich...hang on...the next post will probably see a more complete walkway and it will look more functional. The two side doors...one in each side...provided access from the great cabin to this stern gallery walkway.
I am not surprised that this type of personal needs would be omitted from a kit and the question remains for scratch builders how to deal with that other than ignore small details that are only pressing to the person in need at the moment. RichNow that is a good question Rich...where and how was the Captains head placed...I can see the conundrum...it is entirely possible this particular kit did not model that detail...maybe we can do a bit more research about this issue with late 1500 galleons...anyone on the forum have ideas??
Good recommendation to keep in mind. Merry Christmas!!! RichA note on removing “char” on the edges of laser cut parts. Most will struggle to remove all the char from the edges of laser cut parts. I take a more discerning path. The char can effectively provide a weathered or aged look to certain parts that can enhance the look of the part and the model. So I leave char in place on many parts. If you look closely at photos posted so far of the Revenge you might catch this technique on edges of many hull parts...although it is hard to see. I will try to remember to illustrate a few examples in future postings. My thought is to not be so quick to sand off char until you see how it might enhance the aged look of a part in place...edges often age faster and darker than flat sides.
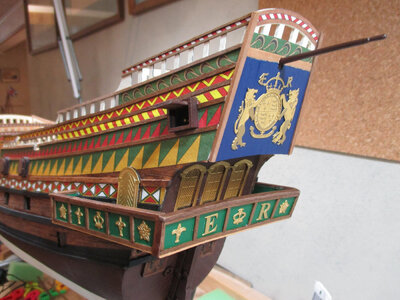
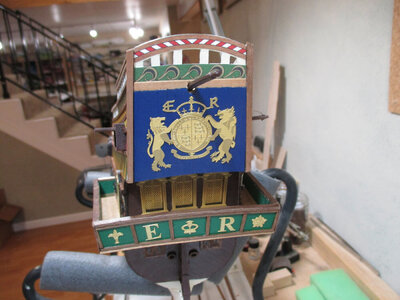
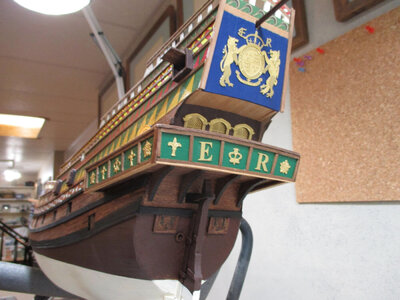
Hail Britannia, Elizabeth Rex and Dan for this build progress!! Rich (PT-2)Posting more progress on the stern gallery structures. The walkway is nearly complete. There are some arch braces to add but I need to get at the port side gallery door set to add hinges and knobs before I do the arches. And I definitely need to complete the port gun port coverings now...no more procrastinating! The "E" is ever so slightly off...the CA dried too fast to make the last slight adjustment. I don't dare try to pop it off to adjust as the etched brass can be delicate and might bend. So on to the gun port covers then the details on the deck level bulwark cap rails.
View attachment 201449View attachment 201450View attachment 201451
Elizabeth went off of plum at times but being the Queen no one could mention that. ;-) Rich (PT-2)Interesting that the canted “E” is not noticed with a casual look at the stern...I only really saw it from the photos. Right now I am leaving it alone to see how much it aggravates me to do something...
Hallo Jim alias @danielsjeI have not posted a build log for some time so I thought it was time. I have started the Victory Models Kit Revenge 1577. It is a classic Race Built Galleon Warship of the Elizabethan Navy. I started the model six months back and set it aside to build a smaller model for my Granddaughter. She asked for a specific model. How could I say no. So this build log is starting after the typical keel and bulkhead construction is complete. Two decks are planked and installed. However, from here we can pick up the concept of the Victory Models kit construction and start progress comments and photo support. The kit itself is well stocked with parts, billets, and small parts. The wood is of high quality. Victory Models uses thin fiber board and plywood shapes as the base or "first planking." One then applies a second planking on the shape and install that on the model. The instruction booklet is photo driven. Short instructions with a photo of where and how the part is attached. There are also 20 sheets of plans that focus on specific sections and the build.
To get started here are a few introductory photos to illustrate the kit I am working with. Victory Models kits are high quality and they have a unique approach to model building.


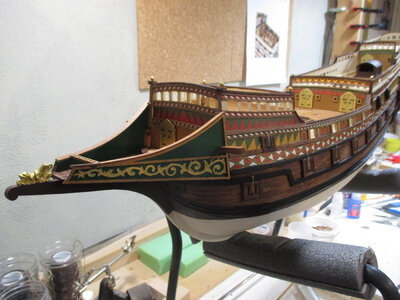
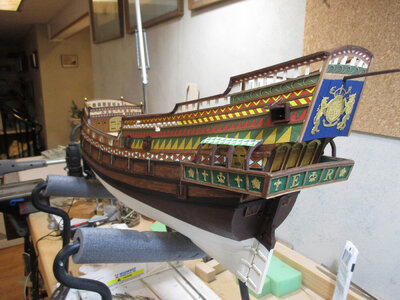
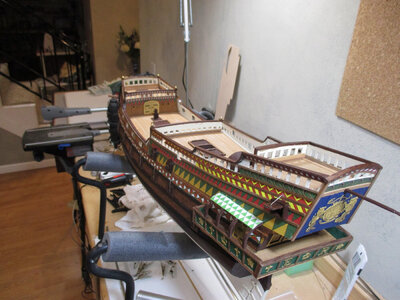
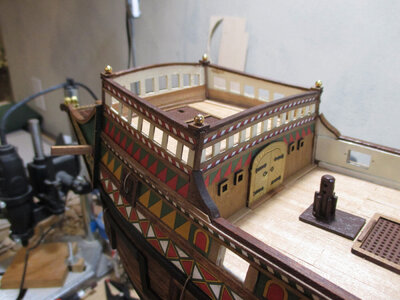
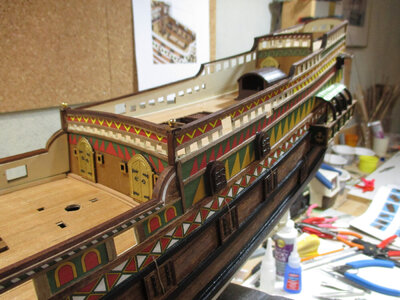

it's wonderfully workWhen we get stuck in repetitious details on the model it can be more than a few days before we get to post again. I have finished what I will call phase one of the hull. This includes the primary hull decorations, and the gun port covers. Also included are the cap rails. The gun ports took awhile due to adding the etched brass details and forming the gun port frames. The primary bow and stern structures are in place. The next step is the deck details to include the cannons, all the rigging belay points, pin rails, and chain plates, etc. So a lot of deck and upper hull details yet to come. Let me also say that we all know that when building the hull of our ship model what we do on one side is repeated on the other side. Normally the two sides are the same. I made a mistake on one side with the placement of a middle wale that I corrected on the other so this is the first model that I can honestly say the two sides are a whee bit different. I did not notice the error until much later when other relationships started going screwy. Good thing we can't see both sides at the same time sans a photo side-by-side! And...no...I am not going to highlight my mistake...but sharp eyes on one of the photos below might spot it...just saying...

