Oh...NO!!!! I mean Oh...Yes, but...even as you beautifully painted, pity you have to cover amazing carvings!!! 


-

Win a Free Custom Engraved Brass Coin!!!
As a way to introduce our brass coins to the community, we will raffle off a free coin during the month of August. Follow link ABOVE for instructions for entering.
-

PRE-ORDER SHIPS IN SCALE TODAY!
The beloved Ships in Scale Magazine is back and charting a new course for 2026!
Discover new skills, new techniques, and new inspirations in every issue.
NOTE THAT OUR FIRST ISSUE WILL BE JAN/FEB 2026
You are using an out of date browser. It may not display this or other websites correctly.
You should upgrade or use an alternative browser.
You should upgrade or use an alternative browser.
VOC ship The Prins Willem (scale 1:75) Year 1651
- Thread starter Steef66
- Start date
- Watchers 76
-
- Tags
- 1:75 prins willem
- Joined
- May 27, 2021
- Messages
- 222
- Points
- 88

Just plain wood looked really great.Oh...NO!!!! I mean Oh...Yes, but...even as you beautifully painted, pity you have to cover amazing carvings!!!
- Joined
- Aug 8, 2019
- Messages
- 5,584
- Points
- 738

Thanks Dirk and Kirill.
The ventilation openings shoud be four each lantern. That's to much on this scale.
Yeah the wood was looking better. If I was started the build, I didn't use any paint, only oil. I love the look of wood to. But the ship was already painted, so I keep going on. And we have the pictures
The end result
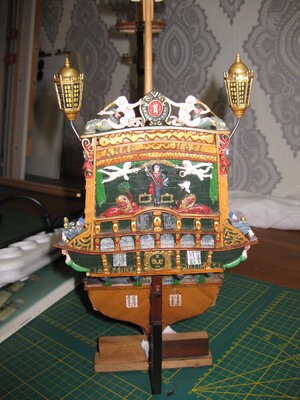
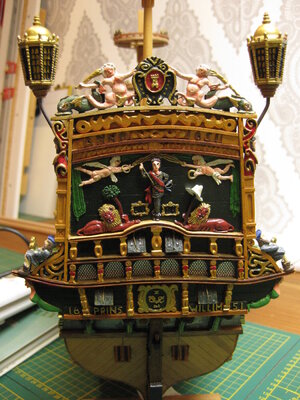


Oh!
I see... understood why painted... but OK , it still looks nice!
NO! VERY NICE! I like it very much!
by the way, couldn't you try to use artistc potal'(artificial gold leafs) instead of gold paint? it will make fantastic effect when supplement any even best of the best "gold" paint!!! Very easy to apply !
I 've found this stuff recently and... when one time I tested it , than immediately "repainting" with this potal' all my previously gold paints works

 it works perfrctly with combination light touch of bitumen varnish and gloss laquer as finish layers( protection against oxidation) and enhance the expressiveness of the carvings relief
I see... understood why painted... but OK , it still looks nice!
NO! VERY NICE! I like it very much!
by the way, couldn't you try to use artistc potal'(artificial gold leafs) instead of gold paint? it will make fantastic effect when supplement any even best of the best "gold" paint!!! Very easy to apply !
I 've found this stuff recently and... when one time I tested it , than immediately "repainting" with this potal' all my previously gold paints works


 it works perfrctly with combination light touch of bitumen varnish and gloss laquer as finish layers( protection against oxidation) and enhance the expressiveness of the carvings relief
These handcrafted lanterns fit with the motif of the ship perfectly! I love your work!
- Joined
- Apr 20, 2020
- Messages
- 6,253
- Points
- 738

magnificentThanks Dirk and Kirill.
The ventilation openings shoud be four each lantern. That's to much on this scale.
Yeah the wood was looking better. If I was started the build, I didn't use any paint, only oil. I love the look of wood to. But the ship was already painted, so I keep going on. And we have the pictures
The end result
View attachment 243106View attachment 243107


- Joined
- Aug 8, 2019
- Messages
- 5,584
- Points
- 738

Look at last picture here Post in thread 'VOC ship The Prins Willem (scale 1:75) Year 1651' https://shipsofscale.com/sosforums/...-willem-scale-1-75-year-1651.6761/post-179665ventilation openings ... again
could be more than 4?

- Joined
- Aug 8, 2019
- Messages
- 5,584
- Points
- 738

Everybody thanks again for al the likes and compliments.
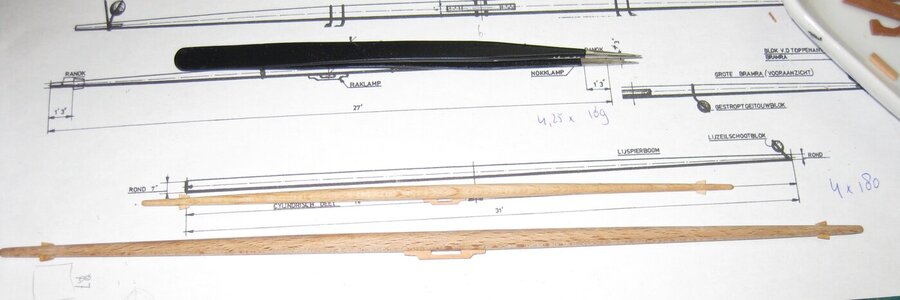
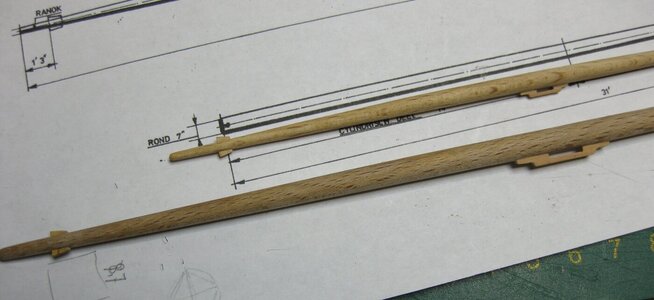
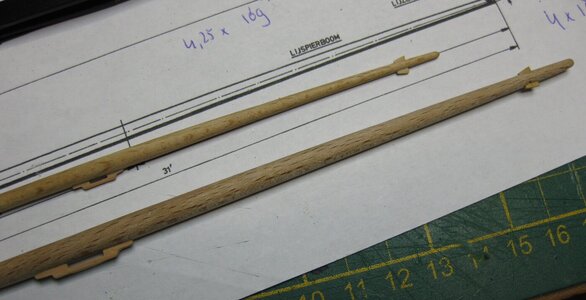
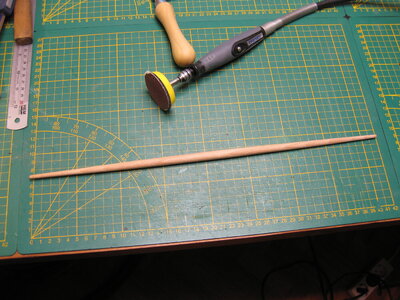
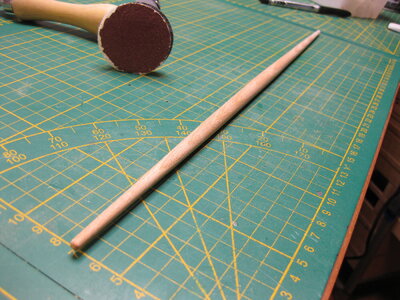
Yesterday and this morning I started to work on the main yard. I use the explanation of mr. Otto Blom (He uses v. Yk) to measure the yard thickness at different places. But that didn't worked out for me. So I went to AutoCAD and drawn the form of the yard using the curve tool. Starting point, mid point and end point. Midpoint should be 11 mm. But I choose 10,5 mm. Because 10,5 mm is the max. for the Proxxon lathe. Then 42 cm long and at the cleat is the yard arm 4,2 mm.
I half the drawing because I only have a A4 printer. Printed out in PDF but mentioning al the measurements . See pdf in attachment (not the real measurment, had to correct it to 10,5 mm.).
In the lathe I made the thickness at the specific point like the drawing and then afterwards I use a round sander on my Dremel to make the form. The measurement is correct after this. I used a wooden block with sandpaper to make the form straight and use sandpaper sponge to make the surface smooth.
The result:


Attachments
- Joined
- Apr 20, 2020
- Messages
- 6,253
- Points
- 738

very successful and very Delicate


- Joined
- Aug 8, 2019
- Messages
- 5,584
- Points
- 738

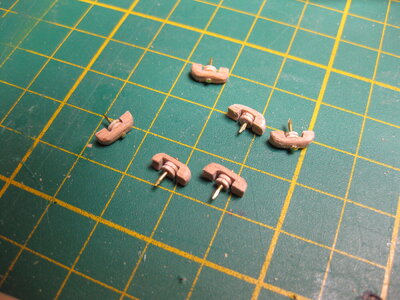
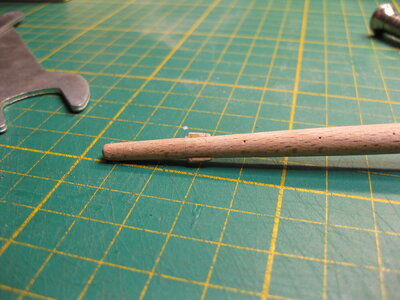
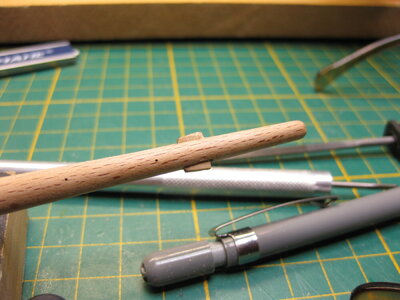
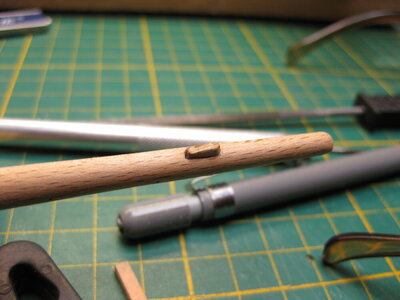
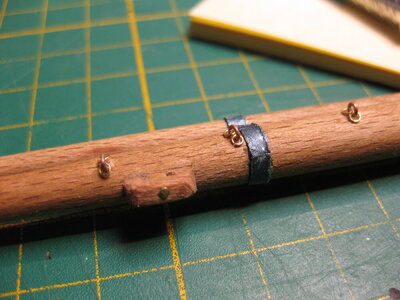
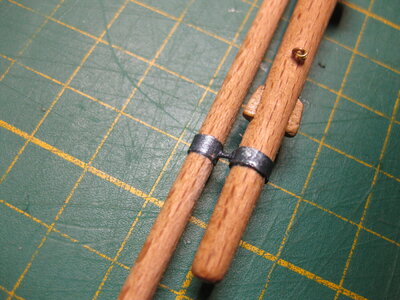
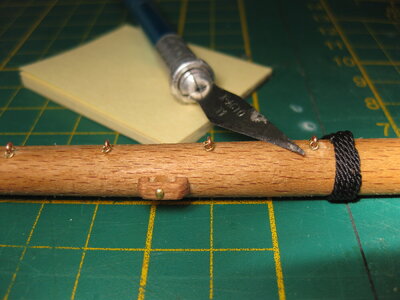
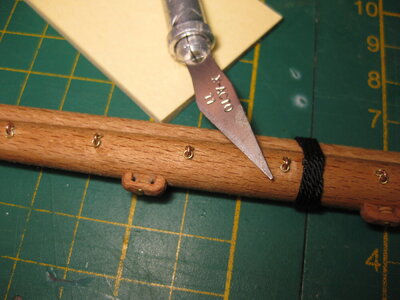
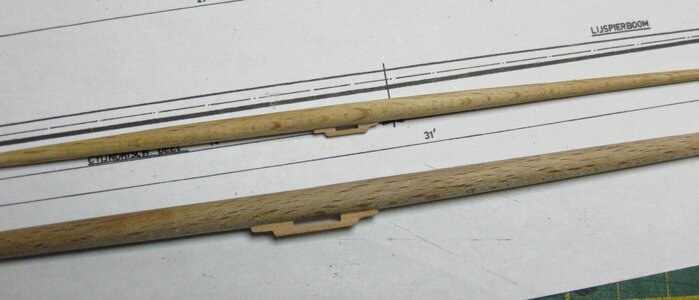
Studding sail booms.
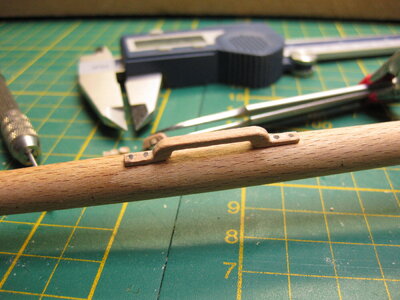
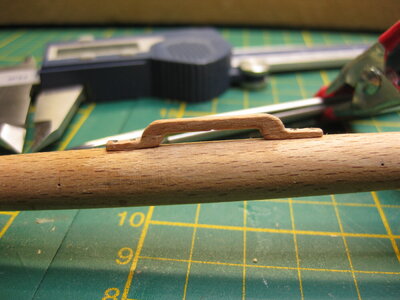
I made the Iron rings with tape (Aluminium tape) Cut it to 2 mm strokes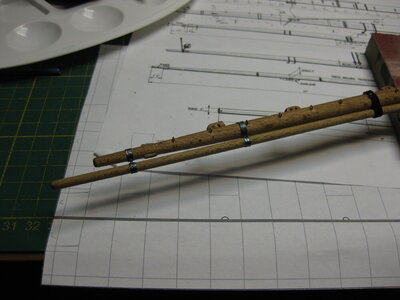
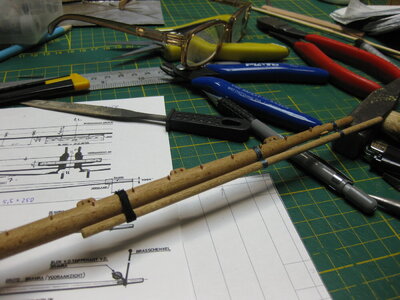
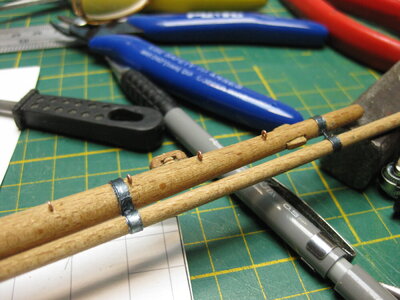 and round it up around the yard and the boom. Then a nail between them to let it look like real.
Steel paint to complete the look.
I painted the yard with Ecoline amber with 1:1 water and finish it of with Danish oil.
Now I only need to make the rings of the reef lines.
I made the Iron rings with tape (Aluminium tape) Cut it to 2 mm strokes


 and round it up around the yard and the boom. Then a nail between them to let it look like real.
Steel paint to complete the look.
I painted the yard with Ecoline amber with 1:1 water and finish it of with Danish oil.
Now I only need to make the rings of the reef lines.
- Joined
- Aug 8, 2019
- Messages
- 5,584
- Points
- 738

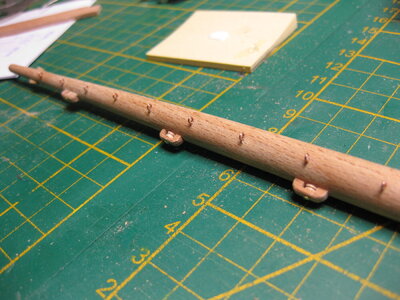
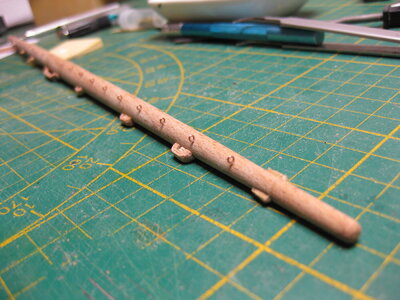
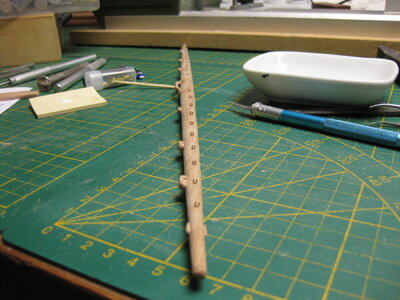
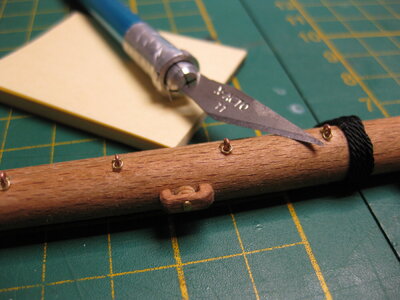
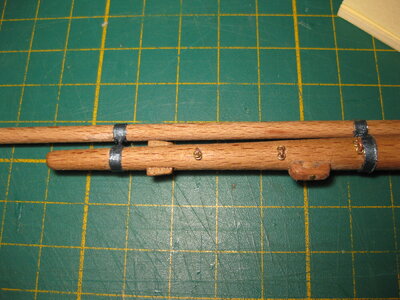
Thanks for the likes and visit to my log. These 2 yards are ready now and next I will start on the fore mast yards.
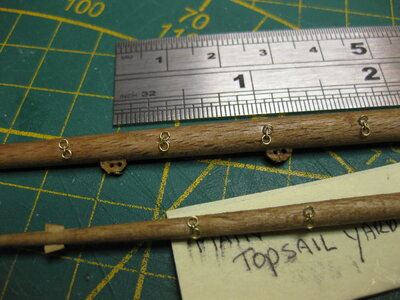
First a few pictures of the main topsail yard and topgallant yard.
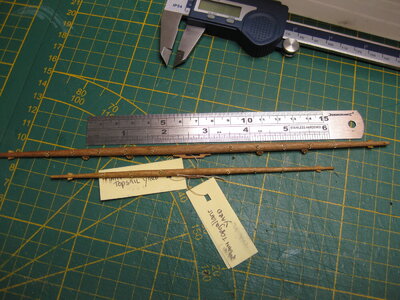
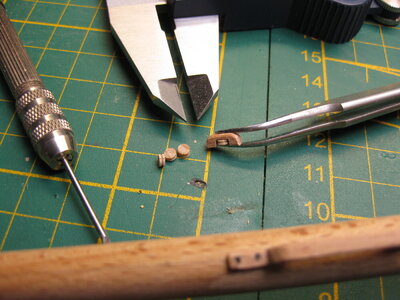
These rings for the reeflines are a pain in the a$$, so tiny, and now whay to hold them properly.
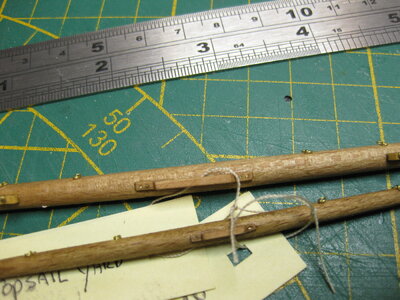
Made the plans for forming the yards in AutoCAD (see pdf)
Maybe I will make a Excell sheet to share, so you got it complete in a table
First a few pictures of the main topsail yard and topgallant yard.

These rings for the reeflines are a pain in the a$$, so tiny, and now whay to hold them properly.


Made the plans for forming the yards in AutoCAD (see pdf)
Maybe I will make a Excell sheet to share, so you got it complete in a table
Attachments
- Joined
- Feb 22, 2021
- Messages
- 130
- Points
- 253

I was away from forum for a while... but well, well, well... Stephan  great progress
Lanterns looks really nice. Congrats
I was thinking as well about carving mine... but then I went to photo etched method and soldering... and that was painful and long process
Yards looks neat
True... ring bolts for gaskets (reef-lines) are "interesting" part to build
However, for me reef-lines or rather fixing them to the rings were much more "entertaining"
Are you going to blacken the metal work or you will leave it in brass color?
Cheers,
Matt
Lanterns looks really nice. Congrats
I was thinking as well about carving mine... but then I went to photo etched method and soldering... and that was painful and long process

Yards looks neat
True... ring bolts for gaskets (reef-lines) are "interesting" part to build

However, for me reef-lines or rather fixing them to the rings were much more "entertaining"
Are you going to blacken the metal work or you will leave it in brass color?
Cheers,
Matt
- Joined
- Aug 8, 2019
- Messages
- 5,584
- Points
- 738

Thanks Matt, I appreciate your compliment.Are you going to blacken the metal work or you will leave it in brass color?
I don't know by bow what to do with the brass rings. Blacken wasn't a success even if they're degrease with acetone. So I leave them like this or paint them black. I wait till all the yards are done. They are so small, when sails are in place and all the ropes you almost not noted them. When black you don't see them at all.
My next build will be a bigger scale
- Joined
- Feb 22, 2021
- Messages
- 130
- Points
- 253

Hi,
I always poke other modelers for un-blacken brass or copper elements... so forgive me
...simply because it's painful for my eyes

...but I understand that blackening is not going always as we wish.
Many factors can occur failure.
Sometimes problem is in brass itself due to some weird alloy.... this days it's not that difficult to find some shitty one.
Not sure what kind of blackening solution you are using, but highly recommend to get Brass Black from Birchwood Casey (it's possible to get in Europe) or JAX products... made in US but... one of the best I've ever encounter... problem is that this has to be sourced from US.
In term of preparing brass or copper try with isopropyl alcohol (IPA) for degreasing, it's cheap and doesn't stink like acetone. Just dump it and leave it for some time.
You can try also with just a regular kitchen vinegar... it gives some micro surface etching to the detail so blackening solution has better grip.
You can combine both one by one rinsing vinegar using water and then dump it into IPA.
Citric acid works as well...
Sometimes I'm etching details a little bit in FeCl3 (Iron(III) chloride), but after that it require really good rinse to stop the process.
Once again... some experiments to find best method
Cheers,
Matt
I always poke other modelers for un-blacken brass or copper elements... so forgive me

...simply because it's painful for my eyes


...but I understand that blackening is not going always as we wish.
Many factors can occur failure.
Sometimes problem is in brass itself due to some weird alloy.... this days it's not that difficult to find some shitty one.
Not sure what kind of blackening solution you are using, but highly recommend to get Brass Black from Birchwood Casey (it's possible to get in Europe) or JAX products... made in US but... one of the best I've ever encounter... problem is that this has to be sourced from US.
In term of preparing brass or copper try with isopropyl alcohol (IPA) for degreasing, it's cheap and doesn't stink like acetone. Just dump it and leave it for some time.
You can try also with just a regular kitchen vinegar... it gives some micro surface etching to the detail so blackening solution has better grip.
You can combine both one by one rinsing vinegar using water and then dump it into IPA.
Citric acid works as well...
Sometimes I'm etching details a little bit in FeCl3 (Iron(III) chloride), but after that it require really good rinse to stop the process.
Once again... some experiments to find best method
Cheers,
Matt


