Good afternoon. Hopefully your hand will be ready for some more action on your Prins Willem before Netflix runs out of Sci-fi movies..Paul, Jim, Brad, ConsNZ, Kurt and shota thanks for the kind words. These are more then welcome. Also the likes are a warm welcome.
No I didn't read them, Even the movie I didn't seen. I downloaded the ebooks of James Corey - Expanse (11) and put them in my reading list.
Thanks for the advice. 40 years ago I read a lot of SciFi books and seen every movie that was available. There are a few classics I still like to watch.
Phase IV, The Andromeda Strain, The Blob, Soylent Green, The Day the Earth Stood Still, The Thing with Boris Karloff but also the John Carpenter version is one of my favourites. The bladrunner I seen about 50 times, the phrases of Rutger Hauer in the end are magnificent.
-

Win a Free Custom Engraved Brass Coin!!!
As a way to introduce our brass coins to the community, we will raffle off a free coin during the month of August. Follow link ABOVE for instructions for entering.
-

PRE-ORDER SHIPS IN SCALE TODAY!
The beloved Ships in Scale Magazine is back and charting a new course for 2026!
Discover new skills, new techniques, and new inspirations in every issue.
NOTE THAT OUR FIRST ISSUE WILL BE JAN/FEB 2026
You are using an out of date browser. It may not display this or other websites correctly.
You should upgrade or use an alternative browser.
You should upgrade or use an alternative browser.
VOC ship The Prins Willem (scale 1:75) Year 1651
- Thread starter Steef66
- Start date
- Watchers 76
-
- Tags
- 1:75 prins willem
- Joined
- Aug 8, 2019
- Messages
- 5,585
- Points
- 738

Thanks Grant.Good afternoon. Hopefully your hand will be ready for some more action on your Prins Willem before Netflix runs out of Sci-fi movies... Seriously, best wishes on a speedy recovery. Cheers Grant
My neighbor got this surgery 4 times. And he told me at least 10 days before the hand works like old times. So in about 5 days I will go on. The ropewalk is still in place to start and go on. Need to make 4 tacks.
I wish You to recover as soon as possible ! Take care of Your hands. My very best regards.
ALL of those classics are WONDERFUL! And yes, Rutger Hauer's reflection on the great loss that the end of a life brings will make you tear up every time.Paul, Jim, Brad, ConsNZ, Kurt and shota thanks for the kind words. These are more then welcome. Also the likes are a warm welcome.
No I didn't read them, Even the movie I didn't seen. I downloaded the ebooks of James Corey - Expanse (11) and put them in my reading list.
Thanks for the advice. 40 years ago I read a lot of SciFi books and seen every movie that was available. There are a few classics I still like to watch.
Phase IV, The Andromeda Strain, The Blob, Soylent Green, The Day the Earth Stood Still, The Thing with Boris Karloff but also the John Carpenter version is one of my favourites. The bladrunner I seen about 50 times, the phrases of Rutger Hauer in the end are magnificent.
Now you also tapered your hand? Hope it was not advised by Van Ykthe surgery went well this morning. Can,t use the left hand, hurts a little to much. But the doctor said, that tomorrow I can maybe do some little work with it. The only thing he said was stay away from your table saw machine, I don't want you to see you back to soon.
View attachment 436547
 .
.Hope you will be building soon.
Btw very interesting technique
- Joined
- Aug 8, 2019
- Messages
- 5,585
- Points
- 738

Like tears in Rain....ALL of those classics are WONDERFUL! And yes, Rutger Hauer's reflection on the great loss that the end of a life brings will make you tear up every time.
- Joined
- Aug 8, 2019
- Messages
- 5,585
- Points
- 738

Now you also tapered your hand? Hope it was not advised by Van Yk.
Hope you will be building soon.
Btw very interesting technique
 tapered, no not Yk it was Wassen. A great taper of hands.
In a few days it must be no problem to build and if not I start writing Sci-fi books.
This technic is indeed interesting and above all not that hard to do.
- Joined
- Sep 14, 2020
- Messages
- 152
- Points
- 88

Nice job on the rigging parts so far, thanks for showing the process on rigging details
A Happy Easter and a quick recovery, Stephan.
Regards, Peter
Hi Stephan, I'm curious how your recovery is coming along?
Happy Easter!
Happy Easter!
- Joined
- Aug 8, 2019
- Messages
- 5,585
- Points
- 738

Thanks Learner for visiting my buildlog. For me it is also still a learning proces.Nice job on the rigging parts so far, thanks for showing the process on rigging details
Thanks Peter, happy Easter for you to and enjoy your holiday.A Happy Easter and a quick recovery, Stephan.
Regards, Peter
Happy Easter to you to Paul. The recovery of my hand is going on, everyday it's getting better. Today I shaved the dog and cut her nails.Hi Stephan, I'm curious how your recovery is coming along?
Happy Easter!
A few fingers are still stiff and difficult to use, especiallythe fine modelwork isn't easy to do. Maybe This week I can try again to make a tack without trowing away the end result.
Working on the HZ model is to much force because of the sawing and sanding. Thanks for asking about my hand.
Last edited:
- Joined
- Aug 8, 2019
- Messages
- 5,585
- Points
- 738

Thanks my good friend, happy Easter to U2Happy Easter Stephen
happy that the recovery is going well
happy Easter
- Joined
- Aug 8, 2019
- Messages
- 5,585
- Points
- 738

Thanks all for the likes, comments and visit to my build log.
As promise I will show you how I made the tacks on my rope walk.
I can use my hand again (not 100%, but in time it will get better)
So here is the how too
First I made a few adjustments on my rope walk. It is necessary that the wagon is fasten in place when you start attach the yarn in the rope walk. The part that turns the rope, I will call it the wagon, needs to fit in place. And after the yarn is tensioned and after removing the lock, it should remain in place.
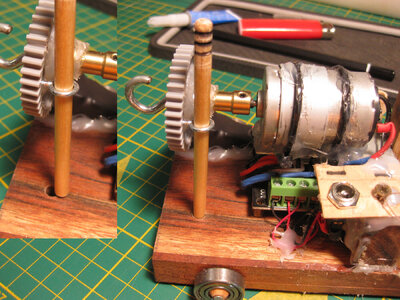
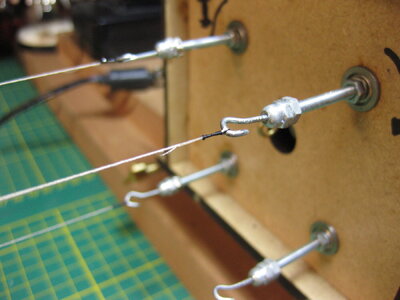
In the picture above you see how I solved the problem of a moving hook. It is very important this hook should not move or turn till you start the third phase of rope making: turn the rope.
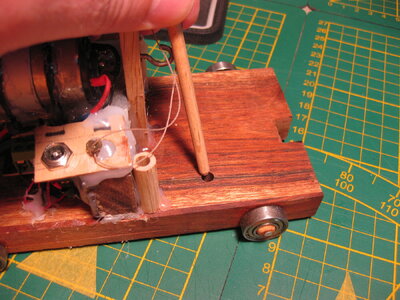
In the picture below you can see how I attached the wagon to the table. Clamp him below the wooden piece and the wooden pin makes sure it stays in place. In the table there is a hole where it fit in.
In this way the wagon don't move when tension the yarn.
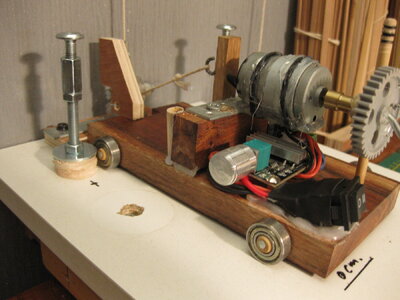
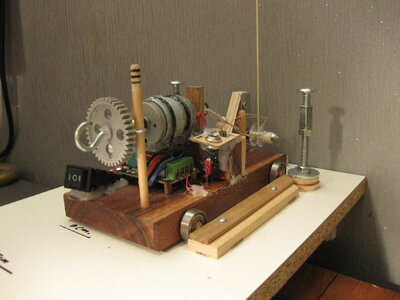
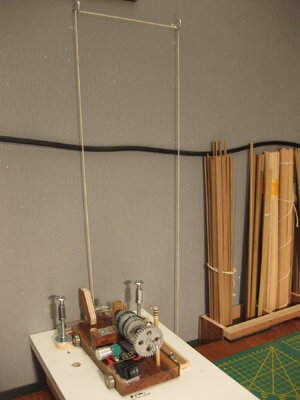
The switch is the turn direction. I is RH (Hawser or just rope) and II is LH (cable).
Then I start to attach the yarn in the rope walk. I make a three times six rope that I juvenile to Three time two.
After I go three time around the hook of the strand-wheel (I name that part that turns the strands), I clamp the yarn to the hook with a little clamp to hold the tension. Then I go to the next hook till I got three hooks done with each 6 single yarns.
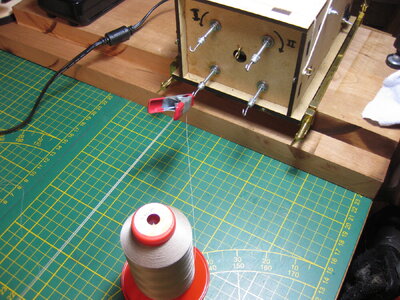
Then I do a different act than normal when I am twisting rope. I fix every strand near the hook by twisting yarn around it and a drop of CA. So I make sure when I cut a yarn only that yarn come of and the other end stays in place.
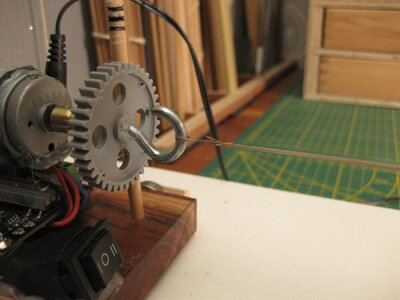
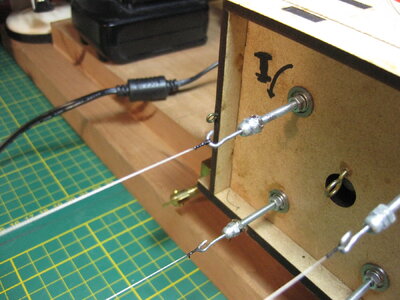
After the glue dried I start to take away the lock on the wagon so it can move on the table. Leaf the look on the hook in place. Start turning the strands until the length of the strands is decreased to 90% of the starting length.
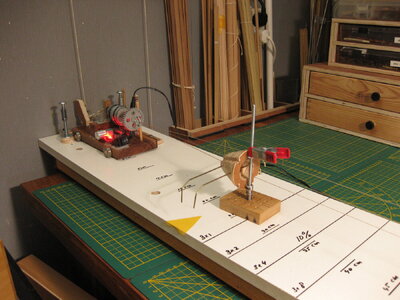
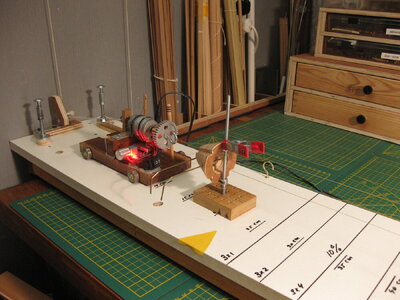
Then I remove the lock on the hook of the wagon and switch to position I of the switch. Start turning again til the first mark on the table.
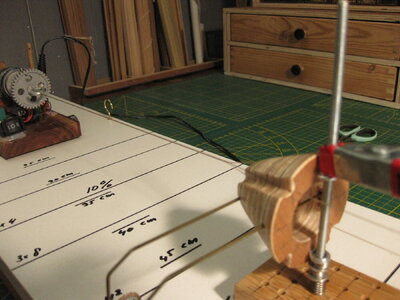
I show you those marks later in the story. these marks (four) are 10 cm in distance to each other.
First I clamp the rope part with a bigger clamp to hold it in place and I remove the spreader to the back.
And start to cut from each strand one yarn, keep the cut near the clamp.
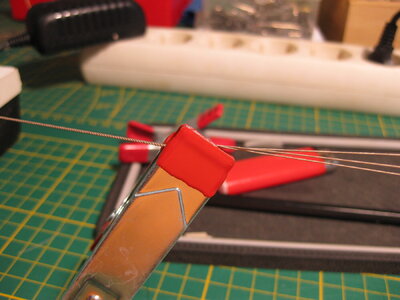
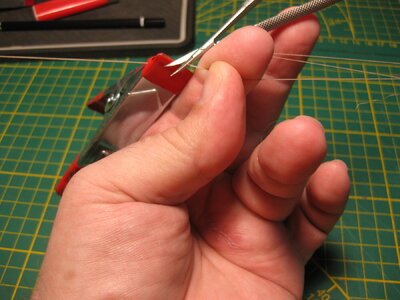
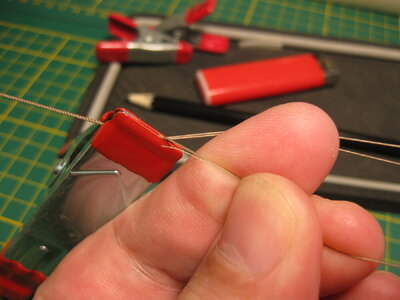
I remove this yarn over the length till the strand-wheel.
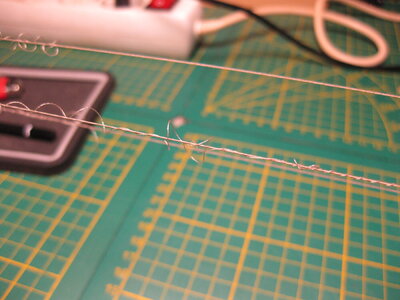
After that I switch the wagon in the off position.
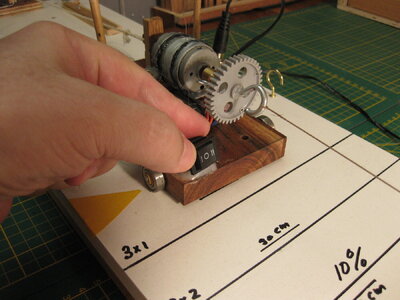
I put tension on the strands by pulling the wagon backwards. On the table you see the marks. And you see that the clamp is behind the mark. This is because the strand got a little longer after removing a piece of yarn. This happens every time and you need to adjust this by turning the strand wheel until the difference is gone.
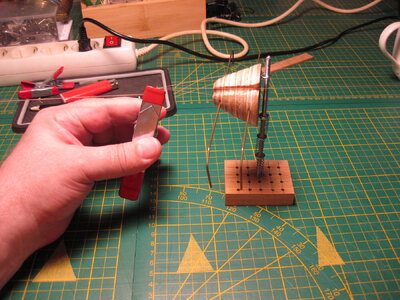
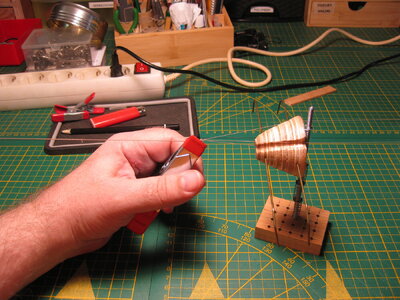
Switch the wagon in the I position and start turning rope to the next marker (stop in time, my motor turn a little on after I connect the power) And then the next yarn til I got three times two rope left. When I finished I secure the ends on the wagon and the strand wheel with CA. And remove the rope after removing the fuss where I cut the yarn.
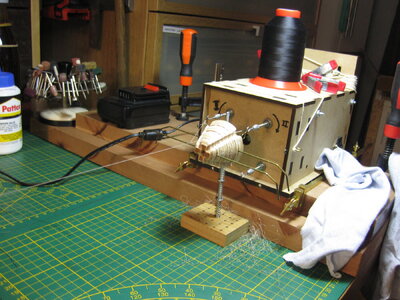
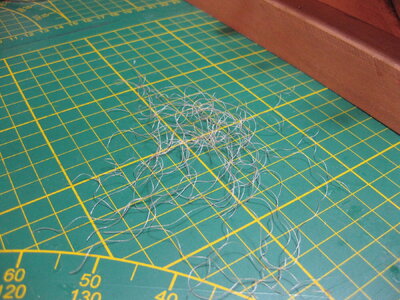
You can see the yarn what I cut of. I use a little scissor to remove this.
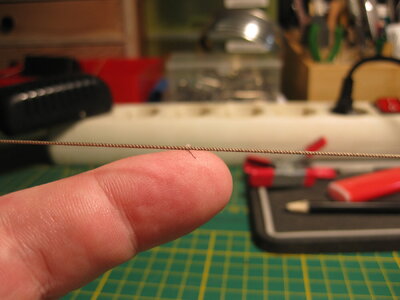
Sorry guys, I forgot to take a picture of the rope I made. I did this 3 times and I thought I got pictures of it. My admiral always says to me: "Don't think, leave that to a horse, they got a bigger head!"
After I got 3 ropes in this way, I put these ropes in the rope-walk and turn them into a cable. The thickest part of the rope on the wagon and the small part on the strand-wheel. Make also sure to double the weight on the wagon.
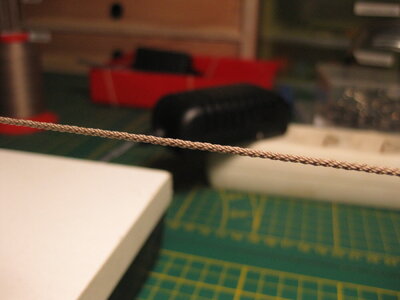
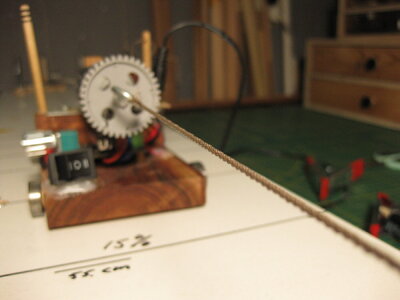
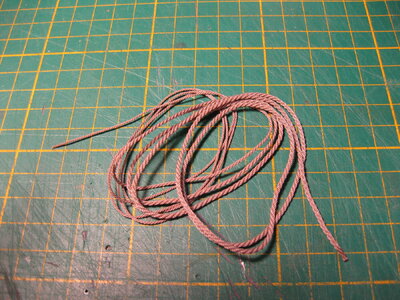
And above the end result.
There are a few things to keep in mind.
If there are questions I like to answer them all.
Thanks for watching this.
As promise I will show you how I made the tacks on my rope walk.
I can use my hand again (not 100%, but in time it will get better)
So here is the how too
First I made a few adjustments on my rope walk. It is necessary that the wagon is fasten in place when you start attach the yarn in the rope walk. The part that turns the rope, I will call it the wagon, needs to fit in place. And after the yarn is tensioned and after removing the lock, it should remain in place.

In the picture above you see how I solved the problem of a moving hook. It is very important this hook should not move or turn till you start the third phase of rope making: turn the rope.
In the picture below you can see how I attached the wagon to the table. Clamp him below the wooden piece and the wooden pin makes sure it stays in place. In the table there is a hole where it fit in.
In this way the wagon don't move when tension the yarn.


The switch is the turn direction. I is RH (Hawser or just rope) and II is LH (cable).
Then I start to attach the yarn in the rope walk. I make a three times six rope that I juvenile to Three time two.
After I go three time around the hook of the strand-wheel (I name that part that turns the strands), I clamp the yarn to the hook with a little clamp to hold the tension. Then I go to the next hook till I got three hooks done with each 6 single yarns.

Then I do a different act than normal when I am twisting rope. I fix every strand near the hook by twisting yarn around it and a drop of CA. So I make sure when I cut a yarn only that yarn come of and the other end stays in place.


After the glue dried I start to take away the lock on the wagon so it can move on the table. Leaf the look on the hook in place. Start turning the strands until the length of the strands is decreased to 90% of the starting length.


Then I remove the lock on the hook of the wagon and switch to position I of the switch. Start turning again til the first mark on the table.

I show you those marks later in the story. these marks (four) are 10 cm in distance to each other.
First I clamp the rope part with a bigger clamp to hold it in place and I remove the spreader to the back.
And start to cut from each strand one yarn, keep the cut near the clamp.


I remove this yarn over the length till the strand-wheel.


After that I switch the wagon in the off position.

I put tension on the strands by pulling the wagon backwards. On the table you see the marks. And you see that the clamp is behind the mark. This is because the strand got a little longer after removing a piece of yarn. This happens every time and you need to adjust this by turning the strand wheel until the difference is gone.


Switch the wagon in the I position and start turning rope to the next marker (stop in time, my motor turn a little on after I connect the power) And then the next yarn til I got three times two rope left. When I finished I secure the ends on the wagon and the strand wheel with CA. And remove the rope after removing the fuss where I cut the yarn.

You can see the yarn what I cut of. I use a little scissor to remove this.

Sorry guys, I forgot to take a picture of the rope I made. I did this 3 times and I thought I got pictures of it. My admiral always says to me: "Don't think, leave that to a horse, they got a bigger head!"
After I got 3 ropes in this way, I put these ropes in the rope-walk and turn them into a cable. The thickest part of the rope on the wagon and the small part on the strand-wheel. Make also sure to double the weight on the wagon.


And above the end result.
There are a few things to keep in mind.
- Make sure that the tension on the three strands is always equal.
- When turning the rope make sure that the strands turn together simultaneous.
- that's also important when you make the cable that you hold the same tension and a simultaneous turning.
- use enough weight on the wagon to hold the rope tight when turning it.
- Take your time for this and the result will be fine.
If there are questions I like to answer them all.
Thanks for watching this.
Bravo, mon ami!! reversed engineering
Brilliant Stephan! The only concern I have is that’s a lot of wasted thread laying on the table. How does a frugal Dutchman survive that? 


