Xebec of 1753 - Plank on Bulkhead Kit by Amati in 1/60 Scale - Build by Smithy

I think it’s looking beautiful. X

And that’s the main thing, innit?

Aksherly, that’s just one of the main things. The main main thing is that I was enjoying myself so much I completely lost track of the time. With a little luck and a following wind, I may have found a way back to enjoying myself in the model making hobbies. Yee-ha! Giddy up a ding-dong!

The MAIN main main thing, the foundation of Smithy Style is my belated realisation that for me (not necessarily for you) the emotional content of modelling, is far more significant than the thinking. This is nothing new. Some of you will recall the 1960's and remember "if it feels good, do it! It's not even new to me. It's not even new to me in the context of model making because this is how I used to do it when I was eight years old. It's new to me here and now - in retirement - in modelling.

And the MAIN MAIN main main thing is that I may be able to take this loosening of the shackles of so-called thinking into the other parts of my life.

Wow!
 
Last edited:
Aksherly, that’s just one of the main things. The main main thing is that I was enjoying myself so much I completely lost track of the time. With a little luck and a following wind, I may have found a way back to enjoying myself in the model making hobbies. Yee-ha! Giddy up a ding-dong!

The MAIN main main thing, the foundation of Smithy Style is my belated realisation that for me (not necessarily for you) the emotional content of modelling, is far more significant than the thinking. This is nothing new. Some of you will recall the 1960's and remember "if it feels good, do it! It's not even new to me. It's not even new to me in the context of model making because this is how I used to do it when I was eight years old. It's new to me here and now - in retirement - in modelling.

And the MAIN MAIN main main thing is that I may be able to take this loosening of the shackles of so-called thinking into the other parts of my life.

Wow!
Well, I don’t know. Can you really be sure until Buddy has weighed in?
 
View attachment 515245

All finished. You can see a few lozenges on the stbd bow that I didn’t round off before fitting. They were before my road to Damascus moment. I’ve done what I could with a tiny chisel but they will stand to remind me of my breakthrough. Or breakdown if you like. Ha!

I think it’s looking beautiful. X

And that’s the main thing, innit?
Good afternoon Smithy. Looks very cool. The deck edges look way better with the walnut edging. Cheers Grant.
 
P4240001.JPG

Today I am a big planker, something I've been called before. (I think that's what they said, anyway.)

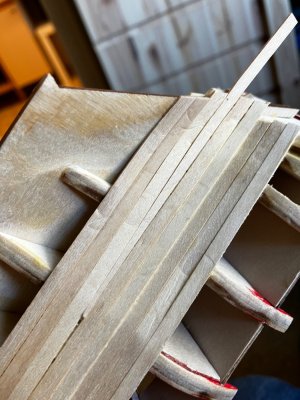
I wanted to see how much faster i could plank using my hot Titebond method, which eliminates clamping and glue drying time. I began with four planks already attached from yesterday, and worked downwards alternating sides. I didn't rush at all because this wasn't a bid to break records but an attempt to discover my relaxed planking frequency. I didn't stop the clock for, making coffee etc because that's pretty much a constant time loss, whatever I'm doing.

P4240003.JPG

There's a plank welded into the stem and the first three bulkheads, no clamps, no superglue, the remainder just hanging there waiting to be secured. The glue on the plank and the bulkheads is already dry so there's no rush, no mess.

P4240005.JPG

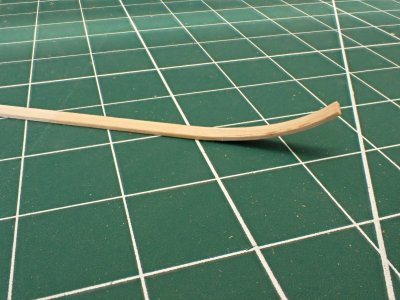
That's all the plank bending I'm doing. That's in order to line the wood up for a smooth entry into the rabbet.

P4240008.JPG

Two hours and five minutes. Six full length planks attached and already firm enough for a rub down with sandpaper. Compared to the conventional methods that I used to use, that's about two days faster.
 
The after dinner session is to be a bit more organised. Not quite production line but working in batches. Six planks this morning so I'll try six again. Not rushing but being efficient.
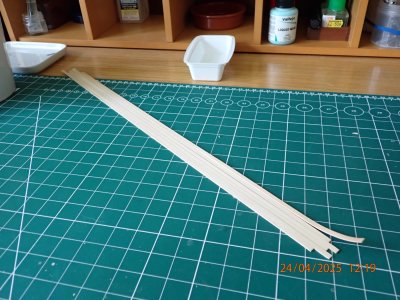
P4240012.JPG

Start 12:19 one plank already bent from last session.

P4240013.JPG

Remaining 5 planks bent. Three minutes.
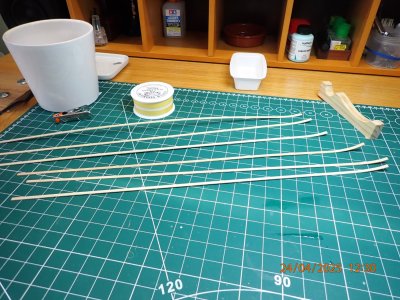
P4240014.JPG

All six glued on inner face and both edges. Eight minutes. Note that the bulkheads were all glued this morning and allowed to dry so that was a time saving that will help me all the way to the end.

As each one comes to be fitted the bow end will be cut to fit the rabbet and the cut end will be dipped in a little glue.
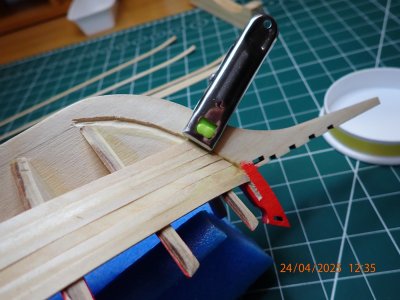
P4240015.JPG

I said no clamps but it seems wise to make sure that the leading end doesn't pop out of the rabbet. There's been no problems yet but I'm nervous because everything is going so well.
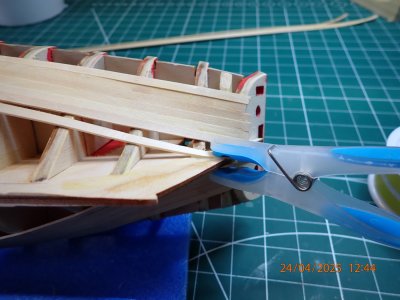
P4240016.JPG

I spoke too soon. The last joint on this one isn't keen to stick. I may have been stingy with the glue or it might be the twist. I add more glue. Boil it up with the heater and immediately start on the next stbd one.

P4240017.JPG

The next plank is on and I'm pausing to check that the last port side plank is set. I can wait as long as needed but it's ok so I press on to the end.
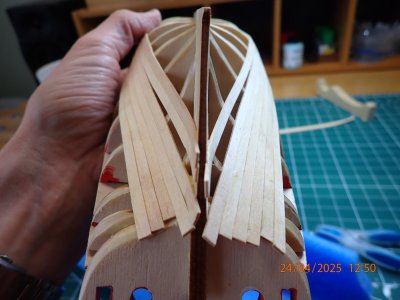
P4240018.JPG

The planks tell me that it's time for some gaps. Forcing them would result in buckling. However, they have bent and twisted for me far more than I would have expected. Why? Because I'm heating them as I place them so they are being shaped to fit perfectly without me even realising!

Note that these planks aren't symmetrical. I don't care - they are only there to make a shape for the second planking to look good on.
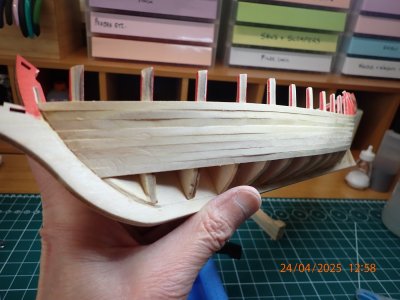
P4240019.JPG

Done. All set hard so I can immediately start making triangles to fill the gaps. (Not part of this time trial though.)
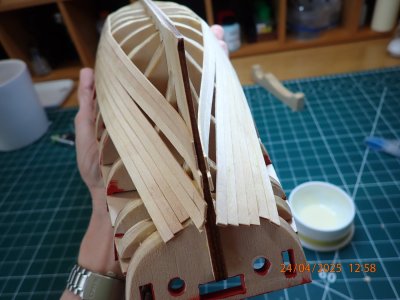
P4240020.JPG

Six planks fitted and ready for the next step by 12:58. I started at 12:19 so that's 40 minutes, give or take the odd unrecorded seconds.

Nine Planks per Hour. Using wet glue and clamps I used to be happy with four per DAY, and overnight setting.

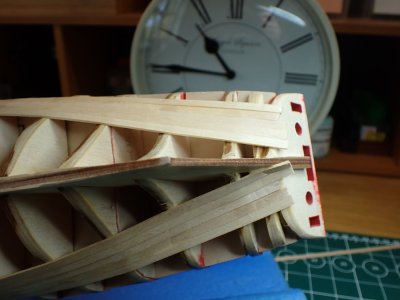
Also, just look at that bow. I was able to align the planks exactly side by side before spot welding them into place, reducing the sanding/scraping time too. (Please disregard the second plank down on the second bulkhead which I shimmed out in error last night due to not understanding the shape of the boat. D'oh!)

There is a problem which the sharp eyed among you will perhaps have noticed. The hull shape is a bit lumpy. That's because the fairing of those bulkheads wasn't done well. Good enough for pirates though.

My method is many times faster, easier, and neater than the 'traditional' way, which means I can build more ships and spend more time on the interesting parts too. Yay!
 
Last Post for the day.

IMG_2133.jpeg

I used a slightly different procedure putting the fillers in. The edges of the hole were already covered with a layer of dry Titebond and I used a small amount of wet glue on the planquette, to lubricate its passage. Then heat as usual to set it.

Still learning folks!

Do you apply glue along the plank edge as well as the backside?

It’s vital to have a well brushed in layer of dry glue both sides of any joint for welding. So yes, I apply glue to the bulkhead edges, the bearding, the rabbet and the back and sides of the planks. It's extra easy to do both sides of the planks before fitting instead of having to do the the previous one in situ. It takes but a moment.

If you are really pushed for time you can dry the glue with a warm hairdresser.

~~~~~~~~~~~~~~~

I’m going to try out another new idea. Instead of answering every comment on my threads asap, I’m only going to come here when I have some progress, no matter how small, to report. Effective immediately I’m telling myself “No picture - no entry.”

This is intended to reduce my screen time and boost my modelmaking. You will all continue to be answered but you might have to wait a short while. (How many short whiles make a long while?)

For me this is a big change but it’s the way many SoS bloggers operate and I think it is instrumental in keeping their build logs on topic - something at which my previous style was hopeless.
 
Last edited:
IMG_2134.jpeg

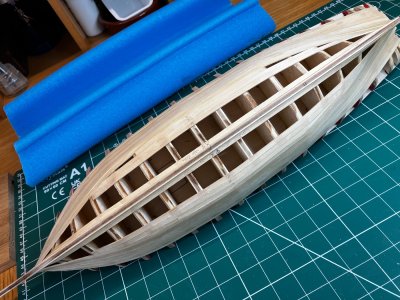
Another hour and a half this morning. Ten planks laid but only four were full length. On the other hand I’ve made and fitted four triangular fillers so I think I’m keeping up my pace.

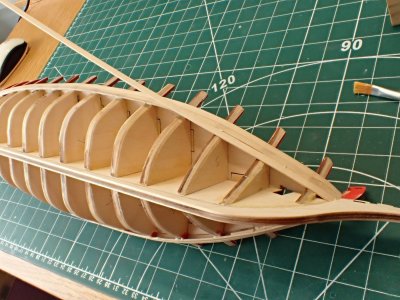
The hull is very lumpy, like tent canvas stretched over frames. This is because:

a. the wood is so soft, it’s close to balsa so I think it’s basswood rather than lime.

B. I’ve been pressing too hard with the heater between the frames.

3. I couldn’t be bothered to pre-bend my planks.

However, it’s a pirate ship built for drunken pirates by conniving pirate shipwrights so it’s not supposed to be as smooth as Concorde. Ha! Good old ‘good enough’ wins the day!

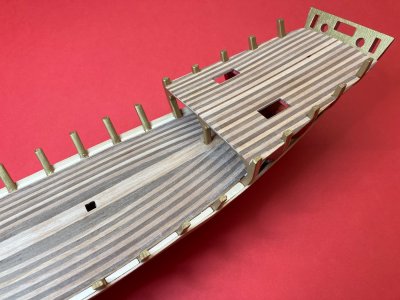
Predicting my future moves is always risky but I’m fairly confident that I’ll complete the first planking today as far as is possible without the stern extension in place. I’d like to get that strange grating-floored platform glued up for overnight setting so that I can finish off the first planking (including smoothing) this weekend.
 
Last edited:
Breaking off for a spagbol now. I’ve spent over three hours on Le Coquin today.

IMG_2137.jpeg

I’ve closed up the bottom OcCre fashion. That’s to say, without wasting time and energy laying planks perfectly that will be completely covered up later. Planks laid today: 16 (counted midships).

Filling those little triangular gaps took more time than I allowed for, so it’s unlikely that I’ll plank the bulwarks today as I planned. Never mind, as the philosopher V Leigh said, ‘tomorrow is another day’
 
Last edited:
image.jpg

Was there ever a pirate or even a privateer without a gold earring or chest full of doubloons? They loved the bling factor!

“So let’s have some gold leaf on da boat guys!”

image.jpg

Brass is Gold as seen from a scale distance. Shinier than this would look silly to me.
 
It’s very easy to post an update from your telephone! You don’t even have to type I’m dictating all of this!

image.jpg

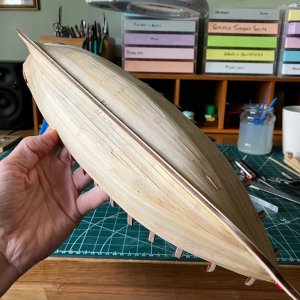
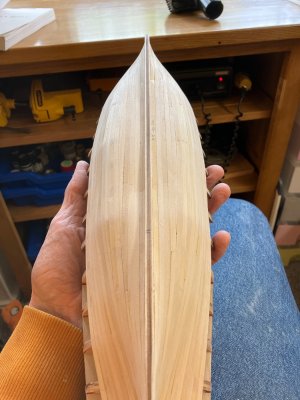
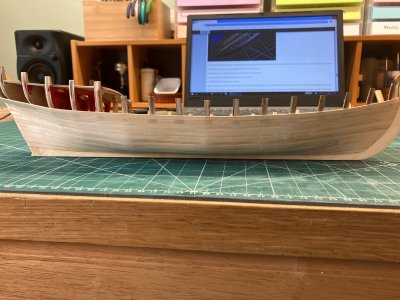
I’ve been scraping sanding and even using a little disc sander to smooth out my bottom. There are still some irregularities where the ribs show through, but it looks a lot better than it did before.

image.jpg

That photograph shows the irregularities a little more clearly. Oh well, I’ll just have to live with it now.

Incidentally, is there anybody out there?
 
Last edited:
Looks like you got a couple of ribs in the wrong places do you think?

I think you are dead right.

IMG_2138.jpeg

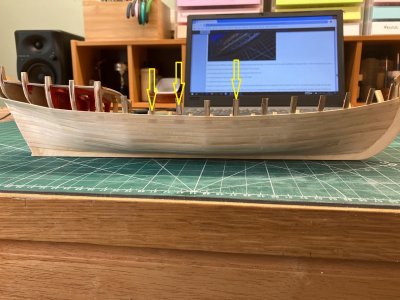
It look as if the bulkhead that has the red arrow should be where the blue arrow is pointing and then the two in between should move up towards the stern.

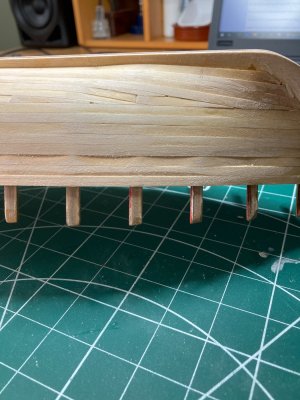
I’ve definitely not helped matters by pressing on too hard as you can see in this picture.

image.jpg

But that’s just occasional planks and wouldn’t explain Le Coquin’s child bearing hips.

I numbered the bulkheads according to the plans. I even numbered the slots. Did I check the numbers agreed before I started splashing glue around? I don’t remember taking that quite important step.

No wonder the deck fitted so badly.

Well, thanks Mike. Now I know what the mistake was perhaps I won’t make it again.

Well, not too often maybe ROTF ROTF ROTF.
 
I think you are dead right.

View attachment 515848

It look as if the bulkhead that has the red arrow should be where the blue arrow is pointing and then the two in between should move up towards the stern.

I’ve definitely not helped matters by pressing on too hard as you can see in this picture.

View attachment 515849

But that’s just occasional planks and wouldn’t explain Le Coquin’s child bearing hips.

I numbered the bulkheads according to the plans. I even numbered the slots. Did I check the numbers agreed before I started splashing glue around? I don’t remember taking that quite important step.

No wonder the deck fitted so badly.

Well, thanks Mike. Now I know what the mistake was perhaps I won’t make it again.

Well, not too often maybe ROTF ROTF ROTF.
Since there is another layer of planking yet to come, it’s nothing a generous coat of body filler won’t fix.
 
Hi Smithy. Yikes. Maybe worth a go reshaping the hull with poly filler and strips of wood glued to first layer to build up the indentations. I did this on my Bounty renovation - worked pretty ok. Cheers Grant
 
It’s very easy to post an update from your telephone! You don’t even have to type I’m dictating all of this!

View attachment 515845

I’ve been scraping sanding and even using a little disc sander to smooth out my bottom. There are still some irregularities where the ribs show through, but it looks a lot better than it did before.

View attachment 515846

That photograph shows the irregularities a little more clearly. Oh well, I’ll just have to live with it now.

Incidentally, is there anybody out there?
Detach the planking on the frames with the arrows and put an adequate thickness, this is what I would do. Frank

image.jpg
 
Back
Top