YANGTZE RIVER HIGH-NET FISHING SAMPAN [COMPLETED BUILD]

Hello Everyone

Once again, I would like to start this posting by thanking all of you for your tremendous support during this build. The fact that this is such an enjoyable build for me is made all the more special by your wonderful contributions. Thank you All!

After the first two coats had been applied and properly absorbed, it was time to move onto the third coat. Now at this point you have to make a call. Do you want a shiny or a matte finish?

SHINY:

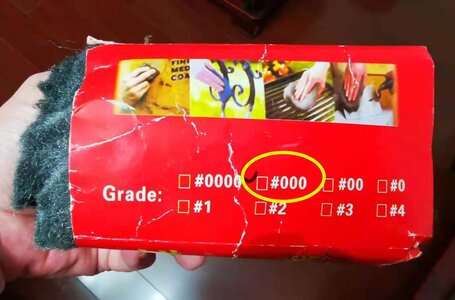
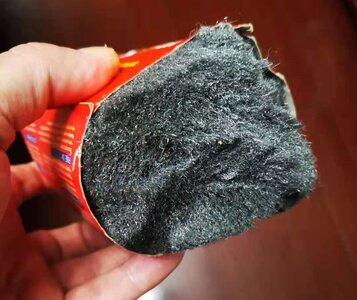
If you go for the former, the whole hull can now be “sanded down” or rubbed down with 000-grade (@Dean62 Dean even uses 0000-grade steel wool) before applying the next coat.
微信图片_20210801195041.jpg

微信图片_20210801195048.jpg

For a shiny finish, the next coat will also be thinly applied with a cotton rag and subsequently rubbed vigorously with another, coarser-textured rag. This process would then be repeated for each subsequent coat.

MATTE FINISH:

However, for the sampan, a shiny finish was not what I was going for, so I just reapplied the following coats with a brush as per normal. Whether the wood was more porous than normal (it didn’t look so because it really is an exceptionally fine-grained wood) or whether it was very dry (it didn’t look or feel like that either), I don’t know, but it just soaked up the third layer in no time. At this point, I was also surprised to see that not much darkening in color had taken place. At this point I changed my ratio to 50% Tung and 50% mineral turpentine.

And … when that fourth coat went on … Bam!
微信图片_20210703083636.jpg

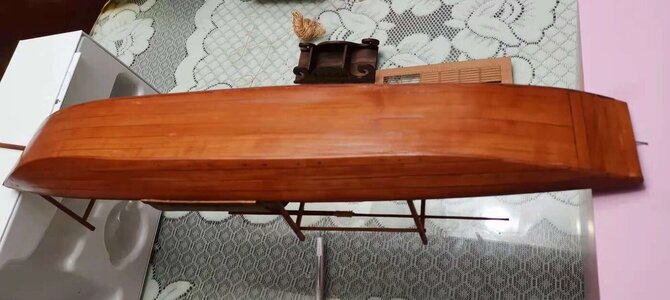
The fourth coat was the first one that gave a real indication that the Tung Oil was slowly beginning to saturate the wood and brought with it a definite change in colour. This picture still showed the wood relatively "wet" with oil.
微信图片_20210703100518.jpg

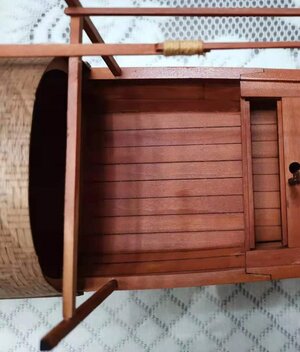
Note that the glossy or whitish spots indicate where the oil has not penetrated fully and is actually sitting on top of the wood. This has to be wiped off immediately otherwise it will leave white spots on the wood.

And then it was case of playing the waiting game of allowing the wood to dry thoroughly, all over.
微信图片_20210731095443.jpg

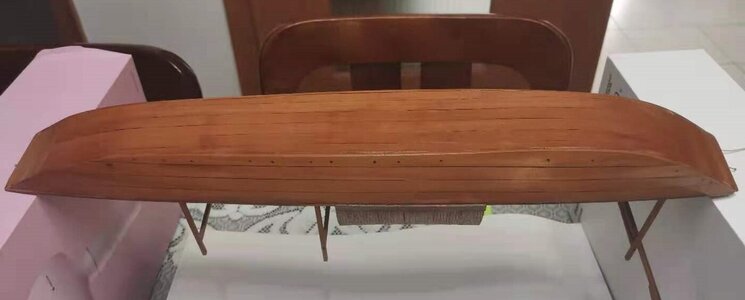
The picture above shows the hull after it had dried more thoroughly. It was still not ready at this point for a next coating, but the wood had now assumed a more brownish/honey-like color than before. Here you can also see the nailing on the bottom part of the hull. This had to be done (in fact it was all-important) in order to secure the bottom plank to the hull and luckily my earlier boxing of the hull with Pauwlina wood allowed me to do this. The bulkheads are, however, simply too thin continue the nailing process on the rest of the planking. On the next sampan where I will be using rib frames into which the horizontal slats of the bulkheads can be inserted (see @Schrader Hellmuht's wonderful build of the Quanzhou Treasure ship), treenailing can be carried out on the whole hull.
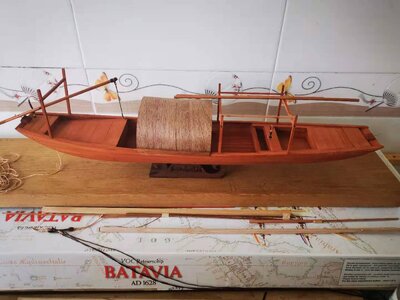
微信图片_20210715231154.jpg

This picture was taken in natural light with the fourth coat still in the process of drying. I was surprised to see that it had once more assumed a "reddish" color in natural light.
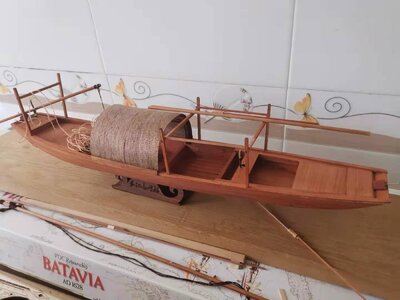
微信图片_20210715231146.jpg

However, with the wood completely dry, the color had turned into a more wooden tone. This wood was really playing tricks with my eyes and cellphone camera! :)
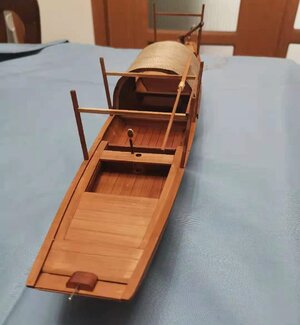
微信图片_20210702094554.jpg

And now a definite honey/orangy brown after the four coats had completely dried.
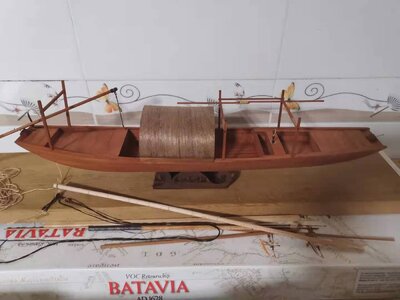
微信图片_20210715231138.jpg

After the fifth coat had completely dried.
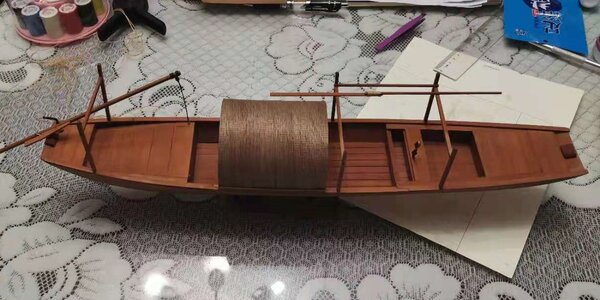
微信图片_20210719234418.jpg

And after the sixth coat (Top and Bottom)
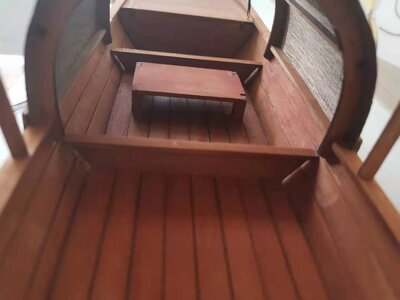
微信图片_20210715231127.jpg

As u rule of thumb, for decorative items, 2 to 5 coats will generally suffice , while functional utensils and certain surfaces (Such as Unicorn Sampans! ROTF ) may require up to 7 coats depending on the finish. This step would be finished when 80% of the surface would remain glossy for at least 40 minutes, which means the wood has now been completely saturated.

So, it is a slow process, but we are getting there!

This is all for now - in my next posting I will include more historical items and while waiting for the Tung to dry, start the rigging.

Thank you all for looking in, the likes and the comments - It is wonderful! Thumbsup

Warm regards - Heinrich
 
Hello Everyone

Once again, I would like to start this posting by thanking all of you for your tremendous support during this build. The fact that this is such an enjoyable build for me is made all the more special by your wonderful contributions. Thank you All!

After the first two coats had been applied and properly absorbed, it was time to move onto the third coat. Now at this point you have to make a call. Do you want a shiny or a matte finish?

SHINY:

If you go for the former, the whole hull can now be “sanded down” or rubbed down with 000-grade (@Dean62 Dean even uses 0000-grade steel wool) before applying the next coat.

View attachment 247342

View attachment 247343

For a shiny finish, the next coat will also be thinly applied with a cotton rag and subsequently rubbed vigorously with another, coarser-textured rag. This process would then be repeated for each subsequent coat.

MATTE FINISH:

However, for the sampan, a shiny finish was not what I was going for, so I just reapplied the following coats with a brush as per normal. Whether the wood was more porous than normal (it didn’t look so because it really is an exceptionally fine-grained wood) or whether it was very dry (it didn’t look or feel like that either), I don’t know, but it just soaked up the third layer in no time. At this point, I was also surprised to see that not much darkening in color had taken place. At this point I changed my ratio to 50% Tung and 50% mineral turpentine.

And … when that fourth coat went on … Bam!

View attachment 247344

The fourth coat was the first one that gave a real indication that the Tung Oil was slowly beginning to saturate the wood and brought with it a definite change in colour. This picture still showed the wood relatively "wet" with oil.

View attachment 247345

Note that the glossy or whitish spots indicate where the oil has not penetrated fully and is actually sitting on top of the wood. This has to be wiped off immediately otherwise it will leave white spots on the wood.

And then it was case of playing the waiting game of allowing the wood to dry thoroughly, all over.

View attachment 247348

The picture above shows the hull after it had dried more thoroughly. It was still not ready at this point for a next coating, but the wood had now assumed a more brownish/honey-like color than before. Here you can also see the nailing on the bottom part of the hull. This had to be done (in fact it was all-important) in order to secure the bottom plank to the hull and luckily my earlier boxing of the hull with Pauwlina wood allowed me to do this. The bulkheads are, however, simply too thin continue the nailing process on the rest of the planking. On the next sampan where I will be using rib frames into which the horizontal slats of the bulkheads can be inserted (see @Schrader Hellmuht's wonderful build of the Quanzhou Treasure ship), treenailing can be carried out on the whole hull.

View attachment 247355

This picture was taken in natural light with the fourth coat still in the process of drying. I was surprised to see that it had once more assumed a "reddish" color in natural light.

View attachment 247356

However, with the wood completely dry, the color had turned into a more wooden tone. This wood was really playing tricks with my eyes and cellphone camera! :)

View attachment 247357

And now a definite honey/orangy brown after the four coats had completely dried.

View attachment 247360

After the fifth coat had completely dried.

View attachment 247361

And after the sixth coat (Top and Bottom)

View attachment 247362

As u rule of thumb, for decorative items, 2 to 5 coats will generally suffice , while functional utensils and certain surfaces (Such as Unicorn Sampans! ROTF ) may require up to 7 coats depending on the finish. This step would be finished when 80% of the surface would remain glossy for at least 40 minutes, which means the wood has now been completely saturated.

So, it is a slow process, but we are getting there!

This is all for now - in my next posting I will include more historical items and while waiting for the Tung to dry, start the rigging.

Thank you all for looking in, the likes and the comments - It is wonderful! Thumbsup

Warm regards - Heinrich
Your finishing knowledge with Tung Oil has paid you the dividends with this beautiful small model. Your careful work has presented wonderful detailing in the construction. Rich (PT-2)
 
Your finishing knowledge with Tung Oil has paid you the dividends with this beautiful small model. Your careful work has presented wonderful detailing in the construction. Rich (PT-2)
Thank you very much for the high-praise Rich. Actually, the model is not so small. The hull is 66cm in length to which you can add a further 12 cm for the Yuloh. But I understand exactly what you mean. Let's hope I can continue the detailing with the rigging and the ancillaries that I want to try my hand at.
 
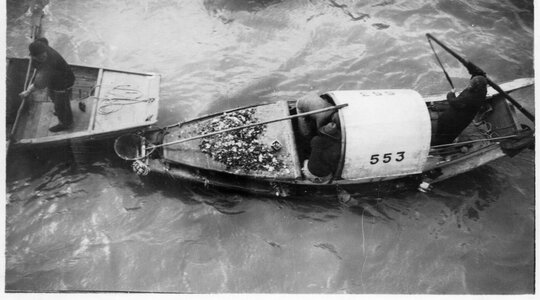
So as promised, some more historical information.

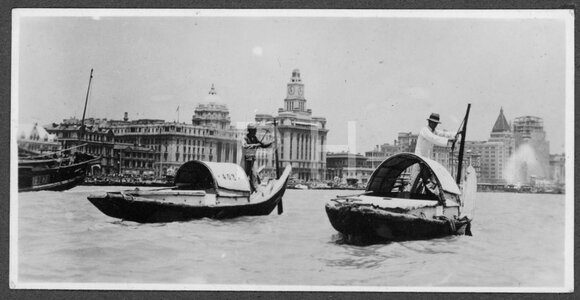
THE HONGTOU SAMPAN or Shanghai / Hong Kong Harbor Sampan

Antwerp_Sampan.jpg

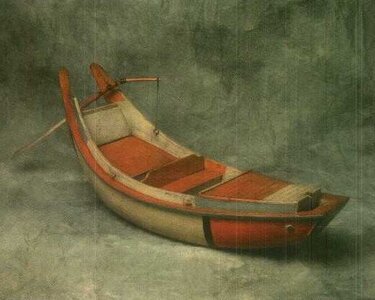
Above: from Shaky Ships: The “Hong'Tou”, a small sampan used in the harbour of Shanghai (National Maritime Museum, Antwerp. AS 35, 48, 10).

Worcester in his excellent book, The Junks and Sampans of the Yangtze, writes:

This quaint and colourful little craft is a distinctive feature of the Shanghai Harbour. It is called the Hung-T'ou or red head, because of its painted bow, but is more commonly referred to as the mu-chi, or hen boat, for its supposed resemblance to that fowl. Actually, if one were to liken it to a bird, a duck would be a better choice, for it is squat in appearance, with a turned-up tail, and rides the river like a duck.

These boats are entirely Chinese in design and construction. It would seem that they owe something to the Amoy influence. Their history is obscure, but the fact that they have no guild would seem to point to a comparatively recent origin.

They are preferably built of Foochow pine, but if this is unavailable, softwood from Ningpo (Ningbo) is used. The bulkheads are made of hsiang-chang, a hardwood from Kiangsi. The timber is supplied by the merchants in the form of chang-pa-t'ung, that is to say, poles of 1 chang 8 ch'ih. These sampans are all built in or near Shanghai.

The sampan illustrated below is 18 feet over-all, with a beam of 5 feet and depth of 2 feet. It draws only a few inches unless loaded to capacity, when there is the minimum of freeboard.

Audemard 2.png


Untitled.png

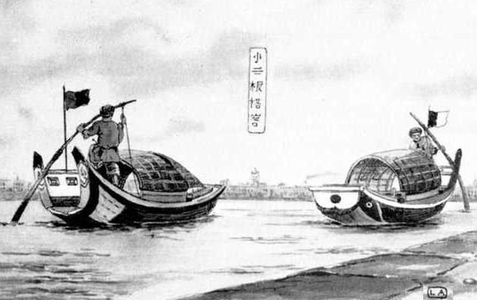
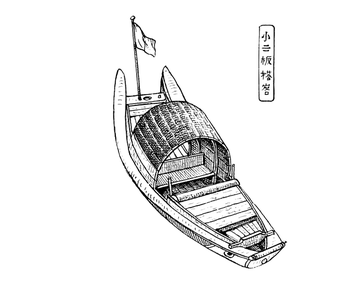
The above two drawings are both from Audemard, Les Jonques Chinoises Vol 6.

Escadre (13).jpg

Escadre (4).jpg

312-Sampans-on-Huangpu-Whangpu-River.jpg


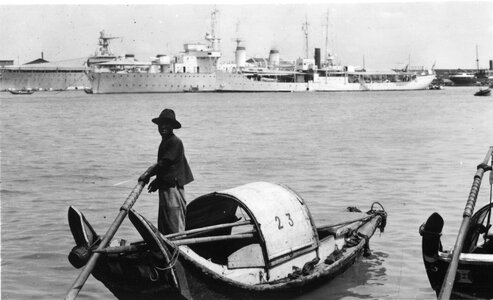
These sampans, of which there are to-day the record low figure of 813, are required to register with the harbour Police of the Chinese Maritime Customs. This is done annually, usually in April. No fee is charged for registration, but the sampanmen are required each to pay 40 cents towards the cost of the paint used in numbering the boats. On the hood, on each side of the registered number of the sampan, a coloured dot will be noticed. The colour is changed each year and shows at a glance when the boat was last registered. The harbour Police record the names, addresses, and other particulars of the boatmen and insist on the boats being kept seaworthy and clean. The sampanmen claim that they belong to the Customs and are very proud of this association.

(Photographs supplied by: Virtual Shanghai)

RIGGING:

However, as mentioned earlier, the Hong'Tou is NOT The sampan that I am building.

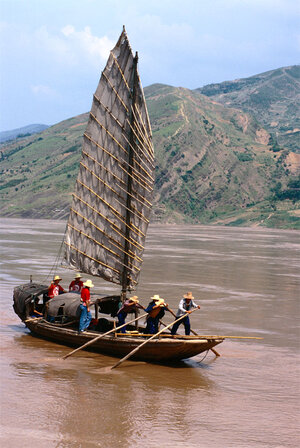
In my second to last post I showed the canopy installed, the H-shaped frames constructed and one of the two paddle oars in its storage place. The reason that I have kept the right side “open” at this stage is to facilitate easier working on the rigging. The Yangtze-river sampans, in contrast to their Hong Kong and Shanghai namesakes, COULD be equipped with a sail when traveling long distances as part of their quest for fertile fish grounds.

4.jpg

The beautiful picture below (taken at the Three Gorges in the Yangtze river) clearly illustrates the derivative that I am building.

three-gorges-trib .jpg

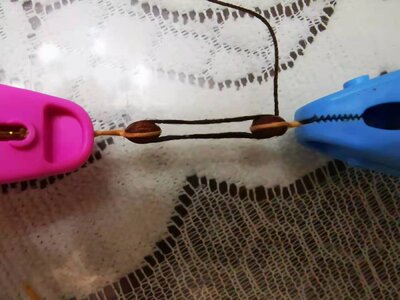
I started the rigging process by making the first two blocks that will make up the lanyard at the top of the mast.

微信图片_20210715231105.jpg

I apologise for the quality (or lack thereof) of the photo, but the light is not good in the apartment. Suffice to say that the blocks supplied by Unicorn are of very good quality and I had no qualms about working with those as is.

微信图片_20210712101333.jpg

Next my beautiful and wonderful Admiral stepped in and sewed the spars to the pre-sewn sail. I was utterly relieved that I could escape that ordeal and - as I have come to know when she planked the Leudo - it was perfect!

That is all for now. Let us see how far we get tonight.

Warmest regards - Heinrich
 
Hello Heinrich, Great job you have did on your Tung'n Oil, it sure looks just great and so very rich in color. Thanks for sharing all of your great pictures of the Sampan People, they are almost like being there.
Regards Lawrence
It's an absolute pleasure my friend. yes, the Tung Oil does give a very rich color - especially with Pear Wood!
 
So as promised, some more historical information.

THE HONGTOU SAMPAN or Shanghai / Hong Kong Harbor Sampan

View attachment 247740

Above: from Shaky Ships: The “Hong'Tou”, a small sampan used in the harbour of Shanghai (National Maritime Museum, Antwerp. AS 35, 48, 10).

Worcester in his excellent book, The Junks and Sampans of the Yangtze, writes:

This quaint and colourful little craft is a distinctive feature of the Shanghai Harbour. It is called the Hung-T'ou or red head, because of its painted bow, but is more commonly referred to as the mu-chi, or hen boat, for its supposed resemblance to that fowl. Actually, if one were to liken it to a bird, a duck would be a better choice, for it is squat in appearance, with a turned-up tail, and rides the river like a duck.

These boats are entirely Chinese in design and construction. It would seem that they owe something to the Amoy influence. Their history is obscure, but the fact that they have no guild would seem to point to a comparatively recent origin.

They are preferably built of Foochow pine, but if this is unavailable, softwood from Ningpo (Ningbo) is used. The bulkheads are made of hsiang-chang, a hardwood from Kiangsi. The timber is supplied by the merchants in the form of chang-pa-t'ung, that is to say, poles of 1 chang 8 ch'ih. These sampans are all built in or near Shanghai.

The sampan illustrated below is 18 feet over-all, with a beam of 5 feet and depth of 2 feet. It draws only a few inches unless loaded to capacity, when there is the minimum of freeboard.

View attachment 247746


View attachment 247747

The above two drawings are both from Audemard, Les Jonques Chinoises Vol 6.

View attachment 247741

View attachment 247742

View attachment 247743


These sampans, of which there are to-day the record low figure of 813, are required to register with the harbour Police of the Chinese Maritime Customs. This is done annually, usually in April. No fee is charged for registration, but the sampanmen are required each to pay 40 cents towards the cost of the paint used in numbering the boats. On the hood, on each side of the registered number of the sampan, a coloured dot will be noticed. The colour is changed each year and shows at a glance when the boat was last registered. The harbour Police record the names, addresses, and other particulars of the boatmen and insist on the boats being kept seaworthy and clean. The sampanmen claim that they belong to the Customs and are very proud of this association.

(Photographs supplied by: Virtual Shanghai)

RIGGING:

However, as mentioned earlier, the Hong'Tou is NOT The sampan that I am building.

In my second to last post I showed the canopy installed, the H-shaped frames constructed and one of the two paddle oars in its storage place. The reason that I have kept the right side “open” at this stage is to facilitate easier working on the rigging. The Yangtze-river sampans, in contrast to their Hong Kong and Shanghai namesakes, COULD be equipped with a sail when traveling long distances as part of their quest for fertile fish grounds.

View attachment 247748

The beautiful picture below (taken at the Three Gorges in the Yangtze river) clearly illustrates the derivative that I am building.

View attachment 247750

I started the rigging process by making the first two blocks that will make up the lanyard at the top of the mast.

View attachment 247768

I apologise for the quality (or lack thereof) of the photo, but the light is not good in the apartment. Suffice to say that the blocks supplied by Unicorn are of very good quality and I had no qualms about working with those as is.

View attachment 247769

Next my beautiful and wonderful Admiral stepped in and sewed the spars to the pre-sewn sail. I was utterly relieved that I could escape that ordeal and - as I have come to know when she planked the Leudo - it was perfect!

That is all for now. Let us see how far we get tonight.

Warmest regards - Heinrich
Shared tasks are what crew-work is all about for successful completions. Rich
 
@PT-2 Rich you are so right. I have an incredibly supportive partner and when there is something tangible that she can do to help, she always jumps in. And boy ... if you think that I am a stickler for detail, she is something else. I have the best QC in the world! (Sometimes to my own detriment! ROTF ).
 
Hello Everyone

With all training centers in Jiangsu Province closed again because of Covid-19, I kept full-sail ahead with the sampan.

Rigging:

The configuration is of course very close to that of the Chinese Junk and is unique in that it features no standing rigging. A very good introduction on this type of rigging is the article by Pat Reynolds

What’s in a Rig Series #3

There’s probably no rig more fascinating than the junk rig. Long before Columbus’ time, early as the 10th century, the Chinese were making their way through the oceans with a rig that has amazingly stood the test of the time. There are many who feel that this very old but very innovative sail plan is superior to the more popular and ubiquitous sloop rig and others.

The junk is predicated upon sails that are fully battened, a characteristic associated with more modern racing vessels and they typically lack any standing rigging (stays and shrouds). They are a completely different looking sail plan and in practice it’s clear the early Chinese engineers and designers were way ahead of their time. A thousand years later, there are advocates ready to point out the many areas where the junks reign supreme.

Due to the full batten set-up, the sails maintain an efficient consistent shape and are fast, especially downwind. In a big breeze junk owners will attest that they’re extremely easy to reef and, as an added bonus, are inherently self-tacking. There are obvious cost benefits to not having any standing rigging – no maintenance, replacement or (costs aside) anxiety about sudden failure. Because of the full battens, there’s also no flogging or flapping of sails and there’s fewer blind spots, like what you might experience with a large genoa on a sloop or cutter rig.

The main disadvantage that’s cited with junk rigs is there upwind deficiency. Although there are theories as to how to improve this, most junk owners will concede that the best they can do is come closer to how well a sloop travels upwind.

微信图片_20210712101333.jpg

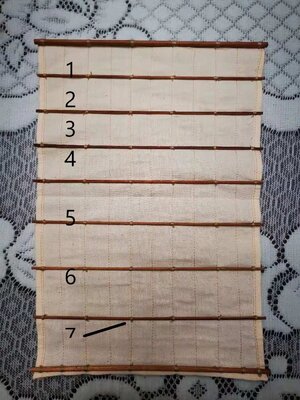
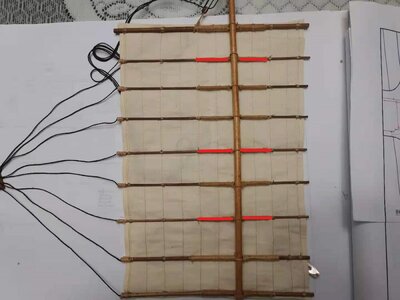
If we can just for a moment take a look again at the Admiral’s excellent sewing, you will see that marked # 1-7 are the battens. The fact that the High-Net Fishing sampan had 7 battens meant that it was a large one by sampan standards – normally they had either four or five battens.

微信图片_20210712100340.jpg

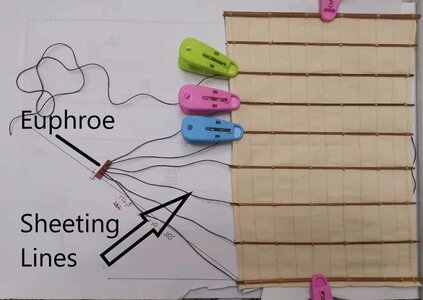
My first job was to glue the sheeting lines to the Port Side of the battens. You can see that I used a large sheet of paper to clamp the sail to and then I drew the angle of the sheeting lines on that. The Euphroe (essentially a friction block), through which all the sheeting lines pass and which maintains equal tension on all the lines is seen above connected to the lines.

微信图片_20210715231117.jpg

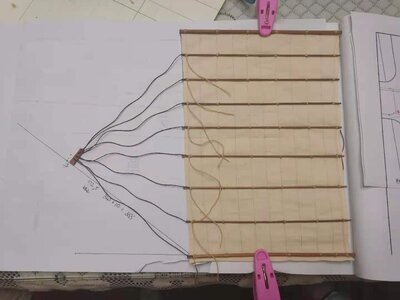
With all the sheeting lines attached to the battens and the with the Euphroe in place, all 8 lines were stropped where they were affixed to the battens. On the picture above you can see that I have already glued the stropping lines into position.

Then it was time to move onto the mast. I was really not happy with the “mast” that Unicorn supplied. It was too thin in diameter (according to scale), it wasn’t straight and it actually looked as if it was made up of two pieces of wood glued together. I raided my scrap materials box, but found nothing suitable. Then … brainwave. The Haarlem’s dowelling! They were 1mm too thick in diameter but some sanding brought it to exactly the correct diameter. However, there was one major problem – the color. It was almost white in appearance compared to the reddish hue of the Pear Wood. Untreated it stuck out like a sore thumb so something had to be done.

I made contact with @DaHaimodel and what the “top” Chinese modelers use to stain wood (My Kolderstok stain was far too dark and I wasn’t going to place an order to the Netherlands just for that). And what a pleasure it was to deal with this gentleman. Not only did he promptly reply, but we exchanged numerous ideas about a variety of aspects pertaining to model building. I believe that some of the things we discussed, may lead to some significant developments. In case you are unfamiliar with DaHai take a look at this thread in the New Kits and Developments Section.


But to get back to the masts – he advised me to use Shellac – which would be the first time for me using that.

O1CN01nOD86K23ekNPgQIio_!!2001957281.jpg

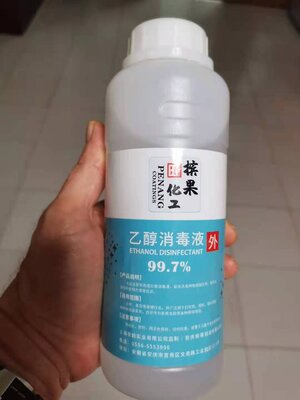
This is how the product is advertised on Taobao. I obviously selected the “red” color shellac and together with a bottle of 99% alcohol, ordered my stash from Taobao.

微信图片_20210718223026.jpg

微信图片_20210718223034.jpg

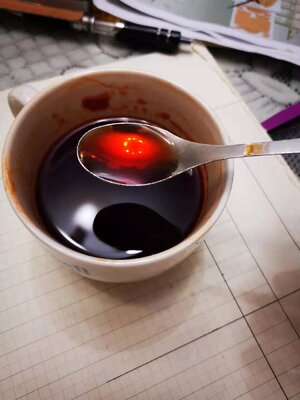
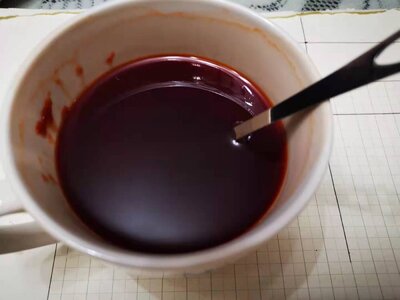
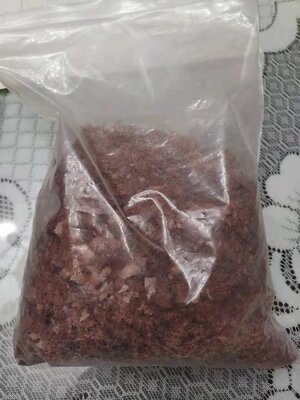
Now comes the fun part where I get to be alchemist. The dry shellac flakes and alcohol are mixed in a ratio of 1:5.

微信图片_20210718223044.jpg

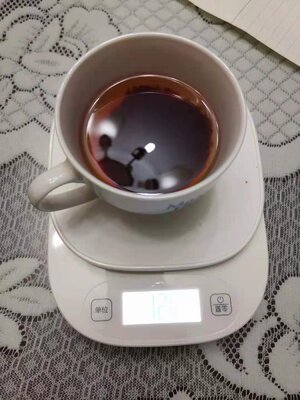
Even though the alcohol had just been added to the shellac, you can already see the colour that it is assuming. 50 grams of Shellac / 100ml of alcohol.

微信图片_20210718222435.jpg

After 15 minutes the mixture was even mimicking a Chinese flag when you look into the spoon. OK ... ok ... my "flag" has more stars than the 5 it is supposed to have! ROTF

微信图片_20210718223306.jpg

And after approximately an hour, the mixture was ready for application. This I all did with meticulous attention to step-by-step pictures, but when it came to the actual application, I got completely sidetracked.

微信图片_20210801195406.jpg

In any case, here you can see the effect of the shellac and the mast in place. Now earlier on, @Short John Bronze mentioned that there are luckily not ratlines. This may be true BUT the mast had to be stropped - on both sides - in a total of 9 locations. The three red lines just indicate some of the stropping lines.

So as you can see quite a productive day. ROTF

Keep well my friends, PLEASE stay safe and TAKE CARE!

Warmest greetings - Heinrich
 
Absolutely stunning!! I really admire your lack of egoism. And for sure we can se your “professor” style
Dear Hellmuht

I really wished for a "double Love" function on SOS to react to your comment. Your observation is incredibly important to me. I hold your work in very high esteem and to receive a comment like this from you is special. You have no idea how many times I have perused your builds, trying to select a favorite - only to have my initial decision reversed when I discover something else on some of your other builds. :) That is why I am so looking forward to the Quanzhou - I just know how special that will be. Thank you, once again!
 
Back
Top