YQ Bluenose by Johan [COMPLETED BUILD]

Worked a little on the ballast and the fishdeck floorbeams.
For the ballast I opted use the less viscous B7000 adhesive. I applied adhesive on the frames, keelson and sister keelsons inside the area, marked by the fishdeck clamps. Then I added the ballast rocks, making sure the ballast didn't interfere with the later to be installed beams. After letting the adhesive cure somewhat, in order to be able to make minor adjustments, I bonded the floorbeams in place. Once the adhesive of the beams cured, I again applied the B7000 adhesive and stacked the ballast to approximately the topside of the beams.

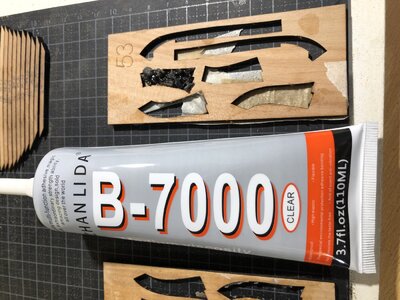
The adhesive I used.
85B791ED-C0E2-43E1-AC44-C5C249EB1164.jpeg

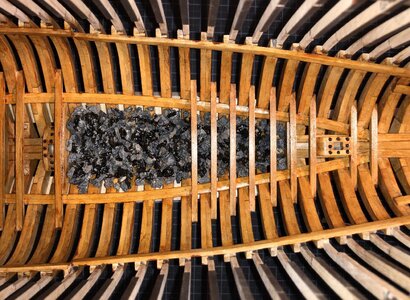
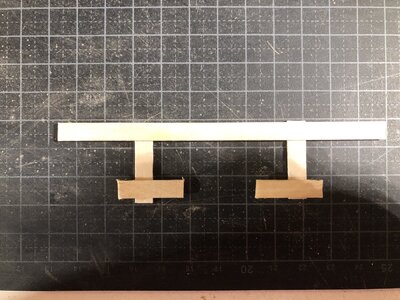
First step (left side of the picture); applying adhesive and adding ballast (making sure to add not too much)
Second step on the right side of the picture; adding the floorbeams to the assembly.
16B2E499-7A6A-4A9D-87D5-EB3BD2386AA4.jpeg

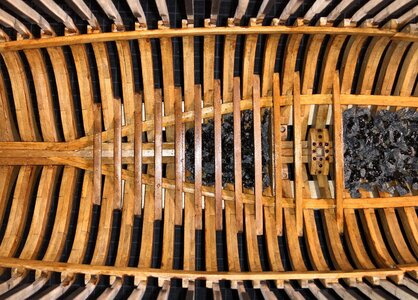
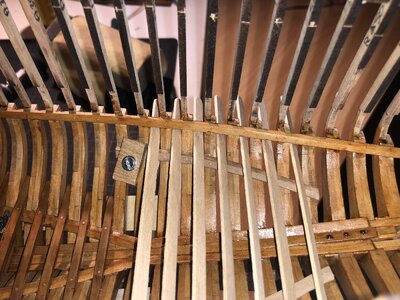
The aft ballast compartment, prior to filling up with ballast.
2675778A-1446-43D2-87D5-DD92DF4F5EE9.jpeg

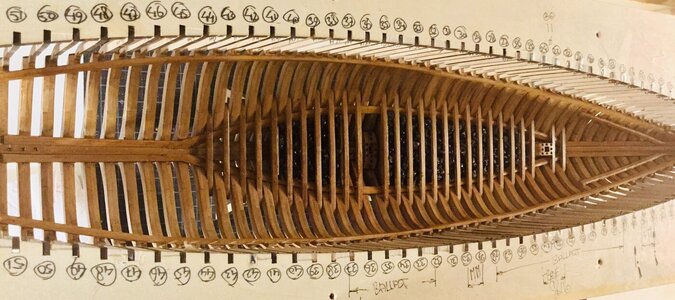
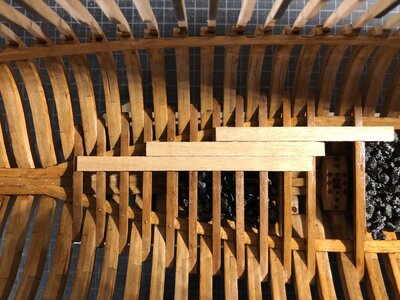
Ballast in place and fishdeck floorbeams installed. I made sure that access to both mast bases ánd the bilge pumps was not obstructed by the ballast.
D09D5627-E162-40DD-88E8-03104DAFCBAE.jpeg

The following steps will include adding a partial fisher deck's floor and the lefthand sidewall.
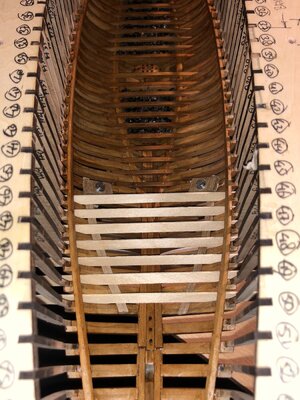
I laid down some planks to see the effect. (Note to self: don't forget the bilge pump feed through!.)
FD516630-9BA9-417E-8B87-60A64CE386E3.jpeg
 
Worked a little on the ballast and the fishdeck floorbeams.
For the ballast I opted use the less viscous B7000 adhesive. I applied adhesive on the frames, keelson and sister keelsons inside the area, marked by the fishdeck clamps. Then I added the ballast rocks, making sure the ballast didn't interfere with the later to be installed beams. After letting the adhesive cure somewhat, in order to be able to make minor adjustments, I bonded the floorbeams in place. Once the adhesive of the beams cured, I again applied the B7000 adhesive and stacked the ballast to approximately the topside of the beams.

The adhesive I used.
View attachment 304094

First step (left side of the picture); applying adhesive and adding ballast (making sure to add not too much)
Second step on the right side of the picture; adding the floorbeams to the assembly.
View attachment 304096

The aft ballast compartment, prior to filling up with ballast.
View attachment 304095

Ballast in place and fishdeck floorbeams installed. I made sure that access to both mast bases ánd the bilge pumps was not obstructed by the ballast.
View attachment 304100

The following steps will include adding a partial fisher deck's floor and the lefthand sidewall.
I laid down some planks to see the effect. (Note to self: don't forget the bilge pump feed through!.)
View attachment 304097
The ballast gives a nice contrast with the beams, Johan.
About the durability: turn the model around and knock on the keel :)
Regards, Peter
 
Last edited:
The ballast came out very well Johan and forms a nice contrast to the very rich wood color you have achieved. The ballast also adds depth to the hull which just makes it so much more realistic. If the ballast was fine after the upside-down knock test, durability should be fine. The bond should - theoretically at least - get progressively stronger.
 
The ballast came out very well Johan and forms a nice contrast to the very rich wood color you have achieved. The ballast also adds depth to the hull which just makes it so much more realistic. If the ballast was fine after the upside-down knock test, durability should be fine. The bond should - theoretically at least - get progressively stronger.
Thanks so much, Heinrich.
It took a lot of convincing myself to jump, despite running some tests... Seeing the result now, I'm pleased I went ahead and added the ballast.
Now planning the next departures from the YQ build route...
(I'm reading too many posts here on SOS on customizing ones build.)
 
As Peter (@Peter Voog) wrote on D.B.B.S, my Admiral was commissioned to hospital earlier today. So far it appears to be more painful than anything else and currently she's being treated with antibiotics. Hopeful she'll be home soon; it's awfully quiet in our house...
So once I was home again I just wanted to distract myself a little and started tinkering with floor support of the aft cabin. If you are looking for plans for that, don't bother, those are not there.
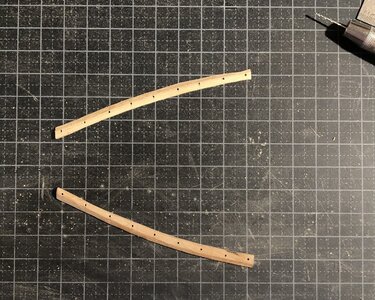
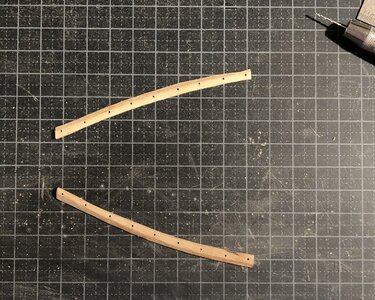
I fooled around a little bit and made myself a pair of clamps.
The results do not satisfy me, but I don't have any spare wood lying around, so I'll leave it as it is for the moment.

170065E9-7102-4043-AAEB-B65B7736305A.jpeg

Once I fabricated those parts I did a dummy install of the two clamps, mainly to check out whether or not the shape of the clamps were correct.

A9869A76-F5C3-4D37-B5A1-6FF593B92CF7.jpeg7D3B533B-4122-45CA-AE24-5B14D05CD8B9.jpeg
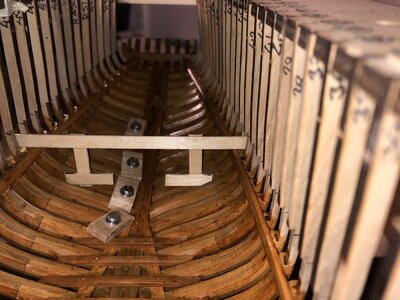
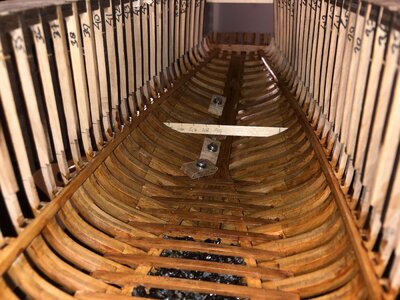
I used some ice popsicle sticks to check the mutual alignment of the floorbeams of the captain's cabin and also the alignment between the floorbeams of the fishhold and the floorbeams representations of the captain's cabin. Still a bit of work involved but I'm getting there... one of these days.
 
one of these days
Your last line is the first ‘song’ on the album Meddle van PF:
-> Meddle - One of These Days <-

One of the first songs our music teacher played in high school: listen to some 3/4 time signature parts in a 4/4. He has conveyed his inspiration well.
The floor of your Captain’s Cabin will certainly get a nice foundation. Relax, listen to the music and overthink the items.
And hopefully your Admiral will recover soon.
Greeting to her and wish her well.
Regards, Peter
Thanks for your encouragements, Peter!
Nice PF song, especially the intro.
 
Hello Johan, Sad to hear that your Admiral is not well and confined to a hospital. We wish her all of the best to get well soon and return home soon. Must be very quit and lonely around your old ship yard. Great progress on your YQ-Bluenose, I to will soon have to look at the deck for the aft cabin, thanks for your ideas on this area.
Regards Lawrence
Hello Lawrence.
Thanks for your well wishes. Quiet indeed it is...
Provided all goes well, the Admiral might leave hospital coming Monday. Fingers crossed.
I will try to post some more background information on the aft cabin. Unfortunately there's not much info available on the aft cabin details. For reference I'm using the Saga and Peter's work on his aft cabin, though I might depart from his approach.
 
As I wrote earlier today, I would present some background info on how I am adding more detail to the aft cabin.
First order of businesses was to establish the cabin height, since this ultimately determines the vertical position of the two clamps. Why two clamps? Because I wanted to use the same construction principle as is used on the fishhold; clamps attached to the frames, beams on top of the clamps and planks on top of the beams.
Back to the cabin height; I used, quite arbitrary, a standing height of 2m (6.6ft), which translates to 27,7mm (1.1") on the scale of the YQ design. Based on this requirement I prepared a tool to mark the position of the clamps on the frames.

The tool to mark the vertical position of the clamps. I had to remove the center part of the lower part to allow for the keelson and sister keelsons.
E9676ECB-C672-4BC8-B40D-D52FCDE8BE5D.jpeg

The upper edge of the marking tool supported on the deck clamps, providing me a constant distance from the deck to the clamps.
6BE16D57-4CB4-40F5-A7E9-8E457D5E65F8.jpeg

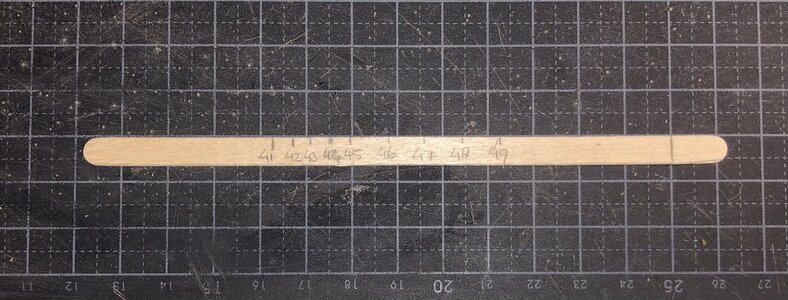
After marking all nine frames, I used a popsicle stick to mark the lateral distance between the pencil marks on the frames.
54057D6D-502E-449A-9506-0356636982D9.jpeg

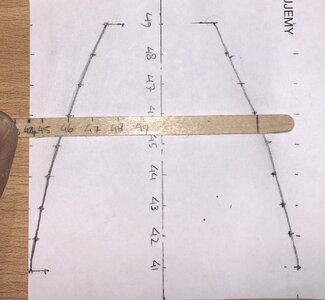
After some fiddling, I had my measures
72AC3338-2EA3-4729-807E-1ABFDD4110BB.jpeg

I transferred those measures to a piece of paper and by connecting the dots, I obtained the curves for the clamps.
F583FFDF-D803-474E-A70A-76924AF30D79.jpeg

Using a pin, I transferred the points to two pieces of scrap wood of the same thickness as the other clamps, connected the dots and used my dremel to remove the excess material.
For one of the clamps it didn't work out too well, but since I don't have enough material left, I unfortunately have to declare it "use as is".
9759BD6E-6D72-47E2-A9FD-D8E7C7D79AFD.jpeg

And now up to the next challenge, manufacturing of the beams...
 
Last edited:
Back
Top