YQ Bluenose by Johan [COMPLETED BUILD]

Since I'll be visiting Peter Voogt this coming week, I stepped away from the whole windlass drive train and found some diversion in the four hatches for the two fishholds.
YQ designed a neat solution for the landings, supporting the hatches. It consists of a base, with rectangular holes, smaller than the hatches. On top of the base a frame is bonded, with holes the size of the hatches. Once bonded, one has the landings and the aperture for the hatches. The hatches themselves are plain rectangular pieces of wood, with a thickness of 2mm, roughly 0,080".
Below the coamings and hatches from YQ for the aft fishhold access:
The top two parts are the hatches, the bonded frame is mid below.
View attachment 337284

Though pleased with the coamings, I wasn't really satisfied with the hatches.
So I made my own hatches.
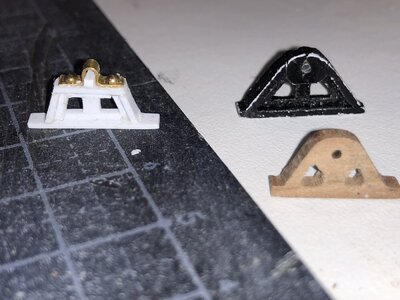
The selfmade hatches are inserted into the frame, for treference the YQ access panels are at the bottom of the picture below:
View attachment 337283
Next steps are to stain the hatches and paint the coaming, than following the same procedure for the fwd hatches.
Always nice to ad scratch made parts. And with some color the get alive.
Regards, Peter
 
Performed a first space allocation exercise. All dry fit, nothing irrevocable. I still need some shafts, bushings and gears, but step by step I'm getting there.
View attachment 336628
The YQ layout differs somewhat from Jenson's sketches in the Saga; the windlass assembly appears to have been positioned closer to the Samson post, whereas the pitch of the jumbo boom support beams was larger than in YQ'S design, which complicate matters in the space department.
The supports for the in-between drive train are far more slender than my current design. It seems it's back to the drawing board again.
View attachment 336629
Good morning Johan. OHLA LA...!!!! Brilliant. Cheers Grant
 
Last Monday night @Peter Voogt and I met at Peter's home.
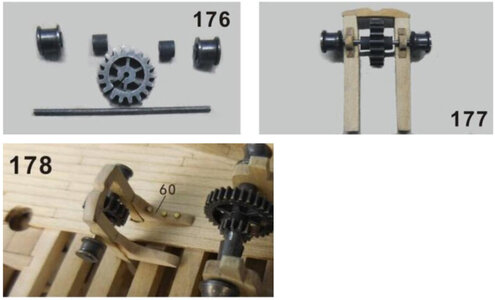
As I was struggling with the entire drive train for the windlass, especially the intertermediate drive, Peter offered me ánd some welcome advice ánd some very useful parts; gears and Evergreen profiles in various shapes and sizes.
While Peter and I were dealing with the technicalities of the foredeck installations, Peter's Admiral prepared us a tasteful diner.
After diner we still had some time left to see the progress being made on Peter's masts, booms, gaffs and sails. Although the pictures in Peter's blog show the details very well, they don't do justice to the scale, the parts are a lot smaller than one might be led to believe. We already mentioned that the diameters of the masts, etc, as supplied with the kit, are too large. The same applies to the diameters of the with the kit supplied pers; too large. It really pays to carefully check all the dimensions and getting the parts close to what they are supposed to be, based on the 1:72 scale.
Having sufficient parts, I now could start on the various parts for the windlass. Unfortunately I made no pictures of the different fabrication stages, sorry, but I am now close to the stage where I can start work on the additional drive train parts.

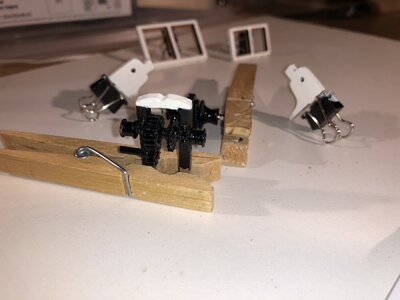
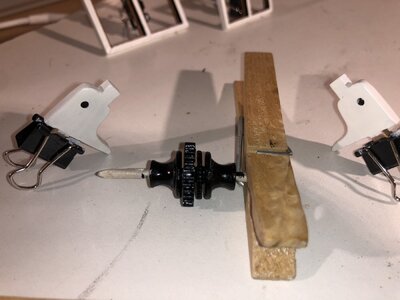
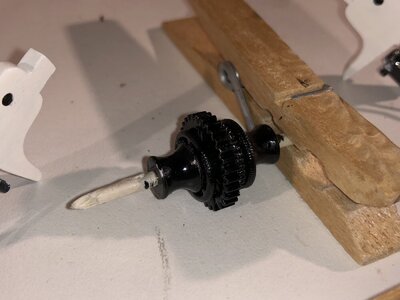
An overview of the windlass drive train parts, with the landings for the fishhold hatches in the background.
97FF0049-7EA8-4D26-8F7D-D9AC1BD26DE6.jpeg

Below the windlass, modified, with the correct position of the the whelps (the drums with concave curvature), between the windlass riding bitts, instead of being positioned outside of the riding bitts.
Added are three gears, which were not part of the kit. Unfortunately the width of the parts was more than the pitch between the riding bits, so I had to reduce the length of the two whelps.

A15F60D5-FE88-4054-870B-82671E95C234.jpeg

The windlass per the YQ build instructions.
E05D1856-CA30-469A-9F32-CA3998F54A80.jpeg

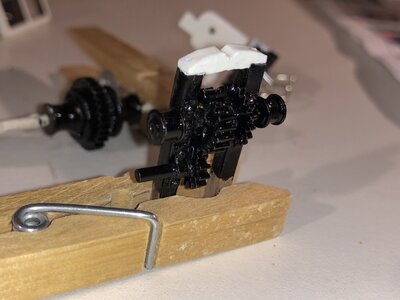
This is my interpretation of the setup of the gear, attached to the engine's drive chain. On top the jumbo boom crotch.
02D52A7B-1159-42F4-9C1F-741B4190F3B6.jpeg

And this is the same assembly, now per the original instructions.
B9B6C462-8B06-4FE0-B04C-E762CA1EE4FE.jpeg

All painted parts still need to be completed by applying a satin gloss varnish.
Next step is to complete the windlass assembly with the riding bitts, followed by installation on the foredeck. Then I can continue my tinkering with the gears between the first gears and the windlass.
To be continued...

3138F989-13C4-443B-BB00-30CA2840F258.jpeg

7F5FD6F7-0E35-4B08-9DD1-244EBB93C613.jpeg
 
Last edited:
Last Monday night @Peter Voogt and I met at Peter's home.
As I was struggling with the entire drive train for the windlass, especially the intertermediate drive, Peter offered me ánd some welcome advice ánd some very useful parts; gears and Evergreen profiles in various shapes and sizes.
While Peter and I were dealing with the technicalities of the foredeck installations, Peter's Admiral prepared us a tasteful diner.
After diner we still had some time left to see the progress being made on Peter's masts, booms, gaffs and sails. Although the pictures in Peter's blog show the details very well, they don't do justice to the scale, the parts are a lot smaller than one might be led to believe. We already mentioned that the diameters of the masts, etc, as supplied with the kit, are too large. The same applies to the diameters of the with the kit supplied pers; too large. It really pays to carefully check all the dimensions and getting the parts close to what they are supposed to be, based on the 1:72 scale.
Having sufficient parts, I now could start on the various parts for the windlass. Unfortunately I made no pictures of the different fabrication stages, sorry, but I am now close to the stage where I can start work on the additional drive train parts.

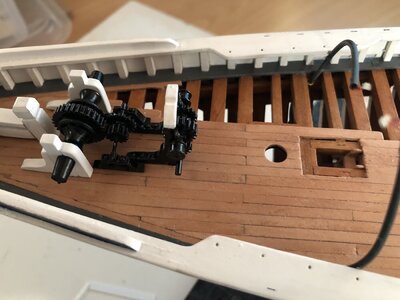
An overview of the windlass drive train parts, with the landings for the fishhold hatches in the background.
View attachment 338000

Below the windlass, modified, with the correct position of the the whelps (the drums with concave curvature), between the windlass riding bitts, instead of being positioned outside of the riding bitts.
Added are three gears, which were not part of the kit. Unfortunately the width of the parts was more than the pitch between the riding bits, so I had to reduce the length of the two whelps.

View attachment 338001

The windlass per the YQ build instructions.
View attachment 338008

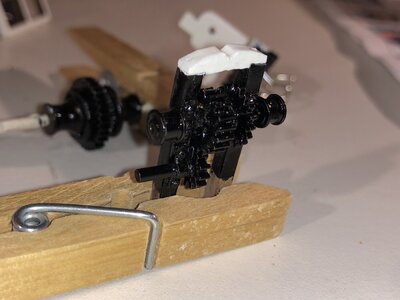
This is my interpretation of the setup of the gear, attached to the engine's drive chain. On top the jumbo boom crotch.
View attachment 338009

And this is the same assembly, now per the original instructions.
View attachment 338010

All painted parts still need to be completed by applying a satin gloss varnish.
Next step is to complete the windlass assembly with the riding bitts, followed by installation on the foredeck. Then I can continue my tinkering with the gears between the first gears and the windlass.
To be continued...

View attachment 338002

View attachment 338003
Nice to see your interpretation of the windlass and the whelps and how it’s growing. With details such as the brackets with nails around the axles on the front of the drive chain. A real challenge, such a complex mechanism in such a small space on this scale.
Regards, Peter
 
Nice to see your interpretation of the windlass and the whelps and how it’s growing. With details such as the brackets with nails around the axles on the front of the drive chain. A real challenge, such a complex mechanism in such a small space on this scale.
Regards, Peter
Thanks Peter,
Too bad I don't have enough room between the bitts, meaning the large gear is positioned too close to the center of the Samson post. The pitch between the bitts should have been a little larger, thus giving more room to play with, but since I am not planning to add all details, like all lever- and brake details, it's good enough for me as it is. To be honest, I never planned to add as much detail as I'm currently incorporating.
But as they say: "Goed voorbeeld doet goed volgen." (A good example tends to be followed.) ;)
 
Having quite a few Evergreen parts, meant I could fabricate another support for the intermediate gear. My first attempt was a monopart, which made it apparant I'm not equipped to pull that off. The second try was to create a support from several wooden parts. This showed improvement, but I still wasn't entirely happy with the support and also @Alf in Iowa suggested to use Evergreen polystyrene profiles instead of wood.
So after been given a load of profiles by @Peter Voog, I started my third try at these supports.
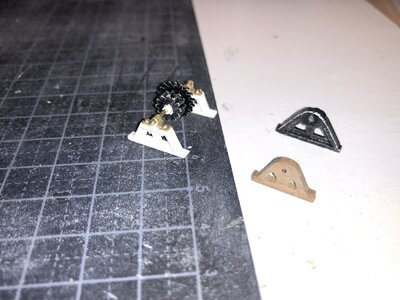
The main issue is still the size, the parts are ridiculously small; the completed support measures 16x7mm.

Below the three tries: in the RH bottom corner the first, solid wood try. The RH top shows the multipart wooden support, while the LH mid shows the polystyrene support.
50A37113-7DC1-4AB4-A077-F21B4E3A403E.jpeg

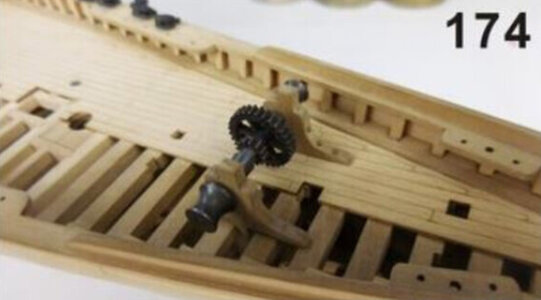
The picture below is an extract from the "Saga". The last polystyrene support at least resembles this sketch.
27FEA77A-B994-4336-9C80-BE28D704169D.jpeg

Again all three supports, but now added the axle with the intermediate gears.
Too bad I still can't follow the presumed windlass drive train configuration, since the YQ design differs from the "Saga" sketches.
DFA0D55D-C27F-44B3-BBA3-4D6421AD70BD.jpeg

In all I'm rather inclined to continue with my last try. Applying a coat of primer and some paint will probably do wonders. (Fingers crossed...)
 
Having quite a few Evergreen parts, meant I could fabricate another support for the intermediate gear. My first attempt was a monopart, which made it apparant I'm not equipped to pull that off. The second try was to create a support from several wooden parts. This showed improvement, but I still wasn't entirely happy with the support and also @Alf in Iowa suggested to use Evergreen polystyrene profiles instead of wood.
So after been given a load of profiles by @Peter Voog, I started my third try at these supports.
The main issue is still the size, the parts are ridiculously small; the completed support measures 16x7mm.

Below the three tries: in the RH bottom corner the first, solid wood try. The RH top shows the multipart wooden support, while the LH mid shows the polystyrene support.
View attachment 338202

The picture below is an extract from the "Saga". The last polystyrene support at least resembles this sketch.
View attachment 338199

Again all three supports, but now added the axle with the intermediate gears.
Too bad I still can't follow the presumed windlass drive train configuration, since the YQ design differs from the "Saga" sketches.
View attachment 338200

In all I'm rather inclined to continue with my last try. Applying a coat of primer and some paint will probably do wonders. (Fingers crossed...)
Good morning Johan. As they say…”The devil is in the detail” …so true when you are making these tiny parts. Your third attempt is definitely the best. Cheers Grant
 
Good morning Johan. As they say…”The devil is in the detail” …so true when you are making these tiny parts. Your third attempt is definitely the best. Cheers Grant
I painted my third attempt and dry fitted the supports and intermediate gear in the focsle. Definitely looks great. Next: apply some varnish and attach the assembly to the foredeck.
DFA29E6C-3456-44B7-AA96-D9D670BC7154.jpeg
 
The same applies here: the time and energy invested has been paid out. Well done, Johan.
Regards, Peter
I agree with our colleagues. That's a first class piece of micro-construction Johan!
Thank you both for your compliments. I can't tell you how pleased I am with the results. I started the build with little desire to go beyond the drawings and build-instructions, but over time and inspired by a lot of other builders, I discovered the satisfaction of adding missing details and scratch building those bits and pieces. Looking forward to the next customisation.
 
Thank you both for your compliments. I can't tell you how pleased I am with the results. I started the build with little desire to go beyond the drawings and build-instructions, but over time and inspired by a lot of other builders, I discovered the satisfaction of adding missing details and scratch building those bits and pieces. Looking forward to the next customisation.
These are wise words. It's easy to skip over some of the details because they look too hard, or will take too long, or... But more times than not the hesitation comes from not being really sure how to accomplish what it is you are trying to accomplish. It's here the forum steps in and provides inspiration and instruction.
 
The windlass won't be of much use without the engine driving the windlass. The engine is housed in a box on the foredeck with a shroud running from the engine casing to the primary driven gears, to protect, I assume, the crew from getting caught in the chain.
Since the drive train from the primary driven gears via the intermediate gears to the windlass is rather complete, I could now focus my attention towards the engine casing and the shroud, extending from the engine casing to the primary gears.
The two assemblies were made using the kit-supplied parts, although I decided to open up the starboard side of the engine casing, staying within the theme of the POF-build with the exposed starboard side.
I also wanted to have working hinges of the lid of the casing.
The first try, no pictures taken, were three simple hinges, but their appearance didn't suit me and on top of that the hinge line was not parallel to the edge of the lid. For the hinges I used 1,0mm copper pipe and a 0,5mm rod. I used some CA-adhesive to lock the hinge pin in the pipe. I also bonded the hinges to polystyrene strips, which in turn were bonded to the fixed part ov the casing and the lid.
But as I said, I was not happy with this arrangement, although the number of hinges matched the YQ design.
So it was back to the drawing board, figuratively speaking.
I came up with a hinge design for which I don't have proper description, so I'll show some pictures of the final result. Maybe someone can help me with the proper nomenclature.
Given the larger volume the new hinge design occupied, I could no longer accommodate three hinges, so I invoked AL-FI rights.

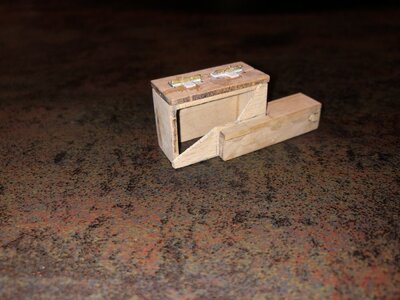
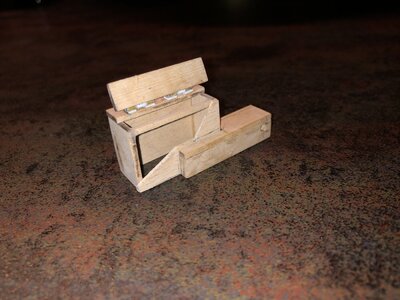
An overview of the engine casing with the drive shroud. The drive shroud has a hole for the axle feed through. The starboard side of the casing is opened up.
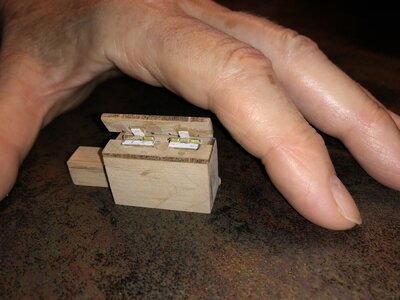
The two hinges can clearly be distinguished. An advantage of this design is, that since the hinge pin is locked at the outer ends, the lid is kept in place.
98A3401A-0296-41B9-942F-19B4FFD0253E.jpeg

The lid shown in the open position.
41627FC5-02B8-40FE-86FC-F5719656C319.jpeg

For sends of size the Admiral lend a hand.
This picture shows the casing and shroud from the port side and slightly aft.
B434D6DE-DF18-43A5-A25F-ABC135F21A27.jpeg

Now it's a matter of cleaning up and painting the parts, followed by installation to the foredeck.
 
Looking good Johan! The windlass is far more complex than most realize. Not so much from an engineering stand point, but due to part count and drive train components, it’s gets a bit crowded at scale. Especially if you add most or all of the components. ;)
 
The windlass won't be of much use without the engine driving the windlass. The engine is housed in a box on the foredeck with a shroud running from the engine casing to the primary driven gears, to protect, I assume, the crew from getting caught in the chain.
Since the drive train from the primary driven gears via the intermediate gears to the windlass is rather complete, I could now focus my attention towards the engine casing and the shroud, extending from the engine casing to the primary gears.
The two assemblies were made using the kit-supplied parts, although I decided to open up the starboard side of the engine casing, staying within the theme of the POF-build with the exposed starboard side.
I also wanted to have working hinges of the lid of the casing.
The first try, no pictures taken, were three simple hinges, but their appearance didn't suit me and on top of that the hinge line was not parallel to the edge of the lid. For the hinges I used 1,0mm copper pipe and a 0,5mm rod. I used some CA-adhesive to lock the hinge pin in the pipe. I also bonded the hinges to polystyrene strips, which in turn were bonded to the fixed part ov the casing and the lid.
But as I said, I was not happy with this arrangement, although the number of hinges matched the YQ design.
So it was back to the drawing board, figuratively speaking.
I came up with a hinge design for which I don't have proper description, so I'll show some pictures of the final result. Maybe someone can help me with the proper nomenclature.
Given the larger volume the new hinge design occupied, I could no longer accommodate three hinges, so I invoked AL-FI rights.

An overview of the engine casing with the drive shroud. The drive shroud has a hole for the axle feed through. The starboard side of the casing is opened up.
The two hinges can clearly be distinguished. An advantage of this design is, that since the hinge pin is locked at the outer ends, the lid is kept in place.
View attachment 338672

The lid shown in the open position.
View attachment 338673

For sends of size the Admiral lend a hand.
This picture shows the casing and shroud from the port side and slightly aft.
View attachment 338674

Now it's a matter of cleaning up and painting the parts, followed by installation to the foredeck.
That are some very fine nice boxes, Johan. Nice from your Admiral she was willing to help with the picture. But if you use your own hand, the boxes will look much smaller ;)
But it is that after all the attempts, you kept going until you had a workable solution that you were satisfied with. AL-FI was a big help!
Regards, Peter
 
Last edited:
Looking good Johan! The windlass is far more complex than most realize. Not so much from an engineering stand point, but due to part count and drive train components, it’s gets a bit crowded at scale. Especially if you add most or all of the components. ;)
That are some very fine nice boxes, Johan. Nice from your Admiral she was willing to help with the picture. But if you use your own hand, the boxes will look much smaller ;)
But it is that after all the attempts, you kept going until you had a workable solution that you were satisfied with. AL-FI was a big help!
Regards, Peter

Having slept over it for a night, I decided I wasn't happy with the engine casing... Sick
Since the weather went south this afternoon, I had ample time to redo the engine box.

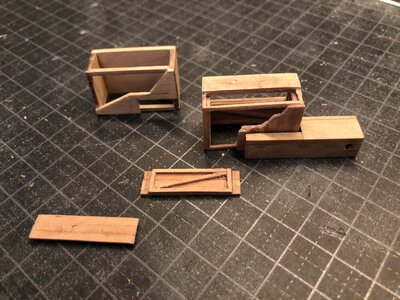
In the left hand top corner in the picture below my first try. Right center is the fruit of my labor this afternoon. A lot more pleasing to the eye, plus I added a removable port side access panel. Both top- and side access covers (lower side of the picture below) still need to be equipped with hinges, but this is where I've gotten stuck. I tried to minimize the size of the hinges, while simultaneously get the hinge line as close as I can to the top surface of the access covers. Where I initially was successful, today my efforts went straight into the dustbin. (One of my jars is filling up pretty nicely today.)
My next step will be to try whether or not soldering the hinges is a feasible option. To be continued.

38978EB0-155D-4ECD-A082-51E6587A5677.jpeg
 
Back
Top