YQ Bluenose by Johan [COMPLETED BUILD]

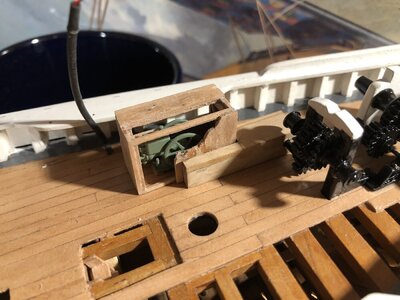
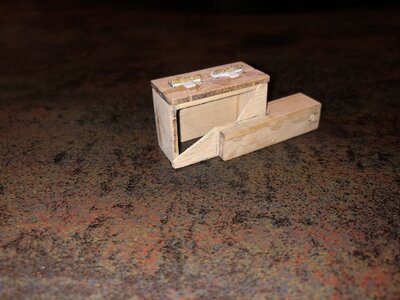
Having slept over it for a night, I decided I wasn't happy with the engine casing... Sick
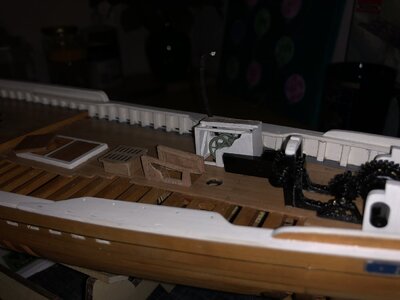
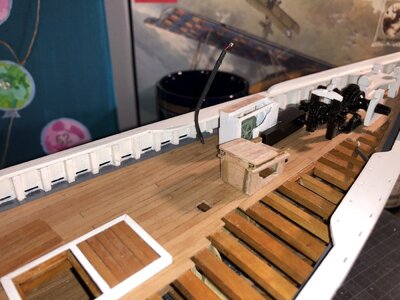
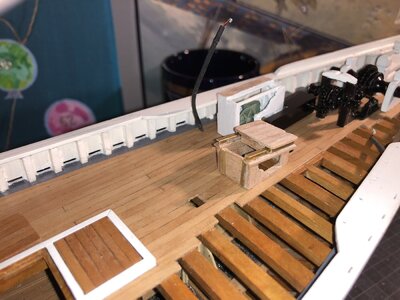
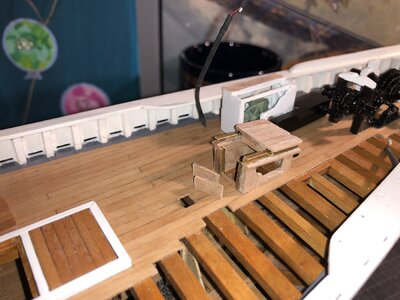
Since the weather went south this afternoon, I had ample time to redo the engine box.

In the left hand top corner in the picture below my first try. Right center is the fruit of my labor this afternoon. A lot more pleasing to the eye, plus I added a removable port side access panel. Both top- and side access covers (lower side of the picture below) still need to be equipped with hinges, but this is where I've gotten stuck. I tried to minimize the size of the hinges, while simultaneously get the hinge line as close as I can to the top surface of the access covers. Where I initially was successful, today my efforts went straight into the dustbin. (One of my jars is filling up pretty nicely today.)
My next step will be to try whether or not soldering the hinges is a feasible option. To be continued.

View attachment 338926
Well, Johan.
At first: you owned a redo-coint!
Second: you keep raising the bar for yourself. Streven naar Beter. Something good will come out there. Your soldering skills becomes also better.
Regards, Peter
 
While considering my options for the design of the hinges of the engine casing access covers, I had some opportunity to continue work on the companionway and the skylight of the focsle.
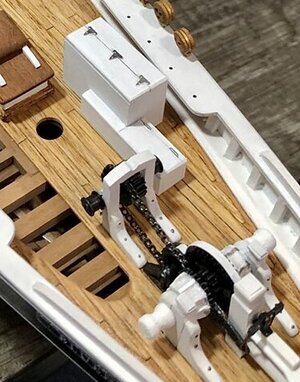
I assembled the base of the skylight from the kit-supplied parts and I scratch build the companionway's side panels. So far, so good and challenges ahead for the companionway. A bit more progress is needed before I know if the self-build companionway has my preference; it wasn't until I applied some paint on the engine casing that I knew I preferred the scratch build casing over the kit-supplied casing.
AB863F98-8846-4353-A113-048EDB9070AC.jpeg
 
Yesterday saw the first steps towards building the companionway.
Today, after securing some essential materials, I continued with the build.
My plan was to have functional boards, for entry to the crew's quarters in the foc'sle. Strangely enough they apparently did not add doors to the companionway, where I expected them, for ease of access. Evidently no primary requirement.
I also wanted to have a functional hatch. In order to be able to build is as compact as I dared, I purchased a copper U-profile, 2x2x2mm, t=0,5mm. (0,080x0,080x0,080, t=0,002, imp units) to function as rails.
After adding the front wall and rails for the boards to the sidewalls and also constructing the roof and the hatch, including the rails, I have the companionway dry fitted on the foredeck.
I did not incorporate the curved access hatch; it's was a case of a function-driven hatch design and I was not comfortable adding the curved hatch into the mix.
Below a couple of shots of the dry fit:

Hatch fully closed:
27FCC63F-E52E-4DDE-81D2-AA03D68E9CE4.jpeg

Hatch fully opened:
01255004-D6B6-4FC3-BC76-1CCAE21A61EF.jpeg

Hatch open and boards removed:
8AF75305-8141-4E8A-B555-D49C2256CE6C.jpeg
Now it's finalizing by adding some details, like grips and hatch stops, followed by painting the various parts and installing the companionway on the foredeck. To be honest, I'm quite pleased how this turned out. Unfortunately I'm out of excuses, so it's back to those thrice darned hinges...
 
Yesterday saw the first steps towards building the companionway.
Today, after securing some essential materials, I continued with the build.
My plan was to have functional boards, for entry to the crew's quarters in the foc'sle. Strangely enough they apparently did not add doors to the companionway, where I expected them, for ease of access. Evidently no primary requirement.
I also wanted to have a functional hatch. In order to be able to build is as compact as I dared, I purchased a copper U-profile, 2x2x2mm, t=0,5mm. (0,080x0,080x0,080, t=0,002, imp units) to function as rails.
After adding the front wall and rails for the boards to the sidewalls and also constructing the roof and the hatch, including the rails, I have the companionway dry fitted on the foredeck.
I did not incorporate the curved access hatch; it's was a case of a function-driven hatch design and I was not comfortable adding the curved hatch into the mix.
Below a couple of shots of the dry fit:

Hatch fully closed:
View attachment 339619

Hatch fully opened:
View attachment 339620

Hatch open and boards removed:
View attachment 339621
Now it's finalizing by adding some details, like grips and hatch stops, followed by painting the various parts and installing the companionway on the foredeck. To be honest, I'm quite pleased how this turned out. Unfortunately I'm out of excuses, so it's back to those thrice darned hinges...
Hi Johan. With a creative mind and small parts, you made a nice entrance to the foc’sle.
Regards, Peter.
 
Thanks Paul. These parts of the build are the little challenges I truthfully enjoy.
Another builder once posted that each of these small constructions should be approached as a task unto itself. That is, be given the full attention it deserves from start to finish. I find this attitude really helpful as it creates moments of accomplishment in the midst of what otherwise might feel rather overwhelming. You can see your friend Peter doing that in his approach, as well as your countrymen Stephan and Maarten. Must be a Dutch thing - but I've adopted it as well.
 
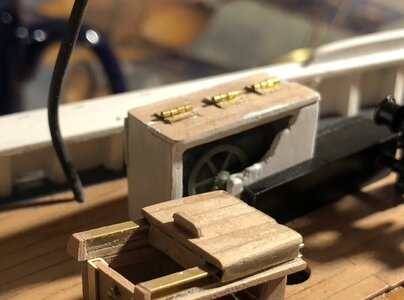
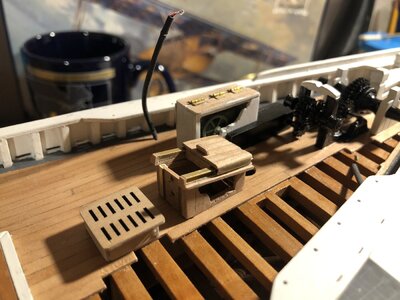
The hinge issue for the engine casing had been resolved; I treated myself with some ready-to-use hinges, bought at a nearby modeling webshop. It's something I couldn't have accomplished myself and this just looks great, IMHO:
B4C03CE9-85BD-485C-8DD7-879907F233C0.jpeg

Further detailing and fine-tuning of the companionway was next on the agenda.
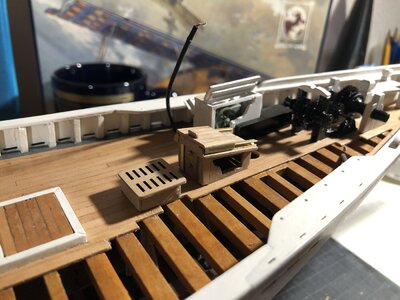
Frequent dry-ditting, checking, re-checking, fiddling and filing and now getting close to start painting:
CE689941-13E0-4400-98B2-9805C3A683CA.jpeg
 
The hinge issue for the engine casing had been resolved; I treated myself with some ready-to-use hinges, bought at a nearby modeling webshop. It's something I couldn't have accomplished myself and this just looks great, IMHO:
View attachment 339812

Further detailing and fine-tuning of the companionway was next on the agenda.
Frequent dry-ditting, checking, re-checking, fiddling and filing and now getting close to start painting:
View attachment 339813
Excuse me RDN, those hinges are just ugly in the midst of so much beauty, see if you can change position in such a way that you don't see them, forgive me for my frankness
 
Excuse me RDN, those hinges are just ugly in the midst of so much beauty, see if you can change position in such a way that you don't see them, forgive me for my frankness
Bongiorno Frank, thank you for your frankness, it's appreciated and also a big thank you for your compliments.
I considered countersinking the hinges in the panels, but those panels are just 1mm thick. That means I don't have much margin for error. Furthermore, I still need to paint the engine casing, which in all likelihood will soften the "hardness" of the copper hinges and also the edges of the hinges.
The initial, self-fabricated hinges were, esthetically, way worse than the current ones...
Scale is an issue all in itself; the model being 1:72 means that a panel of 1mm thick on the model translates into a 72 mm thick panel in real life, which of course is rather ridiculous. All too frequently I find myself running some calculations, just to check how the model translates to full scale and frankly, an awful lot of details are one big compromise to facilitate modeling.
Once the engine casing has been painted, I'll post a couple of picture of the final result. Hopefully the hinges will then be able to get your mark of approval.
Giovanni.
Thanks for answering me
 
The hinge issue for the engine casing had been resolved; I treated myself with some ready-to-use hinges, bought at a nearby modeling webshop. It's something I couldn't have accomplished myself and this just looks great, IMHO:
View attachment 339812

Further detailing and fine-tuning of the companionway was next on the agenda.
Frequent dry-ditting, checking, re-checking, fiddling and filing and now getting close to start painting:
View attachment 339813
I have to say the hinges look out of scale. Way too big in relation to the motor. If it was just a box, then it would be less obvious how big the box really is.
Although I didn’t use the motor, I used the provided hinges and added bolts. They are very thin and a decent representation of a hinge. They may not be the actual type used, if that matters to you, I don’t remember. But I think they look more in scale. Any reason you didn’t use them? Or modify them?
Pic for reference…
76B08CA9-453D-497F-9B08-A80A779E560B.jpeg
 
I have to say the hinges look out of scale. Way too big in relation to the motor. If it was just a box, then it would be less obvious how big the box really is.
Although I didn’t use the motor, I used the provided hinges and added bolts. They are very thin and a decent representation of a hinge. They may not be the actual type used, if that matters to you, I don’t remember. But I think they look more in scale. Any reason you didn’t use them? Or modify them?
Pic for reference…
View attachment 339878
Thanks Dean.
The main reason I used these hinges is that they are functional, which the kit supplied ones aren't.
The scale-issue is a constant nuisance and that also applies to the kit-supplied parts, see also my reply to Frank.
My first applied hinges were selfmade and twice as big as the current ones. I tried to minimize the size of the hinges with a second attempt, but I simply lack the tools and capabilities to realize smaller, functional hinges.
The third attempt was to use ready-to-use hinges, which proved to be the a definite improvement over the self-made ones, at least to me. Though too large, but not as obvious as the first two attempts , they provide the required functionality.

Below a comparison between the self-made hinges (top) and the ready-to-use hinges (bottom).
They both are too large for the scale, that's what I wholeheartedly agree with.
It was a tradeoff between functionality (in order to be able to show the engine) and authenticity. Functionality won.
E7F5B2F0-1DC1-44F9-828C-438B189EDA70.jpeg502A137A-255C-40CE-B952-050F1B52158E.jpeg
 
Last edited:
Back
Top