-

Win a Free Custom Engraved Brass Coin!!!
As a way to introduce our brass coins to the community, we will raffle off a free coin during the month of August. Follow link ABOVE for instructions for entering.
-

PRE-ORDER SHIPS IN SCALE TODAY!
The beloved Ships in Scale Magazine is back and charting a new course for 2026!
Discover new skills, new techniques, and new inspirations in every issue.
NOTE THAT OUR FIRST ISSUE WILL BE JAN/FEB 2026
- Home
- Forums
- Ships of Scale Group Builds and Projects
- Bluenose PoF Group Build
- Bluenose Group Build Logs
You are using an out of date browser. It may not display this or other websites correctly.
You should upgrade or use an alternative browser.
You should upgrade or use an alternative browser.
- Joined
- Sep 3, 2021
- Messages
- 5,197
- Points
- 738

As I wrote in my reply to Peter; I thought the forward and aft frame surfaces to be free of any interface, other than a contact surface for the cross beams. So, based on your and Peter's reaction, I'm holding back on applying any finish at this stage.Oil and glue is not a good idea - Peter is absolutely correct. I know it is tempting, but rather prevent frustration later.
Canoe21
Lawrence
Hello Johan, You have just received some very good information on the oil and glue, please hold off on the oil for now.
Regards Lawrence
Regards Lawrence
- Joined
- Dec 11, 2021
- Messages
- 287
- Points
- 238

Hello Johan, seems to be you're faster then me ... My compliments for the work already done!
- Joined
- Sep 3, 2021
- Messages
- 5,197
- Points
- 738

Thanks!Hello Johan, seems to be you're faster then me ... My compliments for the work already done!
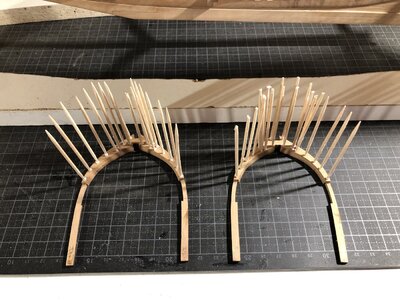
Hi Johan. Building on different stages of the frames keeps your mind clear. And a nice treenailing on your frames.Ongoing fun on the trenails of the frames. 12 Frames complete so far.
View attachment 284956
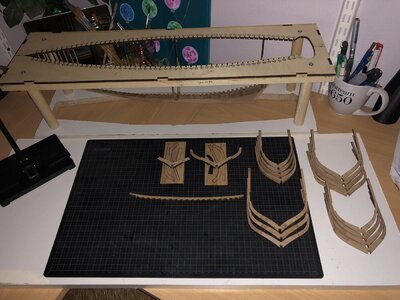
The "shipyard" with frames in various stages of completion.
View attachment 284957
Regards, Peter
- Joined
- Sep 3, 2021
- Messages
- 5,197
- Points
- 738

Hey Peter,Hi Johan. Building on different stages of the frames keeps your mind clear. And a nice treenailing on your frames.
Regards, Peter
That's exactly why I am just doing that; building in stages doesn't get that terribly boring ánd you have to shift focus.
The trenails go in unexpectedly well, once I found the rythm. I don't use a draw plate like you do, but inserting a toothpick with just a little adhesive, while applying some force with a pair of tweezers gives a convincing result. The wood of the toothpicks is softer than the wood of the frames, this results in the tip of the toothpick conforming more or less to the hole in the frame. A dry fitted toothpick confirmed this, still slightly conical, but a little adhesive fills the remaining voids, according to theory.
Still hundreds of trenails to go.... and 28 frames, progress is being made!
- Joined
- Sep 3, 2021
- Messages
- 5,197
- Points
- 738

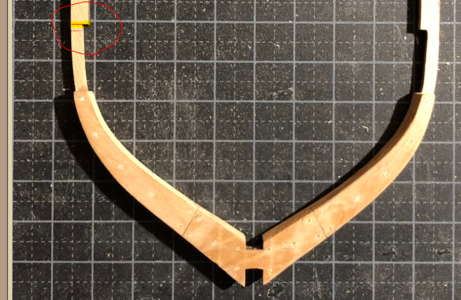
Not so much in terms of progress, but a few weeks back I experienced some frame breaks, which I repaired, using pins and adhesive. On frame sixteen, the frame broke at deck level with about a 60* angle relative to the deck plane. I repaired this frame with my favored method. Yesterday evening, while I was inserting trenails in the frame, the repair became undone, meaning I used the wrong repair method for that particular break. The frame breakage may be for 70% contributed to my clumsiness, the remaining 30% I blame on the brittle pear wood. I tested that on the remains of the broken frame part and I found that the wood breaks with little elastic deformation and almost no warning prior to failure.
In all it took a couple of hours to perform the repair. A good thing I didn't throw out the leftover waste material...
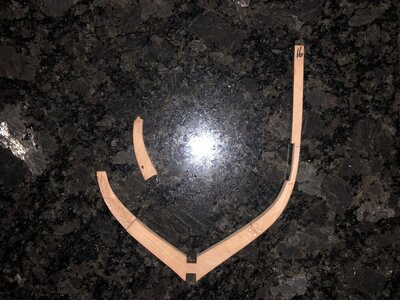
Broken frame (right) with replacement part drawn on a leftover piece of wood on the left
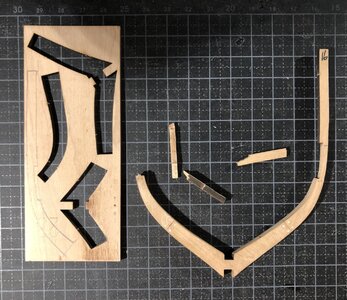
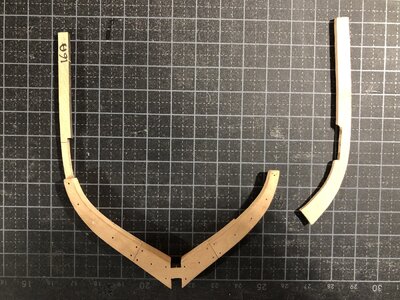
Removed broken frame part from frame assembly. Piece of cake; some steam and it became undone very nicely.
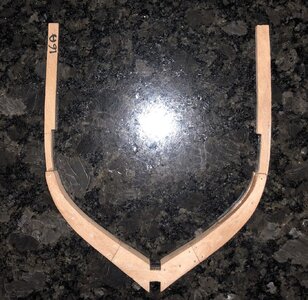
Raw cut replacement part.
Completed frame assembly with raw trimmed frame part.
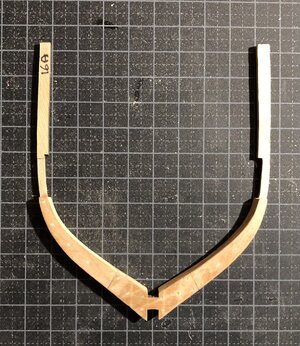
Semi-final trim and repaired frame 16 assembly. Glad it's done...
(Final trim to take place prior to planking.)
In all it took a couple of hours to perform the repair. A good thing I didn't throw out the leftover waste material...
Broken frame (right) with replacement part drawn on a leftover piece of wood on the left

Removed broken frame part from frame assembly. Piece of cake; some steam and it became undone very nicely.

Raw cut replacement part.

Completed frame assembly with raw trimmed frame part.

Semi-final trim and repaired frame 16 assembly. Glad it's done...
(Final trim to take place prior to planking.)

Last edited:
“Wie wat bewaard, die heeft wat!”. Who kept something, have something.Not so much in terms of progress, but a few weeks back I experienced some frame breaks, which I repaired, using pins and adhesive. On frame sixteen, the frame broke at deck level with about a 60* angle relative to the deck plane. I repaired this frame with my favored method. Yesterday evening, while I was inserting trenails in the frame, the repair became undone, meaning I used the wrong repair method for that particular break. The frame breakage may be for 70% contributed to my clumsiness, the remaining 30% I blame on the brittle pear wood. I tested that on the remains of the broken frame part and I found that the wood breaks with little elastic deformation and almost no warning prior to failure.
In all it took a couple of hours to perform the repair. A good thing I didn't throw out the leftover waste material...
Broken frame (right) with replacement part drawn on a leftover piece of wood on the left
View attachment 285639
Removed broken frame part from frame assembly. Piece of cake; some steam and it became undone very nicely.
View attachment 285640
Raw cut replacement part.
View attachment 285642
Completed frame assembly with raw trimmed frame part.
View attachment 285644
Semi-final trim and repaired frame 16 assembly. Glad it's done...
(Final trim prior to take place prior to planking.)
View attachment 285647
A nice replacement. But hopefully it is ones.
Regards, Peter
- Joined
- Sep 3, 2021
- Messages
- 5,197
- Points
- 738

One moment of carelessness is all I need...“Wie wat bewaard, die heeft wat!”. Who kept something, have something.
A nice replacement. But hopefully it is ones.
Regards, Peter
The only thing I find comforting is that if need be, a repair method is available.
- Joined
- Sep 3, 2021
- Messages
- 5,197
- Points
- 738

And I won't part with what I have very easily.There is actually quite a lot of wood left on those frame cut-out blocks.
- Joined
- Sep 3, 2021
- Messages
- 5,197
- Points
- 738

Thanks Dean, I probably could have used a different geometry for the top bit, but I wanted to be able to check the repaired frame against the drawing, to ensure proper positioning later in the jig.Keep in mind, all of the frame above the thin area will be removed later! That is the top of the bulwarks.
See below, I marked the approximate cut off line...
View attachment 285679
So I simply copied the geometry of the drawing on the repair part.
Still have to mark the top of the stanchion, but I was so glad I could repair the frame...
- Joined
- Dec 11, 2021
- Messages
- 287
- Points
- 238

Johan, I have broken at least three frames ... but with a little patience they are back "skilled and enlisted"!
Also because the frames, in that point, do not have a great job to support, are glued to the bulwarks and to the beams of the bridge.
By the way, a great job of patience and manual skill!
Also because the frames, in that point, do not have a great job to support, are glued to the bulwarks and to the beams of the bridge.
By the way, a great job of patience and manual skill!
- Joined
- Sep 3, 2021
- Messages
- 5,197
- Points
- 738

Yeah, the frames are delicate, especially where the cross section of the frames changes abruptly.Johan, I have broken at least three frames ... but with a little patience they are back "skilled and enlisted"!
Also because the frames, in that point, do not have a great job to support, are glued to the bulwarks and to the beams of the bridge.
By the way, a great job of patience and manual skill!
For an ex-airframe designer a no-no...
Thanks for your compliment, Piero; it's appreciated.
- Joined
- Sep 3, 2021
- Messages
- 5,197
- Points
- 738

Today I learned that the schooner reportedly has Dutch roots. Is that why I am so fascinated with the Bluenose? 
A quote from an article in 41*N Magazine, pages 2 through 11:
"Marquardt, a marine artist, model maker, and re- searcher, studied the schooner in Europe, America, and Australia. The first two-masted vessels with gaff sails, forerunners of the schooners, were the speeljachts
of the Netherlands, a country marked by networks of waterways and canals, he posits. The Dutch word speeljacht means play or pleasure yachts; these were the years of the Dutch Golden Age, when the Republic dominated as a sea power; water recreation played a year-round role in citizens’ lives.
“If one looks to the speeljacht as the grandfather
of the schooner,” Marquardt writes, “then nobody earns the title of father more than the Royal Transport.”
The Royal Transport is widely cited as a critical benchmark in the evolution of the schooner.
According to Marquardt, in the late 1600s, against a backdrop of a regular flow of traffic between England and Holland, as well as the British reign of the Dutch-born William of Orange, the 90-foot Royal Transport was launched, in 1695. Royal Transport gained favor quickly, and the rig trend jumped from Britain and Europe to North America—and back.
“The preference for the schooner rig was due to its better suitability for a long and small vessel and the lesser number of deckhands needed in comparison to a sloop rig,” Marquardt writes."
Last edited:
- Joined
- Oct 17, 2020
- Messages
- 1,691
- Points
- 488

- Joined
- Sep 3, 2021
- Messages
- 5,197
- Points
- 738

Hey Frank,View attachment 286115
Buona sera Pietro, può esserti utile?
I had your post going through Google translate; my Italian conversing capabilities are non-existent...
My guess is that we have a translation issue. Let me explain:
During the last few weeks Peter, Henk and I met in person. Given that we all live relatively close to one another makes that easily accomplished.
Currently the three of us are in various stages of our Bluenose plank-on-frame build. Once a year, conditions (covid-19) permitting, a day is organized, somewhere in the Netherlands, where builders can show their builds to colleague builders and other interested visitors. One thing led to another and we challenged ourselves into committing to participate in the next event with our respective builds, regardless of build status.
We also talked about Heinrich's Willem Barentsz/Witte Swaen build and how nice it would be for Heinrich to share his accomplishments with the Dutch public. Given Heinrich's present country of residence, that's not an option.
That's why Peter proposed to copy the most interesting photos, as posted by Heinrich on this forum and show those as a continuous presentation during that day.
Actually I'm a little bit lost as to why you posted the appreciated reference to "Ship modeling simplified". I know that book, but I'm afraid I'm missing the context with Peter's posting.
Migliori saluti,
Giovanni
Last edited:


