YQ Bluenose by Johan [COMPLETED BUILD]

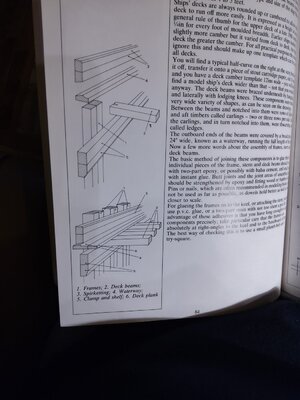
Perfect Johan, so you will glue the bulwarks in relation to the type of design you will use (Saga and / or YQ) to have the scuppers in the correct position.
Well Piero, I think I'll have to commit to having the waterways and decks flush, don't know yet how to pull that one off ánd I will copy Peter Voogt's (@Peter Voogt) solution for clamps, shelves and beams, getting as close to the Saga as you can get, without compromising YQ's design too much.
But first order of business is to complete the keel and the frames, although it's fun to try and think ahead.
 
Last edited:
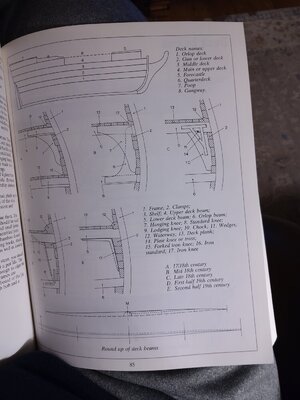
The cross section in post #149, which uses the term "covering board", is actually taken from the "Saga".
Don't ask me why though; the term "waterway" is decidedly better known ánd, as Phil (@Philski) showed us from the extracts of "Historic Ship Models", a justifiable nomenclature.
 
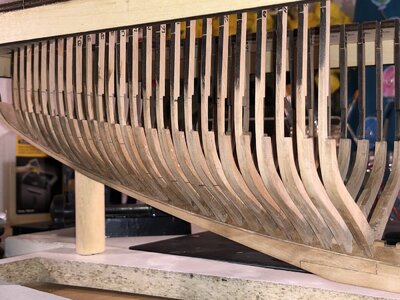
Still working my way through the frames and then some more frames:6559C2C4-BF86-4768-B29E-18514304DFDC.jpeg

Some frames still need a little tweaking...
9AB6D3E7-C52F-460B-9B1A-19823CA6576A.jpeg

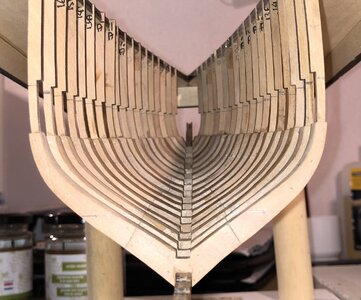
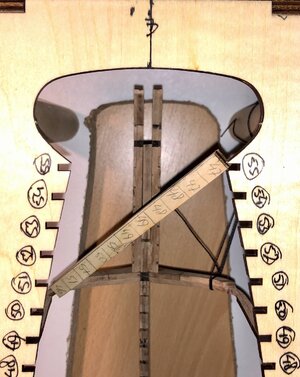
An issue I encountered after adding the spiderlegs: a warped keel. The keel itself is straight, the warp occurs in the deadwood. When I completed the keel, it was a straight one could possible get it.
After laying around for some time, humidity and temperature differences apparently played havoc on the straightness of the keel.
I had a WhatsApp conversation with @Henk Liebre and he advised me to straighten the keel and keep the keel moist for a while. So I put frame 49 in and straightened the keel and applied some water. And now we wait... Glad I put the centerline marks on the jig, this Is how I found the distortion of the keel.
The picture is not taken truly normal to the horizontal, so that's why one can still see the spiderlegs slightly off centre.
F9BCA3ED-A3E6-47F3-B74D-2A0F13BE7A1A.jpeg

Other than trying to solve these kind of occurring issues, it's still trennels what the clock strikes. I "hope" to be back to frame assembly shortly.
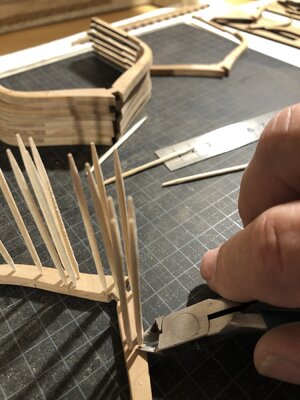
Currently I'm also experimenting with dry install of the trennels, instead of using a bit of adhesive. This seems to be working rather well so far. I tried to remove the odd wrongly installed trennel with a pair of tweezers, but in the end of the day, I always have to drill them out. Therefore I consider the risk of trennels dropping out to be close to zero.
EF615B61-2B37-4119-943F-904DE2AAC9D2.jpeg

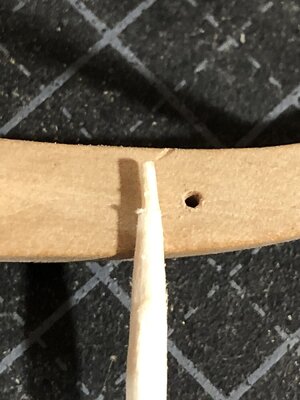
Every once and a whole I check the forming of the trennels, this is how they typically appear; almost straight. Slightly off centre of the original toothpick, I suspect due to eccentric application of the force to drive the trennels into the frame.
DC84E00B-5D4D-4F77-96C7-5F94BD20CAF9.jpeg
 
Hi Johan. Good to see you back on business. The row of frames looks nice!

My keel was also a little twisted after some time. I hold it above some steam and installed it also in the jig with some frames and let it rest and dry. After a week a second small adjust with some contra force and then it was straight again.
About the ‘dry treenailing’: make a test with the protection layer you will put on later. Perhaps both types of wood responds different and the wood pushes the treenail out.
Regards, Peter
 
Still working my way through the frames and then some more frames:View attachment 292184

Some frames still need a little tweaking...
View attachment 292191

An issue I encountered after adding the spiderlegs: a warped keel. The keel itself is straight, the warp occurs in the deadwood. When I completed the keel, it was a straight one could possible get it.
After laying around for some time, humidity and temperature differences apparently played havoc on the straightness of the keel.
I had a WhatsApp conversation with @Henk Liebre and he advised me to straighten the keel and keep the keel moist for a while. So I put frame 49 in and straightened the keel and applied some water. And now we wait... Glad I put the centerline marks on the jig, this Is how I found the distortion of the keel.
The picture is not taken truly normal to the horizontal, so that's why one can still see the spiderlegs slightly off centre.
View attachment 292187

Other than trying to solve these kind of occurring issues, it's still trennels what the clock strikes. I "hope" to be back to frame assembly shortly.
Currently I'm also experimenting with dry install of the trennels, instead of using a bit of adhesive. This seems to be working rather well so far. I tried to remove the odd wrongly installed trennel with a pair of tweezers, but in the end of the day, I always have to drill them out. Therefore I consider the risk of trennels dropping out to be close to zero.
View attachment 292188

Every once and a whole I check the forming of the trennels, this is how they typically appear; almost straight. Slightly off centre of the original toothpick, I suspect due to eccentric application of the force to drive the trennels into the frame.
View attachment 292189
You’re doing a great job Johan! Nice progress. ;)
 
Great to see you back in action again Johan. My apologies for only now catching up on all the builds - but the last two weeks have not been fun. This is a tedious part of the build, but eventually this phase will also be behind you.
 
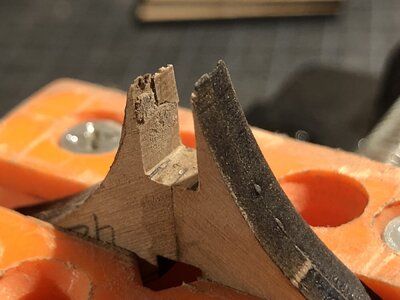
While working my way through the mountain of frames, I came across another issue, not earlier experienced, at least not by me.
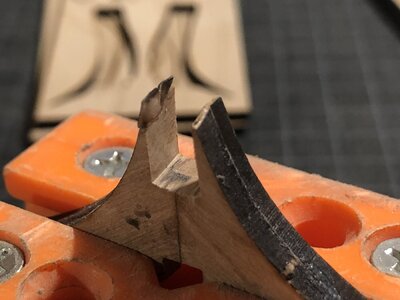
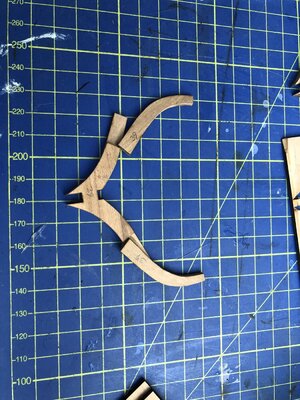
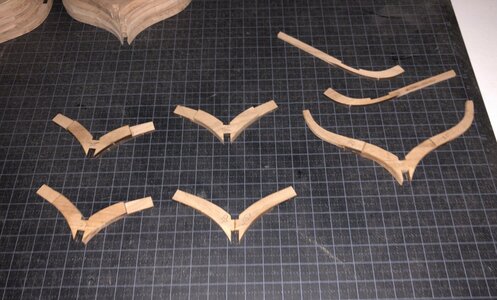
Where frames have an S- curved profile at the interface with the keel, the pointed edges are extremely vulnerable and very prone to breaking off. Whether it's handling, filing or sanding, the points break off very easily.
I already consulted my friends from the DBBS, @Henk Liebre and @Peter Voog, and they gave me some advice on recovery of the frames. Coming Thursday I'll meet with Henk, to see if we can come up with some workarounds to avoid the issue, at least to some extend...

Re-bonded some recovered broken tips, before filing.
After filing it looks (marginally) better.
What was the fun of modeling again?;)
0FF998ED-4F5F-4B96-A7B5-23ABE2091980.jpeg8652A02E-3C8C-4697-A965-5D50ABEB3051.jpeg
 
Well, as I posted earlier, I ran I to some snags where the sharp edges of some of the aft frames broke off. @Henk Liebre offered me a workshop "Frame building" and we agreed to meet at Henk's place. So this morning Henk and I met and we discussed in detail both our processes and their differences. It also turned into a hands-on experience.
The main differences were:
1) Henk does a lot of char removal beforehand. He only leaves enough char to be able to align the parts meticulously, the dark char contrasting wonderfully with the natural wood color, making it easy to accurately align the parts.
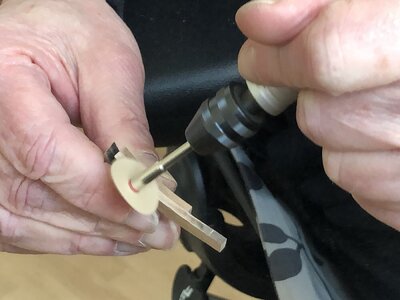
2) A small sanding disk is used for char removal, at minimum RPM. It's a rather effortless procedure, just take your time; we're in no hurry.
3) It appears I might be rather heavy handed, or stressed out, when manually filing and sanding, applying undue force on the more fragile frame elements. Taking it slow gives better control over filing and sanding and significantly reduces the risk of breaking things.
4) I prefer to use a small vice to keep the parts steady while filing and sanding. To my surprise Henk holds the parts by hand and even though one obviously can't keep the parts from moving, the results are very good. I always suspected holding parts by hand would have a detrimental effect on the shape of the cross sections of the frames but nothing is farther from the truth. So this is down to one's personal preferences.
5) Adhesive application, when Henk demonstrated his bonding process, I was amazed by the amount of adhesive Henk used; very little of the sticky stuff was used. This led to almost instantaneous adhesion, with some allowance the locate the parts correctly and within a couple of minutes the next step could be taken.
In all, for me this was a very educational and productive meeting.
Henk, thanks for your hospitality and your time and thanks for sharing your experience, it's highly appreciated.

It's a distinct advantage having some friendly co-builders within driving distance, who are also willing to help a fellow builder. To me, the DBBS sure showed it's value. Thanks Henk and Peter!

PS1 No broken frame tips!!!
PS2 After meeting with both Henk and Peter, both sharing their knowledge and experiences, I'm pretty sure a lot of modelers could benefit from a modeling workshop or course, where one not only could be taught the basics of modeling, but also share experiences with one another.

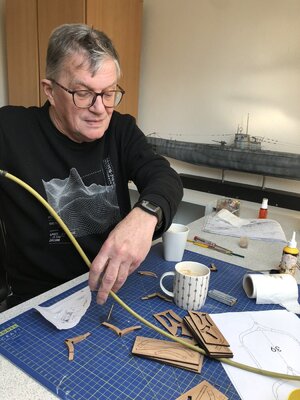
Henk preparing his tools.4868BD79-564D-4D84-BFAC-F3DFBAF5A0ED.jpeg

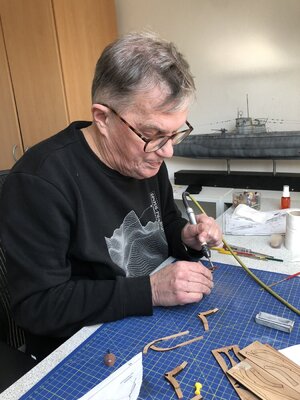
Henk demonstrating his procedure.
(Anything familiar in the background?)
4908906B-4141-41DD-B94E-7EE99D3F857D.jpeg

Close up
2D44F11E-A4FA-45D1-B112-052BBC420FB1.jpeg

Frame assembly in progress:
8C1C2177-2EAE-4252-85A5-EB292E56B07F.jpeg
 
Well, as I posted earlier, I ran I to some snags where the sharp edges of some of the aft frames broke off. @Henk Liebre offered me a workshop "Frame building" and we agreed to meet at Henk's place. So this morning Henk and I met and we discussed in detail both our processes and their differences. It also turned into a hands-on experience.
The main differences were:
1) Henk does a lot of char removal beforehand. He only leaves enough char to be able to align the parts meticulously, the dark char contrasting wonderfully with the natural wood color, making it easy to accurately align the parts.
2) A small sanding disk is used for char removal, at minimum RPM. It's a rather effortless procedure, just take your time; we're in no hurry.
3) It appears I might be rather heavy handed, or stressed out, when manually filing and sanding, applying undue force on the more fragile frame elements. Taking it slow gives better control over filing and sanding and significantly reduces the risk of breaking things.
4) I prefer to use a small vice to keep the parts steady while filing and sanding. To my surprise Henk holds the parts by hand and even though one obviously can't keep the parts from moving, the results are very good. I always suspected holding parts by hand would have a detrimental effect on the shape of the cross sections of the frames but nothing is farther from the truth. So this is down to one's personal preferences.
5) Adhesive application, when Henk demonstrated his bonding process, I was amazed by the amount of adhesive Henk used; very little of the sticky stuff was used. This led to almost instantaneous adhesion, with some allowance the locate the parts correctly and within a couple of minutes the next step could be taken.
In all, for me this was a very educational and productive meeting.
Henk, thanks for your hospitality and your time and thanks for sharing your experience, it's highly appreciated.

It's a distinct advantage having some friendly co-builders within driving distance, who are also willing to help a fellow builder. To me, the DBBS sure showed it's value. Thanks Henk and Peter!

PS1 No broken frame tips!!!
PS2 After meeting with both Henk and Peter, both sharing their knowledge and experiences, I'm pretty sure a lot of modelers could benefit from a modeling workshop or course, where one not only could be taught the basics of modeling, but also share experiences with one another.

Henk preparing his tools.View attachment 294327

Henk demonstrating his procedure.
(Anything familiar in the background?)
View attachment 294326

Close up
View attachment 294329

Frame assembly in progress:
View attachment 294330

Of course the results of our coordinated effort must be shared:
E3397DD8-C548-46CE-8BD0-050AD11DF080.jpeg
 
Nice result this morning, good to show you that there are several roads to Rome are

Mine is patience, what can't do today we'll do tomorrow , no rush
I'm afraid my problem is that I'm so curious/anxious on how the results of all my efforts will look like once finished. Should be able to more thoroughly enjoy the journey.
 
PS2 After meeting with both Henk and Peter, both sharing their knowledge and experiences, I'm pretty sure a lot of modelers could benefit from a modeling workshop or course, where one not only could be taught the basics of modeling, but also share experiences with one another.
Will be busy later
Asked the Admiral if she can clean up her things, can I make it a classroom later
Pre-register ROTF
 
Back
Top