YUANQING BLUENOSE _ E J - Eugene Schmidt

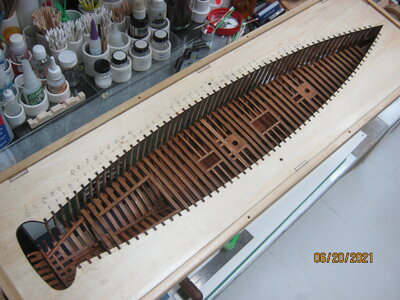
Another assembly and 5 more full beams in place.

View attachment 239251

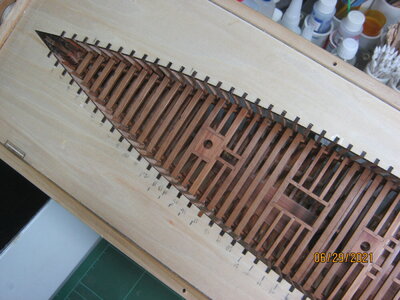
The longest assembly done and the satin coat drying.

View attachment 239252

Next, this assembly goes in, then one single beam. Need to fit the dinky little assembly, the last one, and finish it and then, THE LAST TWO BEAMS!

Now, to think about decking. dug out the pearwood stash.
You’re getting so close! I remember the feeling…you see the light at the end of the tunnel, and you get excited! I really like your clear coat. I skipped that on the top of the deck beams, because it was going to be mostly covered by the deck. But I did end up putting clear on the exposed deck beams after planking the deck.
The deck planking is a little bit of a challenge, but mainly tedious work making all the nibbed ends fit well. You will do good, I’m certain!
One thing that makes a planked deck or hull look uniform is to sort out the colors of each strip so that you have a combination or blending that you want when a natural finish is the goal. Water ways and other particular elements can have a different tone into which the nibbed decking terminates. You may have already done this or considered it but I thought that it is worth consideration for what your own goals are. On a hull gradually changing the tone of the strips can move from a darker are to a lighter one to bring out the fine curves' lines of the hull. Just a thought for consideration as every builder has their own preferences. Rich (PT-2)
 
Not much done so far this week. The last beam assembly showed some glue marks after the poly dried, so I sanded it down more and recoated it.

I've been away from the bench for three days. Removed a set of exterior french doors, reframed the wall for a 56' W X 48' H double window unit. Wall framed, sheathed, window in, flashing applied, Exterior trim installed. Replaced some other exterior trim on the same side of the house. The existing trim was red cedar but has shown rot, usually at the bottom part of the boards. Probably the end gran was never sealed and the board sucked up water from the bottom. All bad parts were cut out and replaced with PVC 1 X 4 trim and caulked with polyurethane caulk. That stuff is nearly indestructible. Took 3 days as the removal of the french door took longer than expected. Whoever installed it never expected it would need to come out again and boy, was it in there good.

Tomorrow, Over to my son's house to install a new bathroom window.

I keep forgetting that I'm 79. I probably shouldn't be doing this stuff any more. But, old carpenters never retire. They just fade slowly into the woodwork. Or build and repair boats.

From Dean 62

I really like your clear coat. I skipped that on the top of the deck beams, because it was going to be mostly covered by the deck. But I did end up putting clear on the exposed deck beams after planking the deck.

Thank you. It took me a while to get what I had in my mind. I always liked the look of the mahogany and teak trims on the boats O worked on. After a repair, it was important to us to get the wood color and finish correct to match the rest of the boat. Like the old Chris Craft's.
An old standby for us was Olympic oil base marine spar varnish. It had an amber tint to it that to me, popped the wood color out. That was what I was striving for. Problem was, it is only available in gloss, and on this scale I didn't care for that. I had a gallon of it in the shop though, so used it as a base coat, just to get the color. I then bought a 8 oz can of Minwax oil base polyurethane clear in satin. I wound up pouring off some of the liquid in the top of the can until I got just the sheen I wanted. About 1/2 way between satin and flat. The Minwax poly is water clear, so it didn't change the color either. I'll install it tomorrow evening.
I always say, if you find something that works for you, stick with it! :p
 
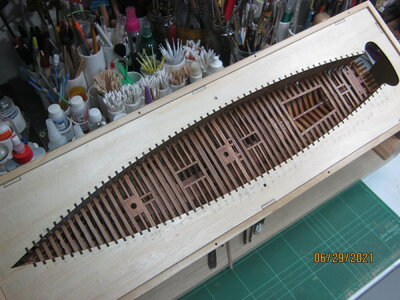
Finished up the last beams and the teeny triangle bits at the stern. Color poly on and drying. Getting ready to start the decking. I've decided to cut enough cherry to do the decking strips.

Looking at the transition between the two deck levels, I'm a bit confused.

Part #45 - appears to be attached to the aft side of Beam #126-26, between the legs of frame #29.
Is the top of part #45 even with beam #126-26 or even with the top of the decking applied on top of it?

Part # 105 - appears to be applied on the aft side of frame #29.
Is the top of part #105 even with beam #126-27 or even with the decking applied to the top of it? Should it be installed now or after the decking is installed?

Thanks for your help.
Beam #45 is flush with deck beams.
Beam #105 is proud of the deck surface and beam it is attached to. You will sand it flush with the upper stern deck.
I installed it after putting the lower bow deck boards down. That will cover any uneven board ends on the lower bow deck. It will also ensure it is proud of the upper stern deck so you can sand flush. It will also allow you to sand the ends of the upper stern deck boards prior to installing it.

To clarify -
1) put on #45, sand flush with beam you attach it to.
2) plank both decks
3) sand edges of upper (stern) deck boards flush with edge of beam, in preparation to install #105
4) Install #105 and sand flush with upper (stern) deck

Hope that make sense! :)
Thanks. Makes sense. The pics I could find and the kit instructions and drawings just weren't very clear to me.

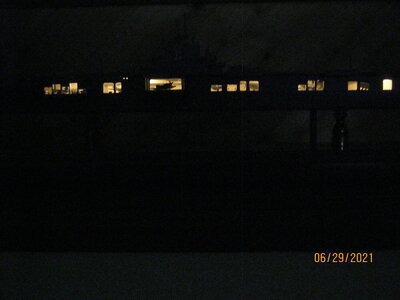
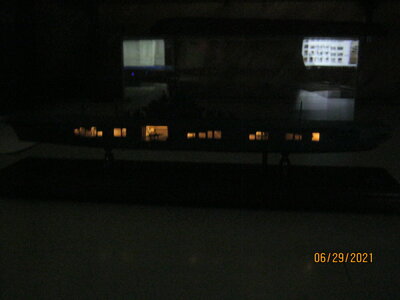
I ordered some LED lights and stuff so I can light the interior. Don't want to start decking until that's all in place. I always try to light the interiors of my ships. Started doing it for aircraft carrier hangar decks. Really makes it come alive. The first one was with grain of rice bulbs, but those things eat up batteries. I stay with 12v systems and can use the same battery pack for short term use or a 120v to 12v plug in power pack. I can plug those into any model I've done (except the first one that was 1.5v incandescent rice bulbs).

Gives me some time to fit beam #45 and cut a bunch of decking strips from the cherry block I have.

Thanks for your help.
 
Beautiful color that really adds depth to the hull.
Thank you. I experimented a lot with colors before I decided on the spar varnish. The finish also. Flat was too flat, satin was too glossy. Wound up using the satin, with some of the clear poured off, so it's kinda half way between satin and flat. Yesterday, while touching up and finishing part #45, I knocked over my little bottle of custom satin, (love potion #9) spilling it all over the floor. Since I have tiled the floor with white vinyl tile, I was able to pick up some of it with my fingers, kinda like testing the cake frosting, and put it back in the bottle, salvaging about half of it. I'll test it to see if the "flatness" has changed much or not.
 
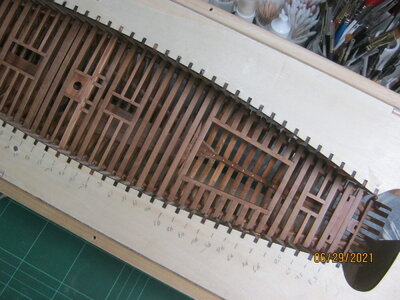
All beams done, including Part #45 and the teeny filler/brace parts at the stern.

IMG_0406.JPG

IMG_0407.JPG

IMG_0408.JPG

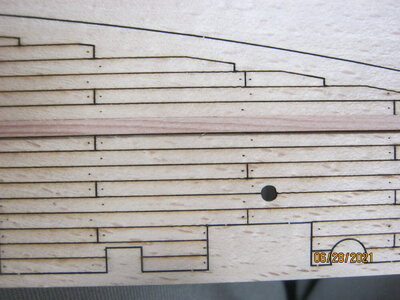
I cut a bunch of the cherry yesterday, sized to match the thickness of the decking sheet. Seem kinda flimsy to me so I may make some more 10/1000 of an inch thicker. These are .113 Wide X .045 thick. The width matches the sheet very well I think.

IMG_0405.JPG

However, I'm not liking the grain too much. Gonna do some playing with some stains and some lemonwood and ramin wood strips I have. I'd like the color of the deck to be somewhat different from the framing and the hull planking. We'll see how it goes.
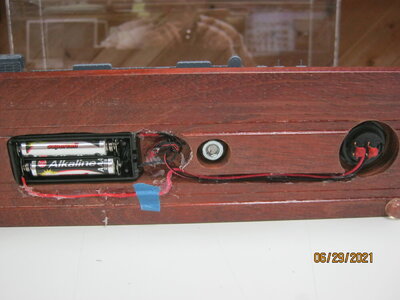
In the meantime, I'll work on the lighting as soon as it arrives, hopefully Thurs or Fri. Need to get that in there before I start to close things up any tighter than they are. Trying to decide placement for the bulbs and the running of the wires to be as inconspicuous as possible. And a method to run the main wire to the display base where the power connection and on/off switch will be. In the past, I've placed a brass tube somewhere, through the bottom into the base, with a routed out area for the battery case/switch/connections go to through holes in the edge of the base. The wire went through the tube from the model to the base.
IMG_0409.JPG

You can see the tube, here painted mahogany, kinda like the Brazilian Cherry Base.

Here, lighted -

IMG_0416.JPG

IMG_0426.JPG

IMG_0425.JPG

In the bottom of the base -

IMG_0412.JPG

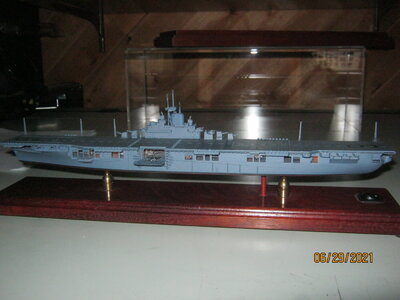
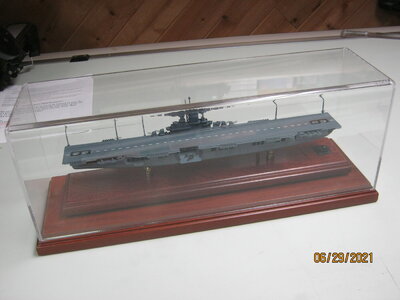
The whole thing, mounted on the base, enclosed in a custom plexiglass dust cover with a display base.

IMG_0413.JPG

Some thinking to do while I wait. Thoughts anyone?
 

Attachments

  • IMG_0410.JPG
    IMG_0410.JPG
    175 KB · Views: 2
  • IMG_0411.JPG
    IMG_0411.JPG
    150.3 KB · Views: 2
All beams done, including Part #45 and the teeny filler/brace parts at the stern.

View attachment 241366

View attachment 241367

View attachment 241368

I cut a bunch of the cherry yesterday, sized to match the thickness of the decking sheet. Seem kinda flimsy to me so I may make some more 10/1000 of an inch thicker. These are .113 Wide X .045 thick. The width matches the sheet very well I think.

View attachment 241369

However, I'm not liking the grain too much. Gonna do some playing with some stains and some lemonwood and ramin wood strips I have. I'd like the color of the deck to be somewhat different from the framing and the hull planking. We'll see how it goes.
In the meantime, I'll work on the lighting as soon as it arrives, hopefully Thurs or Fri. Need to get that in there before I start to close things up any tighter than they are. Trying to decide placement for the bulbs and the running of the wires to be as inconspicuous as possible. And a method to run the main wire to the display base where the power connection and on/off switch will be. In the past, I've placed a brass tube somewhere, through the bottom into the base, with a routed out area for the battery case/switch/connections go to through holes in the edge of the base. The wire went through the tube from the model to the base.
View attachment 241370

You can see the tube, here painted mahogany, kinda like the Brazilian Cherry Base.

Here, lighted -

View attachment 241375

View attachment 241376

View attachment 241377

In the bottom of the base -

View attachment 241373

The whole thing, mounted on the base, enclosed in a custom plexiglass dust cover with a display base.

View attachment 241374

Some thinking to do while I wait. Thoughts anyone?
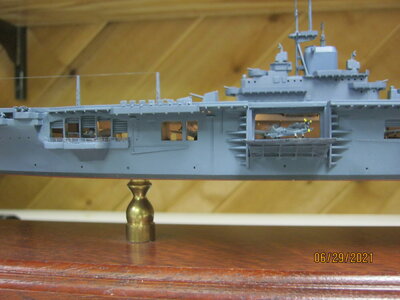
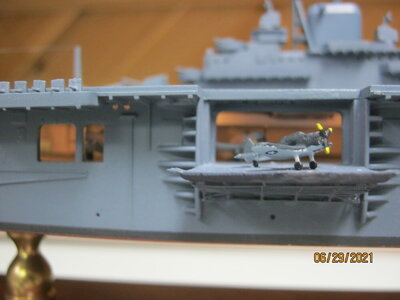
Nice carrier and fighter on the elevator. Which number/name is it? Having served in heavy attack reconnaissance squadrons deployed on the Independence, Saratoga, and Ranger I have a strong connection. Regarding deck material for the schooner, the Bluenose had white pine as was used on a number of other schooners of the era. Rich
 
All beams done, including Part #45 and the teeny filler/brace parts at the stern.

View attachment 241366

View attachment 241367

View attachment 241368

I cut a bunch of the cherry yesterday, sized to match the thickness of the decking sheet. Seem kinda flimsy to me so I may make some more 10/1000 of an inch thicker. These are .113 Wide X .045 thick. The width matches the sheet very well I think.

View attachment 241369

However, I'm not liking the grain too much. Gonna do some playing with some stains and some lemonwood and ramin wood strips I have. I'd like the color of the deck to be somewhat different from the framing and the hull planking. We'll see how it goes.
In the meantime, I'll work on the lighting as soon as it arrives, hopefully Thurs or Fri. Need to get that in there before I start to close things up any tighter than they are. Trying to decide placement for the bulbs and the running of the wires to be as inconspicuous as possible. And a method to run the main wire to the display base where the power connection and on/off switch will be. In the past, I've placed a brass tube somewhere, through the bottom into the base, with a routed out area for the battery case/switch/connections go to through holes in the edge of the base. The wire went through the tube from the model to the base.
View attachment 241370

You can see the tube, here painted mahogany, kinda like the Brazilian Cherry Base.

Here, lighted -

View attachment 241375

View attachment 241376

View attachment 241377

In the bottom of the base -

View attachment 241373

The whole thing, mounted on the base, enclosed in a custom plexiglass dust cover with a display base.

View attachment 241374

Some thinking to do while I wait. Thoughts anyone?
Very clean and accurate work Eugene! Two thumbs up!!!
 
Nice carrier and fighter on the elevator. Which number/name is it? Having served in heavy attack reconnaissance squadrons deployed on the Independence, Saratoga, and Ranger I have a strong connection. Regarding deck material for the schooner, the Bluenose had white pine as was used on a number of other schooners of the era. Rich
Thanks. That is an old (1960's) Hasegawa 1/700 scale kit, supposedly of ESSEX CV-9. Turns out, it's more of a generic ship of the class, as there were lots of corrections to be made. I wanted it accurately depicted as I could. Scratch built the hangar deck, opened lots of hangar bay roller doors as they were most often unless during North Atlantic or heavy weather, most all the gun placements and roller doors on the port side, etc. I served aboard her in the early 60's, albeit the modernized version with the angled deck. She was the most modern ASW fitted carrier in the fleet at that time. I also have a vintage ESSEX Revell kit, produced in the late 50's in box scale (1/540) depicted as the newly refitted ESSEX as ASW. Lots of corrections on that kit to be made also. I've been collecting aftermarket do-da's for that build for several years. Tough, because of the odd scale, but that was MY SHIP and I want to do her right. I built that kit as a 16 year old, never knowing at the time I would serve aboard her. That kit got lost in the years during my service and after.

Yes, I was thinking a lighter color wood for the deck, with little to no grain. Perhaps even doing a bit of wear/weathering on it in traffic patterns. Perhaps the lemonwood might suit with a touch of burnt umber stain. I might make some from a stick of clear sugar pine I have, just to see what it looks like.We'll see. Were the bluenose decks painted at all? I was also thinking of darkening the edges of the planks with black or very dark brown to represent caulking.

Mentioning the deck woods used, it seems most people think that aircraft carrier decks were all teak, but they were in reality, douglas fir. Battleships and some cruisers had teak, but the vast amounts used on a carrier, and the rate of wear and tear, made it to expensive and availability was short for carrier use. By the late 50's and 60's, most ships of the class, (Essex and Yorktown when I served) were a hybrid of wood deck, covered in high wear areas with steel plate, and everything painted with that very thick, rough non-skid stuff.
 
Thanks Dean, and thank you for all the work posting and advise given. This being my first POF build and larger than most of my builds, it has gone slower than expected. The larger scale than I'm used to encourages more and more scale scratch built detail work for sure.
Plus, I'm always thinking about the "stuff" on board. Not too clean, a little bit "messy" with things laying about, wear and tear, you know - real life stuff, that can be added to create realism, without making it look to junky. Even "spit and polish" naval ships have stuff and wear showing, for sure.
 
Back
Top