YUANQING BLUENOSE _ E J - Eugene Schmidt

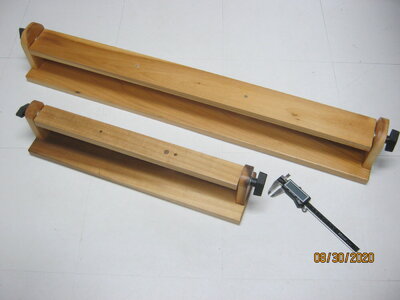
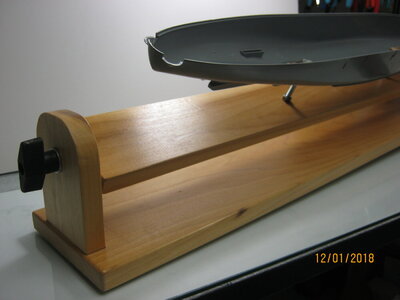
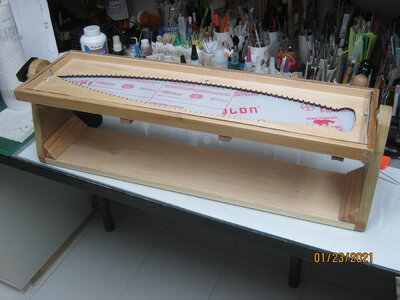
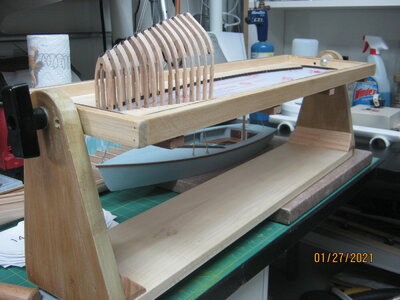
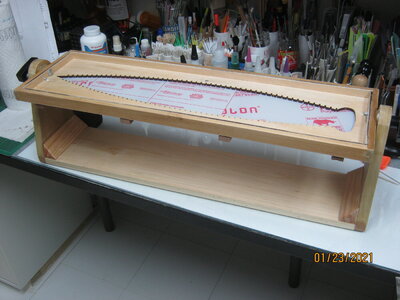
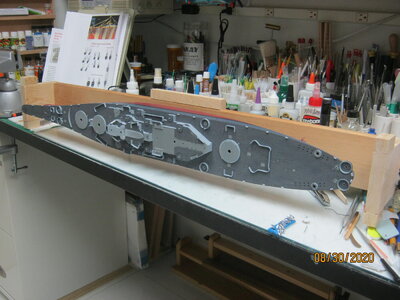
Started by building the jig. Mine did not lay flat. I weighted it down to a marble slab, then glued the edge parts on. After drying overnight it was better, but still not flat. one corner wanted to lift up about 1/8". I wanted to build a rotating jig anyway, so I weighted it down again, doubled up the edge parts with some heavier pieces, glued them on and dried overnight. Then I built the base and ends for the rotating part and assembled everything. After I was done, I transferred it to a 3/8" thick glass plate to check for flatness. Now, it's right on dead flat and the base sits flat too, with no wobble.
IMG_0240.JPG

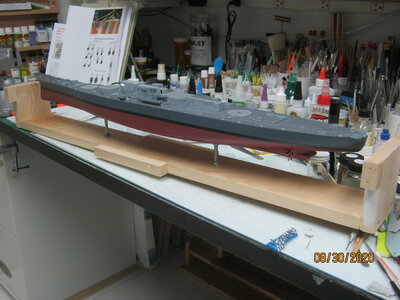
I have done this for plastic ship kits too. One for basic rough work that I can lay on it's side, and one for finishing work, in both 1/350 and 1/700.
IMG_0106.JPG

IMG_0108.JPG

IMG_0105.JPG

IMG_2795.JPG

Now, to get on with building all those frames and the keel.

EJ
 
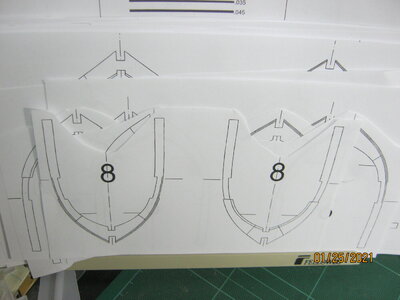
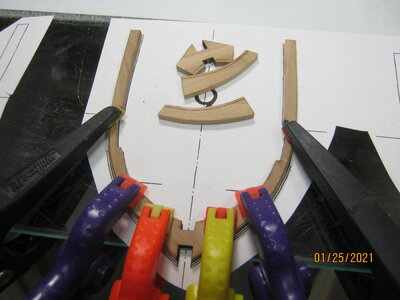
Got started. First, I copied all the frame templates. I wanted to keep the originals in pristine condition. A4 docs print fine on legal size paper, and my copy machine copies exactly the same size even using the multi document feeder. Hold the two sheets to the light and you can only see one drawing. Sweet! Then, I cut out each template into separate pairs to make it easier to use.

IMG_0242.JPG

Then, built up frames 1 thru 4. When starting frame 5, I decided to clean off the char. I don't know how much of that would show, but I want to put on an oil finish of some kind after it's assembled. Found out it's not so easy to clean up after it's put together.

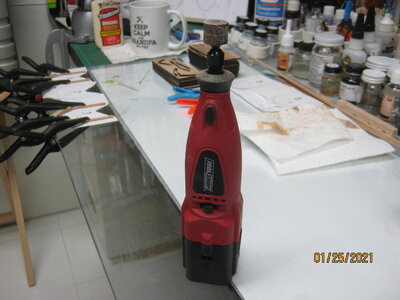
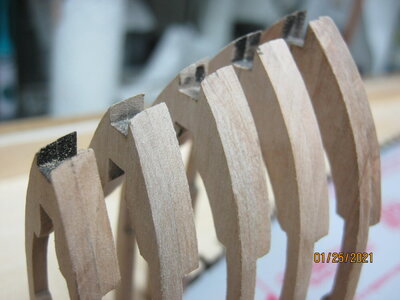
So, after assembling #5 and 6, while waiting for them to dry, I went back and cleaned up the first 4. At the same time, I faired in each one. I found using a power tool speeded things up a lot. This is a cheap tool, don't remember where I got it. It has two speeds. One slower than a Dremel, the other really slower than a Dremel. Perfect for a sanding drum. If you have a light touch (think hand engraving) it works really well. Also do the fairing in with it as well.

IMG_0245.JPG

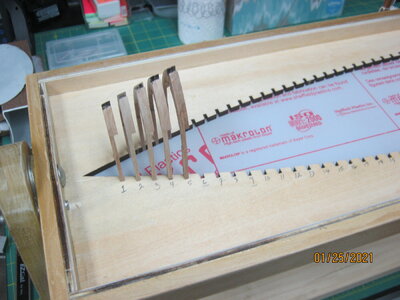
So, now clean up all the char except in the notches, then glue it up, (two steps), then fair in the frame to the marks. A touch of sandpaper to the top tails and they fit nicely into the jig.

IMG_0243.JPG

IMG_0241.JPG

Note the little spacer I made to align the bottom notch.

IMG_0244.JPG

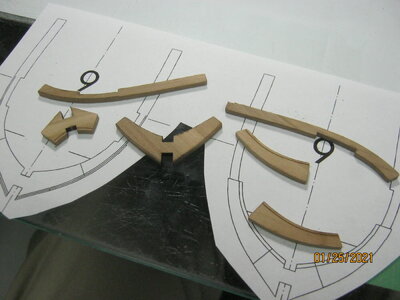
Frame 9 cleaned up.

IMG_0249.JPG

First glue up.

IMG_0250.JPG

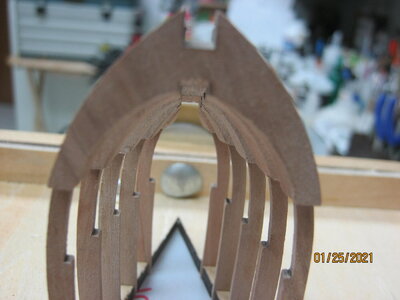
Faired in on the jig.

IMG_0246.JPG

And - inside.

IMG_0248.JPG

Now, the ball is rolling. Just keep at it, a few frames a day.

EJ
 
Hi EJ,
Nice to see your progress with the frames.
You dry-fit them also in the keel before installing in the jig?
Regards, Peter

I have not dry fitted or as yet fitted the frame notches to the keel. I have not glued the frames into the jig yet either. I think the most important fit is for the frame notch to keel join. If the frame has to be set slightly high or low in the frame jig, so be it, as the tops will all be cut off later anyway. I still need to build the keel. Then, make up a "fitting block" of the proper thickness to use as a test fit for each frame, sanding "if needed", the slots in the keel to fit the frame parts. I found the keel notch a bit tight

If I'm wrong about this? Comments?

Just because -
I was curious about the resizing of frame parts when sanding char off. I realize the outside fairing of the frame takes off most of the char anyway, but I'm cleaning mine up except for the notches.
So, I miked a frame (char side to char side) at the upper portion, about 1 1/2" below the top of the frame, then sanded off the char and miked again. The difference was roughly .004" or so, or .002" per side. Also, and I was really impressed with this observation. All laser cut wood, the cut has a taper to it. Very fine cut on the in cut side, but wider on the out cut or "blow out" side. The thicker the part, the more noticeable it can be. Take two strait pieces of the scrap from one of the frames and glue them together edge to edge. This can give you a "visual" of how the taper can affect the joint. These parts are very strait, with very small taper. I miked one of the frame parts, finding a difference in width of .0025" between the width of the two faces, or only .0012" of taper.
So, sanding the char can square up the part a bit, removing the slight taper, sanding the beveled faired in sections removes much more material anyway.
To keep all this in perspective, I miked one of my head hairs ( one of a diminishing number I might add ) and it was .0011".
So, relatively speaking, Sanding these parts carefully truly does change the size of a part by only "A HAIR". Nothing to be concerned about in my thinking.
Thanxs EJ for you extended answer. I agree with your thinking. Indeed, the fitting of the notch of the frames to the keel is most important. I was afraid you started glueing the frames to the jig before fitting to the keel.
I think the .004 / .002 / .0025 etc are in inches. I will convert them to mm to check ;).
Regards, Peter
 
I have not dry fitted or as yet fitted the frame notches to the keel. I have not glued the frames into the jig yet either. I think the most important fit is for the frame notch to keel join. If the frame has to be set slightly high or low in the frame jig, so be it, as the tops will all be cut off later anyway. I still need to build the keel. Then, make up a "fitting block" of the proper thickness to use as a test fit for each frame, sanding "if needed", the slots in the keel to fit the frame parts. I found the keel notch a bit tight

If I'm wrong about this? Comments?

Just because -
I was curious about the resizing of frame parts when sanding char off. I realize the outside fairing of the frame takes off most of the char anyway, but I'm cleaning mine up except for the notches.
So, I miked a frame (char side to char side) at the upper portion, about 1 1/2" below the top of the frame, then sanded off the char and miked again. The difference was roughly .004" or so, or .002" per side. Also, and I was really impressed with this observation. All laser cut wood, the cut has a taper to it. Very fine cut on the in cut side, but wider on the out cut or "blow out" side. The thicker the part, the more noticeable it can be. Take two strait pieces of the scrap from one of the frames and glue them together edge to edge. This can give you a "visual" of how the taper can affect the joint. These parts are very strait, with very small taper. I miked one of the frame parts, finding a difference in width of .0025" between the width of the two faces, or only .0012" of taper.
So, sanding the char can square up the part a bit, removing the slight taper, sanding the beveled faired in sections removes much more material anyway.
To keep all this in perspective, I miked one of my head hairs ( one of a diminishing number I might add ) and it was .0011".
So, relatively speaking, Sanding these parts carefully truly does change the size of a part by only "A HAIR". Nothing to be concerned about in my thinking.
I agree aligning the frames with the top of the jig is not the way to go!
I plan to set the keel with about 7 frames, maybe frames 1,10,20,30,40,50 and 55. That should average the fit across the keel. After that I’m flipping it over and setting all frames to the keel. They may stick up above or slightly below the top surface some. But as you mentioned, that’s not important because they get cut off! Otherwise any difference in the height of the frame from one side to the other will make the frame sit at an angle. In fact I may opt to only use about 4 frames and go from there. I’ll know more when I test fit.
I also like your rotisserie style jig. That’s what I had in mind. Good job on that! ;)
The jig, for the time being, has a piece of lexan sheet (I had it in the shop) fastened to the bottom of the jig to keep the frames from slipping to far into the jig. My idea was, to build all the frames, fit all the notches for the keel and the frame tips to the jig, and let them sit in the jig until all are done. Then, build the keel, double check the keel to frame notch fit on all. I can then place the keel, and fit the join appropriately, gluing them in place. Then flip the jig over, remove the plastic sheet and CA glue the frame tips to the jig, making it (hopefully) solid enough for some final fairing in. I can rotate the jig so it exposes the hull sides toward me when final fairing in and upside down again when placing the longitudinal frame braces.

Will post more pics on that as I progress.


IMG_0240.JPG

EJ
 
The jig, for the time being, has a piece of lexan sheet (I had it in the shop) fastened to the bottom of the jig to keep the frames from slipping to far into the jig. My idea was, to build all the frames, fit all the notches for the keel and the frame tips to the jig, and let them sit in the jig until all are done. Then, build the keel, double check the keel to frame notch fit on all. I can then place the keel, and fit the join appropriately, gluing them in place. Then flip the jig over, remove the plastic sheet and CA glue the frame tips to the jig, making it (hopefully) solid enough for some final fairing in. I can rotate the jig so it exposes the hull sides toward me when final fairing in and upside down again when placing the longitudinal frame braces.

Will post more pics on that as I progress.


View attachment 209044

EJ
I like what you have!
I was thinking last night.... after I build all frames and complete the keel, I am going to trace the profile of the keel onto a piece of wood. Then attach a few frames to the keel and jig. Then I will trace a profile to be cut out with my jig saw on my piece of support plywood, and after cutting the plywood I will screw the jig to it again so it will be open from the top. Then build the side pieces to establish a height, and finally cut the keel profile in a horizontal piece and adjust the height location such that when I rotate right side up, the keel will be supported from beneath with the horizontal piece with keel profile. That way when working inside on keelson and other framing, the keel will be supported underneath for nailing, etc. You could use a keel clamp, however I don't want to risk damaging the keel. Will be more work, but justified IMO. ;)
Great idea! Might prevent a disastrous event.

EJ
 
Had a busy day today, but got A bit more done.
A few more faired in and "jigged"

IMG_0251.JPG

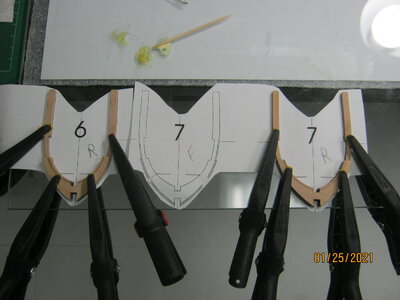
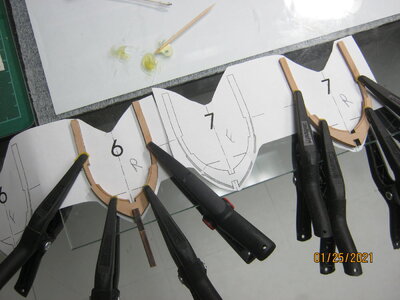
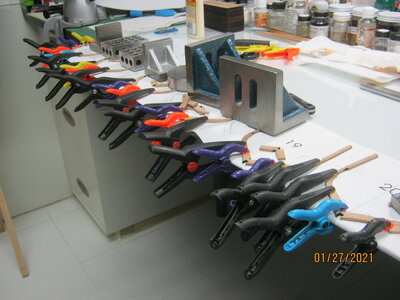
6 more in the "glue up" queue. That's all the longer needle nose clamps I have so I had to use some weights. The clamps are Wolfcraft brand, I thought I got them from Harbor Freight, but they don't have them anymore. The similar one's from Bessey are more expensive and the quality isn't any better. The four I bought - one had a tip missing and the shaft broke when I went to use it. I did find some that "look" like the wolfcraft ones on Amazon, branded Sears. I got a package of a dozen. We'll se what quality they are. The last Sears store in town just closed up last Sunday. I went on Friday and did get a great deal on socket to replace some missing and worn in my sets, like 80% off. That was about all the tools they had left.

IMG_0252.JPG

Won't get much done tomorrow. Got a 1 to 1 exterior door & frame replacement and install a storm door for an old customer of mine. Had 6" of snow yesterday, but most is cleaned up now. Supposed to have partly sunny and temps in the upper 20's tomorrow and Friday (if I need it, I hope not if things go well). Another snow coming this weekend, 6 to 8" they say. We'll see.

EJ
 
Last edited:
Had a busy day today, but got A bit more done.
A few more faired in and "jigged"

View attachment 209100

6 more in the "glue up" queue. That's all the longer needle nose clamps I have so I had to use some weights. The clamps are Wolfcraft brand, I thought I got them from Harbor Freight, but they don't have them anymore. The similar one's from Bessey are more expensive and the quality isn't any better. The four I bought - one had a tip missing and the shaft broke when I went to use it. I did find some that "look" like the wolfcraft ones on Amazon, branded Sears. I got a package of a dozen. We'll se what quality they are. The last Sears store in town just closed up last Sunday. I went on Friday and did get a great deal on socket to replace some missing and worn in my sets, like 80% off. That was about all the tools they had left.

View attachment 209101

Won't get much done tomorrow. Got a 1 to 1 exterior door & frame replacement and install a storm door for an old customer of mine. Had 6" of snow yesterday, but most is cleaned up now. Supposed to have partly sunny and temps in the upper 20's tomorrow and Friday (if I need it, I hope not if things go well). Another snow coming this weekend, 6 to 8" they say. We'll see.

EJ
Looking good, you're moving along at speed!
 
EJ, I GOT MINE FROM MENARDS $1.40 EA, JUST ORDERED 9 MORE THEY ARE WOOLCRAFT BRAND. GOD BLESS STAY SAFE ALL DON
Mine came today. They are EXACTLY the same as the wolfcraft, but without the wolfcraft name on them. They had a tag from sears. Got 12 of them for $28.00, $2.34 each. You got a deal. I checked at our Menards but they didn't have any.
 
Back
Top