YUANQING BLUENOSE _ E J - Eugene Schmidt

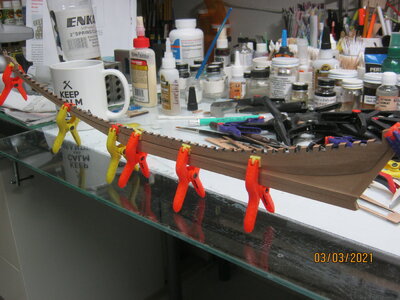
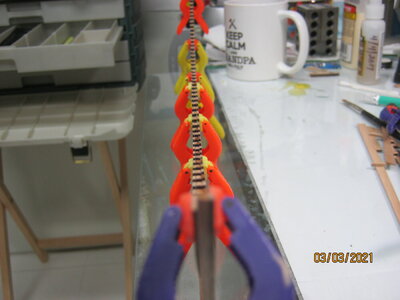
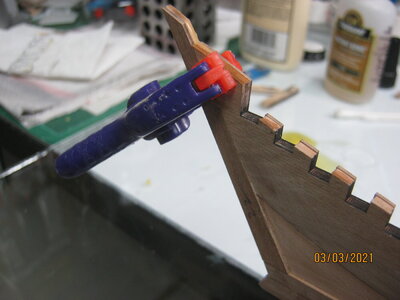
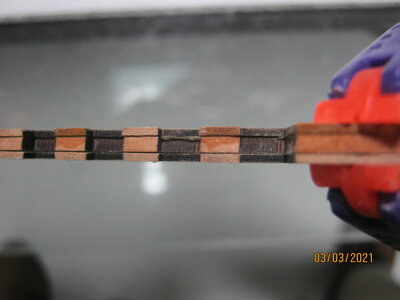
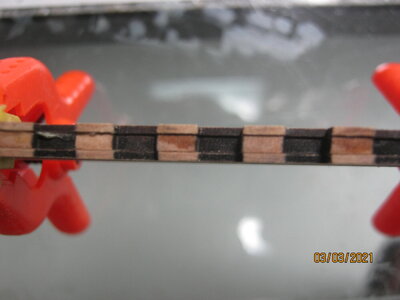
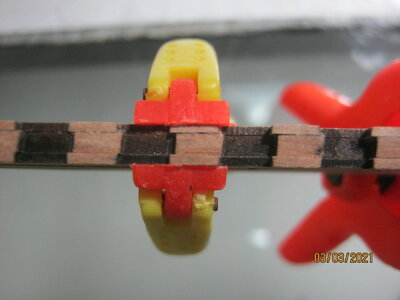
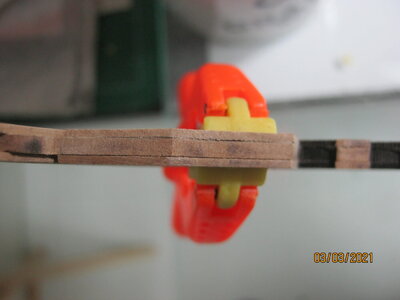
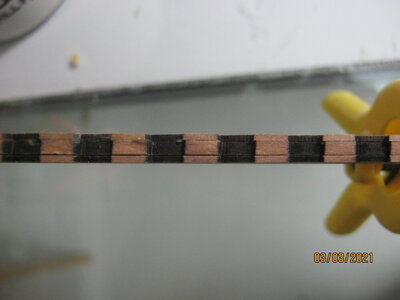
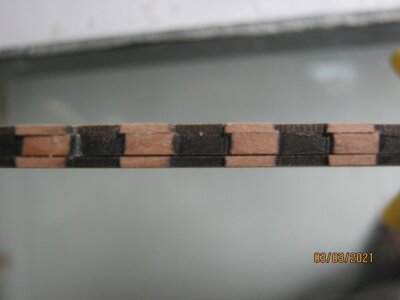
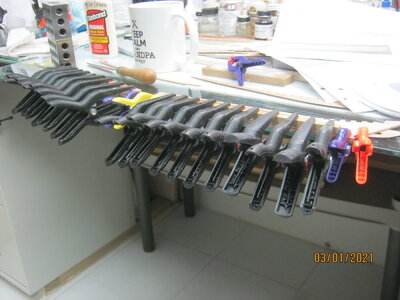
Working on the keel. The first " core " pieces went well. Then I did the lower " cheek " parts, letting them sit overnite. I am clamping them to a piece of 1/4" plate glass to keep them flat.

HOWEVER - when I took the assembly out of the clamps, the keel had a bow and a twist to it.

Has anyone had this happen?

I flipped the assembly, used some scrap from the cheek frets to keep the assembly flat when I clamped it, then glued up the cheeks on the other side.

This picture shows it clamping side two, but the clamping was the same as I used on side one.

I sure hope this thing stays flat with the second laminate on it.
IMG_0264.JPG
 
Hi EJ.

You certainly have enough clamps and have done everything you should have to secure a positive grip. I did not have any trouble with a warped keel - maybe some of the other builders can chip in?
 
Hi,
My keel has a very light twist. But between 2 fingers on each hand, it will be straight. When it goes into the jig with the frames, I don’t expert any problems.
My sugestion: wait for the result after the 2nd layer and have a look when you placed it on the frames in the jig. It may well be the 55 frames together keep everything straight.
Regards, Peter
 
Thanks. I'll finish the backbone of the keel with the parts 17 and 18 on both sides, allowing them to dry thoroughly and see what happens.

I was just a bit surprised at the deformation. Laying flat after gluing up the first side, there was a space under the bow end of about 3/8" and at the stern end of about 1/2", plus, a slight twist to the whole assembly. I'm using titebond glue. I've used this glue for 35 years for woodworking with no issues that I ever noticed.
What glues are you using?
Last days, I was also writing with Finn in his build-log about the glue.
I use a Dutch woodglue: Bison professional. It’s a cat. D2 for use inside.
For PVAC woodglue, we have D1, D2, D3 and D4.
From D1 for inside with a wood humidity less then 15% till D4 for outside with high humidity.
This glue reacts with the humidity in the wood.
Regards, Peter
 
The only thing I have noticed with Titebond is that when it dries it tends to do so with a "yellowish" colour which I don't like. I can't get it in China, but if I could - I would most certainly use the Bison D2. That is the boss of glues.
 
OK. I went ahead and glued up the other side of the keel parts, #20 and #21. Left them overnite. To my surprise, the keel was very flat with a teeny bow and no twist at all. I remember at the plant, they always used a backer sheet to balance laminated panels. Kept them flat. They did both sides at once though.


IMG_0265.JPG

IMG_0266.JPG

Then I glued on part #22, thinking it would help align part #18.

IMG_0275.JPG

However, when I matched part 17 to the upper part of the keel, a strange thing happened.
At the end of the part I lined it up as you can see. But as I attempted to line up the rest of the part, it gradually became offset with the notches in the keel. Nothing I did would change it.

So I just glued it on.

Then starting on the other end with part #18, the same thing happened, to a lesser degree, leaving a bit of a gap at the scarf joint in the middle.

The first three shots show part 17 at the tip, middle and scarf joint -

IMG_0267.JPG

IMG_0268.JPGIMG_0269.JPG

These three show part #18, same thing but not as bad and in reverse.

IMG_0270.JPG

IMG_0271.JPG

IMG_0272.JPG

I have just fiddled with the frame fit a bit, but it seems that the slots in the keel need to be filed to fit anyway, plus some of the frames notches need to be fitted as well. I still have to glue the other side of parts 17 and 18 to the keel yet. I had just clamped it on for the picture. Glued on or not, they both line up with each other, but not to the center of the keel. We'll see how it goes when I get to it.

A note about gluing - I'm using Titebond. Gluing thos long thin parts was a problem, as the glue seemed to dry before I could get things lined up and clamped properly. I had to go back and put a bit of super glue at many of the tops between the notches, as they had curled out from the moisture in the glue. Having 5 thumbs on each hand doesn't help any either.

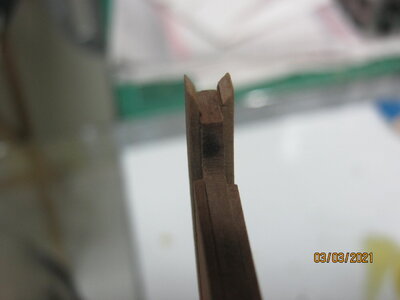
I think I got the point of part 17 angled correctly.

IMG_0274.JPG
 
Last edited:
A lot of work goes into filing the slots on the frames, and on the keel. No way around it, just a part of the build. You may have a little extra to file with your misalignment.
Also the top of the frames need to be sanded to fit in the jig. If the fit is too tight you will break frames, as they are weak in the upper thin section.
I figured as much. I fitted the frames to the jig as I stored each frame in it as they were built.

Just like building a house. Take a huge pile of lumber and cut each piece to fit, then nail it together. :)
 
Well done EJ! That is how the bow section should be bevelled. Thumbsup
 
Finally got taxes done, bookeeping caught up, etc.

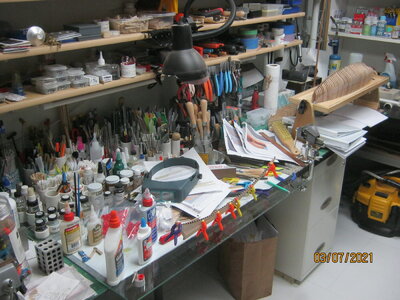
So, back to the bench for a bit. What a rat's nest. First had to organize stuff a bit. Also punched and put the instruction sheets in a binder.

IMG_0276.JPG

I went shopping on Friday. I've had some issues with titebond drying very fast, so doing the outer layers on the keel were quite a challenge. I had forgotten the glue - dry - heat method, so the little tabs all seemed to curl up. After the glue dried, I wound up squeezing each one with a parallel jaw pliers, then putting a bit of CA glue in the gap and clamping them down.
Worked OK but time consuming.

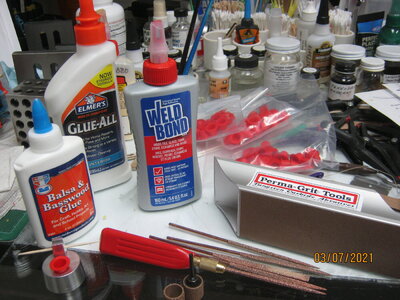
Anyway, some have spoken about Weld Bond glue, so off on a quest. Internet said Home Depot had it - wrong. All they had was Weld Bond contact cement. Then to Menards, wound up with Elmers Glue All. Then on to Hobby Lobby. Found Midwest balsa and basswood glue. In the craft department - VIOLA - Weld Bond. They all appear to be alphitic resin white glue, but as with other products, each brand has their own proprietary blend of ingredients and can work a bit differently.
So, I got all three to try out.

Also, got some carbide grit files. The one's pictured are "medium grit" but look kinda coarse. The finer ones are listed as "Extra Fine". I've got one old one like that I used to clean up hand cut dovetail work. Works great and leaves a smooth finish. They should arrive Monday or Tuesday. Nice thing about them is that when they get "loaded up", you can clean them by just burning the residue off with a Bic lighter. Note the aluminum block. It's also a carbide sander in the fine grit.

The two little drum sanders are also a metal drum with carbide grit. Those things last forever, not like the paper one's from Dremel.

IMG_0278.JPG

Tomorrow, start filing the slots in the keel and frames to fit. Then, install the frames to the keel.

Do you glue the frames to the keel first or to the jig first?
 
Finally got taxes done, bookeeping caught up, etc.

So, back to the bench for a bit. What a rat's nest. First had to organize stuff a bit. Also punched and put the instruction sheets in a binder.

View attachment 218774

I went shopping on Friday. I've had some issues with titebond drying very fast, so doing the outer layers on the keel were quite a challenge. I had forgotten the glue - dry - heat method, so the little tabs all seemed to curl up. After the glue dried, I wound up squeezing each one with a parallel jaw pliers, then putting a bit of CA glue in the gap and clamping them down.
Worked OK but time consuming.

Anyway, some have spoken about Weld Bond glue, so off on a quest. Internet said Home Depot had it - wrong. All they had was Weld Bond contact cement. Then to Menards, wound up with Elmers Glue All. Then on to Hobby Lobby. Found Midwest balsa and basswood glue. In the craft department - VIOLA - Weld Bond. They all appear to be alphitic resin white glue, but as with other products, each brand has their own proprietary blend of ingredients and can work a bit differently.
So, I got all three to try out.

Also, got some carbide grit files. The one's pictured are "medium grit" but look kinda coarse. The finer ones are listed as "Extra Fine". I've got one old one like that I used to clean up hand cut dovetail work. Works great and leaves a smooth finish. They should arrive Monday or Tuesday. Nice thing about them is that when they get "loaded up", you can clean them by just burning the residue off with a Bic lighter. Note the aluminum block. It's also a carbide sander in the fine grit.

The two little drum sanders are also a metal drum with carbide grit. Those things last forever, not like the paper one's from Dremel.

View attachment 218775

Tomorrow, start filing the slots in the keel and frames to fit. Then, install the frames to the keel.

Do you glue the frames to the keel first or to the jig first?
I glued frame 1 and 49 to the keel first. Then I glued them to the jig.
 
Don- c’mon man show us those custom handles.... I think I need some for my Swiss files.... plus I am thinking they have to be sweeeet!
 
Got all the frame to keel notches filed to fit on both the keel and the frames. Not a bad job, just repetitive.

Next I'll file to fit the frame notch on the inboard side of the frame for the inner keel parts. Need to find that part so I have a size to fit it to. I think it's #48, #49, #50. It looks like it would be very difficult to do after the frames are all glued to the outer keel.

Regarding the frames, there are one or two horizontal marks on each template (depending on the frame #). Is it a mark to line up the longitudinals on the inside of the hull? Should I mark the frames from the templates for a reference point?
Lower line in bow frames is for the lower beams on inside of the bow. Upper line is cut off line. Don’t really need to mark that because it’s basically 2mm below the upper part of the notch. In addition when you cut the jig off, you cut it 10mm above that line and file or sand flush upper part of ship after planking bulwarks. So I did not use the upper mark.
The deck beams are flush with the lower part of the notch, no line needed.
 
Back
Top