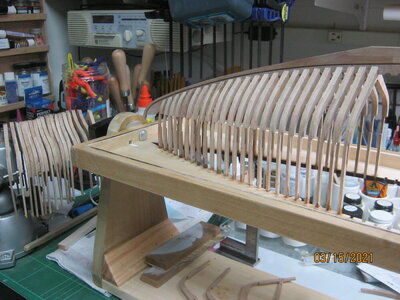
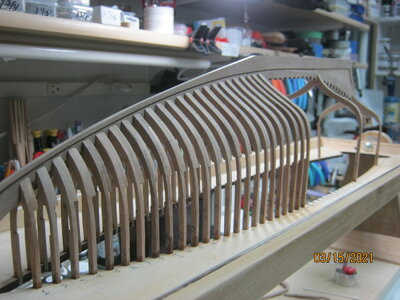
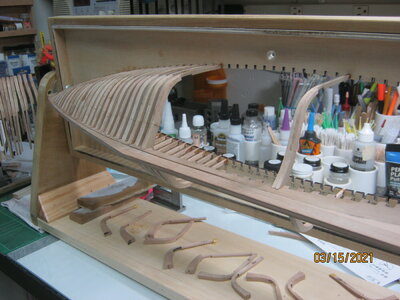
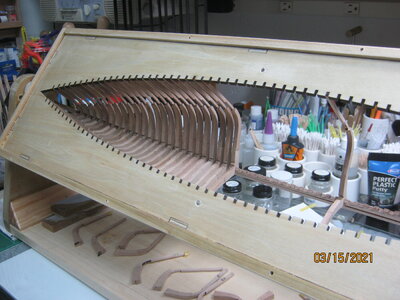
Thanks.Lower line in bow frames is for the lower beams on inside of the bow. Upper line is cut off line. Don’t really need to mark that because it’s basically 2mm below the upper part of the notch. In addition when you cut the jig off, you cut it 10mm above that line and file or sand flush upper part of ship after planking bulwarks. So I did not use the upper mark.
The deck beams are flush with the lower part of the notch, no line needed.
-

Win a Free Custom Engraved Brass Coin!!!
As a way to introduce our brass coins to the community, we will raffle off a free coin during the month of August. Follow link ABOVE for instructions for entering.
-

PRE-ORDER SHIPS IN SCALE TODAY!
The beloved Ships in Scale Magazine is back and charting a new course for 2026!
Discover new skills, new techniques, and new inspirations in every issue.
NOTE THAT OUR FIRST ISSUE WILL BE JAN/FEB 2026
- Home
- Forums
- Ships of Scale Group Builds and Projects
- Bluenose PoF Group Build
- Bluenose Group Build Logs
You are using an out of date browser. It may not display this or other websites correctly.
You should upgrade or use an alternative browser.
You should upgrade or use an alternative browser.
Got the bow end pieces glued in place,
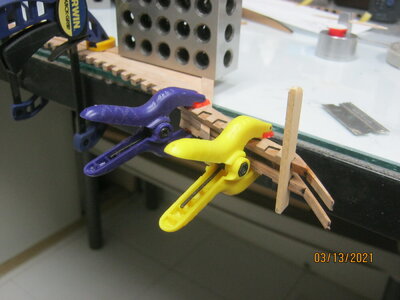
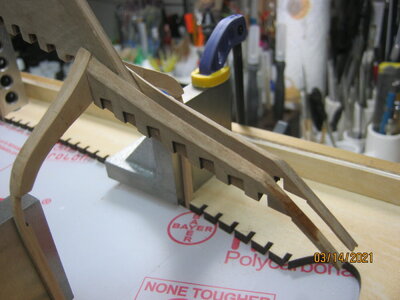
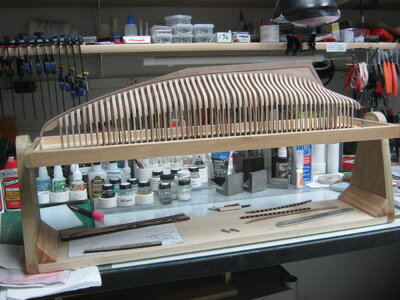
and set up 4 frames in the jig with the keel in them. Set square blocks in there to check for vertical positioning. Everything looks good to me so far.
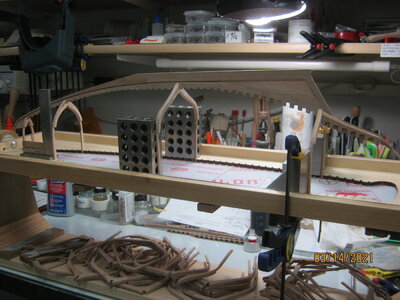
Will glue these in place at the keel and the jig, then remove the plate from the jig and start placing frames, bow to stern, using the rotating function.


and set up 4 frames in the jig with the keel in them. Set square blocks in there to check for vertical positioning. Everything looks good to me so far.

Will glue these in place at the keel and the jig, then remove the plate from the jig and start placing frames, bow to stern, using the rotating function.
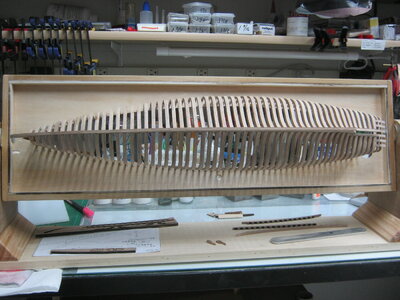
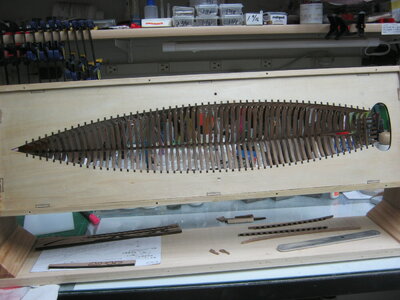
Looking great!Moving along. Everything seems to be falling in place. It has amazed me how rigid and strong this thing gets using those fragile frames.
View attachment 221095
View attachment 221096
View attachment 221097
View attachment 221098
Looking great!
Your rotating framing jig just caught my eye. That is a great idea with the flexibility and adaptability provided for your nicely progressing work. Rich (PT-2)Looking great!
Hi EJ,
The work is looking great with your rotating jig. A solid base!
Regards, Peter
The work is looking great with your rotating jig.
Regards, Peter
Full frames done. One looks like I beveled it backwards. I might have to make a "dutchman" to fill it in.
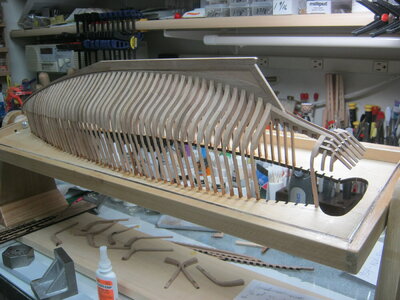
Next up, the stern frames. I think I made a mistake by gluing frame 56 in place. In the pic, 1/2 of frame 55 and parts 51, 52, 57 are not glued. I still need to fair them a bit first, but I'm finding it difficult to get the parts in place, especially both frames 55, because they kinda "hook" together and fit in the slots in the keel. Does it work better to glue them together and install them as an assembly.
I'll look at it again tomorrow.

I looked at doing it as an assembly, however it wasn’t any easier because you have to put in 4 small frames and at the same time align the longer frames. So I dry fit and adjusted all the pieces about 3 times until I could put it all together well dry fitting. Then I glued the 4 small frames vertical with the keel first and then quickly glued in the two wide frames that attach to the keel in order before the glue set up. Was tricky, but if you can get together quickly during a dry fit, you will be okay. Just adjust all notches to make sure everything goes together easy.Full frames done. One looks like I beveled it backwards. I might have to make a "dutchman" to fill it in.
View attachment 221258
Next up, the stern frames. I think I made a mistake by gluing frame 56 in place. In the pic, 1/2 of frame 55 and parts 51, 52, 57 are not glued. I still need to fair them a bit first, but I'm finding it difficult to get the parts in place, especially both frames 55, because they kinda "hook" together and fit in the slots in the keel. Does it work better to glue them together and install them as an assembly.
I'll look at it again tomorrow.
View attachment 221259
Thanks for the perspective. I've got some fitting to do and fairing shy of the etched lines, then a trial fit before gluing.I looked at doing it as an assembly, however it wasn’t any easier because you have to put in 4 small frames and at the same time align the longer frames. So I dry fit and adjusted all the pieces about 3 times until I could put it all together well dry fitting. Then I glued the 4 small frames vertical with the keel first and then quickly glued in the two wide frames that attach to the keel in order before the glue set up. Was tricky, but if you can get together quickly during a dry fit, you will be okay. Just adjust all notches to make sure everything goes together easy.
By the way, after I was done assembling the frames, I got a bottle of Weldbond. Seems to have a bit more "open" time and a bit thinner than Titebond, yet sets up fairly quickly. It doesn't "skin over" quite as fast. I'm liking the stuff and it has worked well fitting the frames to the keel. It is somewhat gap filling as well. I used CA glue where the frame tips meet the jig mainly because I could align the join at the keel using Weldbond, glue and zap the tips at the jig with insta set, aligning everything up before the Weldbond set up solid. Then move on to the next frame.
Today, tackle the stern. I peeked at Don's stern assembly too. I also broke one of the ends off one of the keel extensions, right where the thin end meets the wider section that glues to the main keel. (No vodka was used, but a Jack Daniel's single barrel shot helped). Was able to fix it though and SO FAR, have not broken it off again.
Yes I switched to Weldbond on my last build. I love working with it.Thanks for the perspective. I've got some fitting to do and fairing shy of the etched lines, then a trial fit before gluing.
By the way, after I was done assembling the frames, I got a bottle of Weldbond. Seems to have a bit more "open" time and a bit thinner than Titebond, yet sets up fairly quickly. It doesn't "skin over" quite as fast. I'm liking the stuff and it has worked well fitting the frames to the keel. It is somewhat gap filling as well. I used CA glue where the frame tips meet the jig mainly because I could align the join at the keel using Weldbond, glue and zap the tips at the jig with insta set, aligning everything up before the Weldbond set up solid. Then move on to the next frame.
Today, tackle the stern. I peeked at Don's stern assembly too. I also broke one of the ends off one of the keel extensions, right where the thin end meets the wider section that glues to the main keel. (No vodka was used, but a Jack Daniel's single barrel shot helped). Was able to fix it though and SO FAR, have not broken it off again.
Thank you.Those frames look immaculately clean and free from char! Way to go, EJ! I tried Titebond once and immediately relegated it to the realms of obscurity in a garbage can.
We've used Titebond for years in the shop, buying it in 5 gallon containers. Works great for cabinet making and trim and stair work. Just not as good for modeling as Weldbond.
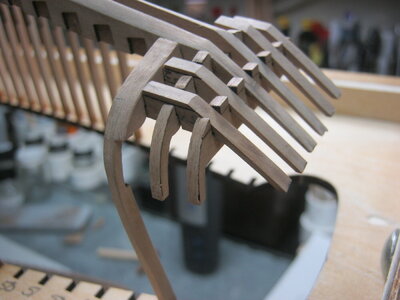
Well, This was a tiring day. Got the stern done. Boy what a fiddly assembly that was. Then finished all the half frames.
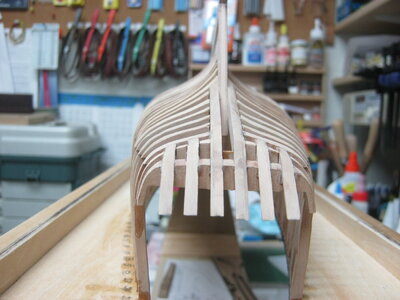
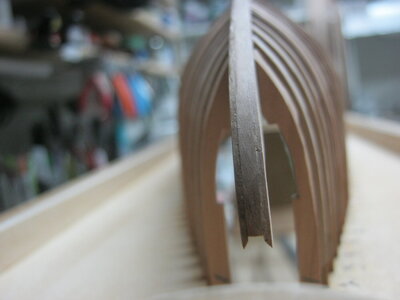
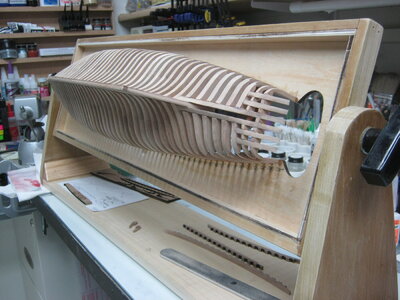
Those two outer parts on the stern, boy, there isn't much holding them on. Hope I don't knock them off too may times. You can see the one I broke, first one left of center in this pic. I don't think this will show later though.
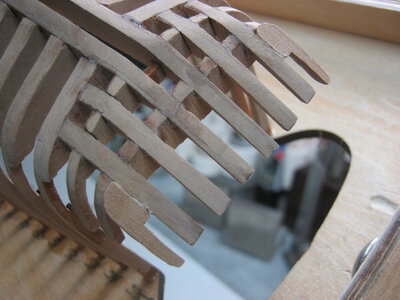
Next up I guess is the blocking for the bow. Lots of pieces and char to clean up there.


Those two outer parts on the stern, boy, there isn't much holding them on. Hope I don't knock them off too may times. You can see the one I broke, first one left of center in this pic. I don't think this will show later though.

Next up I guess is the blocking for the bow. Lots of pieces and char to clean up there.
Looking great!Well, This was a tiring day. Got the stern done. Boy what a fiddly assembly that was. Then finished all the half frames.
View attachment 221489
View attachment 221490
View attachment 221491
View attachment 221492
View attachment 221493
View attachment 221494
Those two outer parts on the stern, boy, there isn't much holding them on. Hope I don't knock them off too may times. You can see the one I broke, first one left of center in this pic. I don't think this will show later though.
View attachment 221495
Next up I guess is the blocking for the bow. Lots of pieces and char to clean up there.
It looks like you are doing well on this fragile framing. It should be greatly strengthened with the interior framing and decking as well I would think with the exterior hull planking securing all of those thin "floating" pieces. This reminds me of a monocoque (or however it is spelled) where the body holds everything together. I wonder if a few temporary battens with an easily removed by moisture glue would secure the projecting transom framing pieces until they are actually planked? I don't know as I am a pier watchman only with the group. RichLooking great!
Can you jump ahead and now place the planking on the transom? RichI was thinking about a "brace" of some sort too. My luck, the brace would allow me to break them all off simultaneously.
There are small gussets added in another step (see fig 13), you can add them now.
Last edited:


