YUANQING BLUENOSE - Peter Voogt [COMPLETED BUILD]

One of the best thing seen in ship model crafting. Even the renown Granado at NMM can't come back into original position. Congrats, really impressive.
 
One of the best thing seen in ship model crafting. Even the renown Granado at NMM can't come back into original position. Congrats, really impressive.
Thanks for these nice words and compliments, Albert.
Perhaps the conservator of the NMM will read this and soon shows that their Granado is also a ‘Pull-Apart’ and ‘Push-Together’ model. ;)
Regards, Peter
 
Thanks for these nice words and compliments, Albert.
Perhaps the conservator of the NMM will read this and soon shows that their Granado is also a ‘Pull-Apart’ and ‘Push-Together’ model. ;)
Regards, Peter
Poor dears... I hope they never ever watch your post... ;-)
 
Finally able to do something about the display case again.
Saw the bottom plate of 8 mm thickness and the inner plate of 6 mm thickness to size.

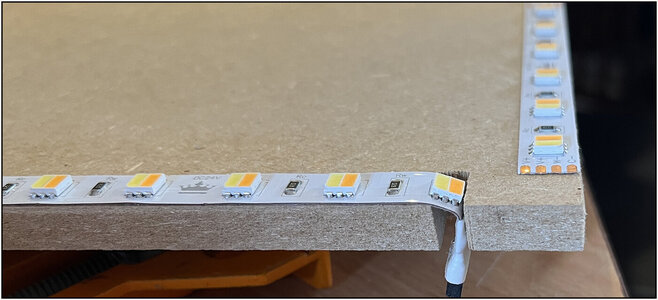
Degreased the edges of the inner plate and glued the LED strips along the edge:
09 Onderplaat.jpg
The strips are provided with double-sided tape, so you only have to remove the cover strip.

At the left a recess has been made for the connection of the battery from below:
10 Uitsparing.jpg
Then I can also have the outside profile tightly connected to the plate.

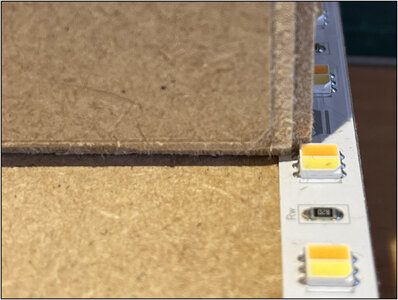
Saw 2 recesses on the edges of the inner plate so that the plate partly falls over the LED strip:
11 Uitsparingen.jpg
I will have to get a 3.5 mm slot on the LEDs to allow the glass to collapse.

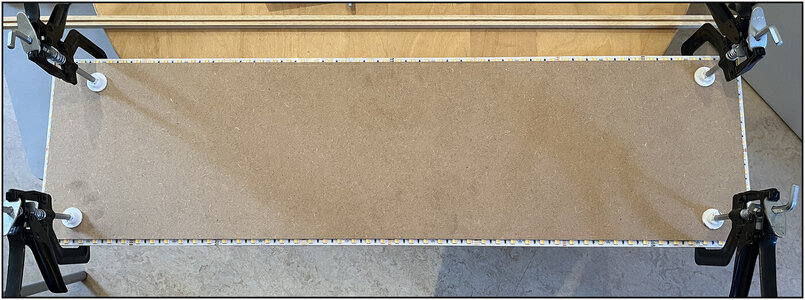
The inner plate is temporarily fixed to the bottom plate to mark the recesses for the glazing bars:
12 Binnenplaat.jpg
The inner plate is 7 mm narrower on all sides than the bottom plate. Why........ that will become clear later.

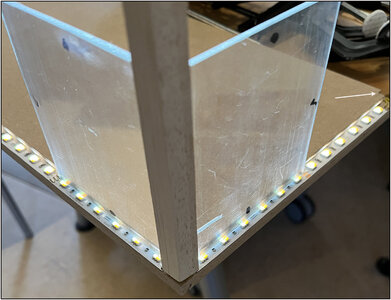
Then the glass bar connects to the outside of the bottom plate:
13 Hoekjes.jpg
Right at the arrow 1 of the cut-out corners.

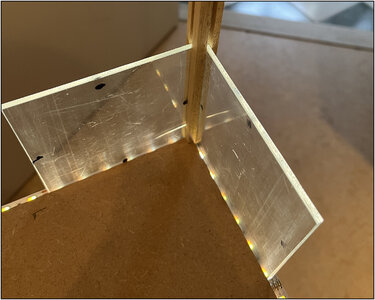
The glass then connects to the inside of the inner plate:
14 Hoekjes.jpg
The inner corner of the glazing bar therefore falls slightly within the inner plate.
Now you can also see why I provide the display case with glass. Through the shaving light from below, you will soon see everything in terms of scratches, dust, greasy fingers, etc.

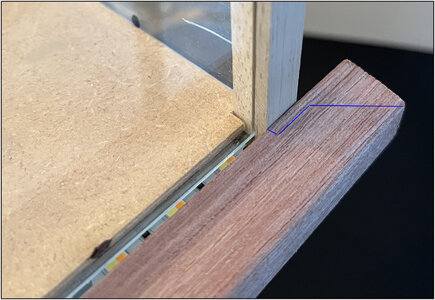
Also bought a corner profile that comes around the bottom plate on the outside:
15 Profiel.jpg
I now have to saw it all around so that it falls party over the LED’s and 3.5 mm in between the glazing bars. And on the corners of the glass slats in miter. See the blue lines.
In the end I get that a 3.5 mm slot for the glass.
The inner and bottom plate are together 14 mm thick. This profile is 17 mm high. Which will soon be slightly higher above the inner plate. The inside will be white, so that it will hopefully reflect a little more light at an angle.

I make the slot for the glasses 3,5 mm. The glass will be 3 mm thick. Then I have some room for the glass in the slot, because the intention is that I can remove the glass with the glazing bars from the bottom plate. Because I have to be able to secure the Bluenose with the top on the 4 brass uprights for transport. Because in the car with all lateral forces while driving, it cannot cope in its 'Pull-Apart' construction. And putting her together and taking her apart every time is also not an option.

I will continue with sawing corners and mitres.
Regards, Peter
 
Last edited:
Finally able to do something about the display case again.
Saw the bottom plate of 8 mm thickness and the inner plate of 6 mm thickness to size.

Degreased the edges of the inner plate and glued the LED strips along the edge:
View attachment 375587
The strips are provided with double-sided tape, so you only have to remove the cover strip.

At the left a recess has been made for the connection of the battery from below:
View attachment 375588
Then I can also have the outside profile tightly connected to the plate.

Saw 2 recesses on the edges of the inner plate so that the plate partly falls over the LED strip:
View attachment 375589
I will have to get a 3.5 mm slot on the LEDs to allow the glass to collapse.

The inner plate is temporarily fixed to the bottom plate to mark the recesses for the glazing bars:
View attachment 375590
The inner plate is 7 mm narrower on all sides than the bottom plate. Why........ that will become clear later.

Then the glass bar connects to the outside of the bottom plate:
View attachment 375591
Right at the arrow 1 of the cut-out corners.

The glass then connects to the inside of the inner plate:
View attachment 375592
The inner corner of the glazing bar therefore falls slightly within the inner plate.
Now you can also see why I provide the display case with glass. Through the shaving light from below, you will soon see everything in terms of scratches, dust, greasy fingers, etc.

Also bought a corner profile that comes around the bottom plate on the outside:
View attachment 375593
I now have to saw it all around so that it falls party over the LED’s and 3.5 mm in between the glazing bars. And on the corners of the glass slats in miter. See the blue lines.
In the end I get that a 3.5 mm slot for the glass.
The inner and bottom plate are together 14 mm thick. This profile is 17 mm high. Which will soon be slightly higher above the inner plate. The inside will be white, so that it will hopefully reflect a little more light at an angle.

I make the slot for the glasses 3,5 mm. The glass will be 3 mm thick. Then I have some room for the glass in the slot, because the intention is that I can remove the glass with the glazing bars from the bottom plate. Because I have to be able to secure the Bluenose with the top on the 4 brass uprights for transport. Because in the car with all lateral forces while driving, it cannot cope in its 'Pull-Apart' construction. And putting her together and taking her apart every time is also not an option.

I will continue with sawing corners and mitres.
Regards, Peter

As of yet I'm not sure I completely understand where you're heading, so I'll keep my big trap shut... ;-)


Did you also run a weight analysis on the 3mm glass panes? Quick and dirty, I guess you could be talking about roughly 15kg of glass panels.
 
As of yet I'm not sure I completely understand where you're heading, so I'll keep my big trap shut... ;-)
As long as it is almost clear in my head, you’ll have to wait ………… ;)
Did you also run a weight analysis on the 3mm glass panes? Quick and dirty, I guess you could be talking about roughly 15kg of glass panels.
No, I have not calculated the weigh of the glass, but will do that as soon as I know the exact sizes.

PS some later, because you triggered me ……. :)
Quick estimate: 1.56 m2. (20x70x80)
The site www.glas.nl indicates: 2500gr x mm x m2.
With their weight calculater: 11.7 kg. Should be able to with a little muscle power.
Regards, Peter
 
Last edited:
As long as it is almost clear in my head, you’ll have to wait ………… ;)
I'm a patient man... sometimes.
No, I have not calculated the weigh of the glass, but will do that as soon as I know the exact sizes.

PS some later, because you triggered me ……. :)
Quick estimate: 1.56 m2. (20x70x80)
The site www.glas.nl indicates: 2500gr x mm x m2.
With their weight calculater: 11.7 kg. Should be able to with a little muscle power.
Regards, Peter
Would be about right. Didn't have the dimensions, so I was somewhat conservative in my assumptions.
 
First, I need to comment on the series of photographs of the finished Bluenose = Simply Stupendous! Beeter, I have not seen - case closed. And talking about closed cases; I have no doubt that the display case will be worthy of Bluenose - "Enuff" said.
 
First, I need to comment on the series of photographs of the finished Bluenose = Simply Stupendous! Beeter, I have not seen - case closed. And talking about closed cases; I have no doubt that the display case will be worthy of Bluenose - "Enuff" said.
Thanks for the compliments and nice words, Heinrich.
Regard, Peter
 
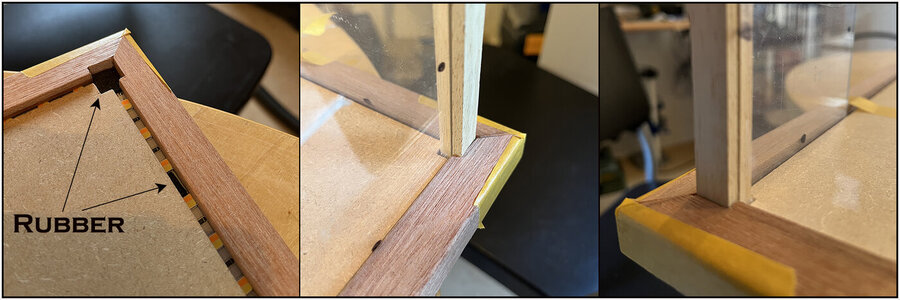
After fitting and measuring the 4 side profiles, sawn:
16 Profiel.jpg
I think the photos with the cut-outs and the miter speak for themselves.
Cut square pieces of rubber in the corners that I glued to the corner wires of the LED strip so that the glazing bars rest on them.
Glued into the rebate on regular distances pieces of rubber so that the glass rests on it later and not on the LEDs.

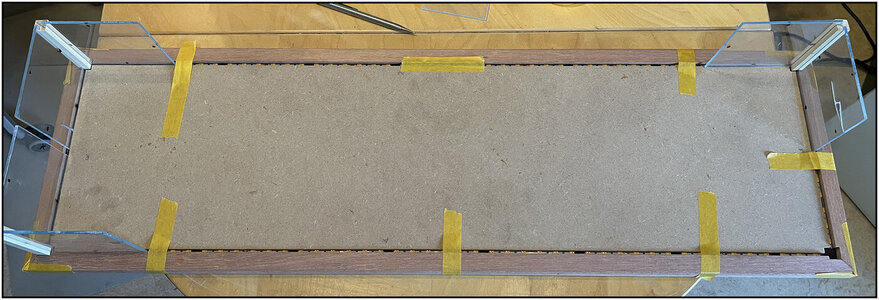
As they sit around the bottom shelf:
17 Profiel.jpg

Now first coat the inner edges with a coat of paint.
Score nails of the correct length to secure the profiles properly later.
And I can start customizing the glazing bars.
Regards, Peter
 
After fitting and measuring the 4 side profiles, sawn:
View attachment 377121
I think the photos with the cut-outs and the miter speak for themselves.
Cut square pieces of rubber in the corners that I glued to the corner wires of the LED strip so that the glazing bars rest on them.
Glued into the rebate on regular distances pieces of rubber so that the glass rests on it later and not on the LEDs.

As they sit around the bottom shelf:
View attachment 377122

Now first coat the inner edges with a coat of paint.
Score nails of the correct length to secure the profiles properly later.
And I can start customizing the glazing bars.
Regards, Peter
Looks to me a very well thought out process for innovative lighting.
 
After fitting and measuring the 4 side profiles, sawn:
View attachment 377121
I think the photos with the cut-outs and the miter speak for themselves.
Cut square pieces of rubber in the corners that I glued to the corner wires of the LED strip so that the glazing bars rest on them.
Glued into the rebate on regular distances pieces of rubber so that the glass rests on it later and not on the LEDs.

As they sit around the bottom shelf:
View attachment 377122

Now first coat the inner edges with a coat of paint.
Score nails of the correct length to secure the profiles properly later.
And I can start customizing the glazing bars.
Regards, Peter
Not surprisingly as well planned and build as the model this casing will be sheltering...
 
Back
Top