-

Win a Free Custom Engraved Brass Coin!!!
As a way to introduce our brass coins to the community, we will raffle off a free coin during the month of August. Follow link ABOVE for instructions for entering.
-

PRE-ORDER SHIPS IN SCALE TODAY!
The beloved Ships in Scale Magazine is back and charting a new course for 2026!
Discover new skills, new techniques, and new inspirations in every issue.
NOTE THAT OUR FIRST ISSUE WILL BE JAN/FEB 2026
- Home
- Forums
- Ships of Scale Group Builds and Projects
- Bluenose PoF Group Build
- Bluenose Group Build Logs
You are using an out of date browser. It may not display this or other websites correctly.
You should upgrade or use an alternative browser.
You should upgrade or use an alternative browser.
YUANQING BLUENOSE - Peter Voogt [COMPLETED BUILD]
- Thread starter Peter Voogt
- Start date
- Watchers 74
Thanxs Heinrich.It's always good if one can utilize prior experience in another build. I will follow with big interest.
The older you are, the more experience you have.
The older you are, the more you can forget.
Regards, Peter
Sorry to be pedantic - but how do you cut the notches in the beam? Are you using a mill?However, just reversed:
View attachment 263595
You can see a little more on the photo. Shorten the top bar slightly on the right so the whole still slides a little to starboard.
Regards, Peter
Paul, you can ask me (almost) anything .....
The 2 notches in the deck beam are pre drilled by YQ.
The crossbars that have to go in there are a bit wider on the heads. Then use in the drill column and cross table to further mill them to size. Then fine-tuning the right angles with the scalpels.
Regards, Peter
The 2 notches in the deck beam are pre drilled by YQ.
The crossbars that have to go in there are a bit wider on the heads. Then use in the drill column and cross table to further mill them to size. Then fine-tuning the right angles with the scalpels.
Regards, Peter
Looking great! Bring on the ice!Just finished the frame:
View attachment 263682
..... the yard was visited by the Labor Inspectorate. The passage had to have a full floor first. Otherwise, construction would be halted.
So do that first:
View attachment 263683
Then I can now continue with the wall covering.
Regards, Peter
Inspiring work at scale.
That's ordered. Dean! Did they ask what kind?Looking great! Bring on the ice!
Vanilla, Stracciatella......?
No, what size and frozen temperature.
OK. It is available on demand.
Regards, Peter
Thanxs Paul.Inspiring work at scale.
I could make some extra progress this afternoon. You have the scoop! The planking. The right nibbling side must still neatly finished:
And with the nails:
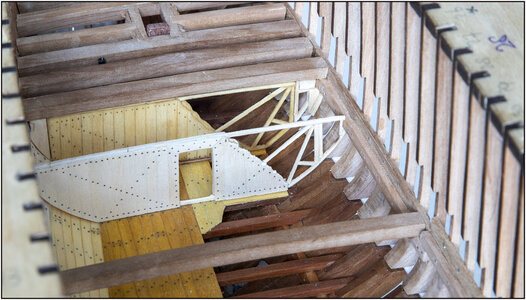
and then the next stages:
-sanding;
-cutting both 'ears';
-glueing the 'ears'
-gluing the wall;
-skirting boards along the floor and wall;
-construction of the planking for storing the ice;
-oiling.
(And I now see I forgot 1 row of nails.)
Regards, Peter
The IceHold is ready and the ice is immediately delivered:
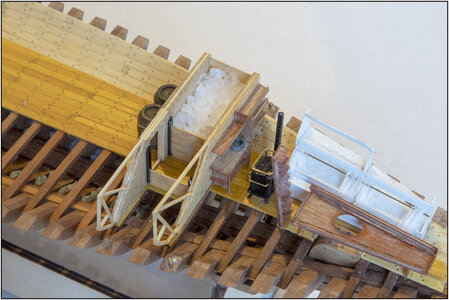
The storage of the ice can be adjusted to the amount that is left. Shelves can be removed that slide between the guides.
On the side of the FishHold there is a storage on the wall for the shelves that are not used:
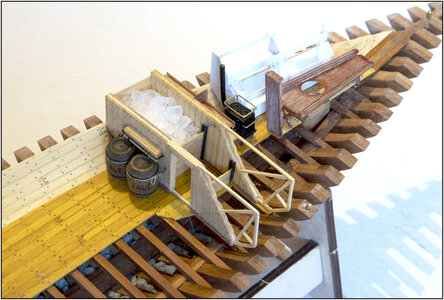
The ice consists of large chunks, because they hold the cold longer. If it is used to preserve the fish, it is chopped smaller.
The Bluenose mainly fished for cod. Salt was used for conservation for certain by-catches.
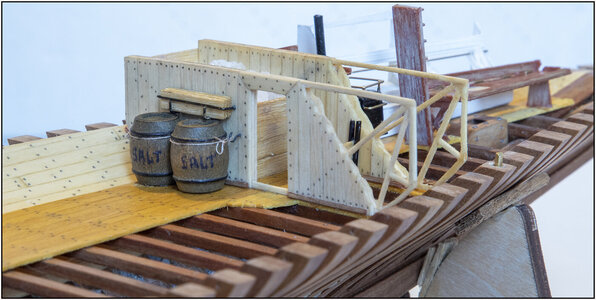
2 barrels of salt are attached to the wall with a rope on hooks.
And the test: sliding the two parts together again succeeded!
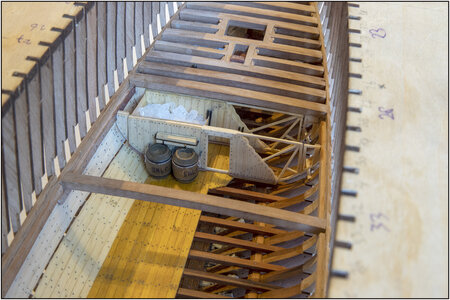
The two parts on top of each other. The left 'ear' was slightly bent. That is now back in line.
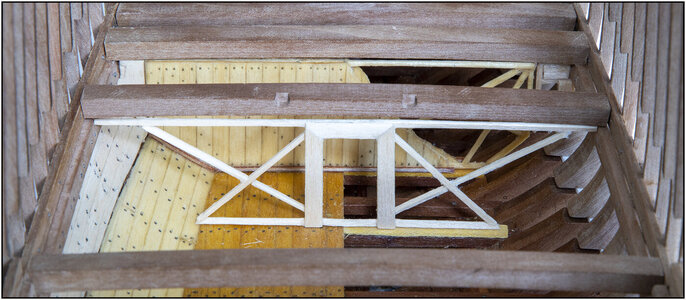
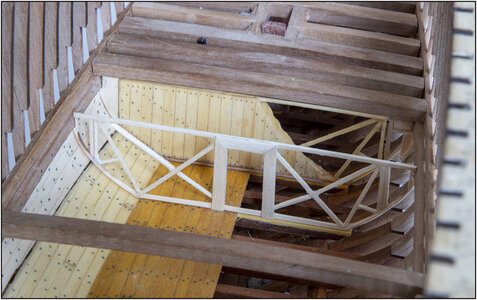
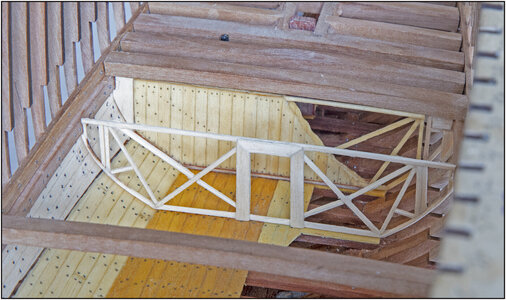
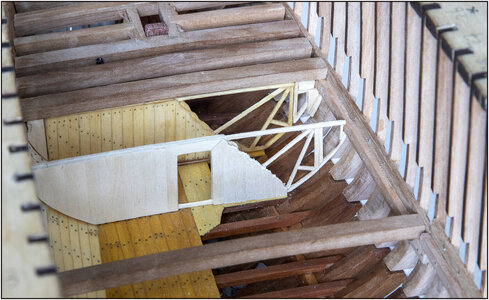
I can't place the deck beams yet. On the beam that will be placed on the wall, I first have to fit 2 cross beams. They will carry an hatch for the access to the Fishhold and IceHold.
When the 1st and 2nd layer of oil is well absorbed and dry, a 3rd layer is added.
Regards, Peter

The storage of the ice can be adjusted to the amount that is left. Shelves can be removed that slide between the guides.
On the side of the FishHold there is a storage on the wall for the shelves that are not used:

The ice consists of large chunks, because they hold the cold longer. If it is used to preserve the fish, it is chopped smaller.
The Bluenose mainly fished for cod. Salt was used for conservation for certain by-catches.

2 barrels of salt are attached to the wall with a rope on hooks.
And the test: sliding the two parts together again succeeded!

The two parts on top of each other. The left 'ear' was slightly bent. That is now back in line.
I can't place the deck beams yet. On the beam that will be placed on the wall, I first have to fit 2 cross beams. They will carry an hatch for the access to the Fishhold and IceHold.
When the 1st and 2nd layer of oil is well absorbed and dry, a 3rd layer is added.
Regards, Peter
Last edited:
I love, love, love this presentation! Simply exquisite Peter.
Thanxs Paul. This afternoon I realized I still had barrels in stock. So more or less ad-hoc adjustments.I love, love, love this presentation! Simply exquisite Peter.
Regards, Peter
This is awesome Peter! I really like what you are doing!The IceHold is ready and the ice is immediately delivered:
View attachment 263914
The storage of the ice can be adjusted to the amount that is left. Shelves can be removed that slide between the guides.
On the side of the FishHold there is a storage on the wall for the shelves that are not used:
View attachment 263915
The ice consists of large chunks, because they hold the cold longer. If it is used to preserve the fish, it is chopped smaller.
The Bluenose mainly fished for cod. Salt was used for conservation for certain by-catches.
View attachment 263916
2 barrels of salt are attached to the wall with a rope on hooks.
And the test: sliding the two parts together again succeeded!
View attachment 263917
The two parts on top of each other. The left 'ear' was slightly bent. That is now back in line.
I can't place the deck beams yet. On the beam that will be placed on the wall, I first have to fit 2 cross beams. They will carry an hatch for the access to the Fishhold and IceHold.
When the 1st and 2nd layer of oil is well absorbed and dry, a 3rd layer is added.
Regards, Peter
- Joined
- Jan 9, 2020
- Messages
- 10,566
- Points
- 938

Amazingly detailed work. If I read all the contemplation that is currently going on with another kit that was designed with the possibility of a split hull, and one takes into account that this was never the case with this kit, then your work takes on another dimension, Peter!
Agreed! Peter has not let innovation intimidate him one bit! But that’s what confidence does for you! No such thing as can’t be done!Amazingly detailed work. If I read all the contemplation that is currently going on with another kit that was designed with the possibility of a split hull, and one takes into account that this was never the case with this kit, then your work takes on another dimension, Peter!
Thanxs Heinrich.Amazingly detailed work. If I read all the contemplation that is currently going on with another kit that was designed with the possibility of a split hull, and one takes into account that this was never the case with this kit, then your work takes on another dimension, Peter!
In the beginning, of course, I also had my doubts about whether this would all work out. It was, more or less a gamble. But now that I have 2 walls I can also pay more attention to the details.
Of course I follow the construction of CAF's Granado with great interest.
Regards, Peter
Last edited:
Hi Dean. We are both in the stage of building walls.This is awesome Peter! I really like what you are doing!
Thanxs for this statement.Agreed! Peter has not let innovation intimidate him one bit! But that’s what confidence does for you! No such thing as can’t be done!
I more or less got it from my father: can not ...... doesn't exist. You're going to try anyway.
And: If you don't feel like it, just make some ‘like it’.
Regards, Peter
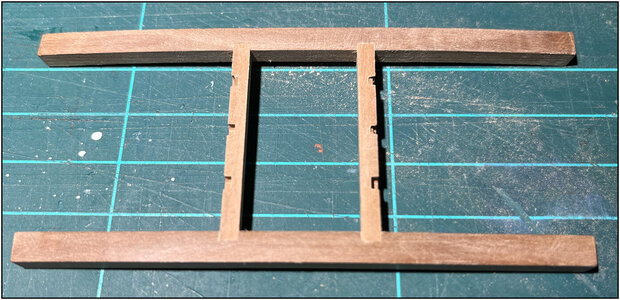
I am now working on the beam frame with the recess for a hatch. It might be interesting what I use to get a flat right-angle base. I like to show it and who knows it might help someone.
I use this metal 'corner clamp' for that:
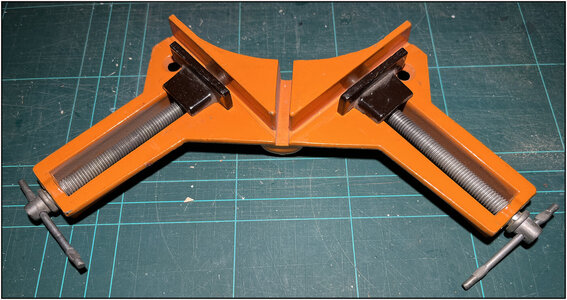
Normally you use it to clamp right-angled connections:
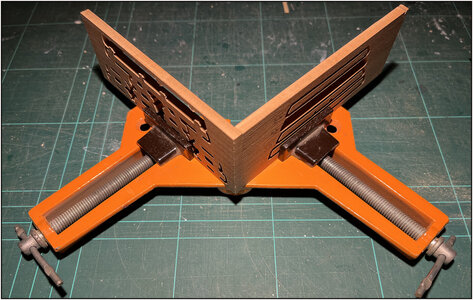
2x90 degrees or 2x45 degrees.
I first make the 4 noses of the short beams and the 4 recesses in the long beams to size so that they fit neatly. I do that partly with the router and to stay straight and flat and I finish the corners in particular with the pointed scalpel. So that I get sharp right angles.
Then I clamp it first as a test in the 'corner clamp' to see if everything fits.
Then the four joints in the glue and in the clamp with a starting pressure:
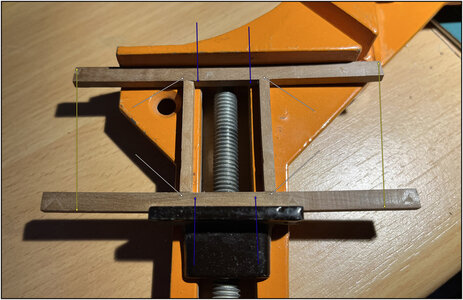
With the following actions:
-I press the 4 corners flat on the metal (white arrows) so that the connections are pressed flat on and into each other;
-I check whether they are perpendicular to the longitudinal recess along the spindle (blue arrows). This can be done by tilting the shadows or the clamp in different directions. If it is off the hook, then some gentle taps against one of the ends to get it square;
- some extra pressure to squeeze the connections together;
-measure the distance between both ends as a last check (yellow arrows).
The result gives, if the preliminary work is done well, 4 nice connections:
Of course you can still check it on the lines of your cutting mat or other angled items (such as Lego blocks).
Then this is a good basis for customizing the other crossbars.
Regards, Peter
I use this metal 'corner clamp' for that:

Normally you use it to clamp right-angled connections:

2x90 degrees or 2x45 degrees.
I first make the 4 noses of the short beams and the 4 recesses in the long beams to size so that they fit neatly. I do that partly with the router and to stay straight and flat and I finish the corners in particular with the pointed scalpel. So that I get sharp right angles.
Then I clamp it first as a test in the 'corner clamp' to see if everything fits.
Then the four joints in the glue and in the clamp with a starting pressure:

With the following actions:
-I press the 4 corners flat on the metal (white arrows) so that the connections are pressed flat on and into each other;
-I check whether they are perpendicular to the longitudinal recess along the spindle (blue arrows). This can be done by tilting the shadows or the clamp in different directions. If it is off the hook, then some gentle taps against one of the ends to get it square;
- some extra pressure to squeeze the connections together;
-measure the distance between both ends as a last check (yellow arrows).
The result gives, if the preliminary work is done well, 4 nice connections:

Of course you can still check it on the lines of your cutting mat or other angled items (such as Lego blocks).
Then this is a good basis for customizing the other crossbars.
Regards, Peter
Nice fit, tight joints! That’s the ticket!I am now working on the beam frame with the recess for a hatch. It might be interesting what I use to get a flat right-angle base. I like to show it and who knows it might help someone.
I use this metal 'corner clamp' for that:
View attachment 264119
Normally you use it to clamp right-angled connections:
View attachment 264120
2x90 degrees or 2x45 degrees.
I first make the 4 noses of the short beams and the 4 recesses in the long beams to size so that they fit neatly. I do that partly with the router and to stay straight and flat and I finish the corners in particular with the pointed scalpel. So that I get sharp right angles.
Then I clamp it first as a test in the 'corner clamp' to see if everything fits.
Then the four joints in the glue and in the clamp with a starting pressure:
View attachment 264121
With the following actions:
-I press the 4 corners flat on the metal (white arrows) so that the connections are pressed flat on and into each other;
-I check whether they are perpendicular to the longitudinal recess along the spindle (blue arrows). This can be done by tilting the shadows or the clamp in different directions. If it is off the hook, then some gentle taps against one of the ends to get it square;
- some extra pressure to squeeze the connections together;
-measure the distance between both ends as a last check (yellow arrows).
The result gives, if the preliminary work is done well, 4 nice connections:
View attachment 264122
Of course you can still check it on the lines of your cutting mat or other angled items (such as Lego blocks).
Then this is a good basis for customizing the other crossbars.
Regards, Peter
- Joined
- Sep 3, 2021
- Messages
- 5,190
- Points
- 738

Superb!The IceHold is ready and the ice is immediately delivered:
View attachment 263914
The storage of the ice can be adjusted to the amount that is left. Shelves can be removed that slide between the guides.
On the side of the FishHold there is a storage on the wall for the shelves that are not used:
View attachment 263915
The ice consists of large chunks, because they hold the cold longer. If it is used to preserve the fish, it is chopped smaller.
The Bluenose mainly fished for cod. Salt was used for conservation for certain by-catches.
View attachment 263916
2 barrels of salt are attached to the wall with a rope on hooks.
And the test: sliding the two parts together again succeeded!
View attachment 263917
The two parts on top of each other. The left 'ear' was slightly bent. That is now back in line.
I can't place the deck beams yet. On the beam that will be placed on the wall, I first have to fit 2 cross beams. They will carry an hatch for the access to the Fishhold and IceHold.
When the 1st and 2nd layer of oil is well absorbed and dry, a 3rd layer is added.
Regards, Peter

