YUANQING BLUENOSE - Peter Voogt [COMPLETED BUILD]

I read but cannot put my hands on which book or page, had a brass bed in his cabin.
Pag. 76 in the Witch in the Wind ....;)
About the BN build, not like a ‘ordinary fisherman’:
“But he (William Dennis, a publisher of the Halifax Herald) did admit it was not exactly usual for a fishing schooner to be finished with trim in brass , or carry sail covers, electric lights, and a electric signal bell system, not to mention a brass bed for the skipper.”
Just mentioning it for your reassurance, Rich. :) Not to be ‘Mr. Wiseguy’ ..... :rolleyes:
Regards, Peter
 
Stunning work Peter. That cabin looks so cozy and inviting - I can't wait to be invited for dinner!
You are welcome, Heinrich. To prepare the dinner:

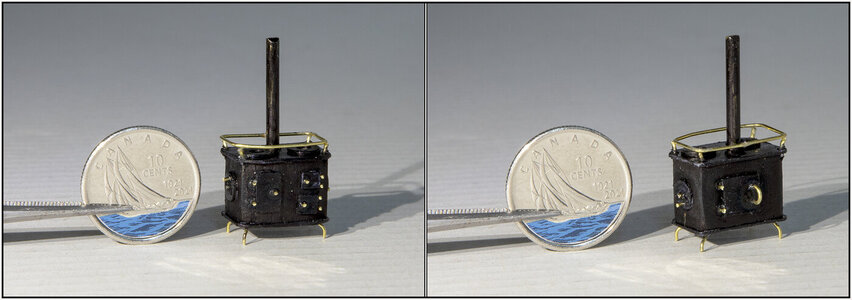
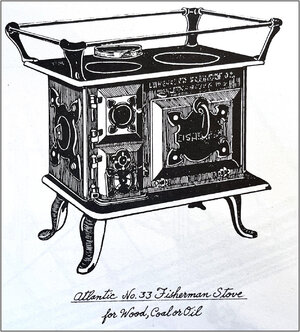
Working from front to back it was time for the blue-dime stove:
523 Stove.jpg
- 3 doors at the front for the different cooking / baking areas;
- a rotating grid on both sides for the oxygen supply;
- the heating hatch at the rear.

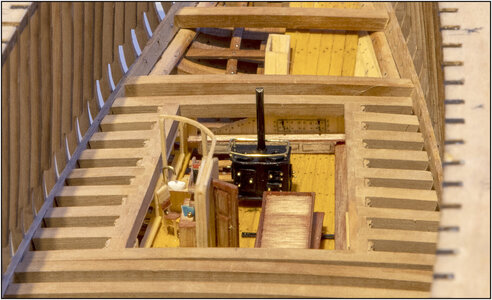
In place:
524 Stove.jpg
I can still adjust the pipe height.

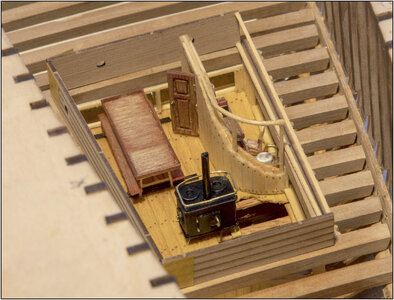
From the rear with the wall on the deck beams:
525 Stove.jpg
I can also adjust the position on the floor.

So, more members for the first served dinner? Yellow-tale is on the menu. :)

On to the last item: the stairs.
Regards, Peter
 
Last edited:
Pag. 76 in the Witch in the Wind ....;)
About the BN build, not like a ‘ordinary fisherman’:
“But he (William Dennis, a publisher of the Halifax Herald) did admit it was not exactly usual for a fishing schooner to be finished with trim in brass , or carry sail covers, electric lights, and a electric signal bell system, not to mention a brass bed for the skipper.”
Just mentioning it for your reassurance, Rich. :) Not to be ‘Mr. Wiseguy’ ..... :rolleyes:
Regards, Peter
Yes, I have that book along with several others where each author has their own perspective and presentation in a full hold of information. Included in one book, possibly The American Fishing Schooners , 1825 - 1935, by Chapelle, was the recognition that Bluenose was designed as a racer and not primarily a fishing schooner. Rich
 
You are welcome, Heinrich. To prepare the dinner:

Working from front to back it was time for the blue-dime stove:
View attachment 277224
- 3 doors at the front for the different cooking / baking areas;
- a rotating grid on both sides for the oxygen supply;
- the heating hatch at the rear.

In place:
View attachment 277225
I can still adjust the pipe height.

From the rear with the wall on the deck beams:
View attachment 277226
I can also adjust the position on the floor.

So, more members for the first served dinner? Yellow-tale is on the menu. :)

On to the last item: the stairs.
Regards, Peter
I love that stove! Great job once again! ;)
 
You are welcome, Heinrich. To prepare the dinner:

Working from front to back it was time for the blue-dime stove:
View attachment 277224
- 3 doors at the front for the different cooking / baking areas;
- a rotating grid on both sides for the oxygen supply;
- the heating hatch at the rear.

In place:
View attachment 277225
I can still adjust the pipe height.

From the rear with the wall on the deck beams:
View attachment 277226
I can also adjust the position on the floor.

So, more members for the first served dinner? Yellow-tale is on the menu. :)

On to the last item: the stairs.
Regards, Peter
Your stove looks hot and ready for a crew "mug-up" before heading out for another trawl. The pinched now of BN on the dime will not complain if the crew is happy! Great work chef!!! Rich
 
I love that stove! Great job once again! ;)
Your stove looks hot and ready for a crew "mug-up" before heading out for another trawl. The pinched now of BN on the dime will not complain if the crew is happy! Great work chef!!! Rich
Thanxs, Dean&Rich. And the likes from the others!
The inside is almost done. Then it’s back to the hull construction again.
Regards, Peter
 
You are welcome, Heinrich. To prepare the dinner:

Working from front to back it was time for the blue-dime stove:
View attachment 277224
- 3 doors at the front for the different cooking / baking areas;
- a rotating grid on both sides for the oxygen supply;
- the heating hatch at the rear.

In place:
View attachment 277225
I can still adjust the pipe height.

From the rear with the wall on the deck beams:
View attachment 277226
I can also adjust the position on the floor.

So, more members for the first served dinner? Yellow-tale is on the menu. :)

On to the last item: the stairs.
Regards, Peter
Stunning
 
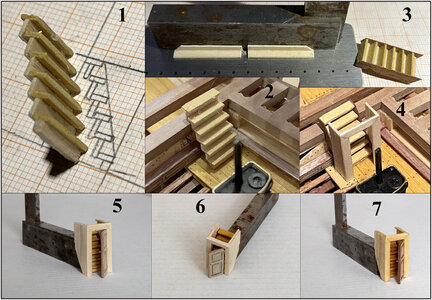
Made the stairs. Some stages with explanation:
527 Stairs.jpg
1: You have to climb 18mm / 0.71" Step height 3mm / 0.12" = 1:1 -> 21.5 cm / 8.46" = 6 steps;
2: Fit into the beam frame that I glued into the hull first. Then it doesn't shift anymore;
3: the door jambs at right angles to the 1st side planks. The stairs are fitted with 2 (side) cheeks;
4: With the lintel. Set perpendicular to the waterline;
5: The panel door in the hinges;
6: Ditto
7: In the linseed oil.

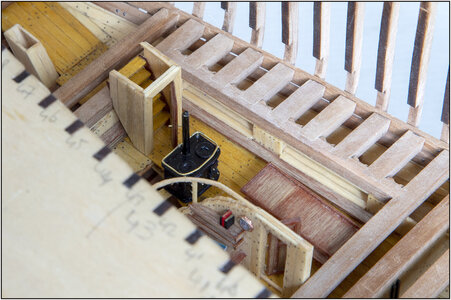
Placed in the cabin:
528 Stairs.jpg
The top step protrudes 3mm above the deck beam. Then I can bridge a 1mm deck plank + a 2mm water list.
It also leans 2mm over the deck beam. The side walls will fit in the wall frame of 1x1mm beams + on the outside of a 1mm plank. The stairwell is then locked against the interior planks. The stove will be placed a little more to the front / table.

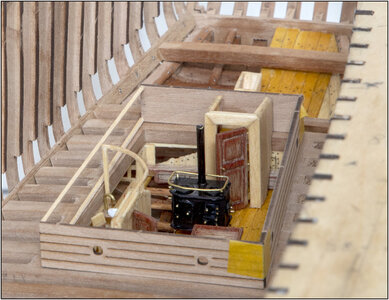
With another picture with the cabin wall placed.:
529 Stairs.jpg
Everything still dry-fit. The frame and the wall still have to be built to fit around it. With an entrance door and the sliding shutter on the roof.

Then I can now close the deck with the remaining 5 deck beams with an opening for the wheelhouse with the rudder shaft passage.
Regards, Peter
 
Last edited:
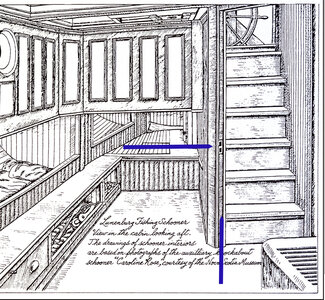
After a question from Stephan on the Dutch forum:
I opted for an interior door.
The Saga drawing was also the inspiration:
479a Cabin.jpg
The blue arrows: horizontal at the door lockplate for a day and dead bolt, vertical at the door frame.
The cabin then does not get the cold / gust of wind / rain inside by opening the outside hatch.
 
Last edited:
After a question from Stephan on the Dutch forum:
I opted for an interior door.
The Saga drawing was also the inspiration:
View attachment 277594
The blue arrows: horizontal at the lock plate for a day and dead bolt, vertical at the door frame.
The cabin then does not get the cold / gust of wind / rain inside by opening the outside hatch.
Hello Peter,

When looking at the Saga-picture, right hand top corner, it looks to me as if the upper door sill is angled, also, the same picture, right hand side, the side panel on the ship's port side seems to extend more into the cabin than the inboard side panel, thus giving the impression that the entrance door is not not parallel to the deckbeans. I suppose you used AL-FI?

Again, adding to an already historical build...

Johan
Quite correct, Johan, about the angles. But I'm not building The Saga BN or Caroline Rose. It serves as inspiration, with indeed a lot of AL-FI. :)
 
After a question from Stephan on the Dutch forum:
I opted for an interior door.
The Saga drawing was also the inspiration:
View attachment 277594
The blue arrows: horizontal at the door lockplate for a day and dead bolt, vertical at the door frame.
The cabin then does not get the cold / gust of wind / rain inside by opening the outside hatch.
In this picture it appears the cabin is extended beyond the upper walls towards the stern, with an extra bunk shown in that area. First you would have to crawl in there to get to it. Second, it seems the rudder shaft can be partially seen. Interesting. ;)
 
Back
Top