YUANQING BLUENOSE - Peter Voogt [COMPLETED BUILD]

Peter,
As we say in Roman (as I am), there are a couple of ways to go to Rome: by car from Amsterdam strait to Rome driving on highways; by fly, from Schiphol Airport strait to Fiumicino Airport; by train, but sincerely I don't know how many train changes you should make ...

P.S.: I'm looking at your log just to get an idea where to start. Honestly, it's difficult for me to understand Chinese (or Mandarin) language. I was thinking of going to my friend who owns a Chinese restorant and ask him to translate the manuals ... paying of course
Hi Piero,
At first some help for the translation. It’s already done:
Dean started first with the black/white pictures and lateron Heinrich added the colored pictures.
Then Dean and Henk fitted everything together.
And I have to mention Don and Eugene for the first steps.

And about the way(s) to Rome. It was mentioned as ‘many roads’. Always a problem with translations. I cycled from Rome to Home and find a lot of different roads.
Regards, Peter
 
Last edited:
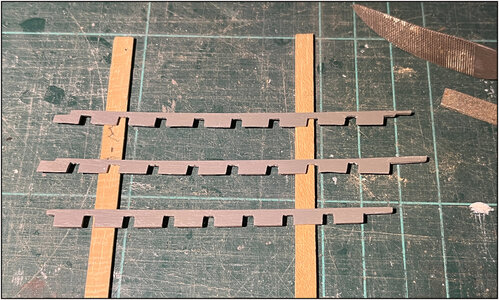
After marking with the 1.5mm strip, I decided not to use the saw but the sanding disc. First the strips separately until close to the marked line. Then in the frames, flat with the outside of the frames.
Some pictures of the steps followed:
543 Waterway.jpg
And used the deck plank 'nibble' strip from the kit to get the right curve in the 3 parts.

Then prime, sand, paint, apply, sand, paint:
544 Waterway.jpg
I didn't make it easy for me: 8 holes connected with a 1.5 mm strip. The paint thickens again, so some sanding again.

With some editing it finally worked:
545 Waterway.jpg

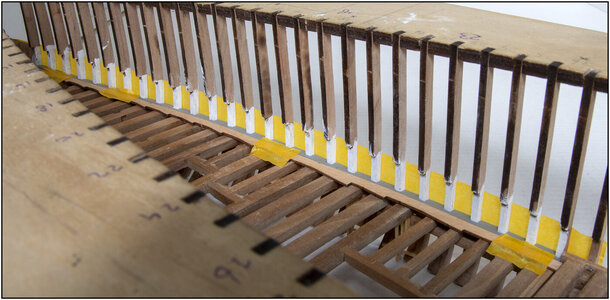
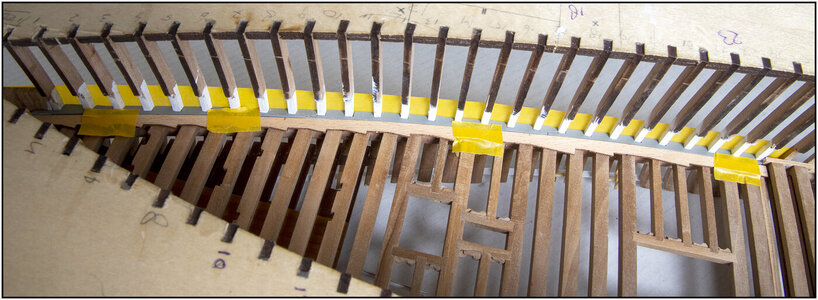
With the strip along it:
546 Waterway.jpg
The yellow tape is on the outside to check the connection with the later hull planks.

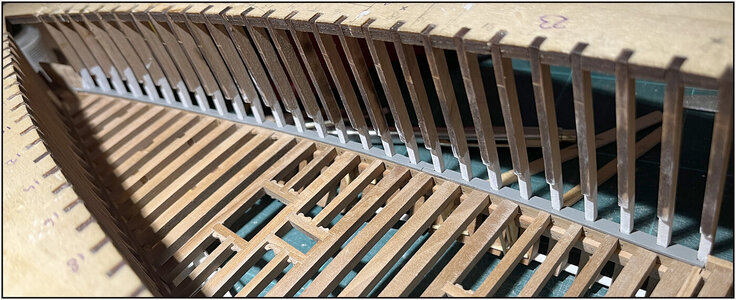
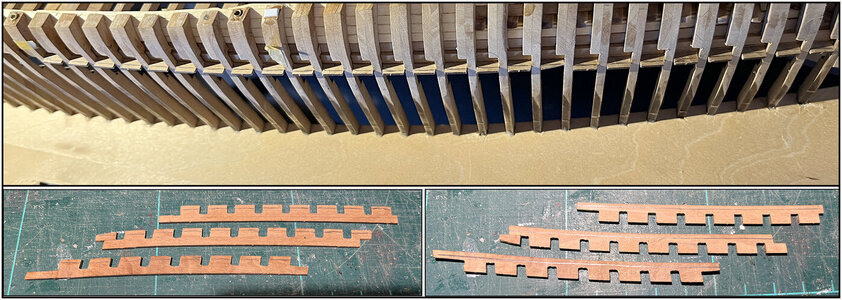
Everything fits together:
547 Waterway.jpg
Dry-fit, because when the hull planks are on, I still have to paint them white on the inside in connection with the frame heads.

It is also nice that the waterways consist of 3 parts per side. According to "the books", the hull and deck planks were between 25 and 30 feet. That is between 7.6 and 9.1 meters. In scale: between 10.5 - 12.6 cm / 4.1" - 4.9". The waterway parts are around 9 cm / 3.5".

I am satisfied and get on with the other 9 parts.
regards, Peter
 
Last edited:
Hi Piero,
At first some help for the translation. It’s already done:
Dean started first with the black/white pictures and lateron Heinrich added the colored pictures.
Then Dean and Henk fitted everything together.
And I have to mention Don and Eugene for the first steps.

And about the way(s) to Rome. It was mentioned as ‘many roads’. Always a problem with translations. I cycled from Rome to Home and find a lot of different roads.
Regards, Peter


Peter, obviously my post was joking, as only we Italians love to do and know how to do ...

Greetings

IMG_20160822_163236.jpg
 
After marking with the 1.5mm strip, I decided not to use the saw but the sanding disc. First the strips separately until close to the marked line. Then in the frames, flat with the outside of the frames.
Some pictures of the steps followed:
View attachment 279549
And used the deck plank 'nibble' strip from the kit to get the right curve in the 3 parts.

Then prime, sand, paint, apply, sand, paint:
View attachment 279550
I didn't make it easy for me: 8 holes connected with a 1.5 mm strip. The paint thickens again, so some sanding again.

With some editing it finally worked:
View attachment 279551

With the strip along it:
View attachment 279552
The yellow tape is on the outside to check the connection with the later hull planks.

Everything fits together:
View attachment 279553
Dry-fit, because when the hull planks are on, I still have to paint them white on the inside in connection with the frame heads.

It is also nice that the waterways consist of 3 parts per side. According to "the books", the hull and deck planks were between 25 and 30 feet. That is between 7.6 and 9.1 meters. In scale: between 10.5 - 12.6 cm / 4.1" - 4.9". The waterway parts are around 9 cm / 3.5".

Can I get started with the other 9 parts.
regards, Peter
This is looking great. Depending on the implications, I want to implement this in my build as well.
(One of the great advantages having kit #44, you can learn an awfull lot from your predecessors...)
 
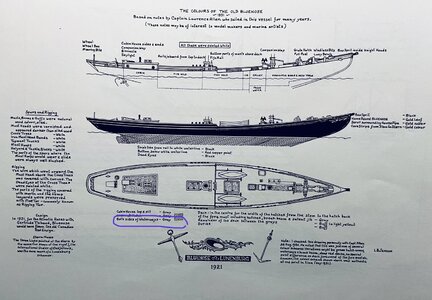
Oh boy. This is going to look magnificent. Am I right - the waterways are painted in a light grey?
You are correct, Heinrich.
On pag. 67 of The Saga, L.B. Jenson has given the painting of the original BN:
5A61168F-BA7B-4671-996D-A8D5FE6CBEAA.jpeg
Both sides of Waterways - Grey.
PS:
See the ‘note’ right-under: the BN has different colors in different times. Shown is from ca. 1931.
Regards, Peter
 
Last edited:
I made some extra samples for the treenails. The size of 0,5 mm gives me the best view.
Supported by the Saga-info:
The outside of the treenails was 1 3/8" = 1.375" = 34,925 mm.
On scale 1:72 34,925 mm = 0,485 mm = 0,019".
In the drilled holes of 0,5 mm, a toothpick pointed in the Drawplate 22 fits well.
With this result on the finished frame 1, fitted in the keel:
View attachment 213563

I accentuated the treenails with the tip of a auto-pencil which is using 0.5mm fillings:
View attachment 213566
It is depending how flat the light floods over te frame to see more of less of the treenail it self or the accent.
The front and the back of the frame has 1 layer of mat varnish.

I also made a sample with the inside of the hole blackening with the pencil, but it gives no much extra on the view.
Regards, Peter

Peter,

To highlight the pins you could use Tamyia's Panel Line Accent Color which I use to highlight the paneling of the fighters I make.
Try, it could go ...
 
Peter,
To highlight the pins you could use Tamyia's Panel Line Accent Color which I use to highlight the paneling of the fighters I make.
Try, it could go ...
Hi Piero,
Thank you for the option. A bit further in my log you will see that I then continued with the syringe / needle.
For my BN they don't need to be highlighted further. The current visual presence is enough.
Regards, Peter
 
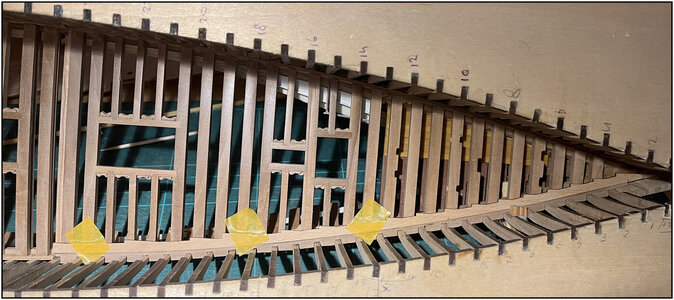
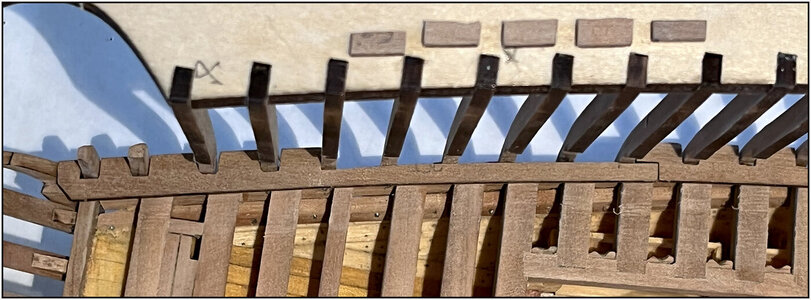
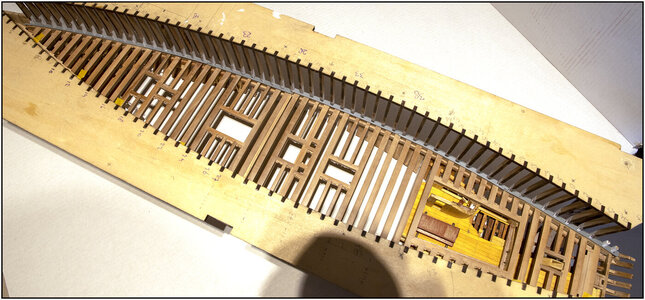
The waterways at the rear took a little more time. When used for the first time as spacers when placing the bearing beam, they were slightly higher on the frames. Otherwise I couldn't place the bearing beam just below the spacers with my fat fingers.
Because they are now being used for the 2nd time lower, the recess runs slightly, because of the curves of the hull. Especially at the rear frames. So much more filing, sanding and filling open spaces with small fitting pieces or ......
548 Waterway.jpg
make a few new shims to size.

Everything made to fit and the top and bottom sides marked:
549 Waterway.jpg

After sanding in the curves, painting and fitting again, all 12 were in place.
The port side that will be planked:
550 Waterway.jpg
Dry-fit with both nibble strips from the kit. But they will be replaced because I will be planking the deck with 2mm planks.

The starboard side:
551 Waterway.jpg
It will not be further planked. Between the deck beams, the little double knees still have to be placed.

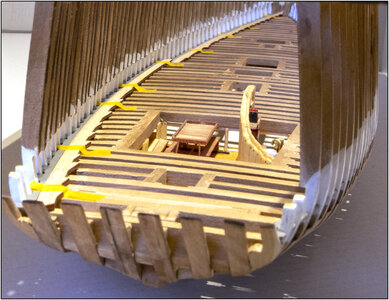
With the view from the stern:
552 Waterway.jpg

Then I can now start with a new chapter:
Planking the hull.
To strengthen the frames of the upper part, I will first install the top planks. They form the bulwark.
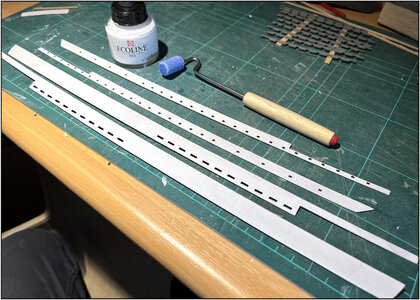
First apply a 1st layer of ‘paint’ on the inside:
553 Waterway.jpg
I use white Ecoline for this, just like on the frame heads. This gives a silk-matte appearance. And with a small paint roller it comes on nicely and dries pretty quickly.
This is also a test for when I paint the hull on the outside.
It turns black with a deep blue glow in it. But that requires some experiments on some pieces of leftover wood.
Regards, Peter
 
Last edited:
Great stuff Peter. Just reading now that you intend to plank the deck with 2mm strips. I used 3mm on the Batavia - and boy - they are already narrow and create a very "busy" effect. I would just do a test run by laying down a few 2mm planks next to one another for a visual clue before you start gluing.
 
Great stuff Peter. Just reading now that you intend to plank the deck with 2mm strips. I used 3mm on the Batavia - and boy - they are already narrow and create a very "busy" effect. I would just do a test run by laying down a few 2mm planks next to one another for a visual clue before you start gluing.
Thanks Heinrich. Of course there will be a test first. And ‘the busy’ depends on whether there is an extra accent of a caulking between the planks. I don't intend to, because I think the linseed oil will strengthens the grooves between the planks very subtly.
But.......of course I'll show it for approval or disapproval first.;) ........ and do my own thing ........ or adjust something ........ or .......We will seeROTF.
 
Last edited:
The waterways at the rear took a little more time. When used for the first time as spacers when placing the bearing beam, they were slightly higher on the frames. Otherwise I couldn't place the bearing beam just below the spacers with my fat fingers.
Because they are now being used for the 2nd time lower, the recess runs slightly, because of the curves of the hull. Especially at the rear frames. So much more filing, sanding and filling open spaces with small fitting pieces or ......
View attachment 280536
make a few new shims to size.

Everything made to fit and the top and bottom sides marked:
View attachment 280537

After sanding in the curves, painting and fitting again, all 12 were in place.
The port side that will be planked:
View attachment 280538
Dry-fit with both nibble strips from the kit. But they will be replaced because I will be planking the deck with 2mm planks.

The starboard side:
View attachment 280539
It will not be further planked. Between the deck beams, the little double knees still have to be placed.

With the view from the stern:
View attachment 280540

Then I can now start with a new chapter:
Planking the hull.
To strengthen the frames of the upper part, I will first install the top planks. They form the bulwark.
First apply a 1st layer of paint on the inside:
View attachment 280541
I use white Ecoline for this, just like on the frame heads. This gives a silk-matte appearance. And with a small paint roller it comes on nicely and dries pretty quickly.
This is also a test for when I paint the hull on the outside.
It turns black with a deep blue glow in it. But that requires some experiments on some pieces of leftover wood.
Regards, Peter
Adjusting those waterway boards was not fun! But you have it behind you now! Looking forward to the planking. It’s always better when someone else is doing it…lol. ;)
 
Adjusting those waterway boards was not fun! But you have it behind you now! Looking forward to the planking. It’s always better when someone else is doing it…lol. ;)
Thanxs, Dean. It was ‘time consuming’.
And for the above bulwark planking: again adjusting. But you get a better view on her lines.
Regards, Peter
 
Back
Top