Inkoppertje:When I do this, my stomach still hits the floor. Any advice?
Wobbling back and forth, possibly with the help of your Admiral

 |
As a way to introduce our brass coins to the community, we will raffle off a free coin during the month of August. Follow link ABOVE for instructions for entering. |
 |
 |
The beloved Ships in Scale Magazine is back and charting a new course for 2026! Discover new skills, new techniques, and new inspirations in every issue. NOTE THAT OUR FIRST ISSUE WILL BE JAN/FEB 2026 |
 |
Inkoppertje:When I do this, my stomach still hits the floor. Any advice?


That's because your arms are too short... and, before you ask, mine are too short as well.When I do this, my stomach still hits the floor. Any advice?


Peter's BN is properly shored in his shipyard, so no worries there.Piero,
What about your BN? Is she doing back&forth also? Let us see some pics when she's doing that ...

Use a footstool?When I do this, my stomach still hits the floor. Any advice?
 .
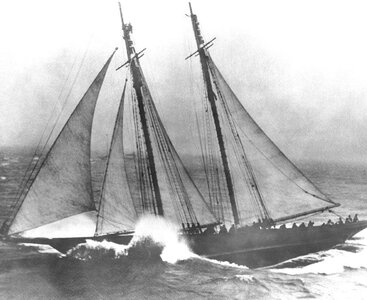
.Well ….. then the BN is in her elements, pitching through rough wavesPiero,
What about your BN? Is she doing back&forth also? Let us see some pics when she's doing that ...

Correct, Paul. For me, the ratlines are also still to come. For such work, my father had a pot of elbows-greas.Hey Peter, this forum is all about helping each other out. You do it and I'll do it! I could use some core strength for ratlines next month....


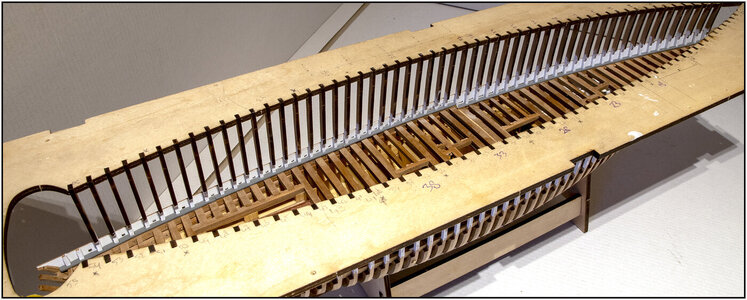
It almost goes without saying, but again meticulous work!It took some effort to place the first planks of the bulwark.
After I had given the boards an extra layer of paint on the inside, I saw when fitting the frames / stanchions and the waterways that everything fitted together quite nicely, without large seams. So decided to give everything another layer and not afterwards after placing it.
First glued the waterways. Then I could sand the outside edges of the waterways extra tight on the outside of the frames.
Correct placement of the waterways was also necessary for the installation of the scuppers. Those scuppers also had to line up properly.
Anyway, after a lot of fitting, aligning, marking, finally placed the first 2 parts on the port side.
View of the inside:
View attachment 281382
A dash of plank under some scuppers, but generally quite in line.
View of the outside:
View attachment 281383
It was quite exciting, because in the beginning you are actually short of hands. This consists of 2 parts that interlock at the transition from low to high. Then the planks that come under it must also connect properly. That is why 2 extra dry-fit planks were applied when stretching the bulwark planks. An increase in the bulwark will be added later on the aft deck.
The scuppers on the foredeck are elongated and on the aft deck smaller and square. The book by Howard I. Chapelle describes that before 1880 / 1900 the scuppers of the aft deck were also elongated. But around that period, I switched to the smaller one on the aft deck. YQ has put that nicely on these planks.
This picture gives a nice view of the sheer / sway:
View attachment 281384
The point of the bow is further neatly finished when both sides are applied and the hole for the bowsprit is made to measure.
Regards, Peter
That’s right, Heinrich. All the energy and love I put into building the hull is now paying off. Really looked some time at her from all sides.N-I-C-E Peter. Now you can see those beautiful lines coming into play. You must be every excited!
Thanxs Johan. Yes, with all the lines, the shadows on the white areas and the white background, it may take a while for the image to become clear. That's fun with photography. My photo-teacher told me: Photography is Painting with Light.It almost goes without saying, but again meticulous work!
When looking at your first picture, it took me five minutes to get the perspective right... In the end I had to zoom in on the bow and slowly scrolled left and there it was.

By the looks of it you also took lessons from Escher.Thanxs Johan. Yes, with all the lines, the shadows on the white areas and the white background, it may take a while for the image to become clear. That's fun with photography. My photo-teacher told me: Photography is Painting with Light.
 Incredible work. The pictures show it well.
I love M.C. Escher!By the looks of it you also took lessons from Escher.

Same here.I love M.C. Escher!

Dear PeterIt took some effort to place the first planks of the bulwark.
After I had given the boards an extra layer of paint on the inside, I saw when fitting the frames / stanchions and the waterways that everything fitted together quite nicely, without large seams. So decided to give everything another layer and not afterwards after placing it.
First glued the waterways. Then I could sand the outside edges of the waterways extra tight on the outside of the frames.
Correct placement of the waterways was also necessary for the installation of the scuppers. Those scuppers also had to line up properly, just above the waterways.
Anyway, after a lot of fitting, aligning, marking, finally placed the first 2 parts on the port side.
View of the inside:
View attachment 281382
A dash of plank under some scuppers, but generally quite in line.
View of the outside:
View attachment 281383
It was quite exciting, because in the beginning you are actually short of hands. This consists of 2 parts that interlock at the transition from low to high. Then the planks that come under it must also connect properly. That is why 2 extra dry-fit planks were applied when stretching the bulwark planks. An increase in the bulwark will be added later on the aft deck.
The scuppers on the foredeck are elongated and on the aft deck smaller and square. The book by Howard I. Chapelle describes that before 1880 / 1900 the scuppers of the aft deck were also elongated. But around that period, they switched to the smaller one on the aft deck. YQ has put that nicely on these planks.
This picture gives a nice view of the sheer / sway:
View attachment 281384
The point of the bow is further neatly finished when both sides are applied and the hole for the bowsprit is made to measure.
Regards, Peter
