YUANQING BLUENOSE - Peter Voogt [COMPLETED BUILD]

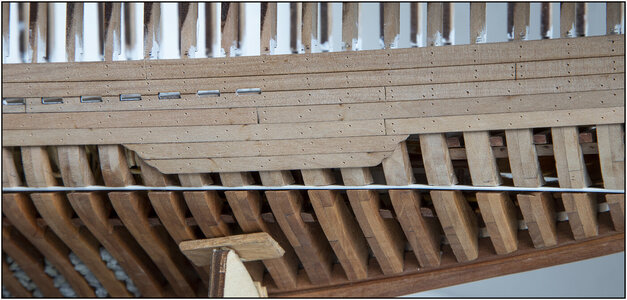
The starboard side also features the 2 bulwarks parts:
View attachment 281962
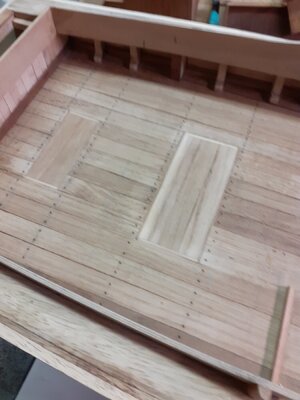
This side is fitted with a total of 5 rows of planks. As shown in the manual by YuanQing for this open side.
I added some extra small boards on 2 places:
View attachment 281963
This is where the fore and mainmast chain plates are secured to the hull.
At 5 row of planks they would stick out or I would have to cut them off.
In the middle by the main mast, 1 plank because there will be another plank on the bulwark and the irons will find also rest over 7 rows.
Then I carry on my theme that I also kept in mind when building the inside of the ship: where support is desired, a few extra nibbled parts.

In the beginning there was a lot of discussion about the rabbet in the keel and whether or not a bevel is present. Here the result of the recessed fronts of the hull planks:
View attachment 281964
Made the parts wet for contrast. Now the planks slide in their entirety against the front of the rabbet. And has the extra 'meat' for good bonding.
The inside looks 2x square on the photo. But it's a \_| with the chamfer that is flush with the chamfer of the bow parts.

Because once again there was today a nice sun, I took some picture with the current state in the demo version:
View attachment 281965

And with the beautiful lines of the rear:
View attachment 281966
Razor light is unforgivable, but the sanding work still needs to be done.

Then it is now time to drill the holes for the treenails. And only after applying the treenails does the sanding follow.
Then there will be those who wonder: is that useful, do you see them? With the hull being painted?
I have already started painting with Ecoline. I had seen several examples of that. This does not give a flat layer of lacquer, but is more or less matt and still shows the necessary part of the wood structure.

In the book Witch in the Wind, De Villiers describes: "The vessel was then ready for painting: a prime coat, more sanding, then the blue-black finisch coat an the gilded trimwork".

I did some experiments with some mixing ratios of Black and Indigo blue:
View attachment 281967
Of course the visible color depends on your monitor color setting.
- the top shelf with almost black;
- the bottom 3 boards with the blue black. Maybe I make them a shade more black;
-depending on the incidence of light, you do not or do see the treenails.

I first coated the bottom three boards and then sanded them almost to the wood. Worked the 2nd layer with my medium polishing block again until the treenails came through.
As far as I'm concerned: subtly present and visible.
I will first apply that to the 5-layer starboard side. Also to practice when I have to do the fully planked port side.
Regards, Peter
Great pictures and great work Peter. I always feel so out of my depth when I look at how you go about your work. Very interesting, and educational Thumbsup
- Mark
 
Dutch Bluenose meets other Dutch Bluenose’s:
Regards, Peter
 
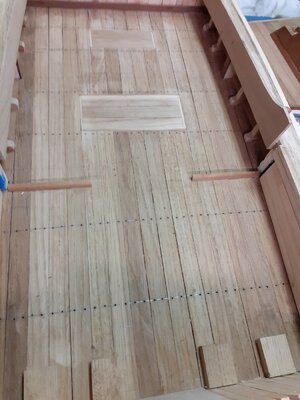
Not much to report, but you should keep your report up to date. ;) On the (open) starboard side, with the point punch, a small 600 holes to be drilled are marked:
566 Treenails.jpg
May be hard to see. Just to be a little convincing:
567 Treenails.jpg
Can I now start drilling the 0.6 mm holes, whereby the drill will now not go wrong thanks to the impressions.
On a next picture I will press both hull halves better closed. :)
Regards, Peter
 
Not much to report, but you should keep your report up to date. ;) On the (open) starboard side, with the point punch, a small 600 holes to be drilled are marked:
View attachment 283052
May be hard to see. Just to be a little convincing:
View attachment 283053
Can I now start drilling the 0.6 mm holes, whereby the drill will now not go wrong thanks to the impressions.
On a next picture I will press both hull halves better closed. :)
Regards, Peter
Hmm. Have you considered leaving it just like this?
 
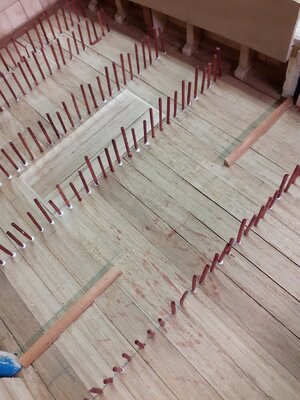
First started with the hand-drill. After 10 holes, I broke my drill bit. Then with the Dremel with a few mm pointed drill and it went very well:
568 Treenails.jpg

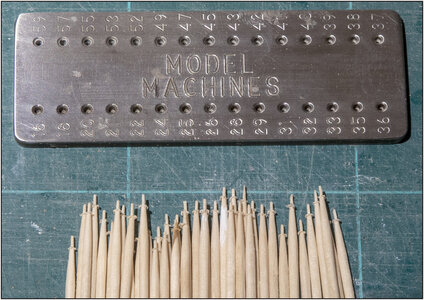
The toothpicks pointed into the Byrnes Drawplate in hole 26:
569 Treenails.jpg

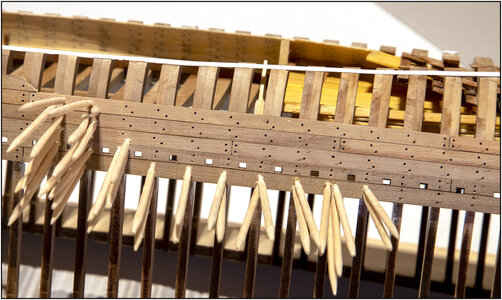
And started gluing:
570 Treenails.jpg

Now get rid of a stock, cut off, repoint and reuse. 'We are economical'.
Regards, Peter
 
Last edited:
OMG, I'm bilingual and I'm really having a hard time thinking up descriptors for the work you have done so far. You should think about publishing this log when you complete your build. Maybe "AL-FI and the Bluenose" for a title.
Jan
Well Jan, by the start of this build-log, I wrote:
The making of this report is partly motivated by the fact that I want to make a photo book/report about the construction of the Robert E. Lee. Partly mainly for myself but also for others who want to know something about it. Then you don't have to open the PC and internet and wrestle through the entire build-log. And easy if the Lee might ever be on an exhibition somewhere.
From the build of the Bluenose will also comes such a book. And the starting of this build-log is a good beginning for that book.
But the edition is probably: 1.
Maybe 3, but those are for “me, myself and I”.
But who knows ....
 
Not much to report, but you should keep your report up to date. ;) On the (open) starboard side, with the point punch, a small 600 holes to be drilled are marked:
View attachment 283052
May be hard to see. Just to be a little convincing:
View attachment 283053
Can I now start drilling the 0.6 mm holes, whereby the drill will now not go wrong thanks to the impressions.
On a next picture I will press both hull halves better closed. :)
Regards, Peter
Peter, I don't know whether I'm more impressed by the accracy of the indentations you've created in preparation for the drilling, or by the fact that you counted all of them ROTF
 
First started with the hand-drill. After 10 holes, I broke my drill bit. Then with the Dremel with a few mm pointed drill and it went very well:
View attachment 283175

The toothpicks pointed into the Byrnes Drawplate in hole 26:
View attachment 283176

And started gluing:
View attachment 283177

Now get rid of a stock, cut off, repoint and reuse. 'We are economical'.
Regards, Peter
I showed the Admiral, Ellen, these pictures and briefly discussed the various options, as shown and described in earlier posts. I was of a half mind to use the tweak, using an old fashioned draftsman's pencil. This idea was shot down real quick by the Admiral, so now I am heading towards a toothpick nightmare... Thanks Peter! ;)
Again thumbs up!
 
Iniziato con il trapano a mano. Dopo 10 fori, ho rotto la punta del trapano. Poi con il Dremel con un trapano a punta di pochi mm ed è andata benissimo:
View attachment 283175

Gli stuzzicadenti puntavano nella trafila di Byrnes nel foro 26:
View attachment 283176

E ho iniziato ad incollare:
View attachment 283177

Ora sbarazzati di uno stock, taglialo, ripunta e riutilizza. 'Siamo economici'.
Saluti, Pietro
Buongiorno, questo metodo lo uso con il bagno nel mordente ad acqua, in modo da risaltare la chiodatura
 

Attachments

  • 20200427_151120.jpg
    20200427_151120.jpg
    235.9 KB · Views: 22
  • 20200427_151116.jpg
    20200427_151116.jpg
    268.2 KB · Views: 23
  • 20200427_115622.jpg
    20200427_115622.jpg
    206 KB · Views: 23
  • 20200427_115616.jpg
    20200427_115616.jpg
    153.4 KB · Views: 22
Back
Top