YUANQING BLUENOSE - Peter Voogt [COMPLETED BUILD]

The Ecoline was nice and dry ......... and again I could not wait any longer ......... after having rubbed in the layer of linseed oil:
635 RedPlus.jpg
636 RedPlus.jpg
Here is a happy person sitting behind his iMac, with next to him....... After all, it was a guess how this would turn out.
Hopefully good weather tomorrow. Because with natural light it shows even more intensely.
Regards, Peter
 
Last edited:
Looks fantastic Peter! Great job! ;)
I did notice with the application of the oil, the treenails can no longer be seen. Maybe when it dries some they will be visible again?
 
Last edited:
Looks fantastic Peter! Great job! ;)
I did notice with the application of the oil, the treenails can no longer be seen. Maybe when it dries some they will be visible again?T
Looks fantastic Peter! Great job! ;)
I did notice with the application of the oil, the treenails can no longer be seen. Maybe when it dries some they will be visible again?
Your semii-transparent red finish is of a different tack than what I was anticipating as I believe that the original red lead opaque paint was a deterrant to ship worms and none of the various tones of the planks were visible. I am interested now to see how your vision of the final appearance of the hull on this side turns out. It well definately be your own BN. Rich
 
Your semii-transparent red finish is of a different tack than what I was anticipating as I believe that the original red lead opaque paint was a deterrant to ship worms and none of the various tones of the planks were visible. I am interested now to see how your vision of the final appearance of the hull on this side turns out. It well definately be your own BN. Rich

Hi Rich @PT-2 . This variation of the red will be as it is now. I know it is different from the original. But the natural wood finish of the partially planked hull on the starboard side is also not like the original. And what about the open frames?;)
The black/blue of the part above the waterline will also be semi-transparant.
With the model I will show how the build of the hull was done. With the 12-frame planks and the treenails.
She will get a stand that looks like she it standing on the shipyard and the owner of the yard wants to show what he is capable of. :)
You can also think that she stands with a kind of primer. And ready to be painted. ROTF
So, construction is therefore literally and figuratively 'out of the box'. With a great help of AL-FI.
Regards, Peter
 
Last edited:
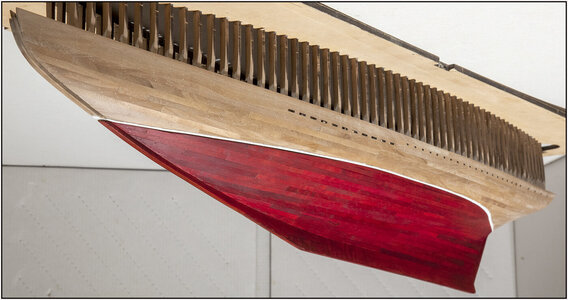
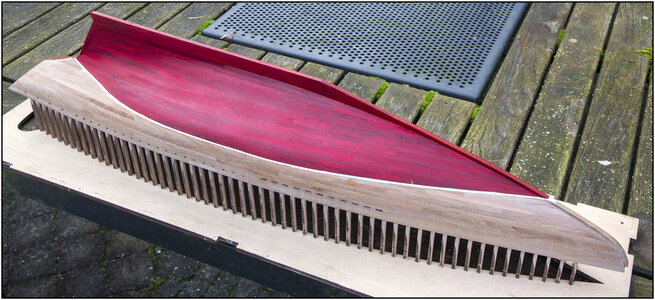
With 2 more shots outside, with a cloudy sky for nice diffused light:
637 RedPlus.jpg
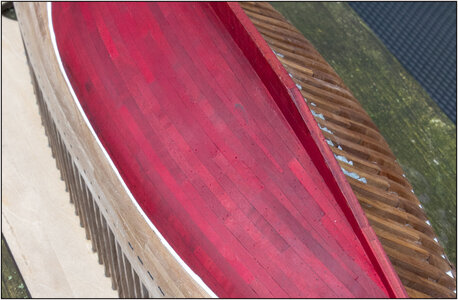
With the still visible treenails, 12-frame planks, inserts, some irregularities etc:
638 RedPlus.jpg
And the different angle of the light gives a different color of red. Both are with the same WB.
And in both the SoS and the Dutch forum, the colors show different again.
So if you really want to see the color, come by! :)
Regards, Peter
 
Last edited:
Hello Peter, yesterday I read your diary from start to finish, 84 pages, almost 4 hours, respect.
Very great work, also very informative, just inspiring Thumbsup . I'm staying tuned;).
Hi Tobias. Thank you very much that you invested so much time in my build log. I feel privileged and also a bit shy.
You are more than welcome!
regards, Peter
 
Daring step the red Ecoline turned out surprisingly well for you, because I
now know from my own experience that the Ecoline is quickly absorbed into the wood and dries quickly and therefore quickly becomes 'spotty'.
Ecoline, and not everything went according to plan here
Nice to see that it can also turn out differently

Greeting
Henk
Thanxs, Henk.
Sorry that the Ecoline was not to your satisfaction.
Perhaps because I had a larger surface area and could make larger rubbing movements. And I could keep rubbing until I had an even color.
 
Daring step the red Ecoline turned out surprisingly well for you, because I
now know from my own experience that the Ecoline is quickly absorbed into the wood and dries quickly and therefore quickly becomes 'spotty'.
Ecoline, and not everything went according to plan here
Nice to see that it can also turn out differently

Greeting
Henk
I now wonder what your Ecoline results look like and what the the issue is you had with it.
 
I now wonder what your Ecoline results look like and what the the issue is you had with it.
Hi Johan
The difference with Peter is that Peter applied all Ecoline evenly and I only applied the sides of the decking on the inside

When attaching, the wood glue made black spots and got worse by applying diluted stain.

This gave black spots on the deck in such a way that it could no longer be sanded away

In had a set of slats in stock which I had all traded with Ecoline, I will no longer use them for this and now wait until the other slats are in

All the slats have now been removed

Regards
Henk
Hi Henk.
I gave your post not a ‘like’ but a ‘WoW’. Because of the content, that's a real shame about all the work. It could have been a ‘like’ because you share this experience with us.
 
Hi Johan
The difference with Peter is that Peter applied all Ecoline evenly and I only applied the sides of the decking on the inside

When attaching, the wood glue made black spots and got worse by applying diluted stain.

This gave black spots on the deck in such a way that it could no longer be sanded away

In had a set of slats in stock which I had all traded with Ecoline, I will no longer use them for this and now wait until the other slats are in

All the slats have now been removed

Regards
Henk
Ha Henk,

Thanks for your explanation and too bad you had to remove part of the deck, that s@&€s...
Correct me if I'm wrong, but I have this gutsy feel that Ecoline might not be suitable for every application.
You used it very locally and still had to bond the parts to the hull structure. Would it be to far stretched to assume the porosity of the wood and the moist adhesive caused the Ecoline to be absorbed in the wood, this causing wood so stain?
Peter on the other hand, appears to have used it more globally, for instance on his hull, where no more adhesive had to be applied, thus no or limited risk of color absorbtion (and if it occurs, it wouldn't be that easily visible either).
This is probably only found out after using Ecoline the way you did and it's something I could have fallen for as well (and possibly many others). One thing's for sure; more testing is needed.
Thanks again for explaining ánd sharing.

Kind regards.

Johan
On the Dutch forum was a question how I used the Ecoline. Perhaps interesting to post it her also:
I applied the Ecoline (ink) to the sanded and polished wood with a cloth rolled in a dot. I did not wet the wood and use the Ecoline undiluted.
It does indeed absorb quickly into the wood and then it can dry unevenly. I kept swiping and rubbing all over the surface until I saw that the surface had some sort of even saturation. Then I immediately started rubbing it out so that I also smoothed out any spots that were too wet.
After the Ecoline had dried, I gently buffed the surface with my medium polishing block to remove the small wood hairs, which stand up a bit due to the wet ink. With my fingertips I felt the wood getting smoother. Not too hard to get bald chafing spots. Literally 'fingerspitzengefühl'.
Ditto with the layer of linseed oil: apply with a (silk) cloth (an old motorcycle helmet cap haha) and keep rubbing until there was an even coverage. Then immediately rubbed with a dry piece of that cloth until a kind of drying occurred.
Regards, Peter
 
Last edited:
And now it's going fast!
I have made several tests for the Black/Blue combination. Because I came across that color in 'Witch in The Wind' by Marq de Villiers. Page 645:
"The railings were installed next, birch and oak timbers roughly shaped at the mill but smoothed to a satrin finish on site; all the necessary blacksmith work was done, such as chain plates, staybolts and more, and the vessel was then ready for painting : a prime coat, more sanding, then the blue-black finish coat and the gilded trimwork".
So, feed for AL-FI.

I haven't done the blacksmith work yet, but have already thought about how to apply this later or how to update it.

I first did tests with Ecoline: 3 parts black / 1 part (indigo) blue and 3 parts black / 2 parts blue.
But they didn't give such a good result.
But thanks to Maarten's @Maarten tip, to test with Schmincke Aere Color, I became a lot happier. That is an acrylic ink with pigment.
After some combinations of quantities I arrived at half and half black and Prussian Blue:
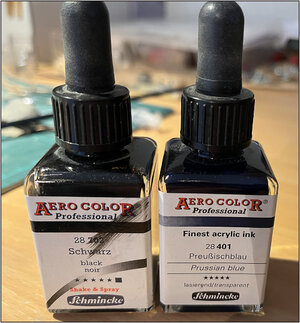
639 Blue-Black.jpg
I'll spare you the tests. The most important thing was my Admiral's choice. I also have to persuade her for a spot for the BN.

Because black quickly becomes a mess, covering everything that shouldn't be black.
With a first impression, with the iPhone:
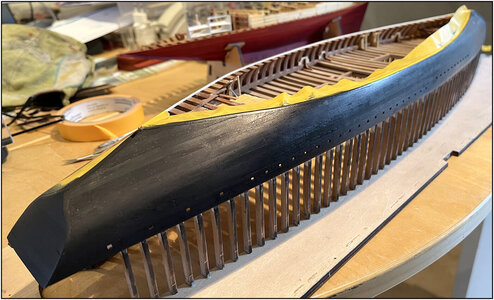
640 Blue-Black.jpg
Again, keep rubbing until an even wet layer is formed. With visible treenails, planks etc.
Now let it dry for a while and then get started with the linseed oil. Exciting again. :)
Regards, Peter
 
Last edited:
WOW Peter you have been fabulously busy. What can I say that has not been said before. The red looks simply amazing and I can only imagine that when the black is finished, it will be in the same league. At the same time I can well understand that with something like Ecoline, results can vary greatly and therefore yours was a very bold step indeed!
 
WOW Peter you have been fabulously busy. What can I say that has not been said before. The red looks simply amazing and I can only imagine that when the black is finished, it will be in the same league. At the same time I can well understand that with something like Ecoline, results can vary greatly and therefore yours was a very bold step indeed!
Thanxs, Heinrich. These are much appreciated comments. Indeed very busy today, with special for you in this reply on your post:

The last contribution for today.
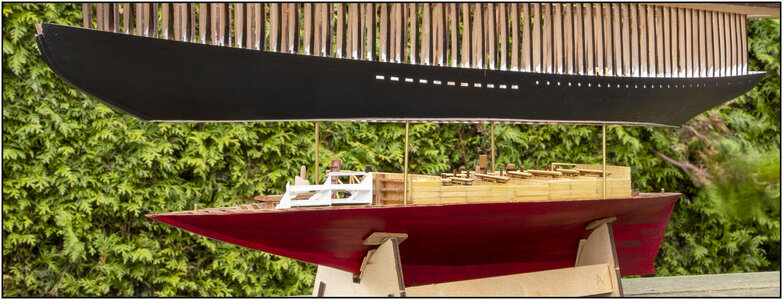
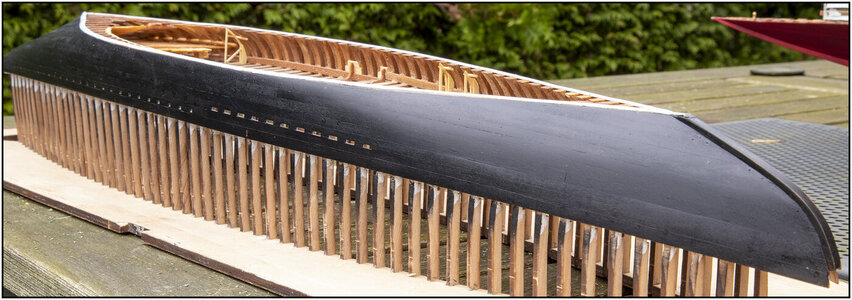
After the ink has dried, time for the linseed oil. When that was also dry, this showed up:
641 Red-Blue-Black.jpg

Also taken outside for the 'exploded-view':
642 Red-Blue-Black.jpg

The profile of the section above the waterline:
643 Red-Blue-Black.jpg
Not very clear in the photo, but the treenails also shine through here. Mission accomplished.:)

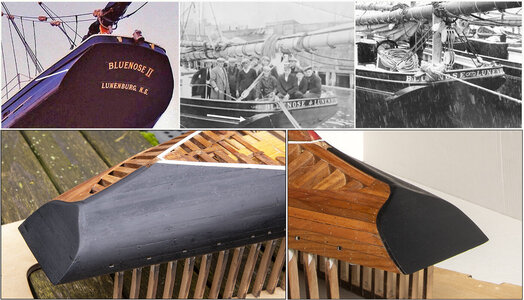
Some extra attention to the stern. We already had some discussion about planking the stern first and then the planking of the hull. And I just did it the other way around.
I came across some pictures of the BN-II and the original BN. Especially with the old ones they show a solid edge around the stern face. Would they then.......
644 Red-Blue-Black.jpg
That's why at my stern on the natural starboard side a heavy edge over the side of the stern planks.
A little stubborn is okay with me. Otherwise ...... AL-FI.
For now, I sit back, rest and enjoy the view on my BN. :)
Regards, Peter
 
Last edited:
And what a view to enjoy! She looks absolutely brilliant! The color has a deep luster without being overbearing while the definition of the individual hull planks is maintained throughout! Schitterend!
 
Back
Top