- Joined
- Sep 3, 2021
- Messages
- 5,190
- Points
- 738

Guilty as charged!Haha, watched my confession in another build-log?
 |
As a way to introduce our brass coins to the community, we will raffle off a free coin during the month of August. Follow link ABOVE for instructions for entering. |
 |
 |
The beloved Ships in Scale Magazine is back and charting a new course for 2026! Discover new skills, new techniques, and new inspirations in every issue. NOTE THAT OUR FIRST ISSUE WILL BE JAN/FEB 2026 |
 |

Guilty as charged!Haha, watched my confession in another build-log?
Thanks for the compliments, Mark. The spacing between the stanchions was done by the jigJust looking at those scupper holes Peter, they look seriously tidy. Did you have to cut them out? If so you have done it to perfection, equally spaced between the stanchions and flush with the deck. I remember the scuppers being a rather nerve-racking part of my AL build. Well done
View attachment 300618

Hi Piero.Hi Peter, from your painted hull pic, do the two colors have a matte or semi-gloss rendering? I'm doing some tests to get the best solution ...
I'm waiting for your answer ....

Just the linseed oil gave the semi-gloss.Thanks Peter!
I assumed you used a semi-gloss over the ink layer. One of the tests I did was to apply a layer of linseed oil over the black / blue and red ink. Another was a layer of semi-gloss transparent spray varnish. Your confirmation means I'm on the right way....


Thanxs, Heinrich. It took some time, but now we go for it!Another example of meticulous planning and execution Peter. The color of the deck planking is spot on to achieve the somber tone that you are after.


It is looking better and better all the time Peter. Good to see you back in the shipyard, I had wondered where you had been. I hope your injury recovers well, and glad to hear that it didn't stop your trekking trip in Sweden, that must've been amazingAfter an accident with the thumb and the saw table that gave me 4 stitches on the top, on the afternoon before I was to travel to Sweden for a snowshoe trekking:
I am now 3 weeks further and I am carefully picking up the thread again. The thumb now has a sensitive pink skin.Ouch - be aware of the sawing machines!
Yikes, hope the recovery goes well. I see some videos of modelers using saws with out guards and I cringe hoping they don't cut their fingers, maybe that's why I don't have a tablesaw, cant trust myself. Thanks Richie. I see you don;t have a tablesaw. Do you use a bandsaw like Don?shipsofscale.com
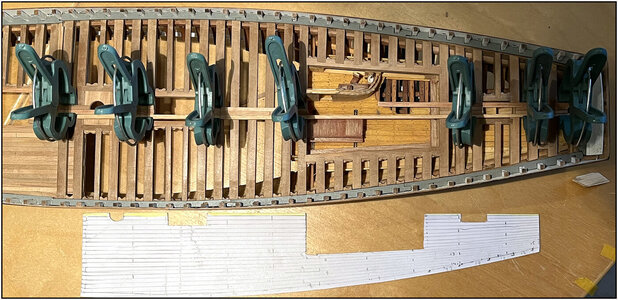
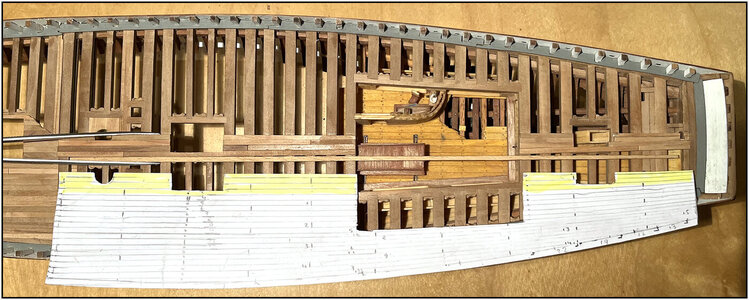
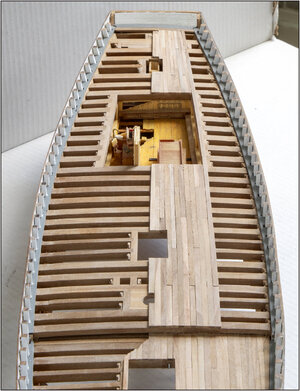
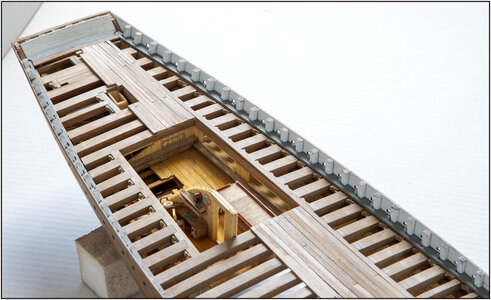
I am this far with the planking:
View attachment 305594
From the inside - underside I make the hole for the relevant water pump.
The last laid plank exactly forms the connection with the longitudinal beam of the recess for the cabin:
View attachment 305595
And the planks also connect nicely with the planks of the low foredeck.
With another picture of the connecting plank:
View attachment 305596
With sawing planks you will of course get some minimal thickness differences. I have no thicknesser, so that will be smoothed out with sanding later.
Everything is still going according to the plan.
Regards, Peter.

Hello Peter, Sorry to hear about your accident with the saw, one hast to be very careful even with these little saws. I use a thickness jig for making those thin cuts, that keeps my fingers away from the blade, also use push sticks, never going below the fence height. Nice to see you back in your Old Ship Yard again.After an accident with the thumb and the saw table that gave me 4 stitches on the top, on the afternoon before I was to travel to Sweden for a snowshoe trekking:
I am now 3 weeks further and I am carefully picking up the thread again. The thumb now has a sensitive pink skin.Ouch - be aware of the sawing machines!
Yikes, hope the recovery goes well. I see some videos of modelers using saws with out guards and I cringe hoping they don't cut their fingers, maybe that's why I don't have a tablesaw, cant trust myself. Thanks Richie. I see you don;t have a tablesaw. Do you use a bandsaw like Don?shipsofscale.com
I am this far with the planking:
View attachment 305594
From the inside - underside I make the hole for the relevant water pump.
The last laid plank exactly forms the connection with the longitudinal beam of the recess for the cabin:
View attachment 305595
And the planks also connect nicely with the planks of the low foredeck.
With another picture of the connecting plank:
View attachment 305596
With sawing planks you will of course get some minimal thickness differences. I have no thicknesser, so that will be smoothed out with sanding later.
Everything is still going according to the plan.
Regards, Peter.
Thanks Mark. The surrounding in Sweden was beautiful, but we had a week of bad weather with also 2 storm day with 115 km/h. But also accompanied with 3 dogsleds. Big fun!It is looking better and better all the time Peter. Good to see you back in the shipyard, I had wondered where you had been. I hope your injury recovers well, and glad to hear that it didn't stop your trekking trip in Sweden, that must've been amazing
- Mark
Thanks Lawrence. I hope to close the half deck soon.Hello Peter, Sorry to hear about your accident with the saw, one hast to be very careful even with these little saws. I use a thickness jig for making those thin cuts, that keeps my fingers away from the blade, also use push sticks, never going below the fence height. Nice to see you back in your Old Ship Yard again.
Regards Lawrence

It's so good to see you're making progress again after a period of enforced ánd voluntary abstinence.After an accident with the thumb and the saw table that gave me 4 stitches on the top, on the afternoon before I was to travel to Sweden for a snowshoe trekking:
I am now 3 weeks further and I am carefully picking up the thread again. The thumb now has a sensitive pink skin.Ouch - be aware of the sawing machines!
Yikes, hope the recovery goes well. I see some videos of modelers using saws with out guards and I cringe hoping they don't cut their fingers, maybe that's why I don't have a tablesaw, cant trust myself. Thanks Richie. I see you don;t have a tablesaw. Do you use a bandsaw like Don?shipsofscale.com
I am this far with the planking:
View attachment 305594
From the inside - underside I make the hole for the relevant water pump.
The last laid plank exactly forms the connection with the longitudinal beam of the recess for the cabin:
View attachment 305595
And the planks also connect nicely with the planks of the low foredeck.
With another picture of the connecting plank:
View attachment 305596
With sawing planks you will of course get some minimal thickness differences. I have no thicknesser, so that will be smoothed out with sanding later.
Everything is still going according to the plan.
Regards, Peter.
Thanks Johan. It’s for now working with 9,5 fingersIt's so good to see you're making progress again after a period of enforced ánd voluntary abstinence.
Your deck starts to look very convincing, can't wait to see the final result.
Thanxs for watching, Cons. This is largely due to the sharp tools. With its pros and consHappy healing going forward. Nice work but how do you people keep everything so clean cut and tidy? I'm forever impressed by everyone work.
