My Connie only had one plank. Good thing for putty and paint.Nice Job !!! I am following your thread.
I have done 3 ships and still I do many mistakes with the 1st plank. Its not easy, but each time there will be improvements. I have in box 2 kits that only have 1 plank. I am still afraid of starting them. But just in case, when the times come to do them, I will have walnut strips with me for a second planking ... to cover my mistakes.
(normally many)
Cheers
Daniel
-

Win a Free Custom Engraved Brass Coin!!!
As a way to introduce our brass coins to the community, we will raffle off a free coin during the month of August. Follow link ABOVE for instructions for entering.
-

PRE-ORDER SHIPS IN SCALE TODAY!
The beloved Ships in Scale Magazine is back and charting a new course for 2026!
Discover new skills, new techniques, and new inspirations in every issue.
NOTE THAT OUR FIRST ISSUE WILL BE JAN/FEB 2026
You are using an out of date browser. It may not display this or other websites correctly.
You should upgrade or use an alternative browser.
You should upgrade or use an alternative browser.
ZHL Black Pearl 2019 Golden Edition-Newbie build [COMPLETED BUILD]
I’m not visualizing what you’re saying. Could you please show us a picture of one of your rejects?For a first build you are doing just fine. Looks better than my first wooden ship, of course that was some 35 years ago...lol. I still have issues with hull planking at times even though I do enjoy butchering wood. One mistake that I have seen most beginners make is in the building of gun carriages. They usually taper to the front of the carriage and not the rear. I wouldn't worry about it at this stage, even I have done it and actually have about 1/2 dozen of them in a drawer somewhere. lol
You might drown it as little as your Niña isIm glad you said that, I was thinking of trying tung oil on Nina perhaps.
- Joined
- Apr 20, 2020
- Messages
- 313
- Points
- 278

I finished most of my hull work and embarked on preparing the masts and yards.
Working from the plans, I cut the dowels to the desired length (actually, slightly longer than the plans, in order to allow a short end piece to go into the drill chuck later on). Gentle note to ZHL, if one were to follow the plans, even if you measure precisely, you will find you will be short on the 4mm round dowels...go ahead, add up all the 4mm requirements on the plans and tell me what you come up with. Good thing I have a couple dowels in my stash so I am all good.
Also, be very careful about tapering the dowels based in the drawings...you have to do an actual measurement of the required diameter based on the round holes in the caps and the squared off dimensions on the cross trees. Be careful also which part of the dowels to round or square off because the instructions aren't always clear.
I have made notes to myself (in red) to make sure I don't make a mistake.
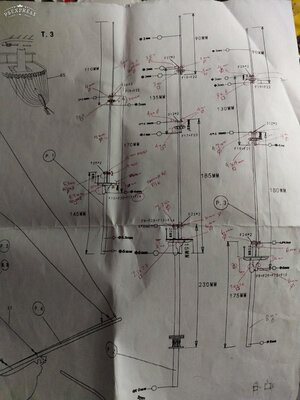
I must say, I don't have any special tools that I can use to taper the rods so I adapted some of the techniques used by some of our friends in the forum.
Here is my simple set up for tapering the dowels..... an electric drill, a vise, a Dremel tool, heavy duty work gloves, some mini flat files, a caliper and sandpaper.
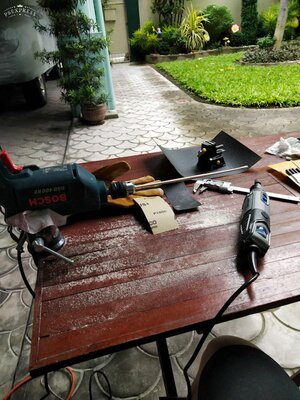
After marking off the desired diameters along the length of the dowel, I insert the dowel into the drill chuck. If I need to take a lot off, I will use the Dremel sander to do the initial tapering while spinning the dowel on the drill. I then finish the job with sandpaper squeezed between my thumb and forefinger as the dowel spins on the drill and while using the heavy duty glove (it will get pretty hot).
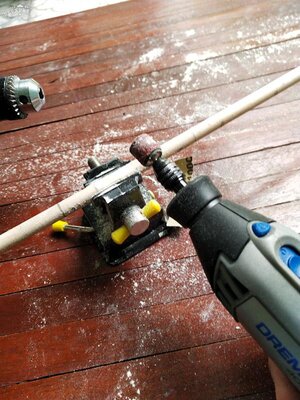
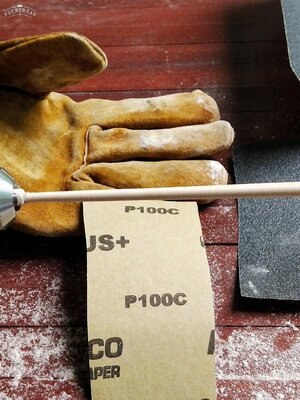
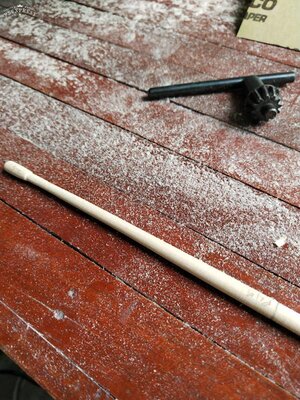
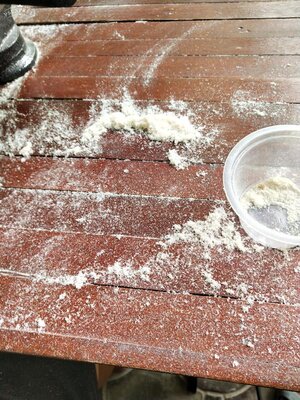
Oh, there is gold in them wood shavings...save this for future wood filler when mixed with white glue.
Here's the masts after a light black wash and a couple coats of tung oil.
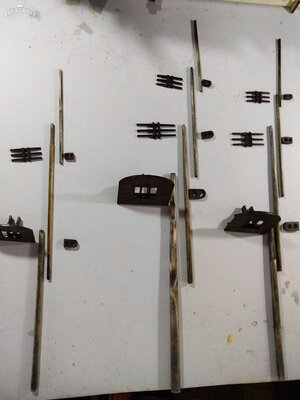
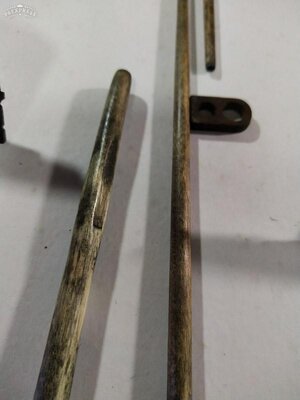
Assembling the masts was pretty uneventful, but required minor sanding and shaping to make sure the dowels fit snug against the caps and cross trees.
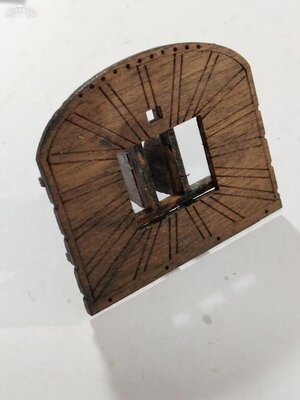
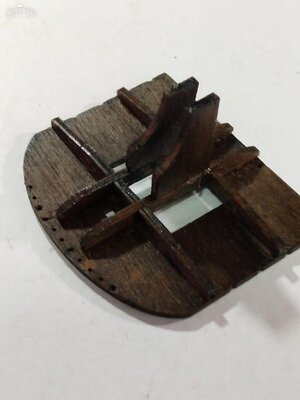
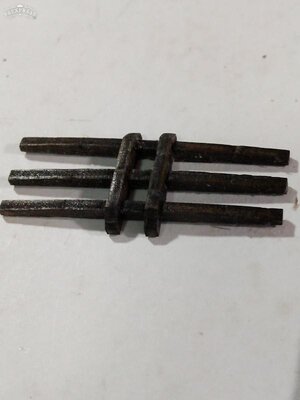
Here's the main mast after putting on some black wooldings.
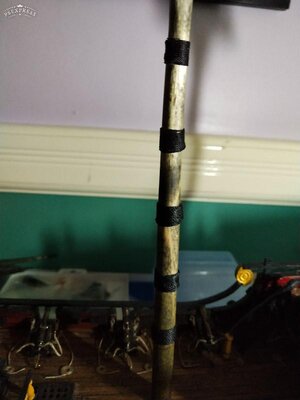
Working from the plans, I cut the dowels to the desired length (actually, slightly longer than the plans, in order to allow a short end piece to go into the drill chuck later on). Gentle note to ZHL, if one were to follow the plans, even if you measure precisely, you will find you will be short on the 4mm round dowels...go ahead, add up all the 4mm requirements on the plans and tell me what you come up with. Good thing I have a couple dowels in my stash so I am all good.
Also, be very careful about tapering the dowels based in the drawings...you have to do an actual measurement of the required diameter based on the round holes in the caps and the squared off dimensions on the cross trees. Be careful also which part of the dowels to round or square off because the instructions aren't always clear.
I have made notes to myself (in red) to make sure I don't make a mistake.

I must say, I don't have any special tools that I can use to taper the rods so I adapted some of the techniques used by some of our friends in the forum.
Here is my simple set up for tapering the dowels..... an electric drill, a vise, a Dremel tool, heavy duty work gloves, some mini flat files, a caliper and sandpaper.

After marking off the desired diameters along the length of the dowel, I insert the dowel into the drill chuck. If I need to take a lot off, I will use the Dremel sander to do the initial tapering while spinning the dowel on the drill. I then finish the job with sandpaper squeezed between my thumb and forefinger as the dowel spins on the drill and while using the heavy duty glove (it will get pretty hot).


Oh, there is gold in them wood shavings...save this for future wood filler when mixed with white glue.

Here's the masts after a light black wash and a couple coats of tung oil.


Assembling the masts was pretty uneventful, but required minor sanding and shaping to make sure the dowels fit snug against the caps and cross trees.


Here's the main mast after putting on some black wooldings.

- Joined
- Apr 20, 2020
- Messages
- 313
- Points
- 278

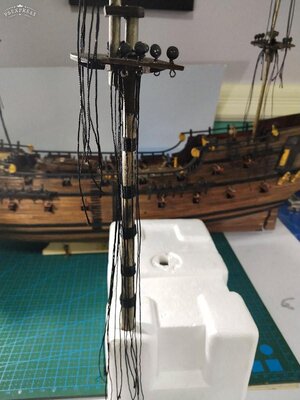
Heeding the advice from our friends, I decided to do as much work off ship as I can. I found a piece of styrofoam which served as my temporary mast base...very convenient because it makes makes it easy to turn the masts around as I need to.
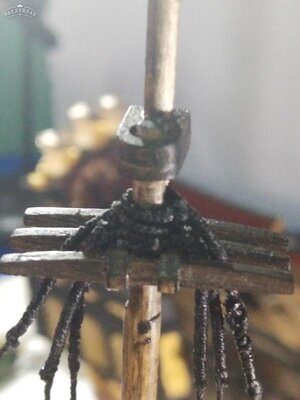
I start by preparing the shrouds. I read that the shrouds need to be served around the collar where they wrap around the mast. I didn't know the proper technique to do this so I just simply wrapped a thinner rope (after running thru bees wax to stiffen it up a bit) and a dab of CA glue to keep the serving line in place.
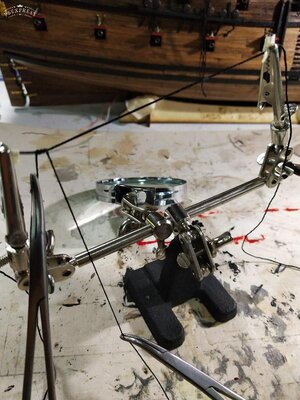
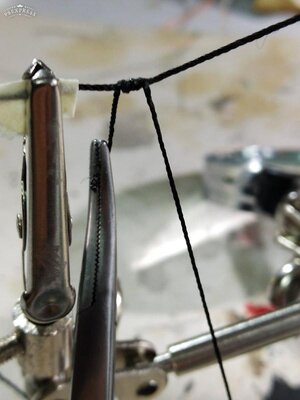
I figured I will serve about 30mm on both sides of the center line.
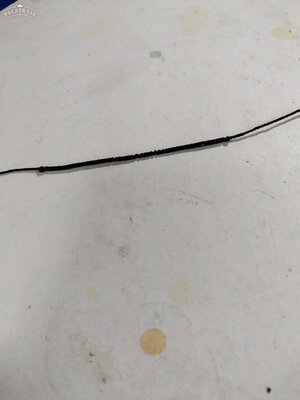
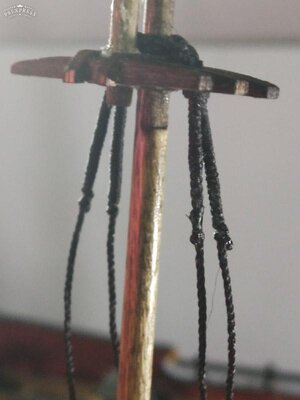
I then started attaching the shrouds to the mast, starboard side first alternating with the port side, starting from the fore most piece. Each shroud pair was seized tight around the mast. However, odd numbered shrouds were wrapped around in a special way (see drawing).
Hint: I found it very useful to use a flossing strip to make the seizings. It helped me get through some tight spaces to thread my seizing rope.
Here's how I attached odd numbered shrouds. This was a simplified method in lieu of doing a cut splice. (Note: credit to rights owner of the picture)

Once I finished serving and seizing the shrouds, it was time to start attaching the deadeyes. I know there are a lot of different methods to properly space the deadeyes, but this is my simplified version.
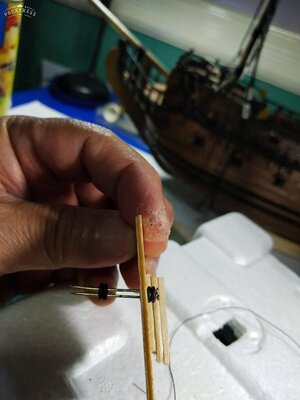
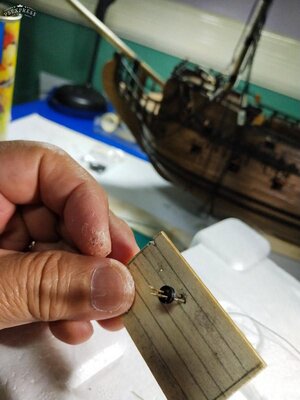
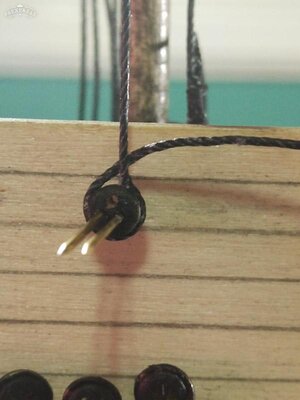
I dab a little CA glue to hold the rope in place then tie a simple knot at the 12 o'clock position thru the little gap in the rope, secured by a bit of glue. Then a couple more turns to get a tighter bind.
Note that the shroud starts from the right side of the deadeye and goes clockwise around the deadeye.
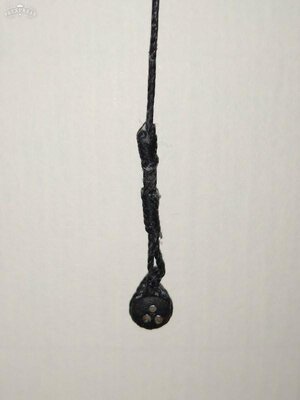
I then did seizings on two places just above the deadeye.

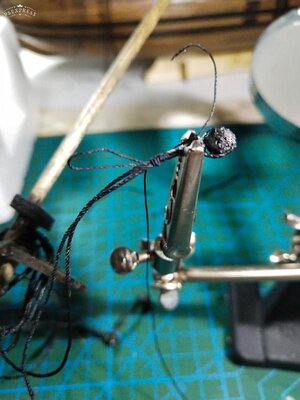
Attaching the lanyards was a matter of following the method described by Donnie in his YouTube video.
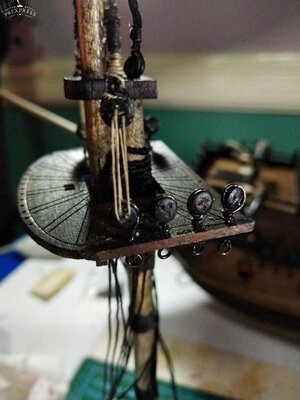
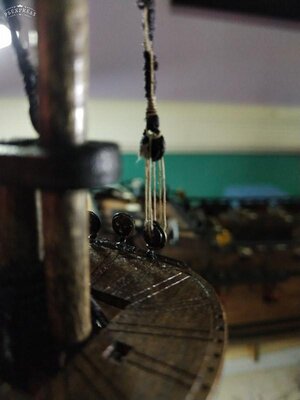
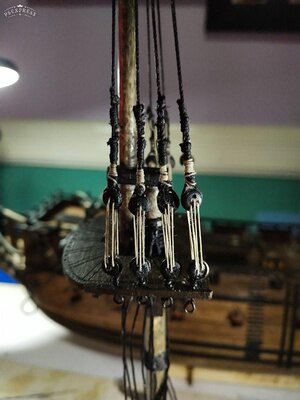
I start by preparing the shrouds. I read that the shrouds need to be served around the collar where they wrap around the mast. I didn't know the proper technique to do this so I just simply wrapped a thinner rope (after running thru bees wax to stiffen it up a bit) and a dab of CA glue to keep the serving line in place.


I figured I will serve about 30mm on both sides of the center line.


I then started attaching the shrouds to the mast, starboard side first alternating with the port side, starting from the fore most piece. Each shroud pair was seized tight around the mast. However, odd numbered shrouds were wrapped around in a special way (see drawing).
Hint: I found it very useful to use a flossing strip to make the seizings. It helped me get through some tight spaces to thread my seizing rope.


Here's how I attached odd numbered shrouds. This was a simplified method in lieu of doing a cut splice. (Note: credit to rights owner of the picture)

Once I finished serving and seizing the shrouds, it was time to start attaching the deadeyes. I know there are a lot of different methods to properly space the deadeyes, but this is my simplified version.


I dab a little CA glue to hold the rope in place then tie a simple knot at the 12 o'clock position thru the little gap in the rope, secured by a bit of glue. Then a couple more turns to get a tighter bind.
Note that the shroud starts from the right side of the deadeye and goes clockwise around the deadeye.

I then did seizings on two places just above the deadeye.


Attaching the lanyards was a matter of following the method described by Donnie in his YouTube video.


- Joined
- Dec 27, 2019
- Messages
- 551
- Points
- 308

Good job. It is gonna look great.Heeding the advice from our friends, I decided to do as much work off ship as I can. I found a piece of styrofoam which served as my temporary mast base...very convenient because it makes makes it easy to turn the masts around as I need to.
I start by preparing the shrouds. I read that the shrouds need to be served around the collar where they wrap around the mast. I didn't know the proper technique to do this so I just simply wrapped a thinner rope (after running thru bees wax to stiffen it up a bit) and a dab of CA glue to keep the serving line in place.
View attachment 183676View attachment 183677
I figured I will serve about 30mm on both sides of the center line.
View attachment 183678
View attachment 183679
I then started attaching the shrouds to the mast, starboard side first alternating with the port side, starting from the fore most piece. Each shroud pair was seized tight around the mast. However, odd numbered shrouds were wrapped around in a special way (see drawing).
Hint: I found it very useful to use a flossing strip to make the seizings. It helped me get through some tight spaces to thread my seizing rope.
View attachment 183680
View attachment 183682
View attachment 183702
Here's how I attached odd numbered shrouds. This was a simplified method in lieu of doing a cut splice. (Note: credit to rights owner of the picture)
View attachment 183681
Once I finished serving and seizing the shrouds, it was time to start attaching the deadeyes. I know there are a lot of different methods to properly space the deadeyes, but this is my simplified version.
View attachment 183684
View attachment 183685
View attachment 183686
View attachment 183687
I dab a little CA glue to hold the rope in place then tie a simple knot at the 12 o'clock position thru the little gap in the rope, secured by a bit of glue. Then a couple more turns to get a tighter bind.
Note that the shroud starts from the right side of the deadeye and goes clockwise around the deadeye.
View attachment 183689
I then did seizings on two places just above the deadeye.
View attachment 183689
View attachment 183690
Attaching the lanyards was a matter of following the method described by Donnie in his YouTube video.
View attachment 183703
View attachment 183704
View attachment 183705
- Joined
- Apr 20, 2020
- Messages
- 313
- Points
- 278

Continuing with work on the masts and shrouds. I am still doing all my work off the boat and will step my masts onto the deck much later.
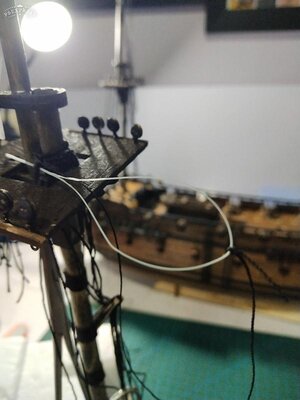
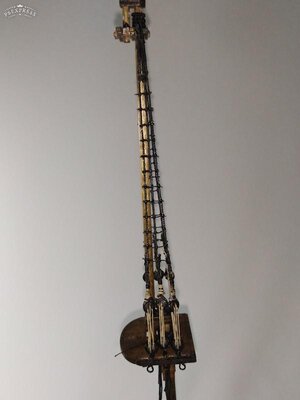
So far, I have finished rigging the shrouds for the lower masts and the top masts. For now, I will just let the lower shrouds to hang down from the masts as I will be rigging them to the channel deadeyes later on, when I have stepped the masts onto the deck. The top masts, however, have been attached to the deadeyes on the mast tops.
I started working on doing the ratlines on the top mast shrouds. I used black rope for both the shrouds and ratlines....0.5mm for the former and 0.25mm for the ratlines. All the ropes were run through beeswax for easier manageability.
For the ratlines, I did my own version of my spacer jig...just 2 pieces of wood strip approximately 10mm wide, held together by 2 clamps. This was a very effective tool to ensure my spacing between ratlines is consistent.
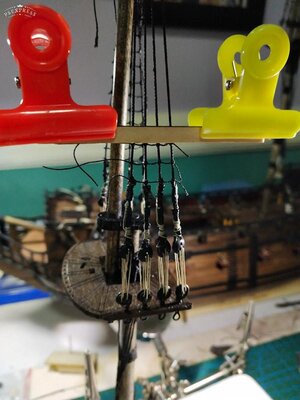
I used the clove hitch knot to tie my ratlines, with a dab of CA glue at both ends to secure in place.
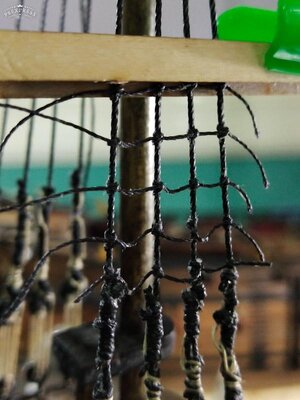
Notice in the picture below my handy helper...the blue flossing strip that facilitates threading the ratlines.
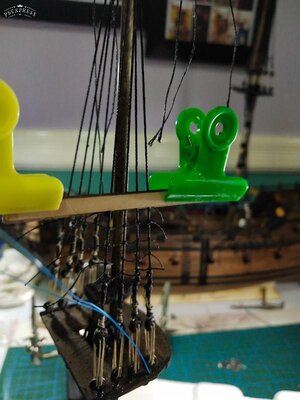
Here's the top mast shrouds with the finished ratlines.
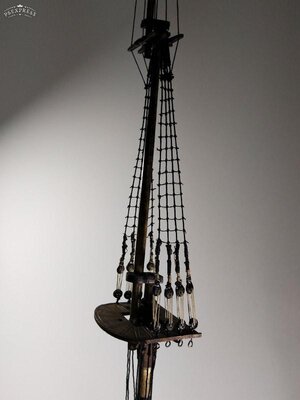
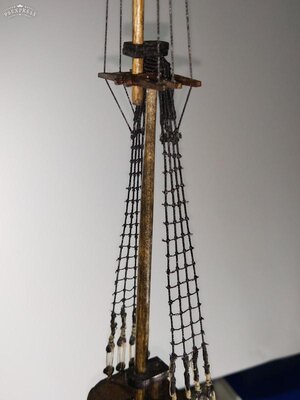
Next are the top gallant shrouds. These have to be run through holes drilled on the cross trees.
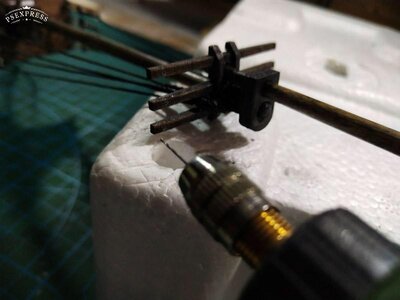
And attached to the topmast shrouds below. I should have put a futtock stave below, but the dimensions are so small as to be noticeable...but really, i just got lazy, and just tied the futtock shrouds to the ratlines below.
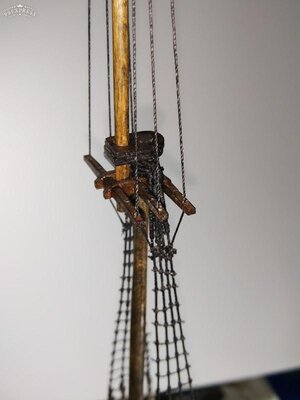
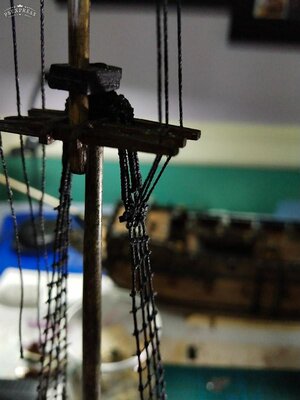
I also put in the railings on the mast tops using brass nails glued to holes on the tops.
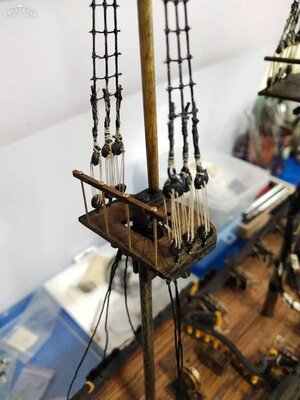
Still working on the masts off boat, the next step is to install the required blocks and pulleys on the masts.
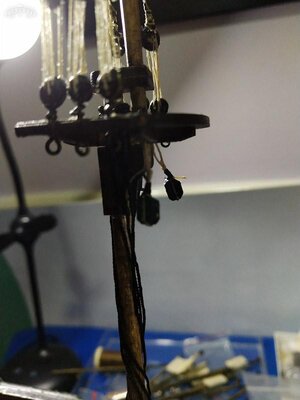
I rigged a deadeye on the lower main mast in preparation to attaching a mizzen stay later on. Note that I like to use the seizing technique below to attach blocks or deadeyes to masts. I find it's neater than just tying a knot around the mast.
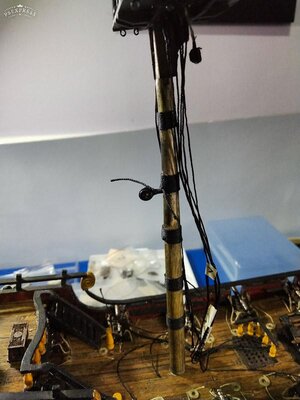
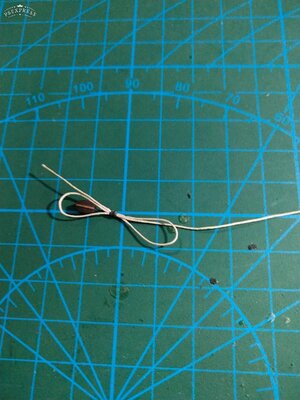
I followed the instructions and attached the blocks to the masts as required.
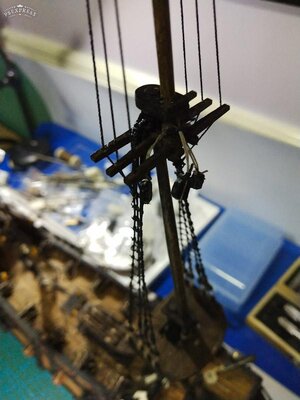
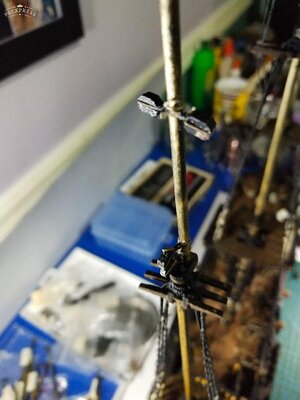
Here is what I have so far.

So far, I have finished rigging the shrouds for the lower masts and the top masts. For now, I will just let the lower shrouds to hang down from the masts as I will be rigging them to the channel deadeyes later on, when I have stepped the masts onto the deck. The top masts, however, have been attached to the deadeyes on the mast tops.
I started working on doing the ratlines on the top mast shrouds. I used black rope for both the shrouds and ratlines....0.5mm for the former and 0.25mm for the ratlines. All the ropes were run through beeswax for easier manageability.
For the ratlines, I did my own version of my spacer jig...just 2 pieces of wood strip approximately 10mm wide, held together by 2 clamps. This was a very effective tool to ensure my spacing between ratlines is consistent.

I used the clove hitch knot to tie my ratlines, with a dab of CA glue at both ends to secure in place.

Notice in the picture below my handy helper...the blue flossing strip that facilitates threading the ratlines.

Here's the top mast shrouds with the finished ratlines.


Next are the top gallant shrouds. These have to be run through holes drilled on the cross trees.

And attached to the topmast shrouds below. I should have put a futtock stave below, but the dimensions are so small as to be noticeable...but really, i just got lazy, and just tied the futtock shrouds to the ratlines below.


I also put in the railings on the mast tops using brass nails glued to holes on the tops.

Still working on the masts off boat, the next step is to install the required blocks and pulleys on the masts.
I rigged a deadeye on the lower main mast in preparation to attaching a mizzen stay later on. Note that I like to use the seizing technique below to attach blocks or deadeyes to masts. I find it's neater than just tying a knot around the mast.


I followed the instructions and attached the blocks to the masts as required.


Here is what I have so far.

- Joined
- Dec 27, 2019
- Messages
- 551
- Points
- 308

Excellent.Continuing with work on the masts and shrouds. I am still doing all my work off the boat and will step my masts onto the deck much later.
So far, I have finished rigging the shrouds for the lower masts and the top masts. For now, I will just let the lower shrouds to hang down from the masts as I will be rigging them to the channel deadeyes later on, when I have stepped the masts onto the deck. The top masts, however, have been attached to the deadeyes on the mast tops.
I started working on doing the ratlines on the top mast shrouds. I used black rope for both the shrouds and ratlines....0.5mm for the former and 0.25mm for the ratlines. All the ropes were run through beeswax for easier manageability.
For the ratlines, I did my own version of my spacer jig...just 2 pieces of wood strip approximately 10mm wide, held together by 2 clamps. This was a very effective tool to ensure my spacing between ratlines is consistent.
View attachment 185823
I used the clove hitch knot to tie my ratlines, with a dab of CA glue at both ends to secure in place.
View attachment 185824
Notice in the picture below my handy helper...the blue flossing strip that facilitates threading the ratlines.
View attachment 185825
Here's the top mast shrouds with the finished ratlines.
View attachment 185826
View attachment 185827
View attachment 185828
Next are the top gallant shrouds. These have to be run through holes drilled on the cross trees.
View attachment 185829
And attached to the topmast shrouds below. I should have put a futtock stave below, but the dimensions are so small as to be noticeable...but really, i just got lazy, and just tied the futtock shrouds to the ratlines below.
View attachment 185830
View attachment 185831
I also put in the railings on the mast tops using brass nails glued to holes on the tops.
View attachment 185832
Still working on the masts off boat, the next step is to install the required blocks and pulleys on the masts.
I rigged a deadeye on the lower main mast in preparation to attaching a mizzen stay later on. Note that I like to use the seizing technique below to attach blocks or deadeyes to masts. I find it's neater than just tying a knot around the mast.
View attachment 185833
View attachment 185834
I followed the instructions and attached the blocks to the masts as required.
View attachment 185835
View attachment 185836
View attachment 185837
Here is what I have so far.
View attachment 185838
I likes it, Matie! Hargh, hargh, hargh! Hoist the yard arms!
nice work !
Man she's comin along great Reggie!!
All that detail trying to make me forget about the lass in the window,
didnt work, I remember LOL
All that detail trying to make me forget about the lass in the window,
didnt work, I remember LOL
- Joined
- Apr 20, 2020
- Messages
- 313
- Points
- 278

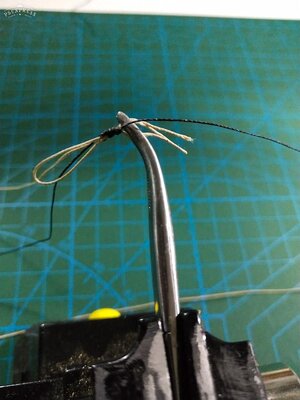
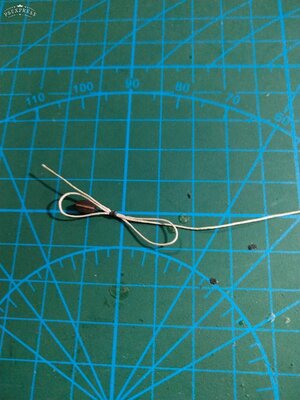
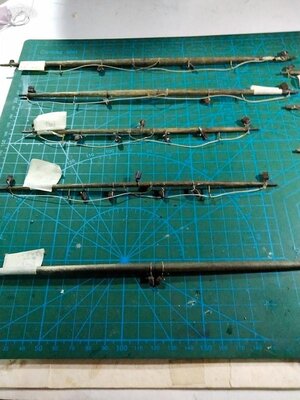
Still doing most of my work off-boat using my trusty styrofoam base. After I attached the blocks to the masts, my next task was to start on the yards. Following the plans, I attached the blocks on the yards using the S-shaped seizing technique.
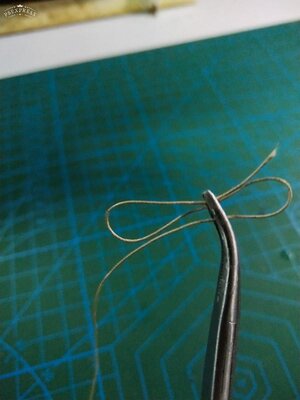

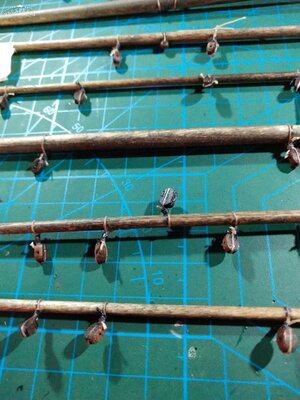
I put in the stirrups and footropes.
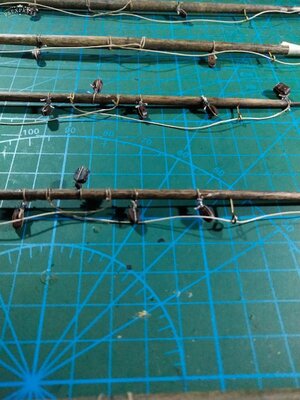
Here's the completed yards .
The next step took me a while to finish because I had to do a lot of reading as to how to mount the various yards to the masts. The instructions weren't clear which method to use to attach the different types of yards, i.e. yards for lower mast, top mast, topgallant and royal masts.
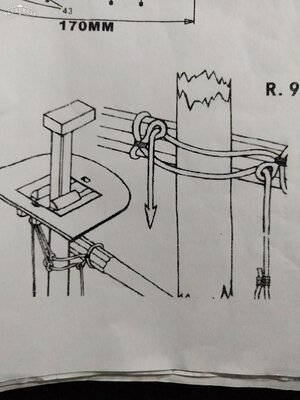
In the end, I decided to use the method below using truss pendants to mount the lower yards for all 3 masts(mizzen, main and fore), except I added trucks (rollers).
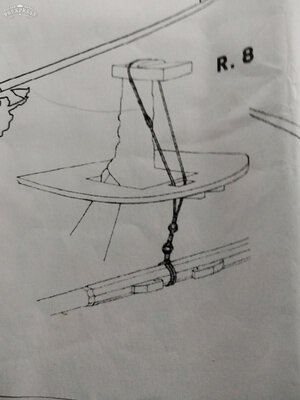
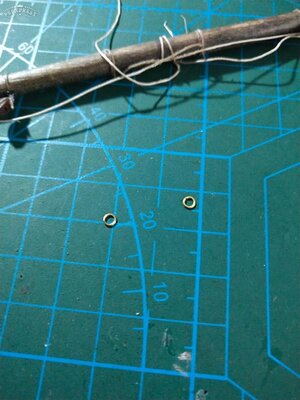
The kit didn't come with the tiny rings for the sling. Luckily I was able to dig up a couple from my stash.
The yard was attached to the sling using the rings, and the rope then went through the hole in the mast top and then slung to the mast cap.
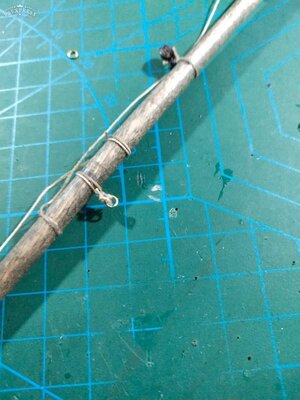
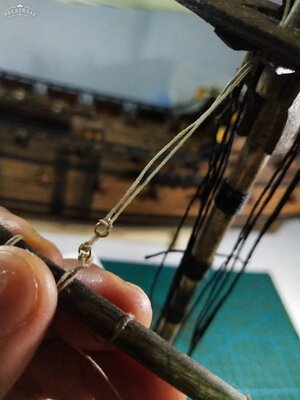
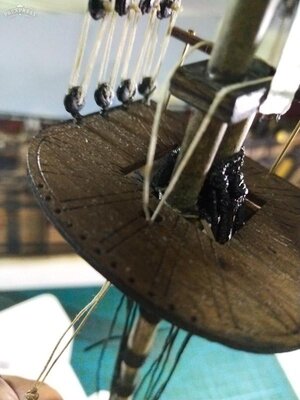
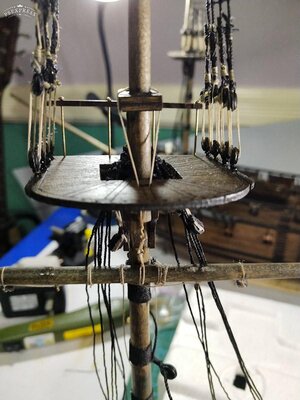
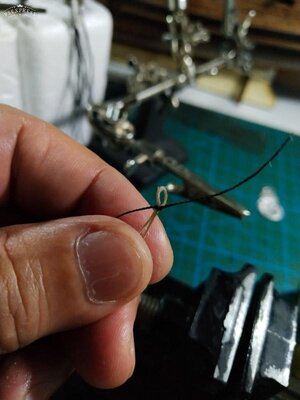
Still working on the lower yards...I attached the yard to the mast is using a truss as illustrated by the picture at the beginning of this post. I started by forming an eye at the end of the rope. I followed the illustration to form the truss around the mast, and, rightly or wrongly, I decided to put rollers(trucks) on the truss.There will be two lengths of rope that I will leave hanging down for later rigging to the deck.
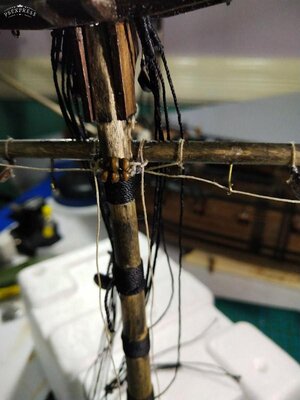
For the topmast and topgallant yards, I decided to mount using the following approach. It is basically a parrel that secures the yard to the topmast.
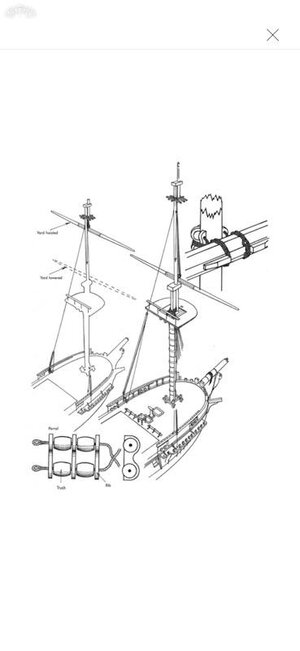
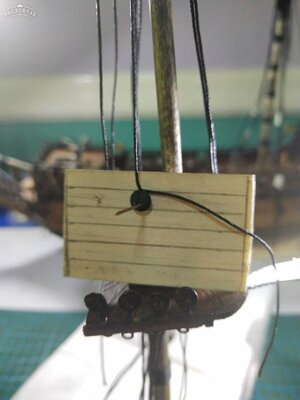
Except I didn't have the parts to make a parrel. As shown in above drawing, I needed rollers(trucks) which i have, and the ribs which didn't come with the kit.
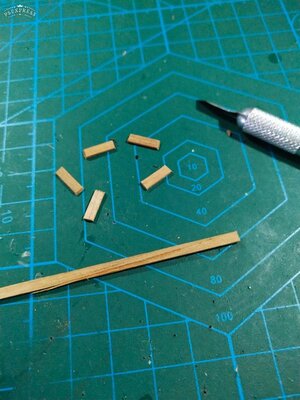
I dyi the ribs using a planking strip and cut 10mm pieces as below. I then drilled two holes where the rope will pass. Rounded the corners and put the little dimple in the center. The assembled parrel turned out ok
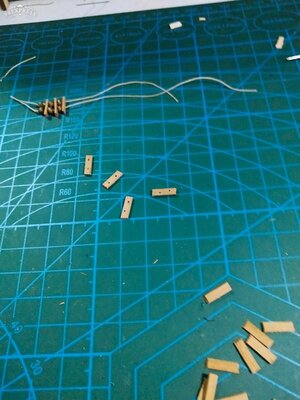
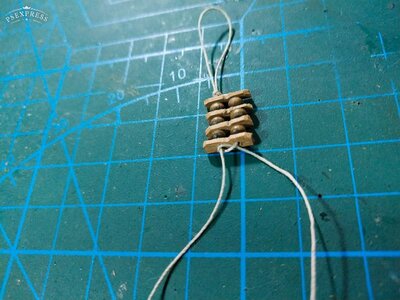
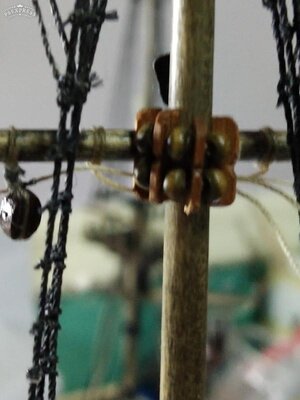
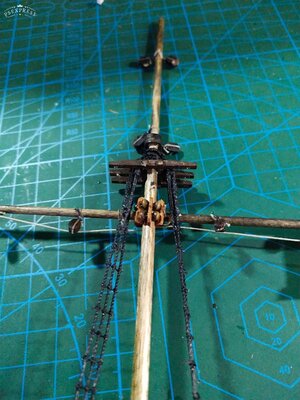
The last yard that I needed to mount is the one below the lower mizzen yard. This was simply attached using the S- shaped seizing technique.
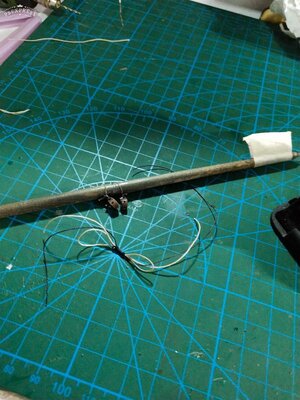
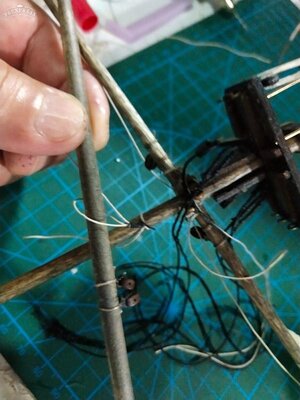
That completes the mounting of the yards. Here is what I have so far.
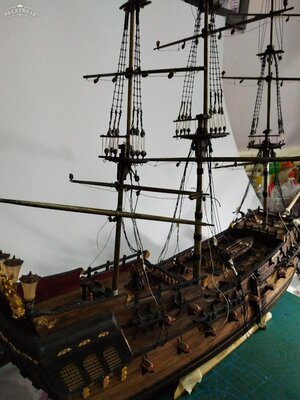
The next steps are going to be fun. I think I'm almost ready to step my masts onto the deck and start working on the standing and running rigging.
Till next time friends.... thanks for stopping by.


I put in the stirrups and footropes.

Here's the completed yards .

The next step took me a while to finish because I had to do a lot of reading as to how to mount the various yards to the masts. The instructions weren't clear which method to use to attach the different types of yards, i.e. yards for lower mast, top mast, topgallant and royal masts.
In the end, I decided to use the method below using truss pendants to mount the lower yards for all 3 masts(mizzen, main and fore), except I added trucks (rollers).


The kit didn't come with the tiny rings for the sling. Luckily I was able to dig up a couple from my stash.

The yard was attached to the sling using the rings, and the rope then went through the hole in the mast top and then slung to the mast cap.


Still working on the lower yards...I attached the yard to the mast is using a truss as illustrated by the picture at the beginning of this post. I started by forming an eye at the end of the rope. I followed the illustration to form the truss around the mast, and, rightly or wrongly, I decided to put rollers(trucks) on the truss.There will be two lengths of rope that I will leave hanging down for later rigging to the deck.


For the topmast and topgallant yards, I decided to mount using the following approach. It is basically a parrel that secures the yard to the topmast.

Except I didn't have the parts to make a parrel. As shown in above drawing, I needed rollers(trucks) which i have, and the ribs which didn't come with the kit.
I dyi the ribs using a planking strip and cut 10mm pieces as below. I then drilled two holes where the rope will pass. Rounded the corners and put the little dimple in the center. The assembled parrel turned out ok


The last yard that I needed to mount is the one below the lower mizzen yard. This was simply attached using the S- shaped seizing technique.


That completes the mounting of the yards. Here is what I have so far.

The next steps are going to be fun. I think I'm almost ready to step my masts onto the deck and start working on the standing and running rigging.
Till next time friends.... thanks for stopping by.
Wow, Reggie! That’s amazing! Maybe I can use some of those ideas when I start work on my yards.Still doing most of my work off-boat using my trusty styrofoam base. After I attached the blocks to the masts, my next task was to start on the yards. Following the plans, I attached the blocks on the yards using the S-shaped seizing technique.
View attachment 186869
View attachment 186870
View attachment 186871
View attachment 186872
View attachment 186874
I put in the stirrups and footropes.
View attachment 186873
Here's the completed yards .
View attachment 186875
The next step took me a while to finish because I had to do a lot of reading as to how to mount the various yards to the masts. The instructions weren't clear which method to use to attach the different types of yards, i.e. yards for lower mast, top mast, topgallant and royal masts.
In the end, I decided to use the method below using truss pendants to mount the lower yards for all 3 masts(mizzen, main and fore), except I added trucks (rollers).
View attachment 186879
View attachment 186880
The kit didn't come with the tiny rings for the sling. Luckily I was able to dig up a couple from my stash.
View attachment 186881
The yard was attached to the sling using the rings, and the rope then went through the hole in the mast top and then slung to the mast cap.
View attachment 186882
View attachment 186884
View attachment 186885
View attachment 186883
Still working on the lower yards...I attached the yard to the mast is using a truss as illustrated by the picture at the beginning of this post. I started by forming an eye at the end of the rope. I followed the illustration to form the truss around the mast, and, rightly or wrongly, I decided to put rollers(trucks) on the truss.There will be two lengths of rope that I will leave hanging down for later rigging to the deck.
View attachment 186896
View attachment 186897
For the topmast and topgallant yards, I decided to mount using the following approach. It is basically a parrel that secures the yard to the topmast.
View attachment 186903
Except I didn't have the parts to make a parrel. As shown in above drawing, I needed rollers(trucks) which i have, and the ribs which didn't come with the kit.
I dyi the ribs using a planking strip and cut 10mm pieces as below. I then drilled two holes where the rope will pass. Rounded the corners and put the little dimple in the center. The assembled parrel turned out ok
View attachment 186905
View attachment 186906
View attachment 186907
View attachment 186908
View attachment 186909
The last yard that I needed to mount is the one below the lower mizzen yard. This was simply attached using the S- shaped seizing technique.
View attachment 186910
View attachment 186911
That completes the mounting of the yards. Here is what I have so far.
View attachment 186912
The next steps are going to be fun. I think I'm almost ready to step my masts onto the deck and start working on the standing and running rigging.
Till next time friends.... thanks for stopping by.
Mentally filing this information away for my use later.
- Joined
- Apr 20, 2020
- Messages
- 313
- Points
- 278

Thanks for the kind words... my build log was primarily intended for newbies like me... coming from an absolute zero knowledge base, I have had to research almost every single step (with lots of help from our friends here in the forum). Some of my posts might be second nature to more experienced modelers, but my intent is to share the learning and improvising process for people like me who have very little experience and have limited access to tools and supplies.
- Joined
- Jan 9, 2020
- Messages
- 10,566
- Points
- 938

Reggie you are doing great work on the rigging. And the worst part is that rigging techniques are vastly different for different ships. So you are right in saying that there is a lot of research that goes into each different build. Be that as it may, your progress is wonderful to watch - and what I really like is that you are using some "unconventional" ideas to solve common problems. And like @Soozook and @Jeff T said - this is great for any prospective builder!


