Hey tonphil, I see your from South Jersey. My wife is from the Caldwells but she's been in Texas since the late 70's. Every so often her northern accent slips in and I remind her this is Texas, Ha!Looking good. Yes me too, Wood will be my material from now on.
-

Win a Free Custom Engraved Brass Coin!!!
As a way to introduce our brass coins to the community, we will raffle off a free coin during the month of August. Follow link ABOVE for instructions for entering.
-

PRE-ORDER SHIPS IN SCALE TODAY!
The beloved Ships in Scale Magazine is back and charting a new course for 2026!
Discover new skills, new techniques, and new inspirations in every issue.
NOTE THAT OUR FIRST ISSUE WILL BE JAN/FEB 2026
You are using an out of date browser. It may not display this or other websites correctly.
You should upgrade or use an alternative browser.
You should upgrade or use an alternative browser.
Good afternoon all.
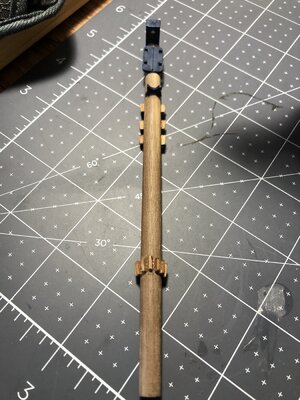
My how time HMS Flys. Almost a month since my last update. I've set the port and starboard channels then set the lower three mast and used them as a guide with a piece of thread to sketch in the strain line direction of the chain plates and dead eyes.
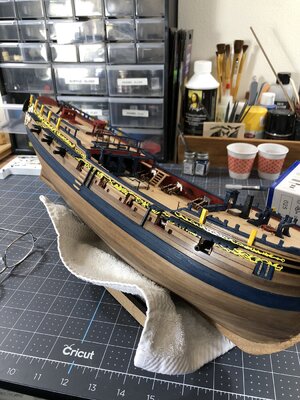
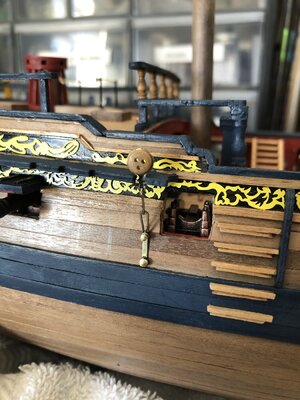
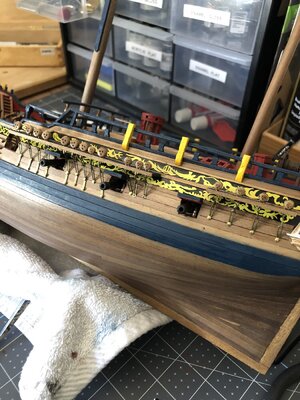
I don't know if it's just me but every time I look at a dead eye I see a face, not unlike that of the old Mr. Bill from Saturday Night Live going "Oh No!"
Next I prepared the top ends of the three mast to receive fore, main and mizzen tops with their various eyelets and dead eyes.
Then completed the required mast woolding which I had to do a few practice rounds on a dowel clamped in a vice.
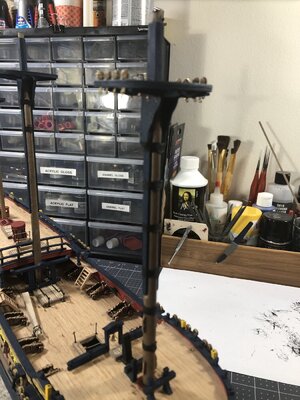
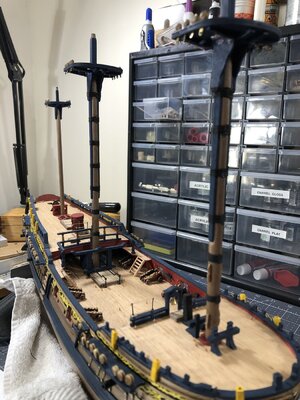
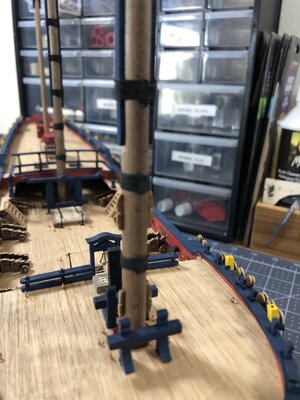
There is an amazing amount of time involved especially when clipping the brass dead eye and chain plate assemblies out then grinding off all the burrs etc.
At first I painted the whole laser etched brass sheet black for a more realistic appearance but found when cutting out and handling them that a lot of the paint was coming off. So I now wire brushed off most of it and will live with the not realistic but very shiny brass fittings.
Till next update, Happy Modeling
My how time HMS Flys. Almost a month since my last update. I've set the port and starboard channels then set the lower three mast and used them as a guide with a piece of thread to sketch in the strain line direction of the chain plates and dead eyes.


I don't know if it's just me but every time I look at a dead eye I see a face, not unlike that of the old Mr. Bill from Saturday Night Live going "Oh No!"
Next I prepared the top ends of the three mast to receive fore, main and mizzen tops with their various eyelets and dead eyes.
Then completed the required mast woolding which I had to do a few practice rounds on a dowel clamped in a vice.


There is an amazing amount of time involved especially when clipping the brass dead eye and chain plate assemblies out then grinding off all the burrs etc.
At first I painted the whole laser etched brass sheet black for a more realistic appearance but found when cutting out and handling them that a lot of the paint was coming off. So I now wire brushed off most of it and will live with the not realistic but very shiny brass fittings.
Till next update, Happy Modeling
Hello all.
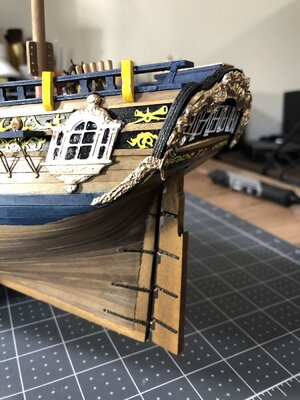
I have a small update here. Not a lot of progress but I am still at it. I finished most of the rails and decorations on the bow prow. Began work on the foremast shroud lines. The first few I tried did not look very good so I took them out and started over twice. I made a little jig to keep the distance between the upper and lower deadeyes fairly uniform in their spread. After repeated seizing on the lines I became somewhat proficient at it and after finishing the foremast portion I noticed I left way too much tail on each line. The plans called for four lashings per tail which I have but now I'm trying to decide if I should redo them and shorten the tail to a more accurate representation. I really would appreciate any comments or suggestions on this.
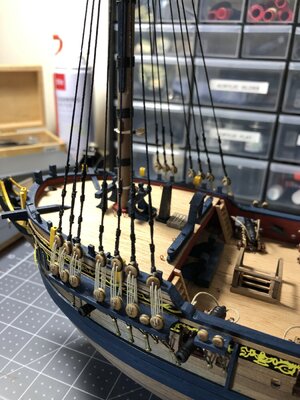
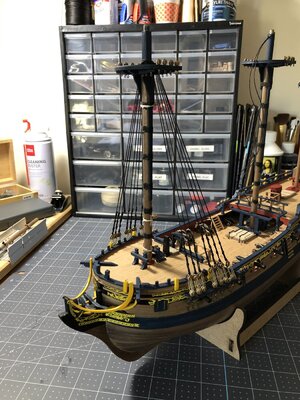
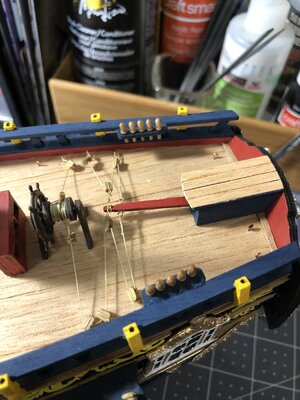
Here I've added the rudder and set the rigging for its operation.
Until next time
Happy modeling!
I have a small update here. Not a lot of progress but I am still at it. I finished most of the rails and decorations on the bow prow. Began work on the foremast shroud lines. The first few I tried did not look very good so I took them out and started over twice. I made a little jig to keep the distance between the upper and lower deadeyes fairly uniform in their spread. After repeated seizing on the lines I became somewhat proficient at it and after finishing the foremast portion I noticed I left way too much tail on each line. The plans called for four lashings per tail which I have but now I'm trying to decide if I should redo them and shorten the tail to a more accurate representation. I really would appreciate any comments or suggestions on this.


Here I've added the rudder and set the rigging for its operation.


Until next time
Happy modeling!
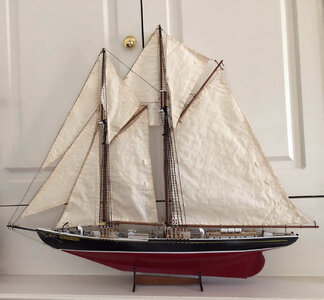
Really nice build. I’m following this now, as the Fly is my next build. Need to finish my Bluenose 1st. As you’re doing the rigging can you post some of the steps and techniques you’re doing? I’m nervous about the amount of rigging on this build and don’t want to screw it up.
Will try to post some details as to the rigging. Mostly blocks and mast details this week and will post some shots of that process. Following other build logs really helped me with my Rattlesnake as well as Pegasus. Did Bluenose II last year. One of my favorites.Really nice build. I’m following this now, as the Fly is my next build. Need to finish my Bluenose 1st. As you’re doing the rigging can you post some of the steps and techniques you’re doing? I’m nervous about the amount of rigging on this build and don’t want to screw it up.
Hi ChrisReally nice build. I’m following this now, as the Fly is my next build. Need to finish my Bluenose 1st. As you’re doing the rigging can you post some of the steps and techniques you’re doing? I’m nervous about the amount of rigging on this build and don’t want to screw it up.
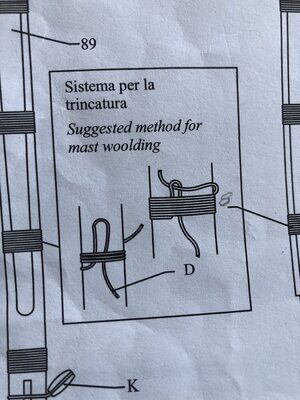
Thank you for the kind words. When it comes to rigging I am a novice and yes this part makes me nervous as well. For me the key to rigging seems to be ones ability to tie good looking and appropriate knots. Especially knots that attach the various blocks and dead eyes to there respective eyelets or each other along a mast or spar. Below is a photo from my FLY plans showing how to do "mast woolding". I also use this same technique to seize two lines together and all the seizings you see in my photos were done with this method. Believe me I'm stumbling along here at this point. There are some really good videos on this subject on YouTube. Search 'seizing a rope or line on model ships'. I bought a used book on the subject 'Knowing the Ropes' which is very help full. I'll be sure to check out your Bluenose build.
Good looking ship STGCSWill try to post some details as to the rigging. Mostly blocks and mast details this week and will post some shots of that process. Following other build logs really helped me with my Rattlesnake as well as Pegasus. Did Bluenose II last year. One of my favorites.
View attachment 199697
Hi all.
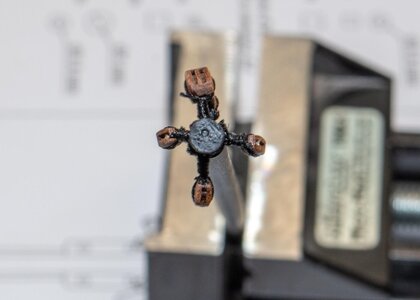
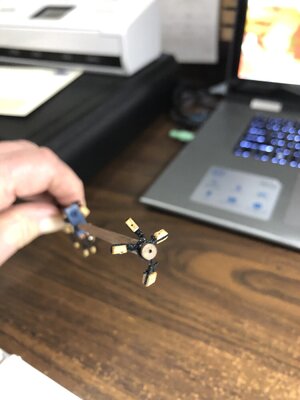
A short update and a big Thank You to TechTrek (Chris) for helping me off the sand bar! My problem was attaching single and double shive blocks to the eyelets I installed at various locations and be able to do it in a fashion that looks presentable. Wire S-hooks were the perfect solution. I've spent at least 3 days trying different methods just to pull em off and start over. Here is my results.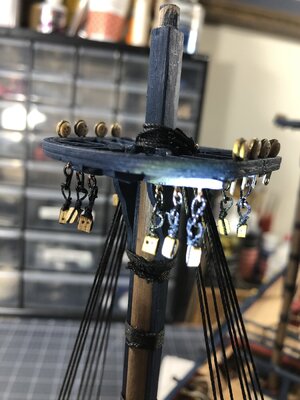
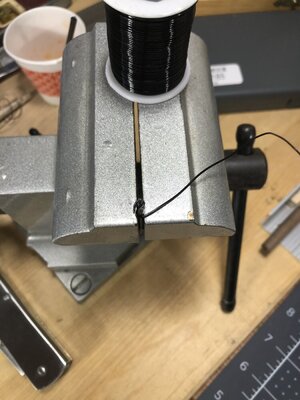
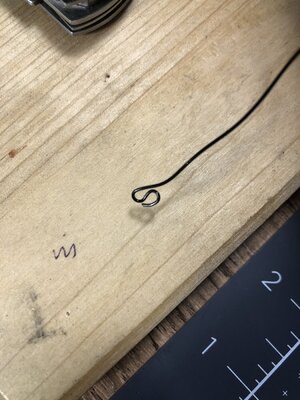
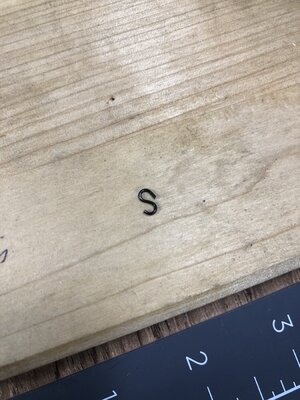
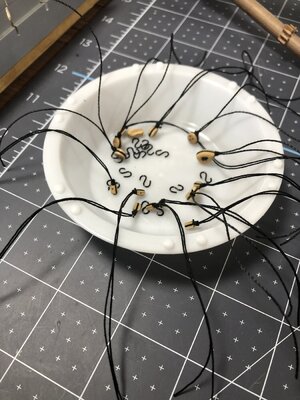
By tying off a nice tight loop with the tails shown here one, this goes on the one part of the S-hook while the other end of the S-hook slides nicely into the eyelet. Because some of my eyelets needed to be rotated 90 deg. to make the block hang right I simply put a 90 deg. rotation at the center of the S-hook. Then just do a slight crimp closing of the hooks and done!
A short update and a big Thank You to TechTrek (Chris) for helping me off the sand bar! My problem was attaching single and double shive blocks to the eyelets I installed at various locations and be able to do it in a fashion that looks presentable. Wire S-hooks were the perfect solution. I've spent at least 3 days trying different methods just to pull em off and start over. Here is my results.


By tying off a nice tight loop with the tails shown here one, this goes on the one part of the S-hook while the other end of the S-hook slides nicely into the eyelet. Because some of my eyelets needed to be rotated 90 deg. to make the block hang right I simply put a 90 deg. rotation at the center of the S-hook. Then just do a slight crimp closing of the hooks and done!
Looking great Daniel, glad I could help out. What is the black wire you’re using? I think I might need a roll of that. I like the jig you made for your S hooks. I just used my round bending pliers.Hi all.
A short update and a big Thank You to TechTrek (Chris) for helping me off the sand bar! My problem was attaching single and double shive blocks to the eyelets I installed at various locations and be able to do it in a fashion that looks presentable. Wire S-hooks were the perfect solution. I've spent at least 3 days trying different methods just to pull em off and start over. Here is my results.View attachment 200444View attachment 200445View attachment 200446View attachment 200447View attachment 200448
By tying off a nice tight loop with the tails shown here one, this goes on the one part of the S-hook while the other end of the S-hook slides nicely into the eyelet. Because some of my eyelets needed to be rotated 90 deg. to make the block hang right I simply put a 90 deg. rotation at the center of the S-hook. Then just do a slight crimp closing of the hooks and done!
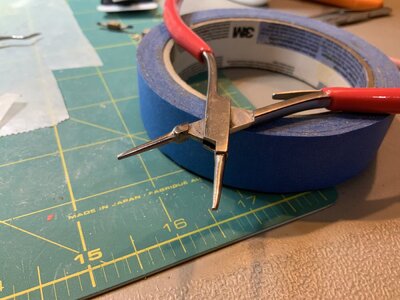
The wire is a 20ga. black coated 'hobby wire' I bought here at a local hobby store (Hobby Lobby). The jig is just a couple 4penny finish nails held in my vice.Looking great Daniel, glad I could help out. What is the black wire you’re using? I think I might need a roll of that. I like the jig you made for your S hooks. I just used my round bending pliers.
View attachment 200465
Thanks for posting the shot of the fore top. I was in doubt about the block arrangement under the platform. Your photo confirmed I got it right.Hi all.
A short update and a big Thank You to TechTrek (Chris) for helping me off the sand bar! My problem was attaching single and double shive blocks to the eyelets I installed at various locations and be able to do it in a fashion that looks presentable. Wire S-hooks were the perfect solution. I've spent at least 3 days trying different methods just to pull em off and start over. Here is my results.View attachment 200444View attachment 200445View attachment 200446View attachment 200447View attachment 200448
By tying off a nice tight loop with the tails shown here one, this goes on the one part of the S-hook while the other end of the S-hook slides nicely into the eyelet. Because some of my eyelets needed to be rotated 90 deg. to make the block hang right I simply put a 90 deg. rotation at the center of the S-hook. Then just do a slight crimp closing of the hooks and done!
Glad I could Help ST. Mabey you can help me. The block group on the end of the Jibboom of the Bowsprit. I can't tell if its 4 singles and 1 double or 3 singles and 1 double. I've been studying the rigging some but still not sure.Thanks for posting the shot of the fore top. I was in doubt about the block arrangement under the platform. Your photo confirmed I got it right.
I went with 4 singles and one double. Figured if there is something on the port side it needs a mirror image on starboard. From this point forward I think I'll be having a lot of questions. Rigging is not my strong point.Glad I could Help ST. Mabey you can help me. The block group on the end of the Jibboom of the Bowsprit. I can't tell if its 4 singles and 1 double or 3 singles and 1 double. I've been studying the rigging some but still not sure.
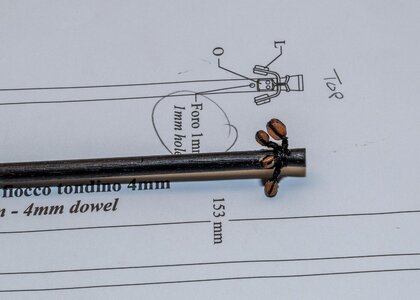
For now I went with 3 and 1. It should be easy enough to add the fourth single if needed. I agree with you though that if you follow symmetry there would be 4 singles. By the way on my next build the Swedish VASA, I will use after market shive blocks that look much better. Wish I had done it on my HMS FLY like it looks you did.I went with 4 singles and one double. Figured if there is something on the port side it needs a mirror image on starboard. From this point forward I think I'll be having a lot of questions. Rigging is not my strong point. View attachment 200843View attachment 200844
This is the first build with after market blocks. Kit blocks are not very pretty and these are really nice.For now I went with 3 and 1. It should be easy enough to add the fourth single if needed. I agree with you though that if you follow symmetry there would be 4 singles. By the way on my next build the Swedish VASA, I will use after market shive blocks that look much better. Wish I had done it on my HMS FLY like it looks you did.View attachment 200851
I got them from craftysailor.com. Also got the ships boat from there. Nice stuff and ships fast. Model shipways also carries them.@STGCS , where did you get the rigging block you're using in your build? I like that look much more than the ones that come with the kit.
Thanks for the info.I got them from craftysailor.com. Also got the ships boat from there. Nice stuff and ships fast. Model shipways also carries them.
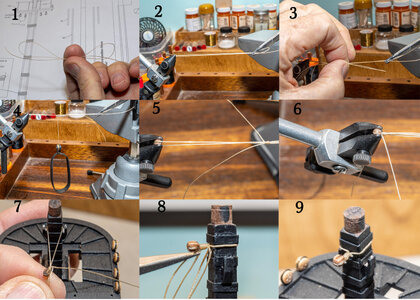
I would guess everybody knows how to attach a block to a mast or spar so this will be old hat to most folks. I thought I’d show the process I use as the tools are a little bit different.
1. Make a figure eight in the line to be tied.
2. Then clamp the ends between a fly-tying vice and a pair of hemostats secured in a vice.
3. Take another piece of line and tie a standard sizing knot around the middle of the lines.
4. I usually do five wraps checking between each wrap to make sure all the wraps are snugged up to each other.
5. Release the vice and insert a block leaving the loop in the jaws and tighten the vice.
6. Slide the knot down the line and push it tight to the block.
7. Take the assembly from the vice and hemostats and place the other loop on the mast or spar and pulling the other tag end close the loop over the mast.
8. Apply a small drop of CA to the knot and trim the tags. I use a small pair of fly-tying scissors that are great for getting close to the knot.
9. Trimmed and secured to the mast.


