THANK YOU DON VERY MUCH ONE OTHER QUESTION, DO YOU FIND THE WELL BOND SETTING UP TO QUICKLY I HAVE HAD THIS PROLEM WITH WELL BOND ON THE FRAMES, THANKS. GOD BLESS STAY SAFE YOU AND YOURS DON
-

Win a Free Custom Engraved Brass Coin!!!
As a way to introduce our brass coins to the community, we will raffle off a free coin during the month of August. Follow link ABOVE for instructions for entering.
-

PRE-ORDER SHIPS IN SCALE TODAY!
The beloved Ships in Scale Magazine is back and charting a new course for 2026!
Discover new skills, new techniques, and new inspirations in every issue.
NOTE THAT OUR FIRST ISSUE WILL BE JAN/FEB 2026
- Home
- Forums
- Ships of Scale Group Builds and Projects
- Bluenose PoF Group Build
- Bluenose Group Build Logs
You are using an out of date browser. It may not display this or other websites correctly.
You should upgrade or use an alternative browser.
You should upgrade or use an alternative browser.
YUANQING BLUENOSE - Don Robinson
- Thread starter DonRobinson
- Start date
- Watchers 26
-
- Tags
- bluenose yuanqing models
Hi Don,
Just caught up on your log. I’m fascinated by your progress. You have some great explanations of your methods.
Jan
Just caught up on your log. I’m fascinated by your progress. You have some great explanations of your methods.
Jan
Thanks Jan, hopefully this helps others avoid some of the mistakes I have made
Hey all, I finally have an update to show. I did not bother to show all the frame installations as @Dean62 did a superb job of that, so if you haven't check out his log! Here I will show the stern and how it's made, it is a real test of your nerves and patience so here we go:
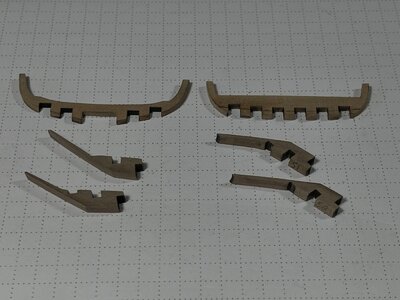
parts required for the stern, top left is 56 and then 57 beside it. The bevels have already been filed down on 56.
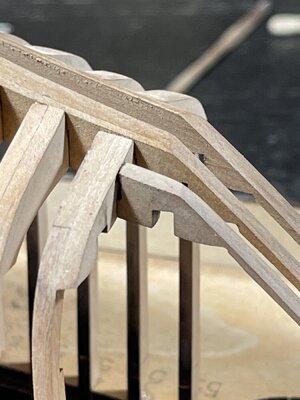
After lots of filing, sanding and dry fitting gluing started. Have a good look at these as it is the last time you will see them in this shape!!
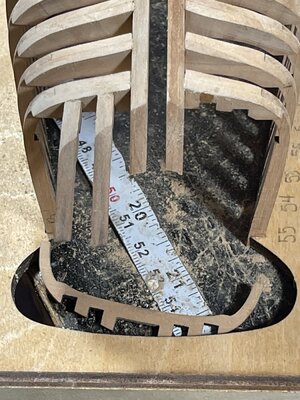
some more added and the first two snapped off. These break off very easily and they broke more than once causing me to do the walk away several times. It was really pissing me off until I finally looked in the instruction book and seen that these will all be covered never to be seen again. Well out with the vodka and celebrating started, then another day off for healing. LOL So when this happens to you do not stress about it as it is not a big deal.
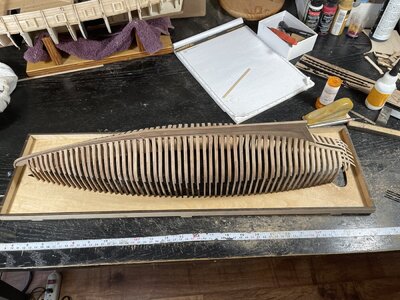
A quick overall look
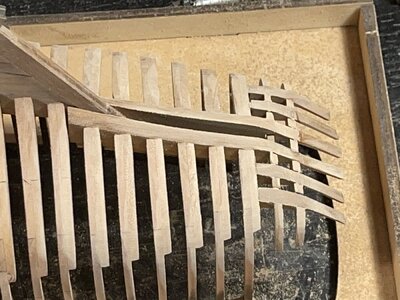
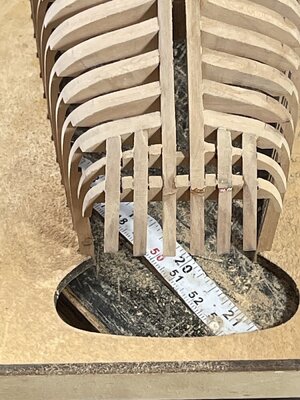
Here is a picture of my crippled stern frames, like as said do not sweat it all of this mess will be hid.
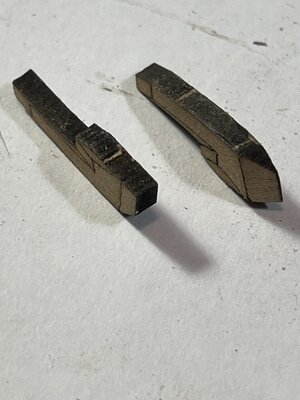
Frames 58, the one on the right has the first bevel done
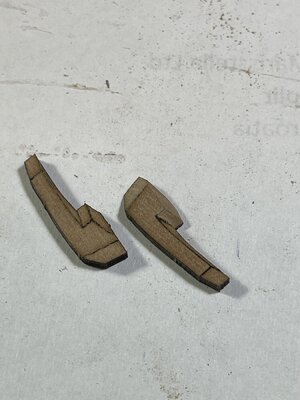
The second bevel completed
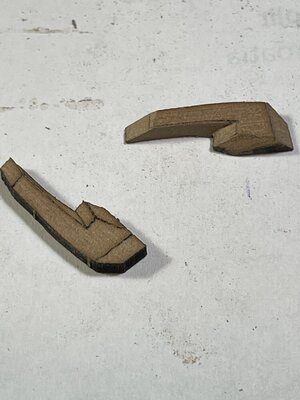
Third and forth bevels finished
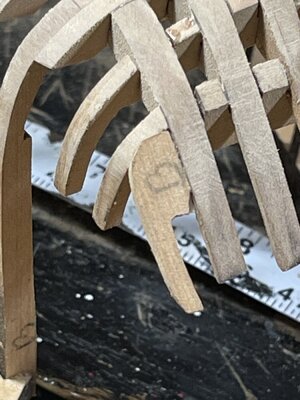
Installed on to the stern, i am not sure what the little angle cut by the stern frame is for but it is on both pieces
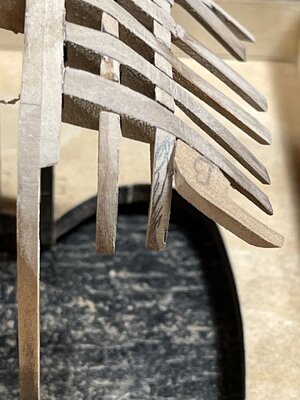
Here I am about to start fairing frame 58 so I mark the frame it is attached to with pencil to help guide me. Gently using a sanding stick and resting it on the other frames to use as a guide I sand until the pencil lines are gone.
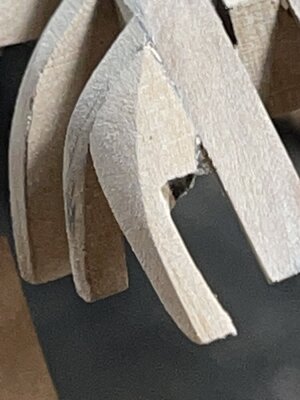
And here is what the end result looks like. You can see a few pencil lines remaining but those were gone when I sanded again with 120 grit
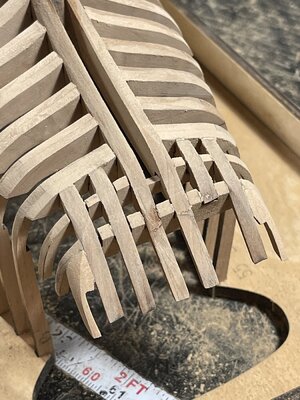
A final look to show the process, it is still not completely sanded but you get the idea. And you might notice another frame gone, this is the third time for that one so it is staying off until later when more support is added. Also notice the varying lengths of the frames this will also be left until later when the planking is added to try and trim these now is asking for a disaster and would be hard to do with any accuracy.
So enjoy this part, really TAKE YOUR TIME and have lots drinks on hand, you will need them!

Take Care, next up are the bow filler blocks.

parts required for the stern, top left is 56 and then 57 beside it. The bevels have already been filed down on 56.

After lots of filing, sanding and dry fitting gluing started. Have a good look at these as it is the last time you will see them in this shape!!

some more added and the first two snapped off. These break off very easily and they broke more than once causing me to do the walk away several times. It was really pissing me off until I finally looked in the instruction book and seen that these will all be covered never to be seen again. Well out with the vodka and celebrating started, then another day off for healing. LOL So when this happens to you do not stress about it as it is not a big deal.

A quick overall look


Here is a picture of my crippled stern frames, like as said do not sweat it all of this mess will be hid.

Frames 58, the one on the right has the first bevel done

The second bevel completed

Third and forth bevels finished

Installed on to the stern, i am not sure what the little angle cut by the stern frame is for but it is on both pieces

Here I am about to start fairing frame 58 so I mark the frame it is attached to with pencil to help guide me. Gently using a sanding stick and resting it on the other frames to use as a guide I sand until the pencil lines are gone.

And here is what the end result looks like. You can see a few pencil lines remaining but those were gone when I sanded again with 120 grit

A final look to show the process, it is still not completely sanded but you get the idea. And you might notice another frame gone, this is the third time for that one so it is staying off until later when more support is added. Also notice the varying lengths of the frames this will also be left until later when the planking is added to try and trim these now is asking for a disaster and would be hard to do with any accuracy.
So enjoy this part, really TAKE YOUR TIME and have lots drinks on hand, you will need them!
Take Care, next up are the bow filler blocks.
Canoe21
Lawrence
Hello Don, Very nice work, she sure is looking great, golly you are sure flying along as well as Dean.
Regards Lawrence
Regards Lawrence
Thanks Lawrence, for the most part it has been fun so far
Canoe21
Lawrence
Hello Don, Yes I can see that, I can hardly wait to be able to start my YQ Bluenose.Thanks Lawrence, for the most part it has been fun so far
Regards Lawrence
- Joined
- May 26, 2020
- Messages
- 205
- Points
- 143

Amazing ship modeling.
Your thread is going to be the go to thread.
Thank you
Your thread is going to be the go to thread.
Thank you
Thanks Terry, You are much too kind!
- Joined
- Jan 9, 2020
- Messages
- 10,566
- Points
- 938

Superb work Don and great explanations. I agree with @marter1229 Terry - between you and @Dean62 Dean at the moment, it is great to follow and learn.
Hi Don.
I agree with the others above: nice work. By your advice, I placed my whisky on my working table.
Regards, Peter
I agree with the others above: nice work. By your advice, I placed my whisky on my working table.
Regards, Peter
Great job Don! I haven’t finished sanding mine yet. I had to dry fit and adjust the notches a little with a file to ensure everything went together. Took about 3 dry fits prior to gluing up! 
Absolutely fascinating following your work. I’ve yet to possess the skills you have but my patience is enhanced by my coffee and it’s additive. I’m enjoying bouncing between your and Deans build logs.
Jan
Jan
- Joined
- Jan 9, 2020
- Messages
- 10,566
- Points
- 938

@Pathfinder65 said: Absolutely fascinating following your work. I’ve yet to possess the skills you have but my patience is enhanced by my coffee and it’s additive. I’m enjoying bouncing between your and Deans build logs.
I fully agree, Jan!
I fully agree, Jan!

Good Morning to all! First up is to Thank everyone for stopping in , giving likes and leaving comments. This makes me happy, in fact I'm so happy that if any of you are in the neighbourhood stop in and I'll pour the drinks. In Jimsky's case coffee and donuts!!!
A quick course in bow filler blocks:
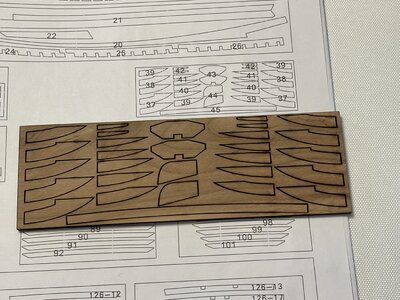
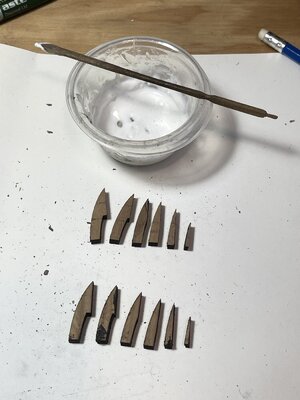
So each block consists of twelve separate pieces, pair them up and glue together, do not clean off the hateful char just yet.
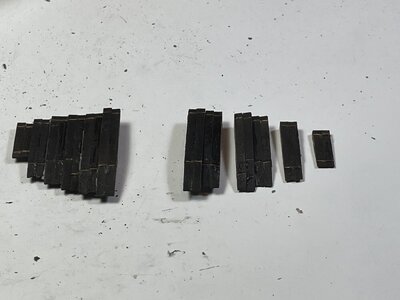
Follow this process until you have one piece of char left. LOL
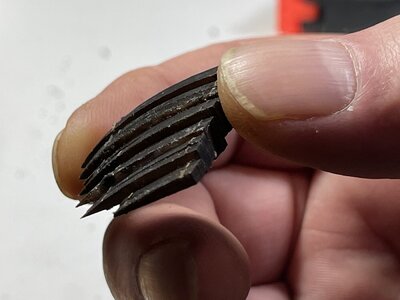
It should look something like this when completed
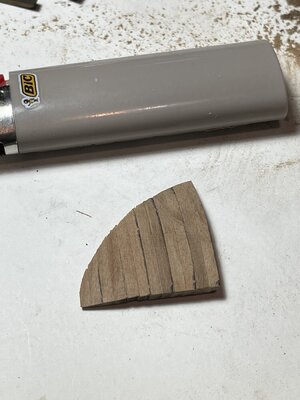
When your finished sanding here is what you'll have.
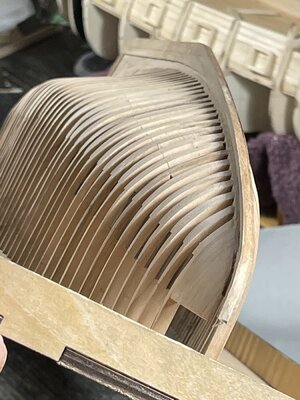
Here it is installed
I'll be right back, grab another coffee!
A quick course in bow filler blocks:


So each block consists of twelve separate pieces, pair them up and glue together, do not clean off the hateful char just yet.

Follow this process until you have one piece of char left. LOL

It should look something like this when completed

When your finished sanding here is what you'll have.

Here it is installed
I'll be right back, grab another coffee!
YEA DON R A GO TO LOG, RESTARTING MINE SOON,. GOD BLESS STAY SAFE ALL DON
Method two of filler block construction:
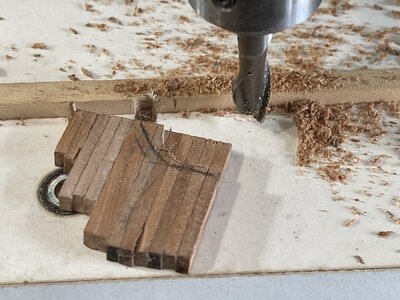
Now for those of you who tend to over sand, drop and break and generally screw things up here is how to fix things. Go through your scrap frame billets, I hope you saved them if not skip this process and go to liquor cabinet! Using table saw cut strips to width then to length and laminate together. Next is to cut the groove on the inside, this is done free hand so please no partying before attempting this!
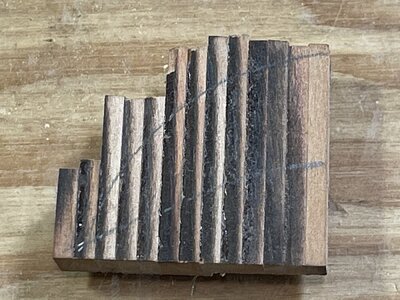
Top line is showing the final size I want and the bottom line shows where the curve or taper is going to start
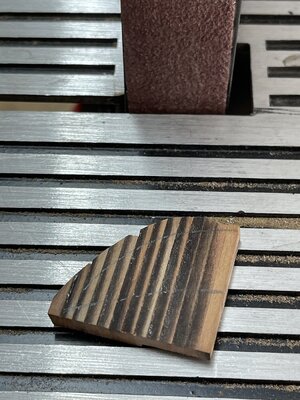
shaping has begun using belt sander
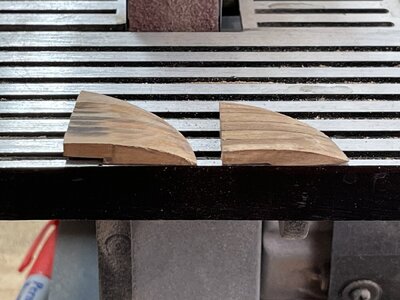
Final shaping done, new block on the left and the old on the right. Final sanding and shaping will be done inside.
I have pictures of final product installed on ship but I seem to have lost them. I'll go look for them and be back, good chance I left them by the vodka bottle.


Now for those of you who tend to over sand, drop and break and generally screw things up here is how to fix things. Go through your scrap frame billets, I hope you saved them if not skip this process and go to liquor cabinet! Using table saw cut strips to width then to length and laminate together. Next is to cut the groove on the inside, this is done free hand so please no partying before attempting this!

Top line is showing the final size I want and the bottom line shows where the curve or taper is going to start

shaping has begun using belt sander

Final shaping done, new block on the left and the old on the right. Final sanding and shaping will be done inside.
I have pictures of final product installed on ship but I seem to have lost them. I'll go look for them and be back, good chance I left them by the vodka bottle.

Considered myself lucky as I will have drinks (coffee ), and donuts! Yay!!!This makes me happy, in fact I'm so happy that if any of you are in the neighbourhood stop in and I'll pour the drinks. In Jimsky's case coffee and donuts!!!
Great job Don! Nice recovery on the scratch built side.Method two of filler block construction:
View attachment 218238
Now for those of you who tend to over sand, drop and break and generally screw things up here is how to fix things. Go through your scrap frame billets, I hope you saved them if not skip this process and go to liquor cabinet! Using table saw cut strips to width then to length and laminate together. Next is to cut the groove on the inside, this is done free hand so please no partying before attempting this!
View attachment 218252
Top line is showing the final size I want and the bottom line shows where the curve or taper is going to start
View attachment 218250
shaping has begun using belt sander
View attachment 218251
Final shaping done, new block on the left and the old on the right. Final sanding and shaping will be done inside.
I have pictures of final product installed on ship but I seem to have lost them. I'll go look for them and be back, good chance I left them by the vodka bottle.


