Hms Alert by Maarten [COMPLETED BUILD]

The progress on your bolts is impressive. You are obviously not afraid of ambitious projects.
Speaking of which - you can hire people who like to add extensions to kitchens!
Ha ha Paul,

Don t be afraid, we hired a builder who will do the biggest part. He works alone and we will help him when needed.
All technical installations I will do myself, just for the fun of it.
 
Very good progress my friend - and you nailing work is looking very good
Very clean and accurate job Thumbsup Thumbsup
BTW: I finished mine (of the normal planking) this weekend - I am sooooo happy
Because now I can go back to the interior.......
BTW2: Be carefull with the dewatering tube inside the foundation area - I guess it would be better to keep it outside the new kitchen in a bypass
Thx Uwe,

No worries, the pipes I will remove and will not be a part of the fundation. Just there untill the concreet is poured to control the rain water in the coming days.
 
Back to Alert.
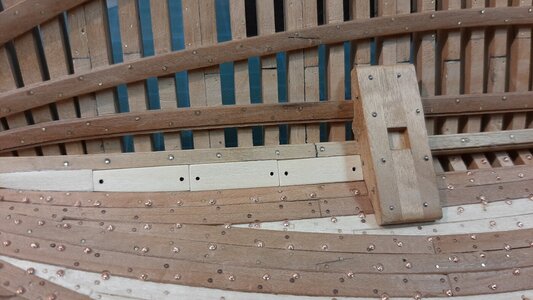
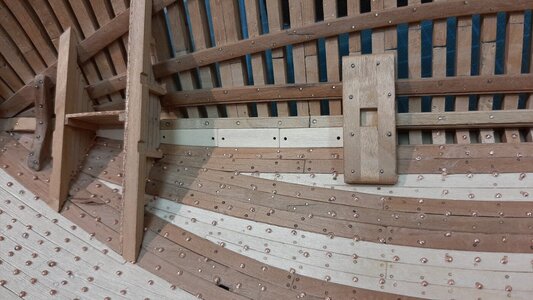
The simulation of the nails, yes fake nails, have been added to the bulkhead planks. I used needle burning for this as to my opinion even the 0,35 mm wire would be too thick.
Just heat the point of a needle glowing red and tap it onto the wood.
20210311_170612.jpg
20210311_170518.jpg
20210311_170508.jpg

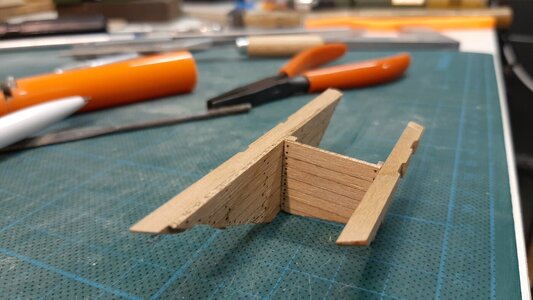
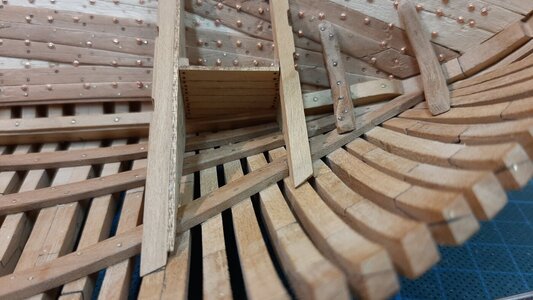
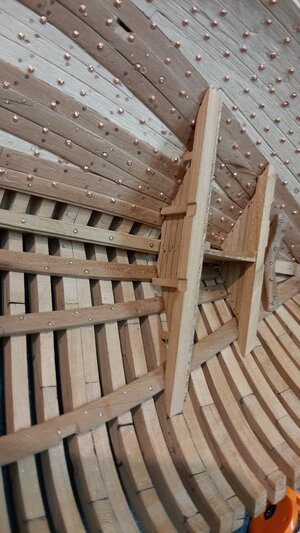
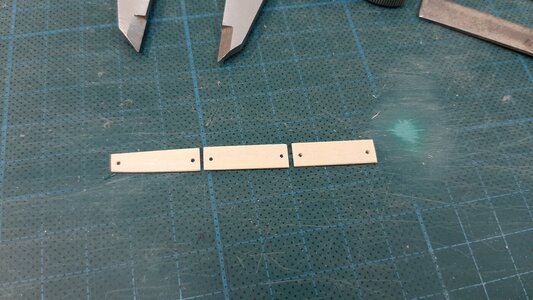
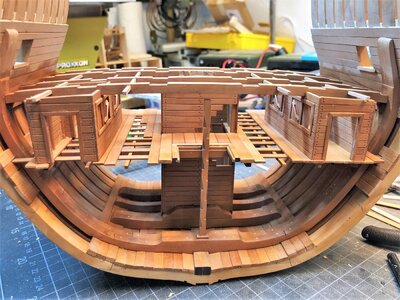
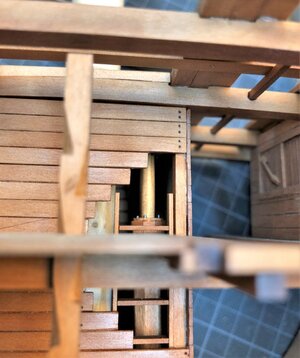
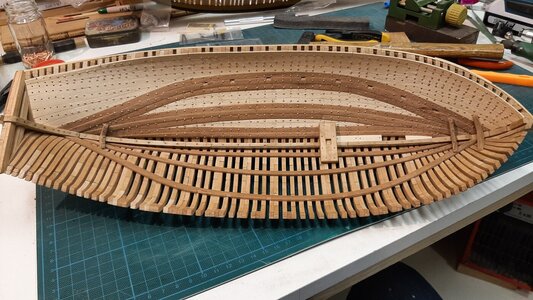
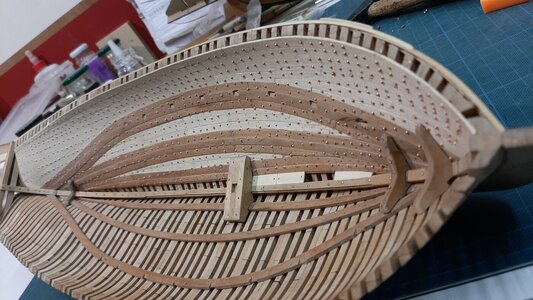
Next are the limberboards, made from 0,5 mm basswood.
20210311_174140.jpg

The fwd limberboard is fixed but the other three before the masts are just layed down and can be removed by pulling them out using the holes in the planks.
20210311_174348_001.jpg
20210311_174407.jpg

Now back to boring, uhm bolting :)
 
Hallo my friend - very good work as we know from you Thumbsup

Do you think, that needle burning is realy necessary - slightly there are some "burned" areas close to your nails visible......
I have the experience, especially if you treaten the wood aftwards with soem oil, that the small holes, only made by a scriber will darken enough to get an impression of a nailhead
I did this in my Bonhomme Richard section model - I think it is "safer" than with a hot needle ...

21.jpg 60m.jpg
 
Back to Alert.
The simulation of the nails, yes fake nails, have been added to the bulkhead planks. I used needle burning for this as to my opinion even the 0,35 mm wire would be too thick.
Just heat the point of a needle glowing red and tap it onto the wood.
View attachment 219728
View attachment 219727
View attachment 219726

Next are the limberboards, made from 0,5 mm basswood.
View attachment 219729

The fwd limberboard is fixed but the other three before the masts are just layed down and can be removed by pulling them out using the holes in the planks.
View attachment 219730
View attachment 219732

Now back to boring, uhm bolting :)
Ahh. Beautiful chaos. Just like in real life!
 
Hallo my friend - very good work as we know from you Thumbsup

Do you think, that needle burning is realy necessary - slightly there are some "burned" areas close to your nails visible......
I have the experience, especially if you treaten the wood aftwards with soem oil, that the small holes, only made by a scriber will darken enough to get an impression of a nailhead
I did this in my Bonhomme Richard section model - I think it is "safer" than with a hot needle ...

View attachment 219734 View attachment 219735
Hi Uwe,

Thx for the comments. Just pinning a tiny hole could also have been an option. The results on your cross section looks great.

By burning the nails are slightly better visible and give more the effect of a rusty nailhead.

The burning marks are pencil marks which I placed to keep the nails in line with the stut on the rear side of the bulkhead, these I still need to sand away.

On the higher deck I will color the bulkheads white and then hopefully the burned nails will still be visible through the white ink I plan to use. We will see.
 
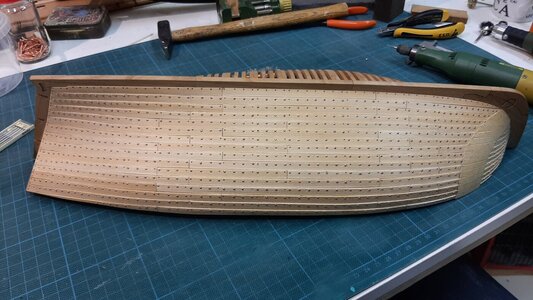
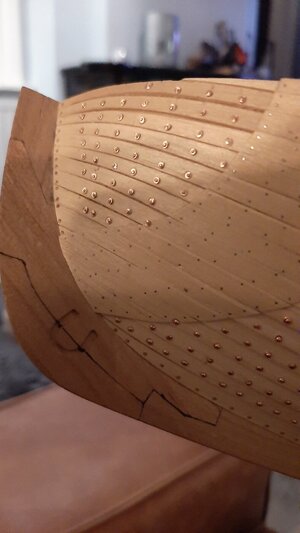
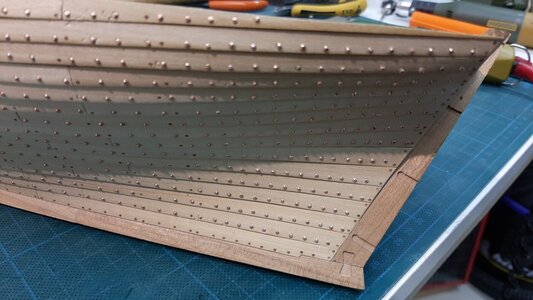
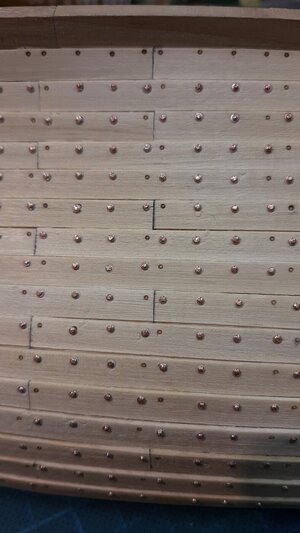
In the mean time on my Alert, still bolting, uhh yes still putting in bolts.
But it is coming to an end.
20210321_180243.jpg20210321_180259.jpg20210321_180311.jpg20210321_180331.jpg

But also did something else.
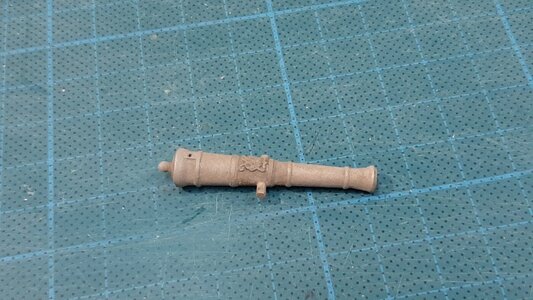
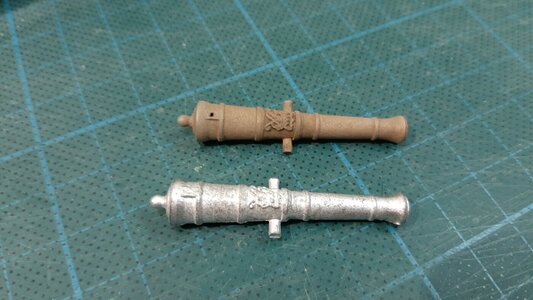
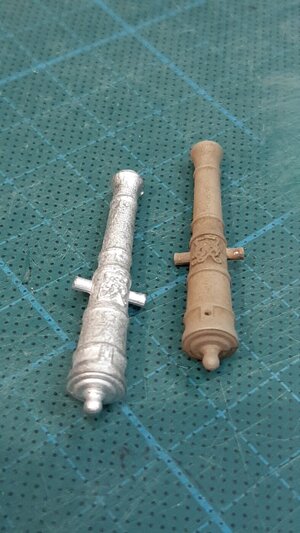
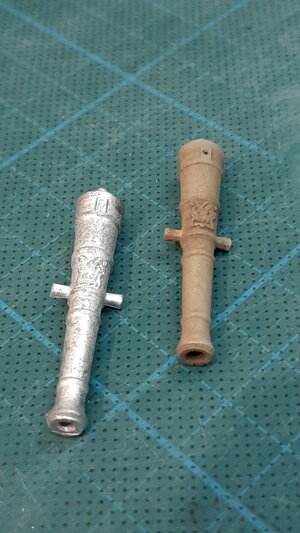
I was not happy how the pewter parts were burnishing, I did some tests with it and I did not like the results.
So looking for a solution I decided to plate the pewter parts with copper as this can be burnished perfectly.
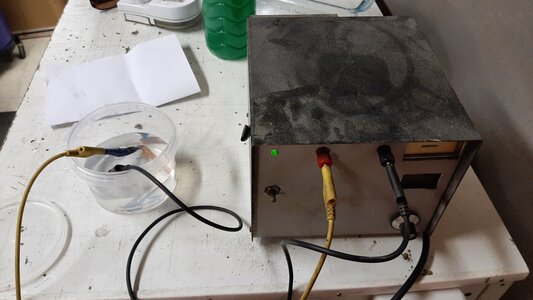
The next question is how to get a copper layer on the pewter, and that is actually quite a simple process. For this I use electrolitic copper plating which you can easily do your selve.

What do we need:
-A small piece of copper
-A DC transformer, preferrably adjustable
-Demineralized water, I use rain water as we have plenty of it. :)
-vinigar

What is the process:
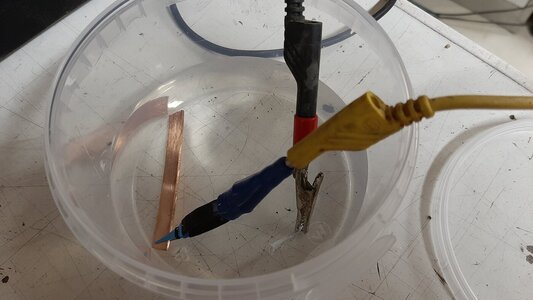
You attach the copper to the + lead of your transformer.
You put a piece of scrap metal to the - lead.
Degrease the metall and copper properly.
Put the rain water in a plastic or glass cup.
Add some vinigar.
Now put both leads with their copper and metal plate into the fluid, not touching each other.
Set the transformer former between 4-6 volts.
20210316_194302.jpg20210316_194315.jpg

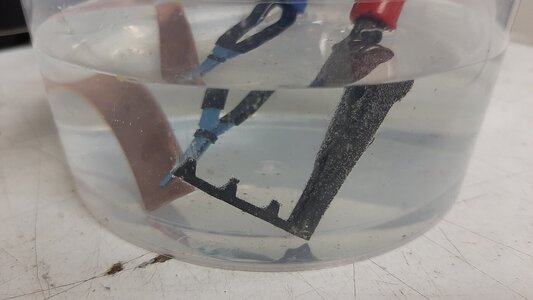
If the process starts you will see bubbles appearing at the metall part, this means that copper ions transfer from the copper plate towards the metall part, plating it with copper.
20210316_204816.jpg

The part becomes black with copper.
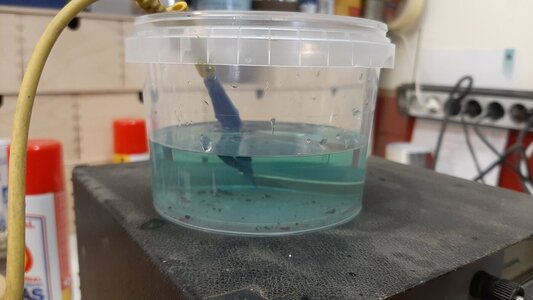
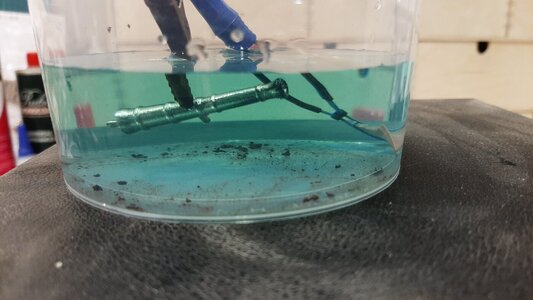
In time the water turns blue in colour, now you are creating copper electrolite which you can use to copper plate your parts.
20210321_105417.jpg

If you have this colour of water you are ready to start plating parts.
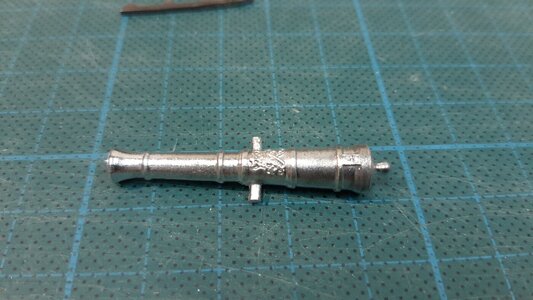
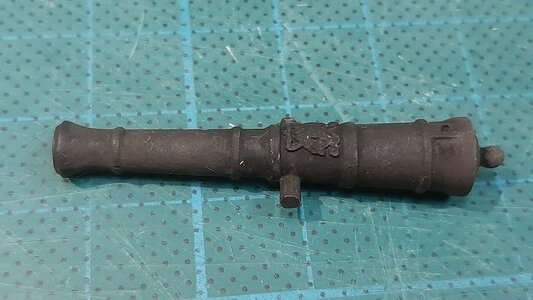
First clean and polish your parts, then degrease properly. I will start with a gun barrel attaching it to the - lead.
20210321_111700.jpg
20210321_111913.jpg

After the first 30 minutes
20210321_113748.jpg

I wrap it of with a piece of paper and it looks like this.20210321_150541.jpg

Then I burnished it.
20210321_125108.jpg

Actually I liked the coppered look more then the burnished one, so I put it again in the copper electrolite.
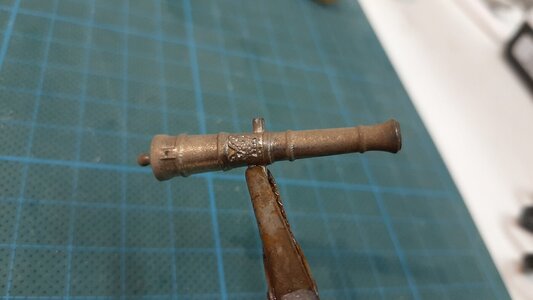
After 4 times this is the end result of the copper plating, the more often you do this process the thicker the layer becomes.
20210321_150719.jpg20210321_150922.jpg20210321_150947.jpg

With this technique you can give your pewter a brass finish, a burnished finish or even a verdegris finish, what ever you prefer.
You can make your own brass gun barrels by means of pewter casting and copper plating them.
 
Last edited:
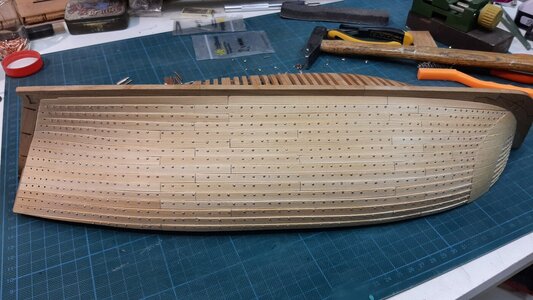
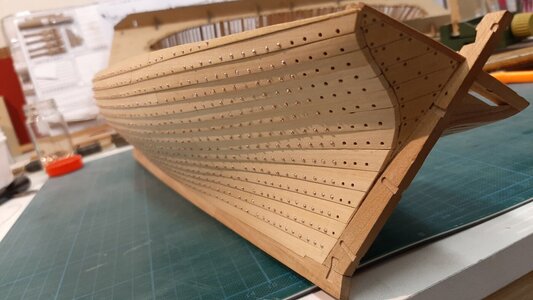
And now the end is near and I face the finall bolt.
Yes they are all in.
20210325_201047.jpg

Sofar used a 2,1 and 1,5 mm cup burr. Now I will finish them all with a 1 mm cupp burr to get this small bolt head with a ring look here already done in the bow section.
20210325_203308.jpg

I have also added the treenails.
20210325_195909.jpg
20210325_201108.jpg

Now it is finishing the outside hull and then I can continue on the inside.
 
And now the end is near and I face the finall bolt.
Yes they are all in.
View attachment 223281

Sofar used a 2,1 and 1,5 mm cup burr. Now I will finish them all with a 1 mm cupp burr to get this small bolt head with a ring look here already done in the bow section.
View attachment 223282

I have also added the treenails.
View attachment 223283
View attachment 223284

Now it is finishing the outside hull and then I can continue on the inside.
This is a lot of dedicated time in producing each bolt and washer even before setting them in the bored holes. Outstanding persistence and dedication to details. Rich
 
In the mean time on my Alert, still bolting, uhh yes still putting in bolts.
But it is coming to an end.
View attachment 222383View attachment 222384View attachment 222385View attachment 222386

But also did something else.
I was not happy how the pewter parts were burnishing, I did some tests with it and I did not like the results.
So looking for a solution I decided to plate the pewter parts with copper as this can be burnished perfectly.
The next question is how to get a copper layer on the pewter, and that is actually quite a simple process. For this I use electrolitic copper plating which you can easily do your selve.

What do we need:
-A small piece of copper
-A DC transformer, preferrably adjustable
-Demineralized water, I use rain water as we have plenty of it. :)
-vinigar

What is the process:
You attach the copper to the + lead of your transformer.
You put a piece of scrap metal to the - lead.
Degrease the metall and copper properly.
Put the rain water in a plastic or glass cup.
Add some vinigar.
Now put both leads with their copper and metal plate into the fluid, not touching each other.
Set the transformer former between 4-6 volts.
View attachment 222387View attachment 222388

If the process starts you will see bubbles appearing at the metall part, this means that copper ions transfer from the copper plate towards the metall part, plating it with copper.
View attachment 222389

The part becomes black with copper.
In time the water turns blue in colour, now you are creating copper electrolite which you can use to copper plate your parts.
View attachment 222390

If you have this colour of water you are ready to start plating parts.
First clean and polish your parts, then degrease properly. I will start with a gun barrel attaching it to the - lead.
View attachment 222391
View attachment 222395

After the first 30 minutes
View attachment 222396

I wrap it of with a piece of paper and it looks like this.View attachment 222392

Then I burnished it.
View attachment 222400

Actually I liked the coppered look more then the burnished one, so I put it again in the copper electrolite.
After 4 times this is the end result of the copper plating, the more often you do this process the thicker the layer becomes.
View attachment 222397View attachment 222398View attachment 222399

With this technique you can give your pewter a brass finish, a burnished finish or even a verdegris finish, what ever you prefer.
You can make your own brass gun barrels by means of pewter casting and copper plating them.
Thanks for so carefully presenting and explaining the process. Rich
 
Back
Top