Sounds like a forethinking preventative measure protecting what is now "hanging out there". RichThere are small gussets added in another step, you can add them now.
-

Win a Free Custom Engraved Brass Coin!!!
As a way to introduce our brass coins to the community, we will raffle off a free coin during the month of August. Follow link ABOVE for instructions for entering.
-

PRE-ORDER SHIPS IN SCALE TODAY!
The beloved Ships in Scale Magazine is back and charting a new course for 2026!
Discover new skills, new techniques, and new inspirations in every issue.
NOTE THAT OUR FIRST ISSUE WILL BE JAN/FEB 2026
- Home
- Forums
- Ships of Scale Group Builds and Projects
- Bluenose PoF Group Build
- Bluenose Group Build Logs
You are using an out of date browser. It may not display this or other websites correctly.
You should upgrade or use an alternative browser.
You should upgrade or use an alternative browser.
Bow blocking almost done, just a bit of fairing after the glue set well.
Pairs made up
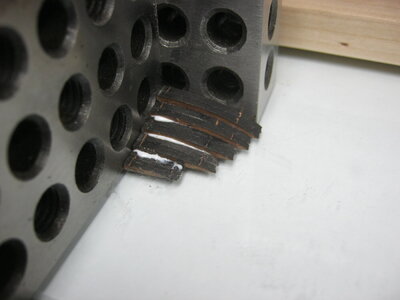
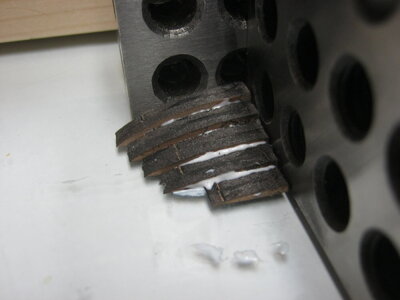
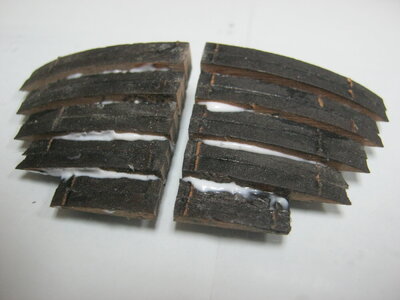
Made a curve template to fair them in, but something was wrong. The template didn't fit the blocs.
Guess what, I missed parts #37. they were in a pair of clamps on the side of the bench, so on they go.
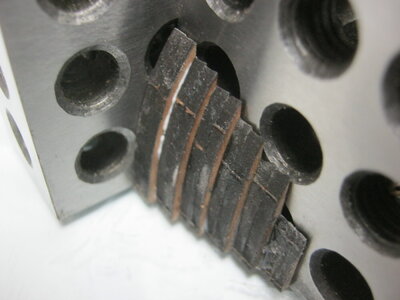
That's better. Faired them in to the template line and frame #1 curve, glued in place.
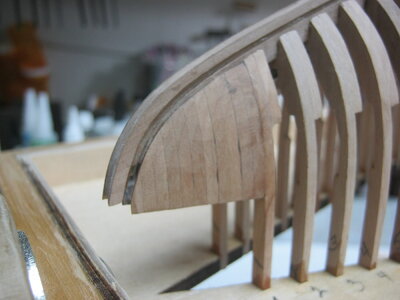
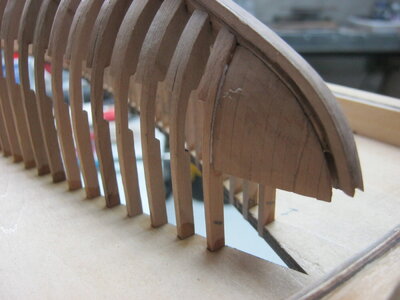
Just a bit of sanding when dry for a final fit.
Pairs made up


Made a curve template to fair them in, but something was wrong. The template didn't fit the blocs.
Guess what, I missed parts #37. they were in a pair of clamps on the side of the bench, so on they go.

That's better. Faired them in to the template line and frame #1 curve, glued in place.


Just a bit of sanding when dry for a final fit.
Well done. 123 blocks come in handy for all sorts of needs. RichBow blocking almost done, just a bit of fairing after the glue set well.
Pairs made up
View attachment 221825
View attachment 221826
View attachment 221827
Made a curve template to fair them in, but something was wrong. The template didn't fit the blocs.
Guess what, I missed parts #37. they were in a pair of clamps on the side of the bench, so on they go.
View attachment 221828
That's better. Faired them in to the template line and frame #1 curve, glued in place.
View attachment 221829
View attachment 221830
Just a bit of sanding when dry for a final fit.
Great job EJ!Bow blocking almost done, just a bit of fairing after the glue set well.
Pairs made up
View attachment 221825
View attachment 221826
View attachment 221827
Made a curve template to fair them in, but something was wrong. The template didn't fit the blocs.
Guess what, I missed parts #37. they were in a pair of clamps on the side of the bench, so on they go.
View attachment 221828
That's better. Faired them in to the template line and frame #1 curve, glued in place.
View attachment 221829
View attachment 221830
Just a bit of sanding when dry for a final fit.
My new perma grit files came today. I found out that the needle files now come in "fine" as well as medium grit. I couldn't locate any in the US, so ordered them direct from perma grit. Shipped on Monday from the UK, Arrived at my house in Michigan USA on Saturday. Geeze, I've waited longer than that for stuff shipped in the US.
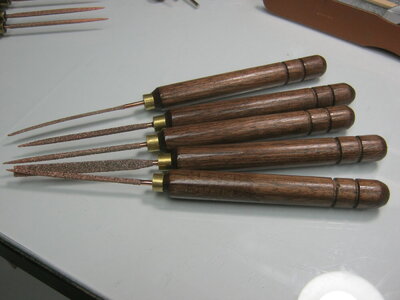
Made some handles for them, as I don't like shifting one file for another all the time with the handle that comes with the set. Plain handles, Walnut with a lacquer finish. As long as I was about it, I made handles for my older files too. One groove for the fine files, two grooves for the medium one's.
The new fine files, equal to about UK grit 320, US grit 120.
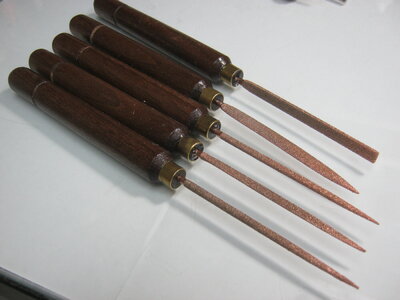
The older one's I've had for a few years,
Some other permagrit items, Rotary burrs, (the yellow one's are a different brand, I forget) a sanding or grinding block with extra fine (US 140 grit) on one side, Medium on the other side (US 80 grit), great for fairing in large areas, and a file I've had for 25 years or more with fine one side and extra fine on the other. These things just last for years and years. Soak in thinner, brush off with a brass brush for plastic and resin type stuff, just brush off and use a bic lighter if it's been used on wood.
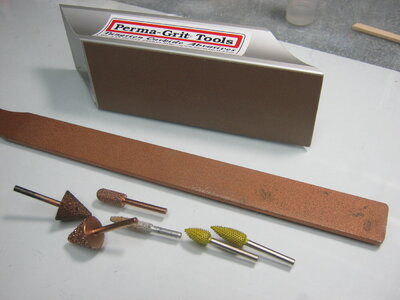
Tomorrow I'll start on the inner keel and stuff.
Made some handles for them, as I don't like shifting one file for another all the time with the handle that comes with the set. Plain handles, Walnut with a lacquer finish. As long as I was about it, I made handles for my older files too. One groove for the fine files, two grooves for the medium one's.
The new fine files, equal to about UK grit 320, US grit 120.

The older one's I've had for a few years,

Some other permagrit items, Rotary burrs, (the yellow one's are a different brand, I forget) a sanding or grinding block with extra fine (US 140 grit) on one side, Medium on the other side (US 80 grit), great for fairing in large areas, and a file I've had for 25 years or more with fine one side and extra fine on the other. These things just last for years and years. Soak in thinner, brush off with a brass brush for plastic and resin type stuff, just brush off and use a bic lighter if it's been used on wood.

Tomorrow I'll start on the inner keel and stuff.
Thanks for all the compliments. I do struggle a bit now, as the eyes and hands aren't what they used to be. I do have a tough time applying 1/350 scale photo etch railings and stuff, but not bad for 79 years of age. I've got enough kits, probably 12 or so wood ships, 16 or so plastic ships, 6 or so and 4 aircraft (both wood and plastic) and amphibious vehicles to build. I'll never get them all done. Cripes, I'd have to live to 125 years old at the rate I build.
Hi EJ,Thanks for all the compliments. I do struggle a bit now, as the eyes and hands aren't what they used to be. I do have a tough time applying 1/350 scale photo etch railings and stuff, but not bad for 79 years of age. I've got enough kits, probably 12 or so wood ships, 16 or so plastic ships, 6 or so and 4 aircraft (both wood and plastic) and amphibious vehicles to build. I'll never get them all done. Cripes, I'd have to live to 125 years old at the rate I build.
Sounds like choise-stress
Regards, Peter.
Hey Ed, you have things looking good. I am going to have to look into those "fine" files,would be a good addition.
I got the inner keel parts installed. Was a bit more fiddly than I thought it would be, but it's in there.
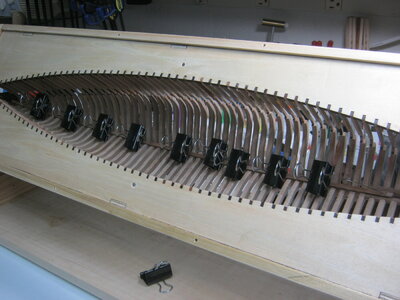
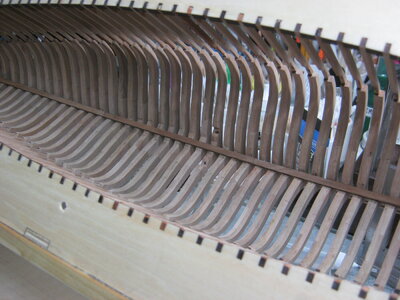
I'll now sand out the interior to fair things in a bit and true up some of the joints.
Next is the longitudinal beams, #135 and fitting the two parts B059 after that. Then Parts 136.
It seems that the upper deck beam supports, (102 and 103) are even with the lower end of the notch in the frames, (two levels).
But I'm confused as to where to position the parts 135 and 136. Is there a mark or something to go by?
I started putting in parts 24 thru 29, spacers? Someone called them waterways? I've gotten 4 of them in, but broke 3 of the 4. Are these used again somewhere else. If so, I'm screwed. Do I really need those things in there? I don't want to break any more of them if I'll need them somewhere else.
Also, is the inside of the blocking at the bow supposed to be faired in?
Last edited:
The more that read about all of the breakage, the more content I am to continue with my larger 64 scale BN which at my pace could be many months until completion. RichI got the inner keel parts installed. Was a bit more fiddly than I thought it would be, but it's in there.
View attachment 222932
View attachment 222933
I'll now sand out the interior to fair things in a bit and true up some of the joints.
Next is the longitudinal beams, #135 and fitting the two parts B059 after that. Then Parts 136.
It seems that the upper deck beam supports, (102 and 103) are even with the lower end of the notch in the frames, (two levels).
But I'm confused as to where to position the parts 135 and 136. Is there a mark or something to go by?
I started putting in parts 24 thru 29, spacers? Someone called them waterways? I've gotten 4 of them in, but broke 3 of the 4. Are these used again somewhere else. If so, I'm screwed. Do I really need those things in there? I don't want to break any more of them if I'll need them somewhere else.
Also, is the inside of the blocking at the bow supposed to be faired in?
Hi EJ,I started putting in parts 24 thru 29, spacers? Someone called them waterways? I've gotten 4 of them in, but broke 3 of the 4. Are these used again somewhere else. If so, I'm screwed. Do I really need those things in there? I don't want to break any more of them if I'll need them somewhere else.
About parts #24-#29: On page 18 and 19 you can find where the get there second live. So yes, you have to use them on the deck.
About: But I'm confused as to where to position the parts 135 and 136. Is there a mark or something to go by?
Does the pictures on page 11, 12 and 13 help you?
Please see the pages with color pictures and translations in:
Bluenose translated instructions
I thought I would start a thread for instructions...
shipsofscale.com
Regards, Peter
Last edited:
Thanks Peter.
I'm gonna hold off on the waterways for a bit. The frames are really stiff and do not want to move much to get them to line up with the notches. I'm afraid that if I file out the notches too much that first, they won't serve to line anything up more than they already are, and second, the fit in their final position will be too loose.
I'll start with parts #135.
Well, I got parts #135 beveled and installed. The mini zip tie idea worked great! Tomorrow, I'll tackle the B059 strips on either side of the inner keel.
I got one of the #103 pieces beveled and installed and I'll do the second one and parts #102 tomorrow. It appears that parts # 136 are parallel to the bottom edge of parts # 102, so I'll do them after that.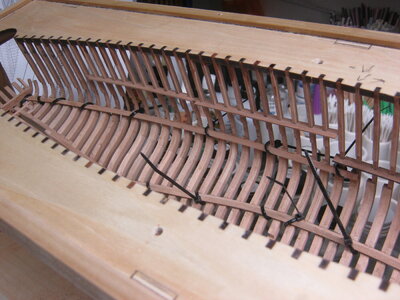
I wound up popping out the spacer ( waterway) parts, repairing the 3 broken one's. I'm not sure they will hold together because of the grain direction. But, if I have to, I think there is enough scrap from the sheets to make new ones from scratch.
After yesterday's dilemma of broken parts, I had a glass of beer, settled down a bit and decided what to do.
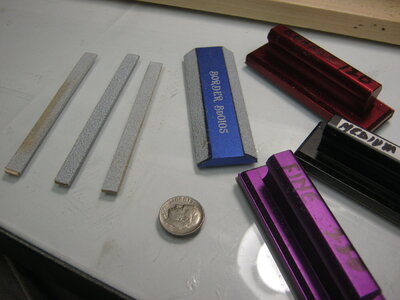
First I made some thin sanding sticks to work on the slots. I use 1/16" by 1/4" basswood strips. Got a whole bag of them from Midway Prod for $4.00. Using PSA sandpaper, I stuck some on one surface, parallel to a cut edge, rolled it over the edge of the basswood, making sure it was square, and onto the other surface, trimming it off flush. Makes two flats and one edge with grit, and one "safe" edge. That's the three sticks on the left. I buy PSA paper in several grits, both in strait rolls and in 5" disks for my power sanders, so I always have plenty of sand papers' The three on the right are aluminum extrusions and have a piece of "Slipstick" UHMW on them. Makes the sandpaper come off easier when it needs to be replaced. They have a nice handle to hang on to. I cut my own sandpaper to fit them also. The other one is an extrusion as well and have beveled edges. I make these out of wood too, in various widths, but the sandpaper doesn't come off so easy from them.
Tomorrow, I might make a curved narrow block to use to finish off the inside of the hull.
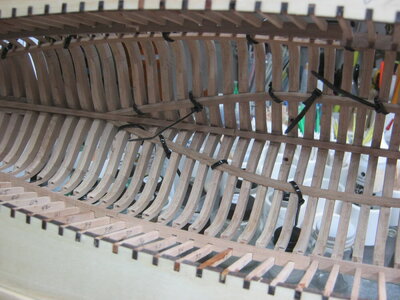
Then, I went to work on the waterways to be used for temporary spacers. Sanding the notches to fit a piece of the scrap material from the frames, and cleaning up the char. Some time, getting away from the bench a couple times to keep myself cool headed, and another beer (or 2), and I got them done and installed. Whew, I deserve another beer.
I got one of the #103 pieces beveled and installed and I'll do the second one and parts #102 tomorrow. It appears that parts # 136 are parallel to the bottom edge of parts # 102, so I'll do them after that.

I wound up popping out the spacer ( waterway) parts, repairing the 3 broken one's. I'm not sure they will hold together because of the grain direction. But, if I have to, I think there is enough scrap from the sheets to make new ones from scratch.
After yesterday's dilemma of broken parts, I had a glass of beer, settled down a bit and decided what to do.
First I made some thin sanding sticks to work on the slots. I use 1/16" by 1/4" basswood strips. Got a whole bag of them from Midway Prod for $4.00. Using PSA sandpaper, I stuck some on one surface, parallel to a cut edge, rolled it over the edge of the basswood, making sure it was square, and onto the other surface, trimming it off flush. Makes two flats and one edge with grit, and one "safe" edge. That's the three sticks on the left. I buy PSA paper in several grits, both in strait rolls and in 5" disks for my power sanders, so I always have plenty of sand papers' The three on the right are aluminum extrusions and have a piece of "Slipstick" UHMW on them. Makes the sandpaper come off easier when it needs to be replaced. They have a nice handle to hang on to. I cut my own sandpaper to fit them also. The other one is an extrusion as well and have beveled edges. I make these out of wood too, in various widths, but the sandpaper doesn't come off so easy from them.
Tomorrow, I might make a curved narrow block to use to finish off the inside of the hull.

Then, I went to work on the waterways to be used for temporary spacers. Sanding the notches to fit a piece of the scrap material from the frames, and cleaning up the char. Some time, getting away from the bench a couple times to keep myself cool headed, and another beer (or 2), and I got them done and installed. Whew, I deserve another beer.

That’s what I wanted to write. Nice to see you find the solution to go one.The stepping-away moments are sometimes a crucial part of the build. You have found the solution and that is all that matters. Well done!
Regards, Peter
Looking good
The waterway boards, that are used as spacers during the beam installation, are not fun to work with, however I am glad you chose to use them.
When I installed them after doing the deck perimeter boards, I did open the notches up some more to help with alignment.
When I installed them after doing the deck perimeter boards, I did open the notches up some more to help with alignment.
Interesting. I didn't check that.Those waterway boards are not very accurate. I measured differences of up to 1 mm between
notches, where they should be equal since the frames are all at the same spacing.
Didn't start my own build yet, only measured.
I would think that they should line up with the notches in the building frame, as that is the "original" frame spacer. I popped one of the part 26 parts out and compared it to the building frame in the same location. The notches all line up ok, EXCEPT the side cuts on two or three notches are not in the same plane as the notches in the building frame. Slipping them on to the frames it would seem would force a slight "twist" to the frame leg.
Some sanding to fit is in order, perhaps in comparison to the building frame notches.
Nevertheless, some fitting will be required for sure when they go onto their final position.


