Bluenose build - DaveFx35

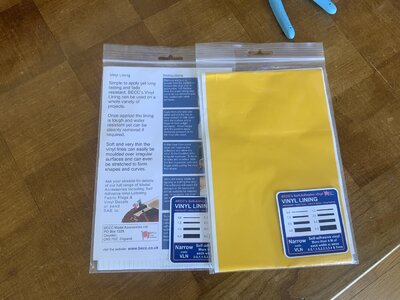
I used this for waterline , they come in various sizes , so much neater
First off, thanks to all who provided encouragement and feedback. Much appreciated!
The quality of workmanship on all of the builds is quite remarkable.

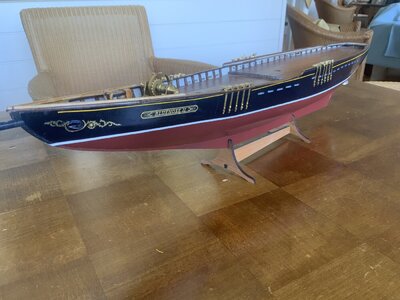
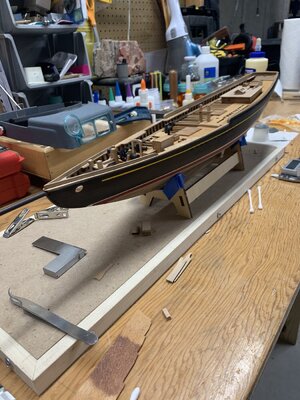
Some progress on getting the finish on the wales. Still some touch-up/cleanup to do.
I started out thinking that I would just do the black using Feibings.
I got some bleeding which caused me to paint the white band at the waterline.
Still debating on going further with hull red down to the keel, but I think I'll stop where I am.

View attachment 224928View attachment 224927

View attachment 224926

View attachment 224924
View attachment 224925

I started to look at the bowsprit installation and couldn't find anything in the manual/plans about it.
Am I missing something?

Dave

ACA4CB47-6E3F-4F0B-85F5-0EBB5FDC48EC.jpeg1CBD027F-F93D-4D5B-A964-01ED65B26133.jpeg
 
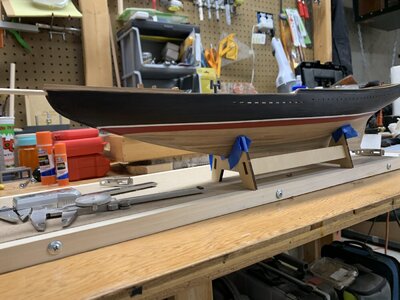
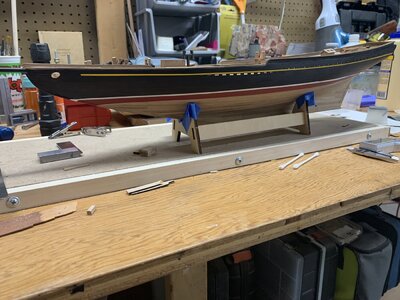
After some deliberation, here's my revised paint scheme.
I wanted to leave some of the planking in an unfinished state.
A smaller white band (maybe still not narrow enough) with a red band underneath (maybe not thick enough).
Still some touch ups still required.
IMG-0454.jpg

I've also been doing some work on the deck fittings and bowsprit but no photos yet.
 
After some deliberation, here's my revised paint scheme.
I wanted to leave some of the planking in an unfinished state.
A smaller white band (maybe still not narrow enough) with a red band underneath (maybe not thick enough).
Still some touch ups still required.
View attachment 228222

I've also been doing some work on the deck fittings and bowsprit but no photos yet.
To paraphrase Dean. . . every plank is one more step to completion. If you are still thinking about the red beneath the LWL you may consider both that a dark dull red (more similar to what was applied to all fishing schooners and balancing the width with the others so that it is not too narrow. Just a thought and I am confident that you will solve the whole model as you want it to be seen. Rich (PT-2)
 
Dave, I like what you have.
Once you paint the railings white, you will have a better idea. I think it will balance out nicely being capped with the white.
Then you have to decide on the line above the scuppers and of course the scroll and name plate.
You might consider a red line above the scuppers to tie in with the red on the hull.
It’s good to have a color scheme in mind. So far you have red, black and white.
Finally, you can stick to the original and keep the yellow for the line above the scuppers and the scroll and name plate text. Just sharing some ideas. ;)
 
Last edited:
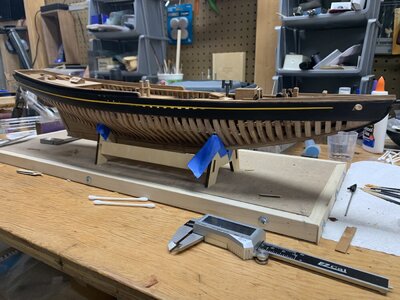
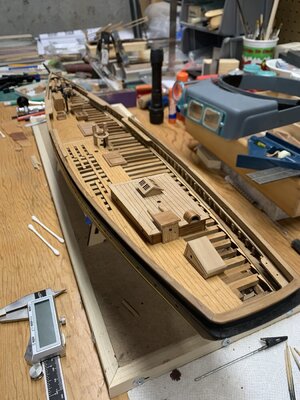
It's been a while so I guess it's time for an update.

Sort of all over the map.
Painted the yellow line on both sides. A little too thick but I'm going to leave it.
Lots of hull paint touch ups still to do.
Pierced the hawseholes and made inserts out of dowel material.
Very tricky and not the greatest results on the the deck but also leaving it.
Done a bunch of deck structures with decent results so far. Nothing attached permanently yet.
Paid a lot of attention to keeping things square.

IMG-0468.jpg
IMG-0469.jpg
IMG-0466.jpg
IMG-0467.jpg

Will be finishing up the deck work next.
Dead eyes and brass work after that.

Wish there was better documentation on masting and rigging.
 
It's been a while so I guess it's time for an update.

Sort of all over the map.
Painted the yellow line on both sides. A little too thick but I'm going to leave it.
Lots of hull paint touch ups still to do.
Pierced the hawseholes and made inserts out of dowel material.
Very tricky and not the greatest results on the the deck but also leaving it.
Done a bunch of deck structures with decent results so far. Nothing attached permanently yet.
Paid a lot of attention to keeping things square.

View attachment 231176
View attachment 231175
View attachment 231178
View attachment 231177

Will be finishing up the deck work next.
Dead eyes and brass work after that.

Wish there was better documentation on masting and rigging.
Good progress Dave! I agree about the info, but there is a lot of info online...it’s a popular ship!
 
Most certainly no idleness here - your Bluenose is showing great progress, Dave and as the deck begins to fill with all the fittings there is just an ever-increasing cohesiveness to the build. Well done!
 
Progress update:
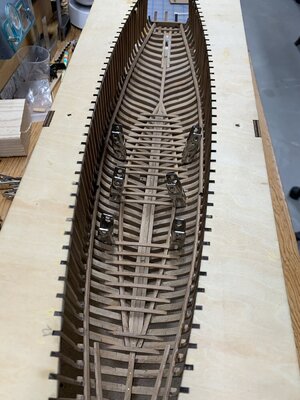
Working on the internal framing.
This is a tight space with gluing challenges.
I had to resort to superglue on the deck clamps.
I hate to do that due to staining but it was so long with many small points of contact.

View attachment 210285


View attachment 210286

Hi Dave

I am strugging to work out where to install parts 24-29 which go on the inside of the frames but apparently lower than 103/102 ( which I can see in your excellent picture). Each of 24-29 is slotted to engage the single thickness upper frames but I cant see them anywhere on yours and cant work out what they are supposed to be. Can you set me straight..?
They appear in the instruction book on page 10 but are not visible on the developing model on the following pages..huh..??
Many Thanks......John

ps...later

maybe they go in temporarily to locate and support 102/103 and are then discarded..?

IMG-0362.jpg
 
Last edited:
Hi Dave

I am strugging to work out where to install parts 24-29 which go on the inside of the frames but apparently lower than 103/102 ( which I can see in your excellent picture). Each of 24-29 is slotted to engage the single thickness upper frames but I cant see them anywhere on yours and cant work out what they are supposed to be. Can you set me straight..?
They appear in the instruction book on page 10 but are not visible on the developing model on the following pages..huh..??
Many Thanks......John

ps...later

maybe they go in temporarily to locate and support 102/103 and are then discarded..?

View attachment 236565

24-29 are the waterway boards on both sides. They are installed temporarily (approx 6mm above the transition from double to single frame width) to establish equal frame spacing prior to installing the long beams on each side that the deck beams go on. After those the long beams on each side are glued in place, the waterway boards are removed and later installed again permanently on the edge of the deck. I left them in place until I was ready to start installation of the deck beams, that way your frame spacing is maintained. Hope that makes sense!
 
Thanks Dave... that makes perfect sense and confirms what I was thinking last night...clear now except for one thing...how do you set the correct height of the side supports 102/103..?

When you "pre-fitted" 24-29 did you enlarge the slots on the waterways or did you thin down the single parts of the frames..?
Actually it’s Dean...lol.
Just answering here where you asked the question.
The top of the side supports are even with the edge of the transition (two frame thickness to one).
I enlarged the slots in the waterways. Frames are thin and fragile enough, so I chose not to make them any thinner.
 
Well I finally decided to do my first build log.
Normally I would just lurk in the background and watch the great work by others.
I've always been reluctant to expose my mistakes publicly, but since others have shown the courage to do so, here it goes.

I started putting the jig together.
I decided to mount it to a 3/4" piece of MDF board to keep it flat.

View attachment 202738

Since Heinrich was working with Don on frame construction techniques, I decided to work along on frame 8.
I had to modify the process slightly. I used a glue stick to attach the pieces to the paper pattern as I was gluing it up.
I did this because I have hand tremors that make it hard to accurately place the parts during glue up and clamping.
I'm not recommending this for others, but it's necessary for me.
I'm using a thick piece of flat steel and magnets to use as my base.

The first picture is the front of frame 8 post glue-up after removing the clamps but before removal from the paper backing.
The second is the back of frame 8, glued and clamped.

View attachment 202739View attachment 202740

I'm thinking of making some registering pieces for the keel slots to use during front/back glue-up.
Will post some shots of this after I give it a try.

My initial observations:
. The frames are really small (compared to my 1/36 bomb ketch!), really challenging for shaky hands.
. The laser cut isn't a perfect 90 degrees. Will need to keep that in mind as work progresses.
. Removing laser char sucks!
Tried several things with limited success (different sanding tools, mini scrapers and Dremel wire wheels).
Way too easy to mess up the part and hard to remove entirely. Suggestions are welcomed!
I found a thread by Dave Stevens on using a sandblasting air gun (air eraser) that looks promising (good excuse for another tool).
https://shipsofscale.com/sosforums/threads/air-brush.3806/#post-74805
I'm going to do a couple of frames at stem/mid-ship and stern before moving on to the keel assembly.

Thoughts on finishing:
I like to finish my wood to a 600 grit, polished looking but not shiny. Tested on some scrap, it will reduce frame thickness slightly.
This is a big difference from my scratch built x-section where you can finish your way down to the proper thickness from slightly over thick piece.
I know not everyone likes such a fine finish but I prefer it.
I use polymerized tung oil for for the frames below the decks and a beeswax/turpentine finish above deck.
The tung oil is slightly darker than the beeswax finish.
Will delay finishing till as late in the process as possible, usually in steps as the build progresses before an area becomes hard to access.
Wood glue won't work over the finish.

One last question. Any thoughts on whether gluing the frames to the jig is necessary and if so, when?
I saw some discussion on this in one of the other threads.
I'm sure Heinrich will address it when the time comes, but I'm curious.

Well enough babbling for now. Hope everyone has a healthy and happy new year!

Regards,
Dave
Hallo Dave alias @Davefx35
we wish you all the BEST and a HAPPY BIRTHDAY
Birthday-Cake
and we wish you a lot of fun with your Bluenose . How is it going?
 
Back
Top