HMS Vanguard 1787 1:72 scale by ADoyon - First Build

Thanks everyone for the discussion on plank bending. I am truly grateful for the incredible response from the SOS community; to El Capi for his thorough explanation on wood properties and bending techniques, to Ken for his recommendation to use hot water and a soldering iron and to Björn for his
basic guidelines for planking. It's all very encouraging and much appreciated.
Andre
 
IMG_1124.jpg
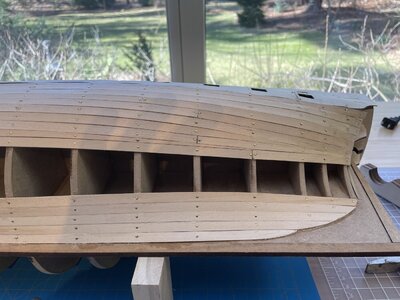
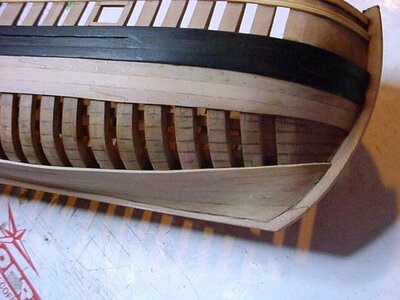
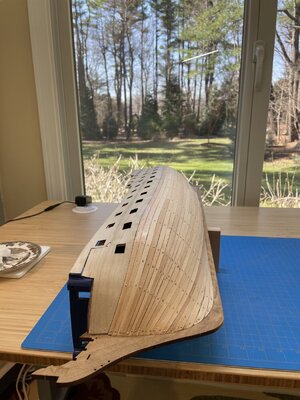
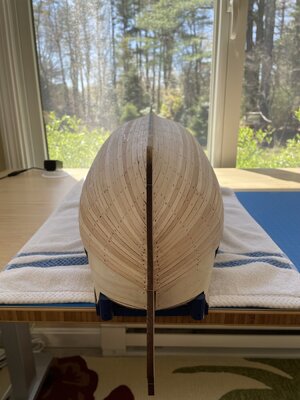
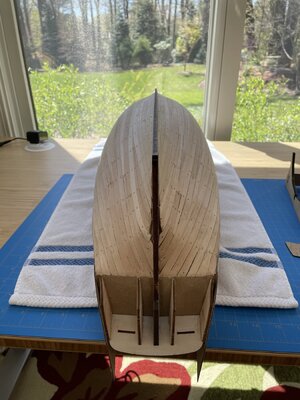
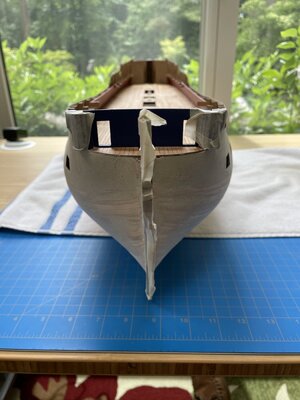
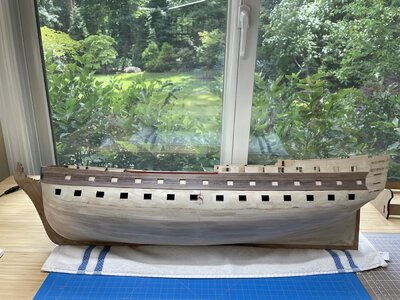
This is how things look now. Following Bob Hunt's practicum, there is no need to use planking rules for the first layer...just cover the hull and trim to fit. This will be covered with a layer of wood filler and another layer of planking. For the second layer I'll follow planking rules using stealers and dropped planks or joggle planks as needed. This is taking a little longer than I thought. I'm applying glue to the edges of the planks as well as to the bulkheads In some places I need to use clamps between bulkheads to keep planks flush with each other. Need to let the glue dry before moving on.
 
Hey Andre, I love the progress you are making! I understand that you are following the instructions from a practicum. But if I could make a small suggestion: add in some drop planks to this first layer...you will be glad you got the practice (not just doing but thinking through how to lay them in). As a rookie I really struggled with this part (and ended up pulling off the second layer of planking at the bow of my ship).

Anyway, just something to think about... I won't be offended if you just want to stick with your program!!!
Hi Paul, I think that's a great idea to get some practice. I'll give it a try and post the results. Working only on the port side now. Hoping the starboard side will be easier and a little faster after this experience.
 
Hey Andre, I love the progress you are making! I understand that you are following the instructions from a practicum. But if I could make a small suggestion: add in some drop planks to this first layer...you will be glad you got the practice (not just doing but thinking through how to lay them in). As a rookie I really struggled with this part (and ended up pulling off the second layer of planking at the bow of my ship).

Anyway, just something to think about... I won't be offended if you just want to stick with your program!!!
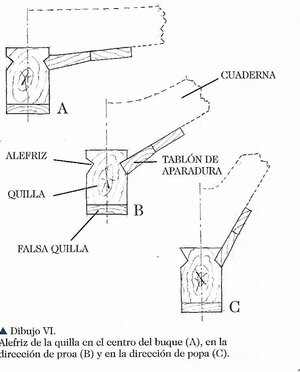
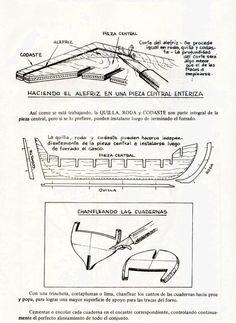
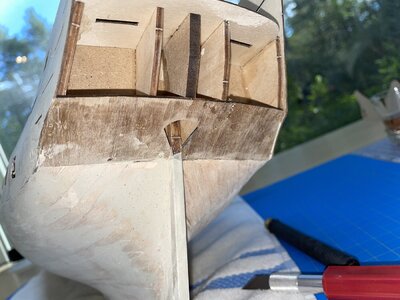
Yes, the Stern Part is wrong. The Planks should NOT be cut off, but going to the end of the "FALSE KEEL· and not having this Triangle without Plank. Have a look at the Book "Simple Hull Planking for Beginner.-Sorry. I have added a PDF file. klick on the bottom of the fig. and will open up.
 

Attachments

  • 220-plankingprojectbeginners.pdf
    1.9 MB · Views: 79
  • 128-POPA- STERN  (10).jpg
    128-POPA- STERN (10).jpg
    5 KB · Views: 43
IMG_1127.jpg
Thanks, El Capi for the additional information on planking to the stern post. Since this is my first build, I am following the instructions I have on hand. Both the kit's instructions and Bob Hunt’s practicum instruct to cut the planks where the aft bulkheads meet the false keel. I believe this is because of the thickness of the two layers of planking. I did trim the false keel so that my second layer 0.5 mm walnut planks would be flush with the stern post. My false keel is 5 mm thick. Total thickness of my lime wood planks and walnut planks on both sides is 4 mm. If I were to trim the false keel to accommodate both layers of planking at the stern post, I would be left with a 1 mm thick false keel at the stern post. This seems to be too weak a section to attach the stern post. I have seen some builds where the first layer of planking goes to the stern post, but I don’t know how it’s done. Maybe the stern post is added after the first layer of planking is complete. In Bob Hunt’s practicum he uses wood filler to provide the smooth transition to the stern post.
 
View attachment 223952
Thanks, El Capi for the additional information on planking to the stern post. Since this is my first build, I am following the instructions I have on hand. Both the kit's instructions and Bob Hunt’s practicum instruct to cut the planks where the aft bulkheads meet the false keel. I believe this is because of the thickness of the two layers of planking. I did trim the false keel so that my second layer 0.5 mm walnut planks would be flush with the stern post. My false keel is 5 mm thick. Total thickness of my lime wood planks and walnut planks on both sides is 4 mm. If I were to trim the false keel to accommodate both layers of planking at the stern post, I would be left with a 1 mm thick false keel at the stern post. This seems to be too weak a section to attach the stern post. I have seen some builds where the first layer of planking goes to the stern post, but I don’t know how it’s done. Maybe the stern post is added after the first layer of planking is complete. In Bob Hunt’s practicum he uses wood filler to provide the smooth transition to the stern post.
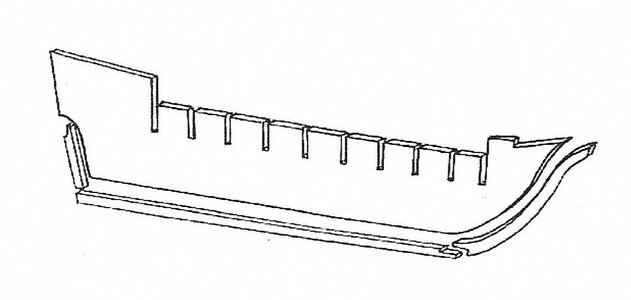
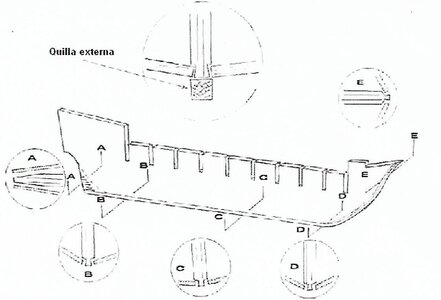
Yes, you are right here. Most builders from Kits. makes the skeleton: False Keel and the Ribs. Then Plank the Hull and when finished they insert the Keel, Stern Post and Bow in the End. To me IT IS NOT CORRECT ( i HAVE MORE THAN 60 yEARS ON MY BACK BUILDING -NOW 77. The False Keel normally has about 4 MM thickness, The Keel, Stern and Bow part 6-MM, That is why a Gardbord -a 2MM wide and about 1MM (on each side is made) so plan on the Bow is inserted in the Bow part-NOT OPPON _ same with the stern as we 2x2MM thick Plank. Try to read the SIMPLE Hull construction for beginners )it was my BIBBLE( you are always welcome -here or for more private question use this area or over Messinger.TRY TO FIND YOUR MODEL BUILD BY OTHER HERE IN SOS. HAPPY BUILDING AND STAY SAFE

205-QUILLA-KEEL (5).jpg74351bbaa68f7d7c708c67da9e6f5424.jpg202---FALSA KILLA-FALSE KEEL (16).jpg203-FALSA KILLA-FALSE KEEL (11).jpg215-FALSA KILLA-FALSE KEEL (12).jpg216---FALSA KILLA-FALSE KEEL (13).jpg334--PROA- BOW (12).JPG84419_R.jpg241-PLANKING.jpg
 
El Capi,
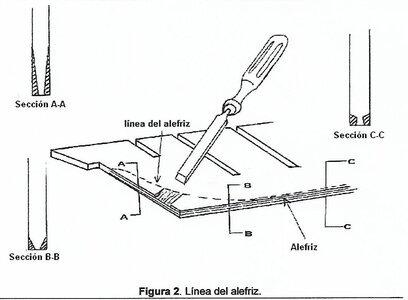
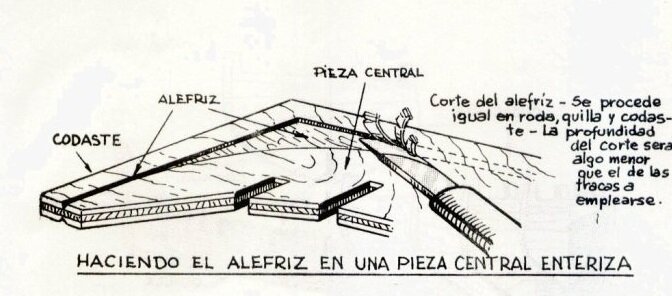
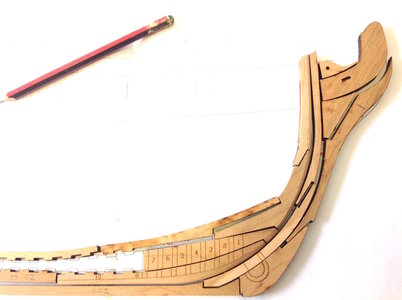
Thanks again for your help. From what I have read, the rabbet joint on real ships was provided to form a watertight seal. On ship models it's provided for appearance and a smoother line where the hull meets the keel and stem. I found a good video on the internet that shows how the rabbet is made on a real ship. It gave me better understanding of how the rabbet joint should look. http://www.boat-building.org/learn-skills/index.php/en/wood/cutting-the-rabbet-large-vessels/. The rabbet joint I cut for the first planking went to the edge of the walnut keel and stem pieces. When I inserted the lime wood planks, they filled the width of the rabbet. So, I plan on re-establishing the rabbet for the second layer 0.5 mm walnut planking by trimming away a bit of the lime wood planks and leaving the smooth edges of the walnut keel and stem pieces alone. Not sure if other modelers do this but I think it would provide me a nice smooth line for the hull.
 
IMG_1133.jpg
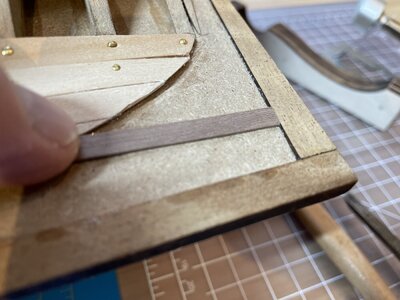
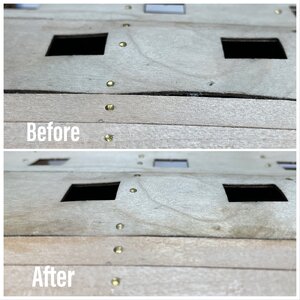
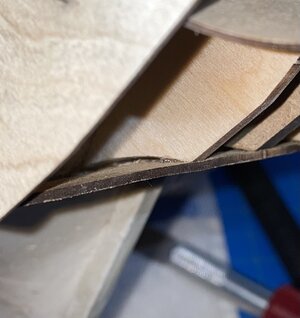
Solved the problem with the wavy bottom edge of the lower plywood gunport pattern. Broke the PVA glue bond between the plywood and lime wood plank with my x-acto blade. I was able to make the plywood pliable in about a minute by applying water with a paint brush while heating the area with my plank bender. Then adding a bead of CA glue and holding the plywood edge down for about 10 seconds did the trick.

IMG_1134.jpg
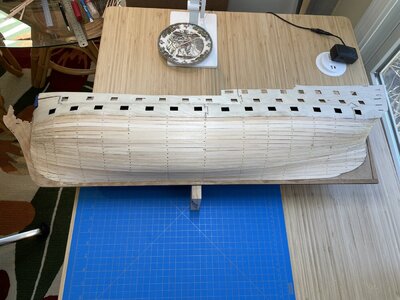
Finished first layer planking on one side.
 
IMG_1148.JPEG

IMG_1158.jpg

IMG_1154.jpg

IMG_1152.jpg

Completed first layer planking and flattened the plywood edge on the starboard side. The photo above shows what the plywood looked like before flattening. This is something I didn’t anticipate since it wasn’t mentioned in the kit’s instructions nor Bob Hunt’s practicum. I do see some waviness in Bob’s photos but it’s hard to say if it’s as pronounced as what I am showing. Also, he does use some wood filler in the shallow areas at bulkhead locations. I didn’t like the idea of using wood filler to compensate because I felt this would be changing the shape of the hull a bit. My first thought was that I could clamp the plywood flush with the plank, but this doesn’t work. The plywood was too hard and stiff to bend under clamping pressure. I was afraid of applying too much pressure and breaking something. In some places the plywood rises above the adjacent plank by its full thickness, which means you cannot sand it down because you would have a paper-thin section or worse, a hole. It wasn’t until after the discussion on plank bending using water and heat that I thought of trying to paint the area with water while applying heat with my plank bender to make the plywood flexible. I’m glad it worked out so well. Just one more thing I want to mention…I did apply PVA glue to the edge of the plywood when laying the first plank knowing I would later be breaking that bond with my x-acto. My reason for that is that it provides the slimmest gap to aid in the quick bond of the CA glue.

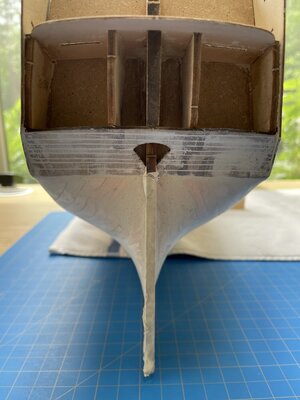
Next, applying some wood filler and sanding in preparation for the second layer planking.
Happy modeling to all!
 
That's a mighty fine planking job for your first model... Did you just use the Hunt Practicum or did you reference other planking guides? I have final planking jobs that don't look that good!
 
That's a mighty fine planking job for your first model... Did you just use the Hunt Practicum or did you reference other planking guides? I have final planking jobs that don't look that good!
Thank you, Lou, and Paul, for your comments. I am following Bob Hunt's practicum but there were no special instructions on how to do this. Bob did say not to worry about following planking rules on the first layer since this will be covered with wood filler and another layer of planking. He did include a mini practicum on planking with my purchase of the Vanguard Practicum, so I was aware of certain planking rules and using stealers and joggle planks, which I believe are like drop planks. I basically followed his photos for the first planking. I hope to do a better job on the second planking, dividing planking sections into 5 plank-wide bands, using stealers and joggle/drop planks, and beveling the edges for a tight fit with adjacent planks.
 
IMG_1187.jpg

IMG_1188.jpg

IMG_1190.jpg

IMG_1173.jpg
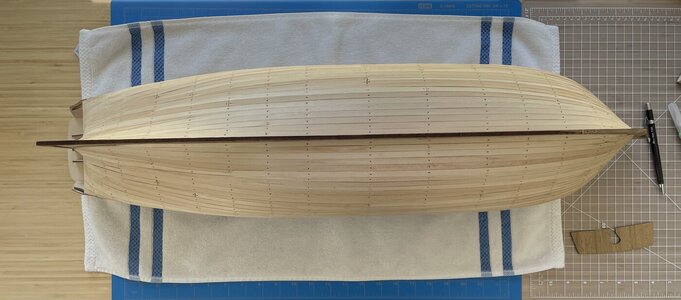
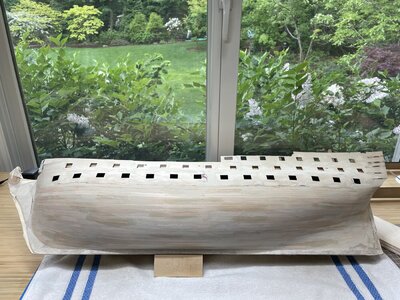
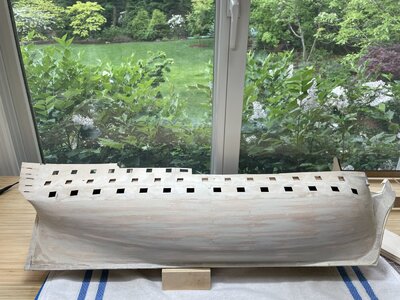
Added wood filler and sanded the hull in preparation for the second layer of 1 mm x 5 mm walnut planking. I also installed the stern counter pattern and had a difficult time installing this part. It was almost impossible to bend this part to conform to the stern counter frames and there is no convenient way to clamp this part. The parts list calls this part out as 1.5 mm walnut ply, but it looks like it’s made from a walnut sheet measuring 1.62 mm thick. I tried soaking it in water for a couple of hours and applying heat with my plank bender but could not make the required bend. I then applied glue and tried to force it into shape by nailing to the stern counter frames.

The photo below shows what the fit looks like.

IMG_1172.jpg
Not happy with the fit, I decided to try and remove the part after the glue had dried. Of course, I broke this part in a few places. I managed to put it back together using CA glue. I then put the part in slow boiling water for over an hour and still could not make the bend. Surprisingly the CA glue held up. I finally made saw cuts on the surface a little more than halfway through the thickness and I was able to make the bend.

The photos below show what this looks like and the fit is now much better. I’m not too concerned with the way this looks since it will be covered by horizontal 1 mm x 5 mm walnut planks.

IMG_1206.jpg

IMG_1196.jpg

With all the trouble I had installing this part I wondered what other modelers have done. Looking at other builds, some look like the counter is flatter. In another build it looks as though the part was skipped altogether and just the horizontal walnut planks were installed. I started to wonder about the actual radius of the counter. Drawings of the HMS Victory in Anatomy of The Ship series seems to show a flatter counter. Does anyone know if there are any actual ship plans for the HMS Vanguard where I could compare against the kit’s plans?
 
IMG_1211.jpg

IMG_1227.jpg
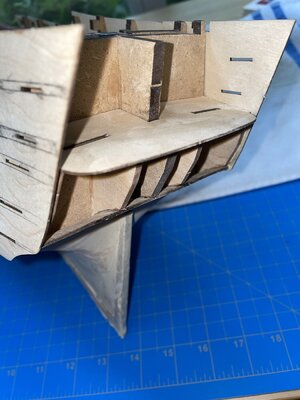
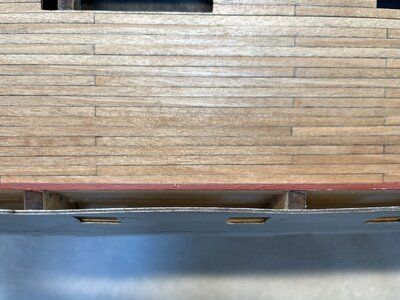
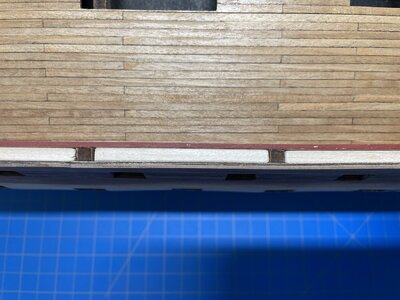
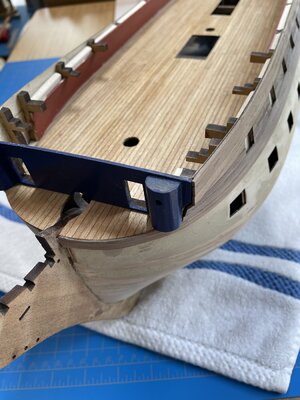
Something I noticed as I’m getting ready for second layer planking…the top edge of the 1 mm thick plywood gun port pattern is a bit wavy. I purchased 3/16” thick basswood from a local crafts store and cut sections to insert between the bulkheads. This straightens and reinforces the plywood edge. Also, I believe it will help with alignment when cutting the gunports through the inner bulwark wall.

IMG_1223.jpg

IMG_1224.jpg

IMG_1226.jpg
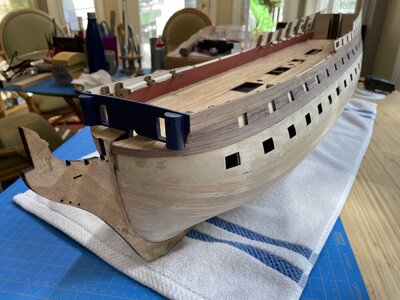
Now starting second layer planking.
 
Very accurate and well prepared hull - looking very good
 
My compliments, Andre great job.
I am finishing the first planking of my Vanguard and I am using aliphatic glue.
What kind of glue are you using for the second planking?
Antonio
 
Back
Top