Cad design Alfred stern cad designing

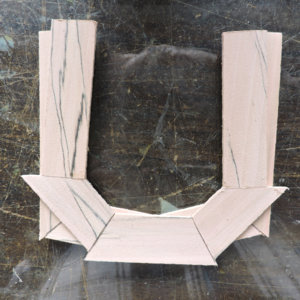
on to the building of a blank at this stage i use a super glue product to glue the blank parts together. It is fast and easy to assemble frame parts.

blank8.jpg

you should end up with two blanks strong enough to handle. There is no need to use any measurements or frame pattern. The angle sets the shape.

blank9.jpg
 
the frame itself i glue both halves together using a wood glue and clamps.

blank10.jpg

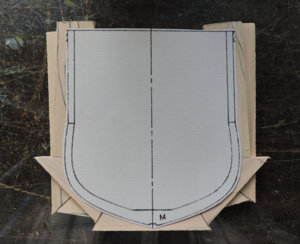
as for the frame pattern I cut close to the outer edge so I can place it on the blank. As you can see i did not cut out the center because if i did that the frame itself becomes "floppy" and it is easy to distort the shape while gluing it to the blank.

blank11.jpg

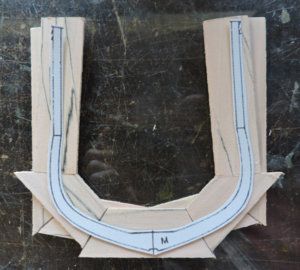
once it is glued in place now I cut out the center section

blank12.jpg

from here you cut out the frame in one finished piece. Starting with the layout of the patterns to gluing the blanks together if you remain careful and accurate when you glue the frame shape to the pattern it should fall right in place.

cutting apart a frame drawing, gluing each part to wood and hand cutting each part then trying to reassemble the frame introduces errors at every step of the way. Frame building and their shape is critical when it comes to building the hull. start accurate and carry that through the entire process.
 
Last edited:
this may seem like I am all over the place with drawing and designing, truth be known I am. The reason is it will take the knowledge of different people to pull this off, I want to get drawings to the 3d artist to create the STL carving files for both 3d printing and CNC carving. The frames and timbering will be sent to another 3D artist.
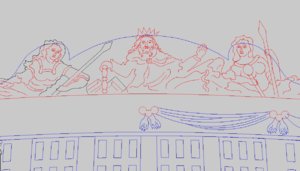
Every little part has to fit so really I need to work on everything. This is a big file with different sections what i am posting is just parts of the working drawing. Here is the stern being laid out.

carvings4.JPG

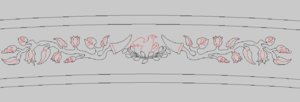
looking closer is the rough draft it will be cleaned up and used to create the carvings

carvings2.JPG

carvings3.JPG

that is what I love to do and that is think about it, design it and try and solve all the problems of cutting and milling.
 
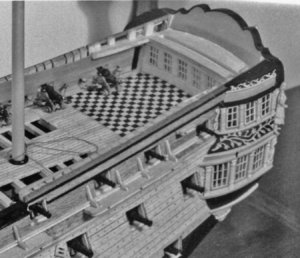
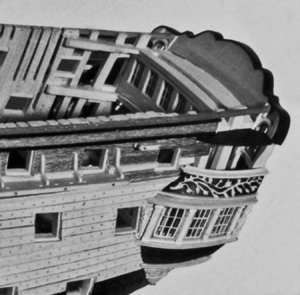
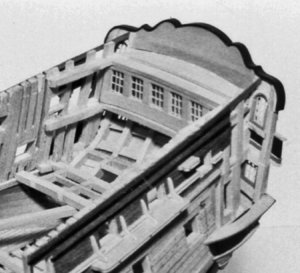
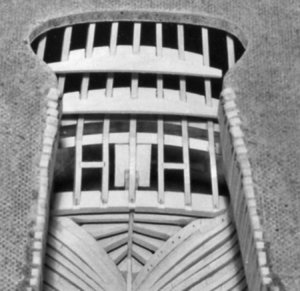
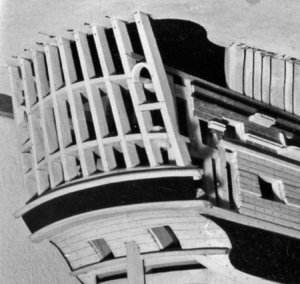
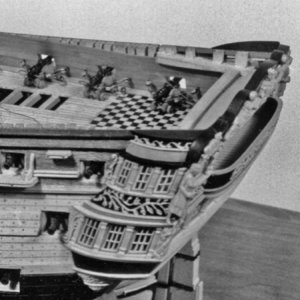
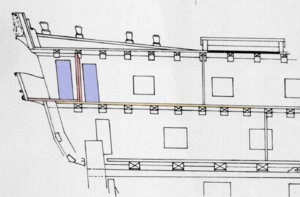
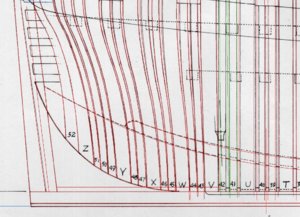
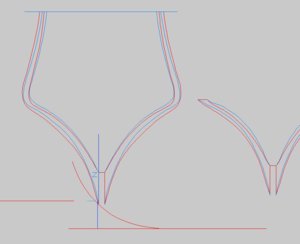
Now we come to a part that my way of building this part was more in line with my research and the way Hahn did it to help us builder. well I can seem to find any of Harolds photo's but am sure most of you have seen how he has built his stern. If you notice on Hahn's he does't have the side count timber which is really the last frame of the ship. With out that and the timbers that fit between it and the fashion frame its a little on the hard side to fit the doors for the quarter galleries As David said the stern timbers do not go all the way up to the topside but ships of Alfreds time was fitted with a balcony, so the upper windows set back in to the ship which Hahn shows. The ideal was to give more strength to the balcony with out a large over hang which on Alfred was about 6 fit from the bulkhead to the out side edge of the balcony railing. As soon as I can hope to take a few more photo's of her stern because this is one part that for me seems to change a lot. View attachment 142067View attachment 142068View attachment 142069
Gary ,I fixed your post ,you inserted 3 times each image

If you have issues how to post images or insert them ,here are some video tutorials made by Donnie

 
thank you Gary for your input on this project

this brings up a big question and it is something every designer and builder must have straight away before even drawing the first line or cutting the first piece of wood.

Harold Hahn designed and built his models with the average hobby model builder in mind, a serious builder but none the less a project most anyone could do. He stylized construction and simplified various parts and left out some finer details.

On the other hand Gary is showing us there is much research you would have to do for building a historic model as close to the way the real ship was built.
Keep in mind there was a general set of rules and methods set down by what the admiralty called the "establishments" however the yard boss and crew did build ships according to what materials they had in the yard and by the training and experience of the master shipwright. Each and every ship was a one off one of a kind. So we can not say this or that was how any ship was built.

As an example of this Harold kept his stern deadwood as one pieces Gary built his up closer to how it was actually done.
Well some model builders feel if you will never see it don't bother doing it, on the other hand some model builders just want the challenge of intricate work and building historically accurate models.

the best approach as a draftsman and designer it would be better to include as much historic details and let the builder decide how to build the model.
 
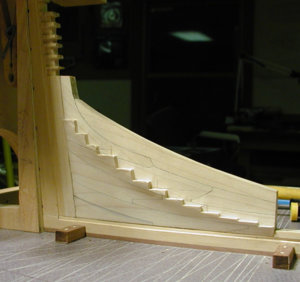
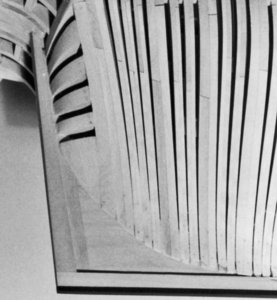
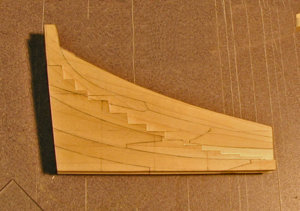
so here is what Hahn's deadwood looked like on his model. It was one solid piece and no steps for the foot of the frames to sit on. but once the frames are set against the deadwood you would not see the steps just the joint between the foot of the frame and the deadwood.

deadwood2.jpg


deadwood1.jpg
 
keeping in mind few model builders have a mill and cutting in those steps would be really difficult. I can not even come up with a way to do it.

One possible idea is to laser cut the pieces for the bottom section and cut the upper section as one piece and set it on top the stepped part. The upper section get totally covered over by the foot of the cant frames so you would not see it unless you took the model apart.

untitled.jpg
 
making it look real
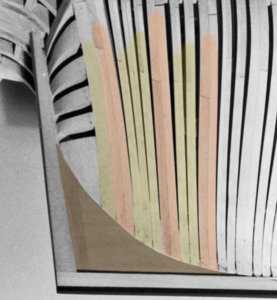
this is the line where the foot of the frame meets the deadwood Harold drew it as a arc

ded0.jpg
he built the model same as the arc

ded1.jpg

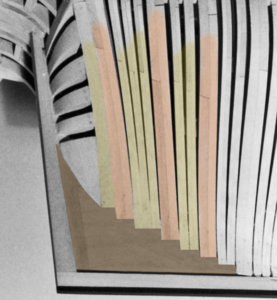
all you have to do is change the arc to steps and square off the bottom of the frames and there you have it. Now it looks just like is should.

ded2.jpg

ded3.jpg

this is so much easier once the frames are sanded and fared into the deadwood it looks just fine. This is like model Railroad guy do they built not as the real thing they build to make it look like the real thing.

any thoughts on building for real or building to make it look real?
 
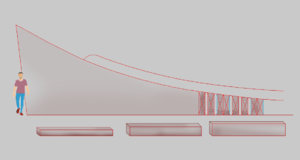
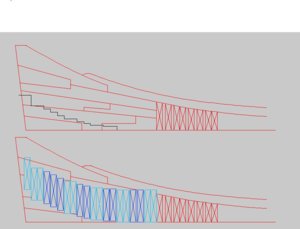
I isolated the stern deadwood so now I will break it down into its separate timbering. There were many different ways to build the deadwood my guess is the construction depended on what timbers were in the yard. This is a big structure from where the guy is standing to the top is 4 1/2 meters about 14 feet. along the bottom are timbers 12 x 12 x 12 feet and 12 x 18 x 12 feet and 12 x 24 x 12 feet.

deadwood5.jpg
 
great thanks

last night I was doing a little drawing and came up with this sort of close to your examples.
from where the last full frame is to the right and to where the steps start the 1/2 frames go all the way to the keel.

deadwood6.JPG
 
the deadwood has been a struggle the last few evenings, this is what I have so far

deadwood8.JPG

but when I look at what I came up with and what Gary has they are not even close, notice my stepping stops short of half way up the deadwood at the stern post side

deadwood10.jpg

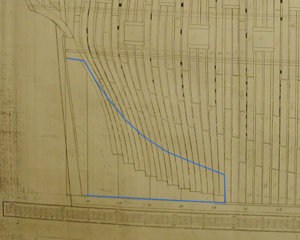
but when I look at the original Alfred drawing and draw a line where i think the top of the deadwood was it kind of sort of looks close to what i came up with.

deadwood9.jpg

the position of the steps was not a random guess. I will post what I did to get them where they are. Plus I put each filler frame on its own step.

note:
what Harold Hahn did in his model, what the original plans show and what Gary did are all slightly different than what I am doing. So this might be called a hybrid of all the sources.
 
ok back to the drawing board but first some more questions
first of all

why put a cannon right in the cabin? imagine if you fired that cannon in such a confined space.

st1.jpg

a view of the back wall i am thinking that is a doorway right before the wall

st2.jpg
st3.jpg

looking at those upper stern transom pieces from the inside

st4.jpg

now looking at them from the outside they are flush with the stern timbers

st5.jpg

now look at the balcony what holds that floor up plus the weight of the balcony? in the image you can see the planking

st7.jpg

ok so on the plans it shows the deck or balcony floor extending out. but I still see nothing supporting it

st8.jpg
 
Dave your dead wood at the back, height wise is to tall. You have taken it up to the gun deck transom and should only go up to the very bottom transom.

in my posted drawing the deadwood does stop at the lower transom. the blue line drawing was just a guess and not actually how I drew it

The photo below shows the deadwood attached to the to the keel and stern post/inner post and stops at the bottom of the last transom. Dave you also have to look at were Alfreds keel is height wise because it sets on top of the dead wood. You also have to remember that the width of the feet of the cant frames were not as wide as wide as the square frames and each step should be the same length to fit the feet of the cant frames.

so your saying the cant 1/2 half frames were narrower than the whole frames? or did they taper from top to bottom. As for the steps they are as wide I did not know if each single filler frame had it's own step or the pair sat on one step.
 
this is how I came up with the steps in the deadwood

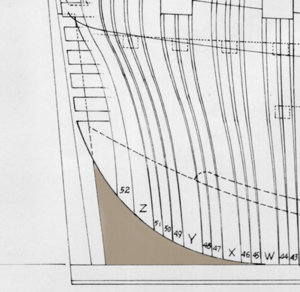
Hahn used the arc line as the end of the frames as you can see here so you can not shift the frames up or down without wrecking the curves of the hull. They have to stay where they are.

stepre3.JPG

turning a frame sideways you can see what i am talking about the foot ends on that arc

stepre1.JPG

so what i did was create a base measurement of .200 and clipped off the very bottom of each frame. That base measurement goes from the arc up and that is the height of the step. now all the frame end with a flat at the bottom that will set on a step. Hahn feathered his frames into the deadwood, now by adding more thickness below the frames they no longer feather into the deadwood. to maintain the same arc the measurement from the arc upward has to be constant for every frame, which atomically sets where each step goes.

stepre2.JPG
 
You guys are the theoretical mathematicians of model building. Don't understand what you are saying, but still very impressed !
 
Back
Top