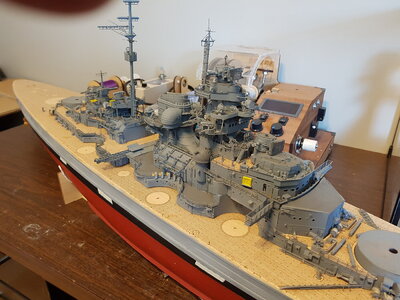
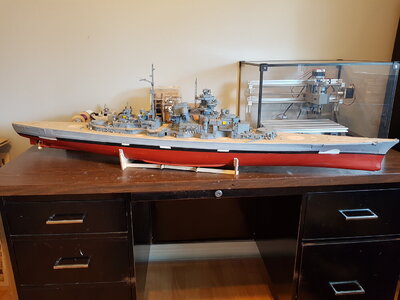
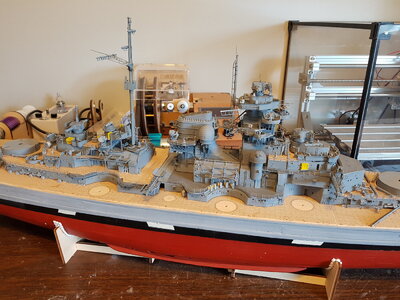
Amati Bismarck 1:200 [COMPLETED BUILD]

From this point on, the process is repetitive. You take the photoetched parts, assemble and bend them to the required shape, paint them, then glue them on the boat. Same thing for the plastic parts. Most of the plastic parts are enhanced with PE pieces to make them look better. I think the only wood parts remaining to be assembled are for the primary and secondary gun turrets.

And then there is some rigging to do which although not like a square rigger, looks still to be complicated,
 
Some of the PE parts are really really small; smaller than a grain of rice. Things like the wheels used to turn the turrets of the flak guns. I put them on anyways, but in my opinion they are hard to see once they are painted. I am a purist so if it calls for these parts to be added then they will be added, but it does bring up the question of how small should they go with the kit parts?
 
Some of the PE parts are really really small; smaller than a grain of rice. Things like the wheels used to turn the turrets of the flak guns. I put them on anyways, but in my opinion they are hard to see once they are painted. I am a purist so if it calls for these parts to be added then they will be added, but it does bring up the question of how small should they go with the kit parts?
Great job on the Bismarck model. My question, I know it's 1/200 scale but how do you manage to cut these smaller bits off the frame, pick them up, smooth out the nibs and attach them to the model/PE assembly part without the dreaded ping, vanish forever in the carpet monster? I watched Trumpeter 1/200, Hood, Rodney and Bismarck being assembled by a professional (IPMS) on behalf of customers and he either ignored or discarded using the small bits you describe because they were unmanageable and invariably most would suffer from 'the ping' or would be unseen on the finished model. Hence I'm really curious how you manage this as I have a 1/350 ready to assemble with some super tricky tiny PE I can't see. - Again, wonderful job on the model. Cheers.
 
Great job on the Bismarck model. My question, I know it's 1/200 scale but how do you manage to cut these smaller bits off the frame, pick them up, smooth out the nibs and attach them to the model/PE assembly part without the dreaded ping, vanish forever in the carpet monster? I watched Trumpeter 1/200, Hood, Rodney and Bismarck being assembled by a professional (IPMS) on behalf of customers and he either ignored or discarded using the small bits you describe because they were unmanageable and invariably most would suffer from 'the ping' or would be unseen on the finished model. Hence I'm really curious how you manage this as I have a 1/350 ready to assemble with some super tricky tiny PE I can't see. - Again, wonderful job on the model. Cheers.
Thank you for your kind words. I just plug away at it. I am not a patient person, but for stuff like this, I guess I do. I use an exacto knife and tweezers and I use CA glue. It is taking forever to get through this model and that is why. If I drop stuff, fortunately I can usually recover them because I don't have a carpet in my room. Ultimately one must decide how fine in details to go. I just figured that I would not be doing the model justice if I skipped anything.

As for painting, I don't really need to prep the surfaces of the PE. For example, when putting together one of the flak guns, I assembled them with all the PE parts first, and then I paint. I am using the Valejo Model air paint for this purpose. It seems to work for me.

Sorry I don't have really any magic solutions for this, but I understnad why that pro skipped some pieces.
 
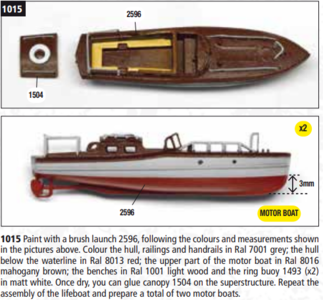
Having progressed rather slowly with the work, I am now facing another obstacle. It is what color should I paint the tops of the lifeboats. The instructions say to use what looks like a brown color, but truth be told I don't like it. I guess I could use my creative license and paint it whatever color I want, or stick to the manual. Stay tuned...

Screenshot 2023-08-16 201245.png
 
Last edited by a moderator:
Next point that I must ponder is whether to put the correct flags on the ship or grey out the area where the flags go as per the instructions.
 
Having progressed rather slowly with the work, I am now facing another obstacle. It is what color should I paint the tops of the lifeboats. The instructions say to use what looks like a brown color, but truth be told I don't like it. I guess I could use my creative license and paint it whatever color I want, or stick to the manual. Stay tuned...

View attachment 389876
The instructions say mahogany brown - being what most wood boats of that era had for much of the decking - or a stained brown teak color. Of course, you do have creative license as a modler. If you are talking about a huge swasticka on the front deck, again, your creativeness though depending on which period paint job you are using. I, and a personal opinion only, would leave that flag off.
 
The instructions say mahogany brown - being what most wood boats of that era had for much of the decking - or a stained brown teak color. Of course, you do have creative license as a modler. If you are talking about a huge swasticka on the front deck, again, your creativeness though depending on which period paint job you are using. I, and a personal opinion only, would leave that flag off.
thanks for the feedback.
 
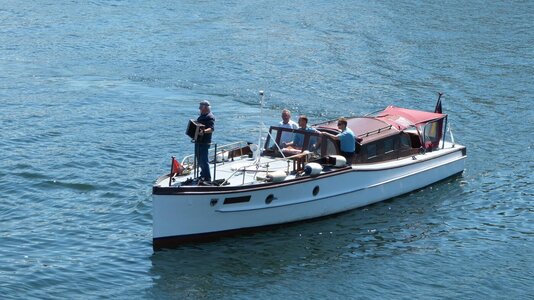
It is looking like the so called 11,5-m-Chefboot


This is the Admiralitätsbarkasse HANNES

Admiralsbarkasse-Hannes.jpg

 
It is looking like the so called 11,5-m-Chefboot


This is the Admiralitätsbarkasse HANNES

View attachment 389910

thank you for this information.
 
Back
Top