-

Win a Free Custom Engraved Brass Coin!!!
As a way to introduce our brass coins to the community, we will raffle off a free coin during the month of August. Follow link ABOVE for instructions for entering.
-

PRE-ORDER SHIPS IN SCALE TODAY!
The beloved Ships in Scale Magazine is back and charting a new course for 2026!
Discover new skills, new techniques, and new inspirations in every issue.
NOTE THAT OUR FIRST ISSUE WILL BE JAN/FEB 2026
You are using an out of date browser. It may not display this or other websites correctly.
You should upgrade or use an alternative browser.
You should upgrade or use an alternative browser.
Artesania Latina Anatomy of Lord Nelson’s HMS Victory 1805
- Thread starter AlanOES
- Start date
- Watchers 38
-
- Tags
- artesania latina victory
- Joined
- Nov 30, 2024
- Messages
- 149
- Points
- 103

Ah,ok
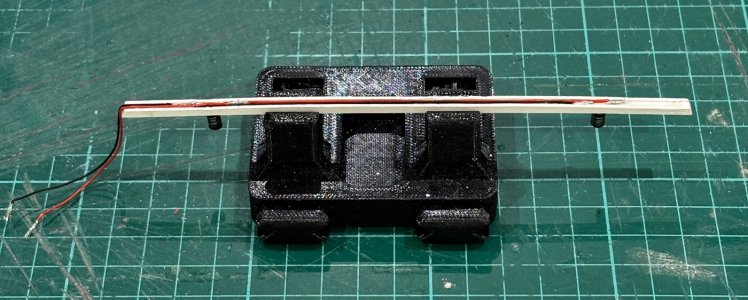
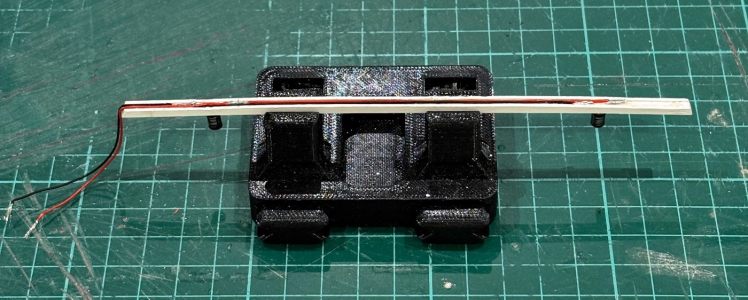
It’s a soldering “hands free” aid from an add I saw on Facebook. Not sure my pic is the actual store I purchased from (didn’t think I paid that much, but I could be wrong, had it for quite a while now) but think there are plenty of similar things out there if you search for soldering aids or clamps etc

- Joined
- Jul 24, 2016
- Messages
- 524
- Points
- 188

Sorry nithing to do with Artisania VictoyAre you on line Norway !
When i read the instructions on the Thick frames at the op behind the gun ports I didnt cut then to shape as i assumed they would be covered ind it would be difficult to get them flat
However After fitting them all I realised that the need ed moveing over to allow the Gun Ports to be the right size
Removed Y5 burnt the wood a bit and cut that (Will clear that later)
Removed Y1 and it went well
Using my Sander it was actually very easy
I wonder if the new Surprise will be better
- Joined
- Jul 24, 2016
- Messages
- 524
- Points
- 188

sorry not artisania vctoryWhat build are you referring to ? ( Y5 and Y1)
- Joined
- Nov 30, 2024
- Messages
- 149
- Points
- 103

Yeah, the video review looks really good, but they always do. Still got at least another 3 years on Victory at my rate, so won’t be looking for any new projects in the near futureSorry nithing to do with Artisania Victoy
I wonder if the new Surprise will be better
- Joined
- Jul 24, 2016
- Messages
- 524
- Points
- 188

i should have realised from the video - main planking is FAR too thick this shows at the end of his inner planking its terribleYeah, the video review looks really good, but they always do. Still got at least another 3 years on Victory at my rate, so won’t be looking for any new projects in the near future
nd where the Ship is open its HAS too be painted to make it look even acceptable
REALLY disappointed
If anyone in UK wants to carry on Contact Me
Its well done but i need to do better and cant
![IMG_20251004_114516[1].jpg IMG_20251004_114516[1].jpg](https://shipsofscale.com/sosforums/data/attachments/532/532022-19bcf20f2217e9620496b03c0589b314.jpg?hash=lpS7SCNDwS)
- Joined
- Jul 24, 2016
- Messages
- 524
- Points
- 188

not needed you just twist the wired and a drop of solderAh,ok
It’s a soldering “hands free” aid from an add I saw on Facebook. Not sure my pic is the actual store I purchased from (didn’t think I paid that much, but I could be wrong, had it for quite a while now) but think there are plenty of similar things out there if you search for soldering aids or clamps etc
View attachment 548193
- Joined
- Jul 24, 2016
- Messages
- 524
- Points
- 188

- Joined
- Nov 30, 2024
- Messages
- 149
- Points
- 103

Instructions video #27 completed
Finally!
Apologies for long delay in completing this video section. Since my last post I’ve had a couple of vacations,( returned from Japan a few days ago)
and in between those I had to deal with the sudden unexpected death of my younger brother . All this has had an impact on the amount of time spent on the build. My brother has been laid to rest and although never far from my thoughts, I felt able to carry on with it just before we left for Japan.
On to the build
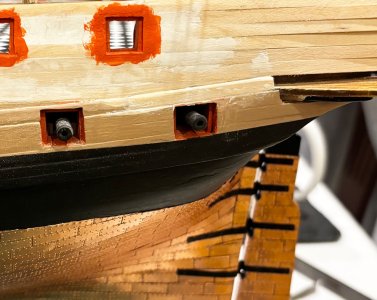
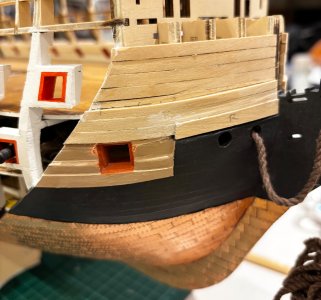
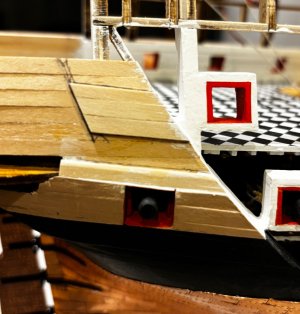
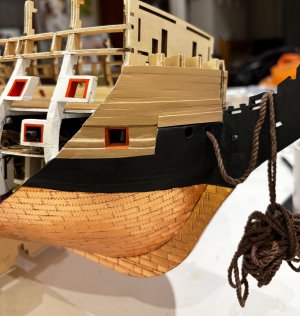
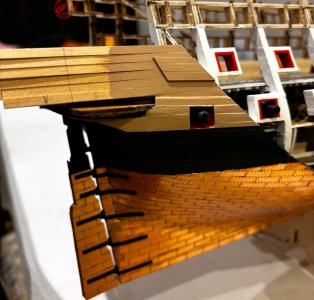
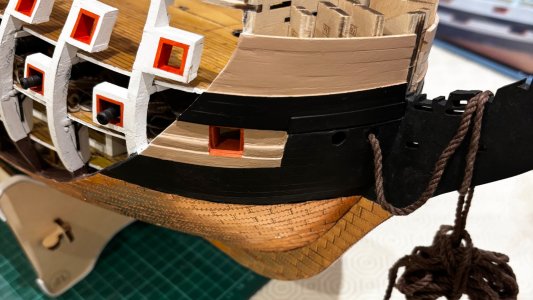
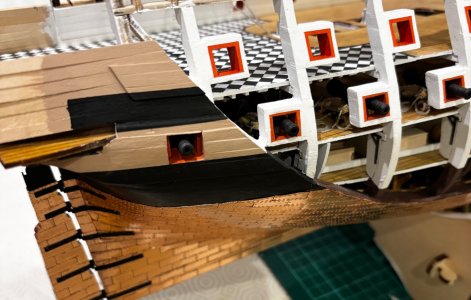
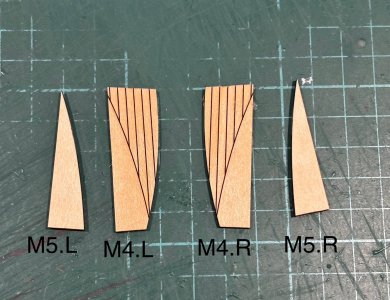
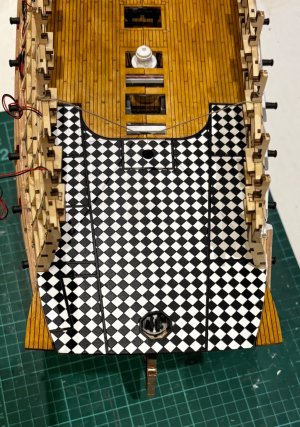
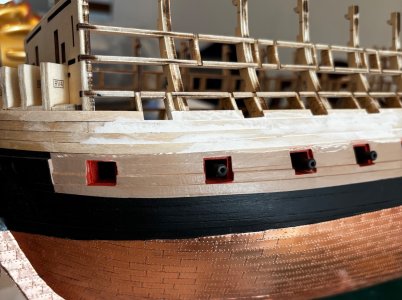
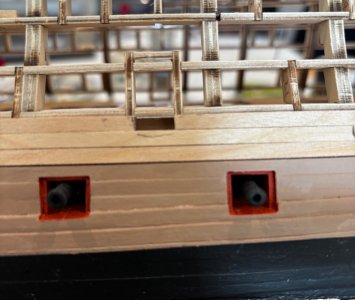
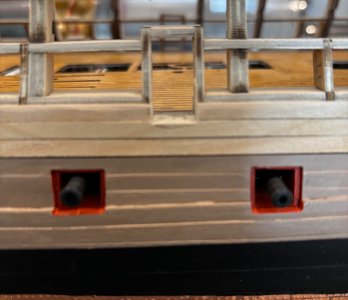
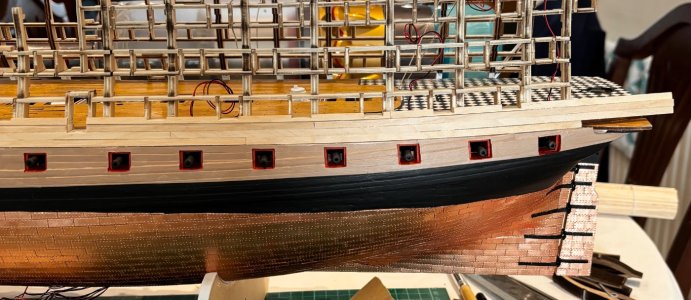
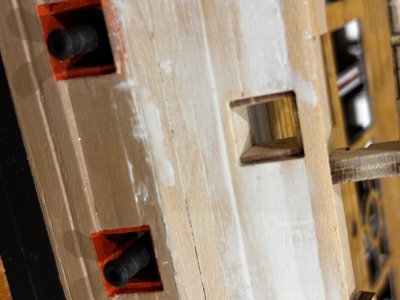
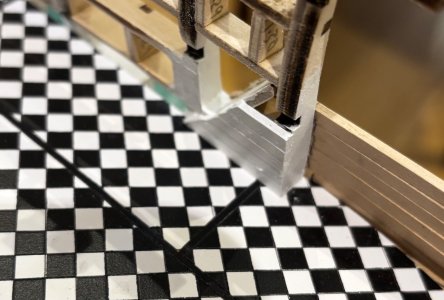
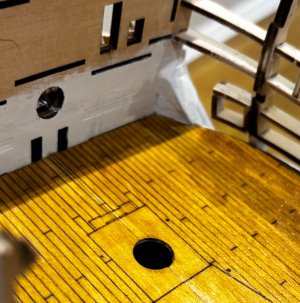
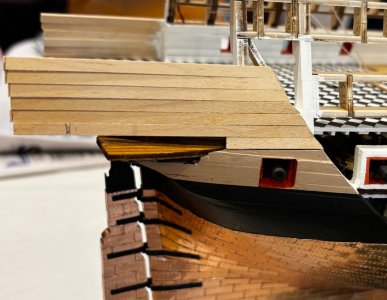
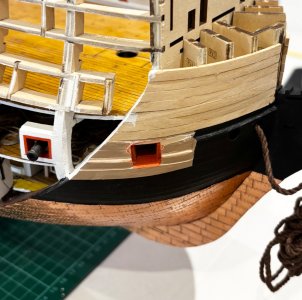
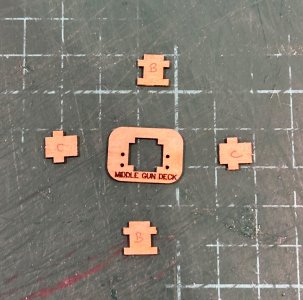
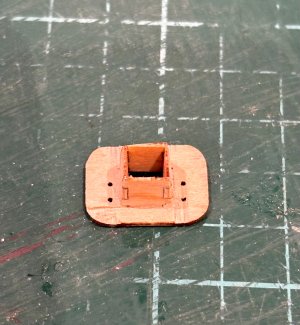
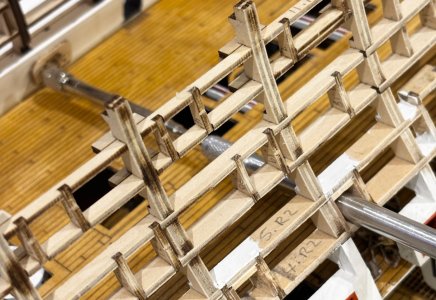
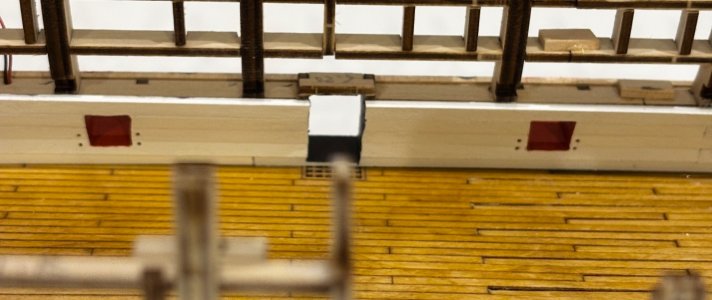
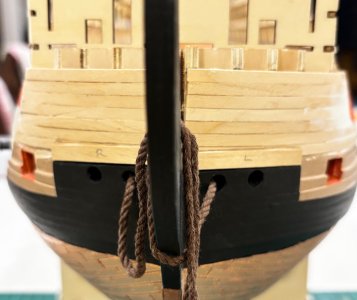
In this final part of video #27 I start by assembling and installing the parts that I assume make up the lower decks of the stern gallery. Next it’s planking the inner and outer hull and fitting the gun port linings. This time I completely changed the sequence as shown in the video, firstly I planked the outer hull, then fitted the gun port linings before planking the inner hull and finishing the planks flush with the inner edge of the linings. This saved all the filling in I had to do on the lower deck and I think it’s a more prototypical way of planking. It was more difficult to trim and clean around the inner gun port openings,(perhaps why they show the different method on the video) but I’ll take that.
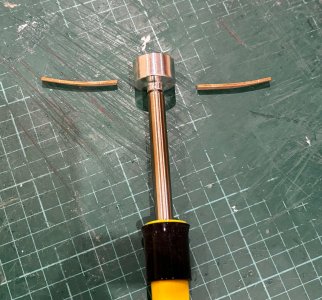
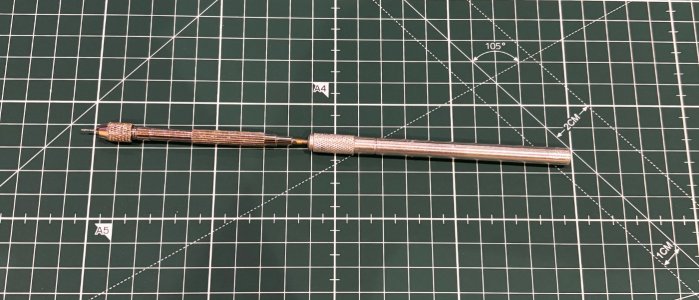
Next it’s making the template and drilling the holes for the gun tackles either side on the gun ports. You may recall that earlier in the build I had contacted AL about the pin vice their builder uses to drill through the gun ports but without success. I already own a pin vice with a chuck small enough to go through the gun ports but the chuck doesn’t close down enough to hold the 0.5 / 0.7mm drill needed for the holes. So I contacted them again and pressed for an answer, this time they replied with an apology for not answering sooner and informed me it’s their own mini pin vice set ref: 27018-1 (for anyone who’s interested),
So I purchased one. They still didn’t explain how he extends it, but I cut off the turning grip at the end and inserted the shaft into my other pin vice previously mentioned, this gave me the length required and fitting the whole assembly into a small power drill made drilling the holes quick and easy.
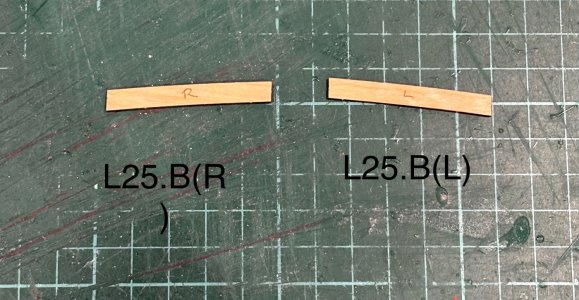
Next it was cutting away the horizontal brace parts on the starboard side between the gun ports and the upright hull framing, sanding down and painting the hull. In the video he doesn’t plank the small inner section at the bow or cut away the stern most horizontal brace, I could see no reason why, perhaps just an oversight, so I did both those things. Finally, using the paper templates provided, I mark and install the middle wale and paint the middle black “beeline”
Video #28 next


- Joined
- Dec 5, 2022
- Messages
- 1,080
- Points
- 443

Hey Allan,
First of all, I would like to express my condolences for your terrible loss. I hope you and your loved ones are doing well under the circumstances! Regarding your construction report: as always, wonderful quality and thank you very much for documenting and building so well. Everything has been implemented really well. We missed you! It's great to have you back.

First of all, I would like to express my condolences for your terrible loss. I hope you and your loved ones are doing well under the circumstances! Regarding your construction report: as always, wonderful quality and thank you very much for documenting and building so well. Everything has been implemented really well. We missed you! It's great to have you back.
- Joined
- Nov 30, 2024
- Messages
- 149
- Points
- 103

Hi GuntherHey Allan,
First of all, I would like to express my condolences for your terrible loss. I hope you and your loved ones are doing well under the circumstances! Regarding your construction report: as always, wonderful quality and thank you very much for documenting and building so well. Everything has been implemented really well. We missed you! It's great to have you back.

Thank you for you kind words, it’s been a hard couple of months xx
Allan, I'm very sorry to hear of your loss. My thoughts and prayers are with you. I'm glad you can get back to your modeling.
Your ship is coming along nicely and looks great.
For extending the pin vice, can you crimp a piece of brass tubing onto the handle? It may require you to remove the top end of the vice.
Your ship is coming along nicely and looks great.
For extending the pin vice, can you crimp a piece of brass tubing onto the handle? It may require you to remove the top end of the vice.
- Joined
- Nov 30, 2024
- Messages
- 149
- Points
- 103

Thank you for your kind thoughtsAllan, I'm very sorry to hear of your loss. My thoughts and prayers are with you. I'm glad you can get back to your modeling.
Your ship is coming along nicely and looks great.
For extending the pin vice, can you crimp a piece of brass tubing onto the handle? It may require you to remove the top end of the vice.
I did cut the handle end off which allowed me to fit it into another small chuck pin vice to give me the length required
- Joined
- Nov 30, 2024
- Messages
- 149
- Points
- 103

Hi AllanAlan,
My sincere condolences to you and your family.
Allan
Thank you for your kind thoughts
I totally understand how you must feel. It has been a rough 2025 for us as well with losing my mom and two of our closest friends. My wife and I find ourselves bringing up a LOT of fond memories of each of them so we realize the happy times they each brought to us and will be forever grateful.
Alan,
So sorry for your loss as well. I went through your same loss of a younger brother some years back. Hard indeed.
re: your work - glad that some of your time is now involved in continuing your excellent build. She's looking so excellent.
Regards,
So sorry for your loss as well. I went through your same loss of a younger brother some years back. Hard indeed.
re: your work - glad that some of your time is now involved in continuing your excellent build. She's looking so excellent.
Regards,
Last edited:
- Joined
- Nov 30, 2024
- Messages
- 149
- Points
- 103

Thank you xAllen,
So sorry for your loss as well. I went through your same loss of a younger brother some years back. Hard indeed.
re: your work - glad that some of your time is now involved in continuing your excellent build. She's looking so excellent.
Regards,


![IMG_20251004_114516[1].jpg IMG_20251004_114516[1].jpg](https://shipsofscale.com/sosforums/data/attachments/532/532023-b1fb4e41c0dd40252f815114c90a6518.jpg?hash=lpS7SCNDwS)
