BALDER, Vlaardingen Herring Lugger from 1912, scratch build scale 1:50 Plate-On-Frame

Hi Peter,
This is a fascinating build, I am glad to be following along.
Wonderful work.
Cheers,
Stephen.
Thanks for the nice words, Stephen. And welcome aboard. The more I look on the old plans, pictures and files, the more I get a view of the overall build. But also more and more questions.
Regards, Peter
 
Could have fooled me: test frame. Looks pretty good to me.
Hi Johan.
The result is what I had in mind. But before that, I had to 'feel' the thin Evergreen material to know how to handle it. Such as bending profiles without twisting. It comes down to cm. for cm. bend and don't want too much at once.
Gr. Peter
 
Last edited:
Wow Peter,

If you fully build it like this you have invented a new type of ship model building. Are the tiny frames sturdy enough to sope with the tension of the plating later in the process?
Very exciting to follow.
You also thanks foor the nice words, Maarten.
A new type of model building is always nice. I won’t tell you and Stephan about that. :) To study the old method of building. That alone is a process in itself. And I have the advantage of having some old plans.
I have 0,13 and 0,25 mm Evergreen plates. They are very flexible but also part of the tests. I want to try to force it like copper plate. It needs to be rounded so that it gives no extra tension on the frames.
Regards, Peter
 
Last edited:
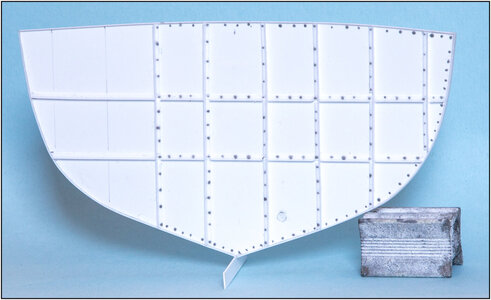
For the 2nd test, I started working with the watertight bulkhead, frame 39. Cut a test plate of 16 cm wide and glued the drawing of the frame on it:
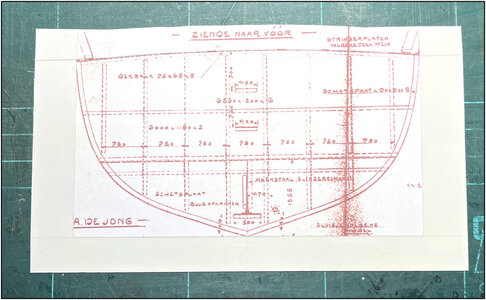
0037 Sheet.jpg
The point where the frame meets the keel beam is glued 12.5 mm from the bottom. That will be the starting point for all the frames.

Cut as precisely as possible along the outer edge:
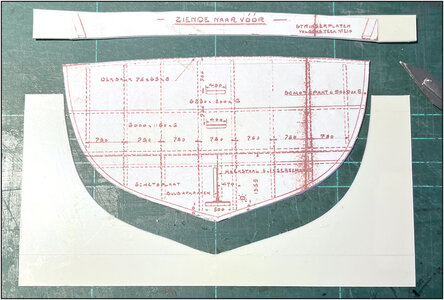
0038 Sheet-Cut.jpg
The top of the plate depends on the top of the frame. That depends on the height of the deck that has a sheer.

Because the profile will go around the cut-out mold, first cut off a thin edge:
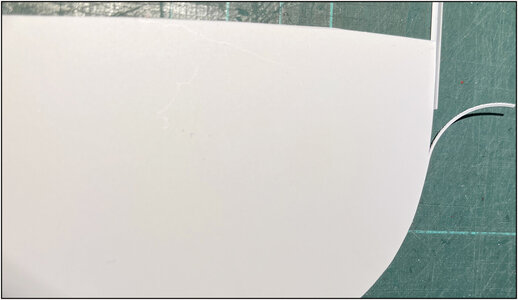
0039 Sheet-Strip.jpg

The watertight bulkhead is reinforced with cross-placed profiles:
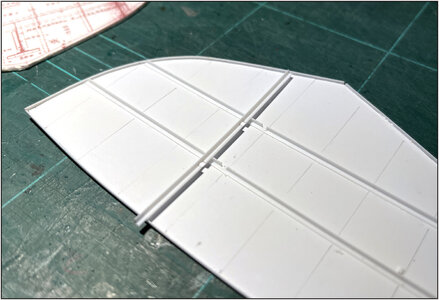
0040 Double.jpg
To make them coincide, both cut out a piece.
Then they both come to rest flat on the plate of the bulkhead:
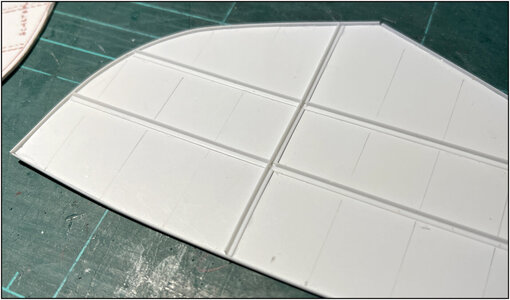
0041 Double.jpg

Then it will look like this:
0042 WaterFrame.jpg
I was through my first bag of 1.5x1.5 cm profiles.
Still not happy with tipping the rivets with the (grayed) glue. Still too much difference in size.

Coincidentally, Maarten @Maarten had asked yesterday whether applying the plates would not put too much tension on the frame. I didn't want to reveal it, but I was just doing that.
A first flat piece was applied at the height of the deck beam:
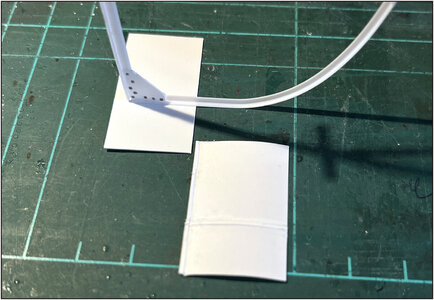
0043 Plates.jpg
The second one is bent at the beginning of the curve. This is also heated against the warm side of the kettle. Also added a small flanged edge at the top.
The old drawing clearly shows that the plates are installed from the top down. The overlap therefore extends upwards.
Perhaps the flanges are not necessary and not used with the original. I just wanted to test it.

The hull is fitted with 6 rows of skin plates on 1 side:
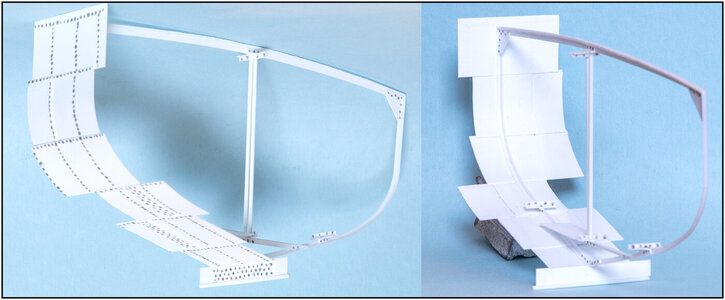
0044 Plates.jpg
Tried different overlaps. From narrow ones with the width of 1 rivet and the wider ones with 3 rows.
The profile on the side remains neatly in shape.
I gave myself a hard time on the outside by putting rivets. I still have to find a mode that I'm happy with. Rivets have also been placed on various parts every 9.5 mm, the distance between the frames.
I used 0.25mm / .01” plate here. As mentioned, I will probably start with the bow during construction. Then more deformations are needed. I may then use the 0.12 mm / .005” plate.

Now start spraying to see how the whole thing turns out.
Regards, Peter
 
Last edited:
Hi Peter,

I think this methode is called SOF? Sheet on frame ROTF

I love this, it is so refreshing. Looks a bit like paper building. It does me thinking about a paper build which is already in my mind for years. It is a cardboard model of an SD 14 cargo ship which is available as a kit.
This model was initially developped as a study model for shipbuilding students in the 70s and it contains every frame detail of this actual standard design ship.
The model is huge.

See a build of it here

Only 4500 parts ROTF
Maybe ever, when I am retired. Until then I enjoy your efforts.

For people interested, you can still order it.
Thanks for this post, Maarten. But building a SOF …….. that’s will be ‘een sof’. But in Dutch it’s not the same as in English. ROTF
But it good looking beside the POB and POF.
That paper model of the SD 14 is ……. Insane! But even more insane, someone has developed that kit! Went through that build-log, very unfortunate that it stopped on August 12, 2022 After 96 days of building.
I think my Balder will be less complex ….. ;)
Regard, Peter
 
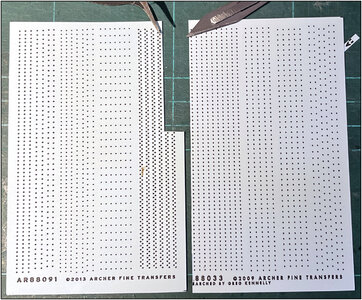
Because the sheets with Resin Rivits had arrived, I testen them also. I ordered 2 sheets as a test. These are actually intended for scale 1:48:
0045 Resin Rivets.jpg
Different patterns and tracks. Just cut it out, soak the cover in water for a while, apply it and fix it with MicroSol once dry.

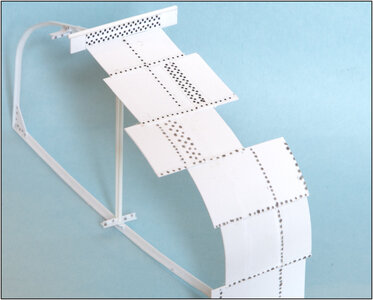
The 2 hull plates that are mounted against and partly on the keel provided with several pieces:
0046 Resin Rivets-1.jpg
I literally and figuratively can't tip that with the grayed glue.

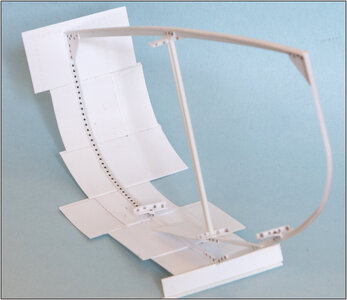
Place a strip on the inside of the inner edge of the L-profile:
0047 Resin Rivets-2.jpg
Tweezers work, but doable.
That looks so sleek that this will probably be the solution for the rivets. But now I still have to spray.

PS: If anyone knows of a Dutch or European provider of such rivets, I would like to hear about it. Because $17.95 per sheet and €7.45 import duties for 2 sheets is quite expensive.
Regards, Peter
 
Last edited:
Are these rivets higher than the paper - so that you "feel" a higher round head?

if you can drill 0,3mm holes, this could be also a way - with much more work - but you like work, or?

Screenshot 2023-09-26 153114.png

 
Are these rivets higher than the paper - so that you "feel" a higher round head?

if you can drill 0,3mm holes, this could be also a way - with much more work - but you like work, or?

View attachment 396747

Thanks for this input, Uwe.
Made a macro of the resin rivets besides the paper cuts:
0048 Resin Rivets-3.jpg
The shape is almost perfect.
Nice to see you found some other small rivets. But 1: they have a to rounded head, 2: I have to rivet them on the inside, 3: I hope that there will be soon more minutes in a hour and more hours in a day. I heard they are doing research into that.
PS: Drilling all that holes is not the problem. Builded up some experience on my BN. ;)
Regards, Peter
 
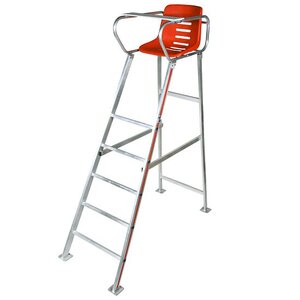
Good afternoon Peter. While reading through the first 4 pages I was “floored” by the novelty/uniqueness of this…..I shouldn’t have been it’s Peter after all. As all of your chairs have been taken up, I brought my own. ;). Cheers Grant
You also thanks for this nice words, Grant. Yep, a bit crazy and I'm still allowed to walk around freely.
It is not necessary to bring your own chair. Even though the front rows may be full, I can borrow these from the neighboring association:
IMG_9056.jpeg
Regards, Peter
 
Back
Top