BALDER, Vlaardingen Herring Lugger from 1912, scratch build scale 1:50 Plate-On-Frame

Super detailing Peter, very impressed, If I can't see things from 30cm away I have the tendency to skip and 0.3mm dowels would never happen!
Thanks, Dom. That's actually the case with me too, but with clip-on glasses the scale becomes ‘sliding’. And luckily the Byrnes Drawplate has no smaller holes……:rolleyes:
Regards, Peter
 
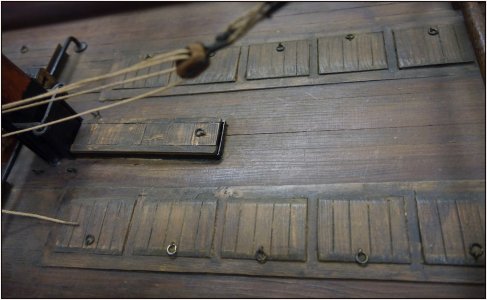
Started working on the hatches. In addition to the technical drawing shown above, the Amsterdam restoration book also contains some old photos. The hatches are sometimes slightly raised.
They are also slightly raised in the model that Sybe de Jong made prior to the restoration:
0651 Hatch Model.jpg
I estimate that Sybe's model was built on a scale of 1:25.

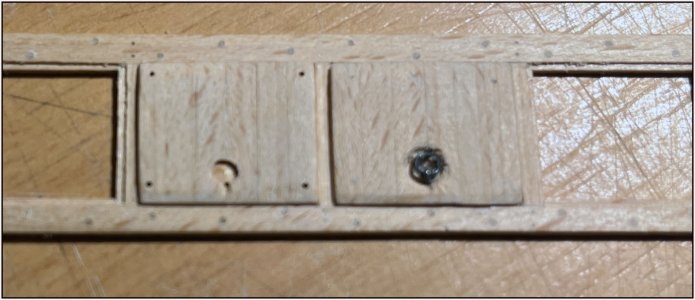
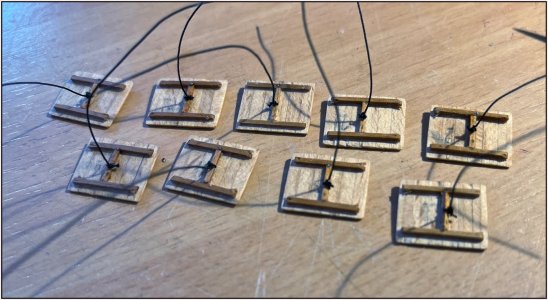
First I made a test hatch entirely by hand. Based on that I was able to mill some details:
0652 Hatch Test.jpg
(Unfortunately not completely sharp with the iPhone.) The test is on the right and version 2.0 on the left. The hatch is 15.75 x 13.5 mm and 1 mm thick. The recessed rounding of 2 ø mm is 0.5 mm deep. The ring is recessed in it:
0653 Hatch Drawing.jpg
That can be seen in one of the details on the drawing. The eye of the eye bolt is also slightly recessed.

This is the result:
0654 Hatch Fit.jpg
Made the 1 ø mm eye bolt and 2 ø mm ring from 0.4 ø mm iron wire.
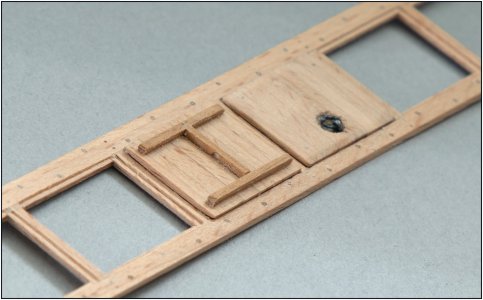
Also with dowels for the connection with the clamps on the bottom:
0655 Hatch Back.jpg
With in the middle the clamp with hole for the lashing of the hatch.
Because you can look into it from the side, I will also secure some hatches with a rope later.
8 more hatches to go .......
Regards, Peter
 
Started working on the hatches. In addition to the technical drawing shown above, the Amsterdam restoration book also contains some old photos. The hatches are sometimes slightly raised.
They are also slightly raised in the model that Sybe de Jong made prior to the restoration:
View attachment 513393
I estimate that Sybe's model was built on a scale of 1:25.

First I made a test hatch entirely by hand. Based on that I was able to mill some details:
View attachment 513394
(Unfortunately not completely sharp with the iPhone.) The test is on the right and version 2.0 on the left. The hatch is 15.75 x 13.5 mm and 1 mm thick. The recessed rounding of 2 ø mm is 0.5 mm deep. The ring is recessed in it:
View attachment 513395
That can be seen in one of the details on the drawing. The eye of the eye bolt is also slightly recessed.

This is the result:
View attachment 513396
Made the 1 ø mm eye bolt and 2 ø mm ring from 0.4 ø mm iron wire.
Also with dowels for the connection with the clamps on the bottom:
View attachment 513397
With in the middle the clamp with hole for the lashing of the hatch.
Because you can look into it from the side, I will also secure some hatches with a rope later.
8 more hatches to go .......
Regards, Peter
Good afternoon Peter. I should be used to you building details that small but I’m still amazed at what you do. Kudos. It’s not the fact you add these tiny details it’s the accuracy of the details within the details which impresses. Legendary.
Thanks, Dom. That's actually the case with me too, but with clip-on glasses the scale becomes ‘sliding’. And luckily the Byrnes Drawplate has no smaller holes……:rolleyes:
Regards, Peter
Remind me not to buy those clip on glasses…. ROTF
Cheers Grant
 
Good afternoon Peter. I should be used to you building details that small but I’m still amazed at what you do. Kudos. It’s not the fact you add these tiny details it’s the accuracy of the details within the details which impresses. Legendary.

Remind me not to buy those clip on glasses…. ROTF
Cheers Grant
Thanks, Grant. The detailed drawing are part of the problem of adding details or not. ;) What you can’t see on those drawings you don’t have to make. :) But that’s also the advantage of scratch building.
Then it’s just a matter of ‘to clip or not to clip’.
Regards, Peter
 
Last edited:
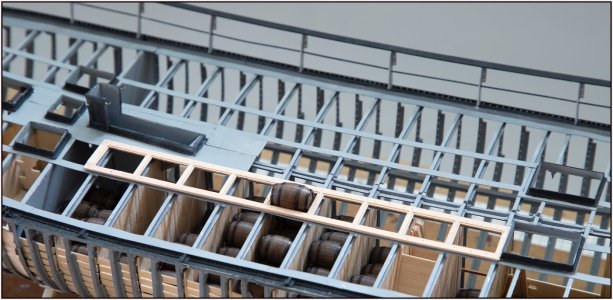
Will you be cutting the frame work in two, attaching the two halves to either side of the hull, or wil the entire frame be attached to either the left- or the right side,allowing you to keep the hatches in place?
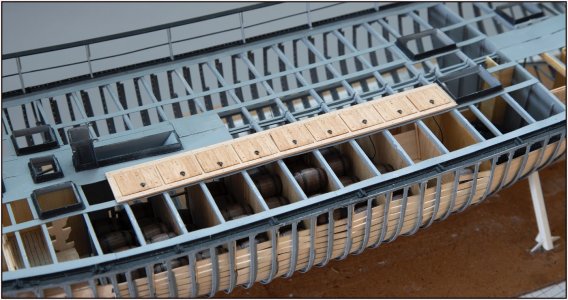
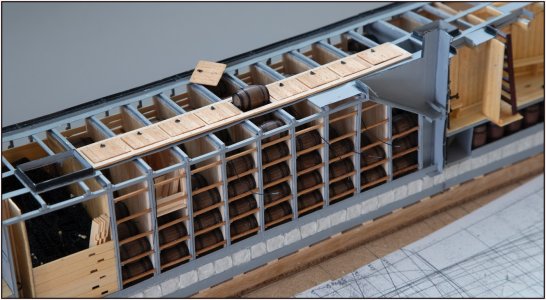
No more cuttings, Johan. As show here it will be placed on the port side:
IMG_2417.jpeg
On starboard just the stringer plates.
Regards, Peter
 
Back
Top