Thanks, i finally made a further step by sanding at the lowest speed.The result is better for the few dowels in needs of corrections.
-

Win a Free Custom Engraved Brass Coin!!!
As a way to introduce our brass coins to the community, we will raffle off a free coin during the month of August. Follow link ABOVE for instructions for entering.
-

PRE-ORDER SHIPS IN SCALE TODAY!
The beloved Ships in Scale Magazine is back and charting a new course for 2026!
Discover new skills, new techniques, and new inspirations in every issue.
NOTE THAT OUR FIRST ISSUE WILL BE JAN/FEB 2026
You are using an out of date browser. It may not display this or other websites correctly.
You should upgrade or use an alternative browser.
You should upgrade or use an alternative browser.
Belem from Artesania Latina - by Fish & Chip
- Thread starter Fish&Chip
- Start date
- Watchers 25
-
- Tags
- artesania latina belem
Wow, that is a great job, very nice
Hi,
Airbrushing and brush painting finished for the mast and yard, let's go know for final rigging, Yeah ! I love this step, even if I found it complicated, learning curve is huge for the choice of knot and the way to install all the threads (rope). Correction on the main mast was done, I should take more precaution next time with my Proxxon milling maching at the thickness of the wood beside the sheave.
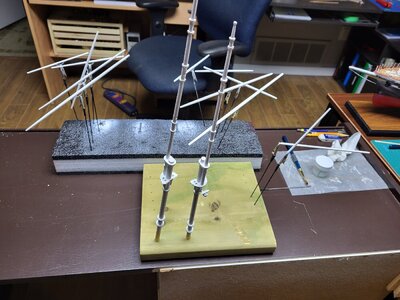
Airbrushing and brush painting finished for the mast and yard, let's go know for final rigging, Yeah ! I love this step, even if I found it complicated, learning curve is huge for the choice of knot and the way to install all the threads (rope). Correction on the main mast was done, I should take more precaution next time with my Proxxon milling maching at the thickness of the wood beside the sheave.

Hallo Michel alias @Fish&ChipHi,
I just start my Belem Model from Artesania Latina. I purchased it in Canada at 300 $ CAD tax and shipping included. It is a bargain if I look elsewhere on the web.
Let me first show you what is inside the box. Sorry, but I do not have so much pictures and I am beginner in showing this kinf of picture. I also purchased the Monography from AAMM at the following link : AAMM store
For now, everythings seem's good and are usual AL goodies.
we wish you all the BEST and a HAPPY BIRTHDAY

Thanks Uwek. Have a good day
Good morning. Happy birthday for Friday Michael. I’ve not had. Much time on SoS so apologies for the belated wish. PS your yards are very good. Cheers Grant
Thanks you Grant.
I am in the reading of "Manuel du manoeuvrier" before beginning the rigging. I will start soon to post new works on my Belem.
I am in the reading of "Manuel du manoeuvrier" before beginning the rigging. I will start soon to post new works on my Belem.
Hi, I received new stock from Cornwall Model Boats : replacement turnbuckles from Amati to complete the missing ones and replace the scrapped one when I tried to mill someones, tiny eye pins of 2 mm from Amati and Caldercraft PE rigging hooks, the smallest one. Unfortunatrly, the hooks seems to be oversize a bit, so here is a no go. The turnbuckle will be used on the bowsprite if the size in good, and for the deck near the mizen. The eye pins are smaller than the one provided from A. Latina and are really well done and uniform, I prefer them. I will replace the ones already glued on the mizzen mast and painted in white in a further step.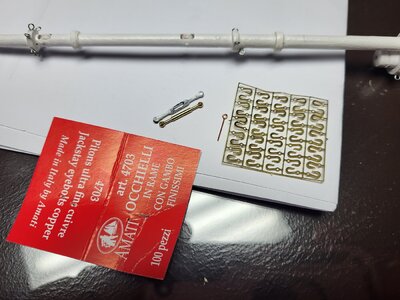
I can now continued the Belem.
OH! I finish to transform the Manuel du Manoeuvrier from .PDF to Word with a formatting allowing search inside the document. I think I will make a resumee of the Knots and blocks in use for period ships and over for covering the usage of each type. I took the .PDF from Gallica (France), Google have the text form. So I combine the pics from the .PDF to the raw text to form the Word document.
Have a good evenning,
Michel
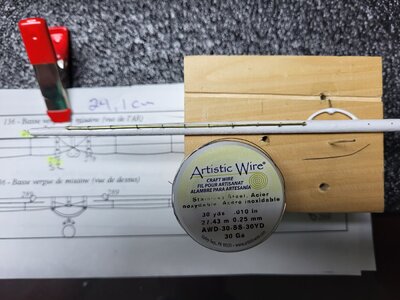
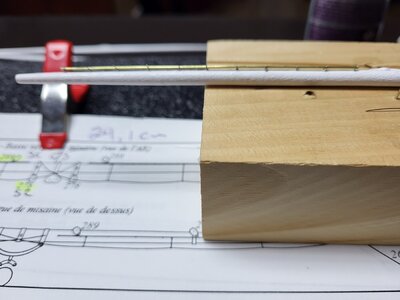
I am continuing the masting by working on the foremast yard. I mill small holes to receive the binding of the single blocks on jackstay (ligature de la poulie simple sur la filière de la vergue). The jackstay are not present on AL plan but found in the AAMM plan. The eyepins are made from Stainless Steel wire (0,25mm) and turn over a plated T pin that was cut to removed the top of the "T", then twist and glue within the yard with CA glue. A small brass rod was used as jackstay passed in these formed eyepins. Well, a couple of hours will be required for completed this work... in between fireplace renovation and marble tiles assembling.
Please help? Where did you obtain the deck plans?Well, once again sorry for my English (I tried Google translate for this post) and my lack of vocabulary on ships. Here are some pictures of the relative positions of the equipment based on the Original Plan vs A. Latina design. As we can understand, the mizzen mast hole should be moved almost 0.5 inch towards the stern. There is a gap near the hull as seen in the first photo. Overall, all things are fairly evenly distributed by AL.
around View attachment 268701View attachment 268702View attachment 268703
Hi Christie,
I bought from AAM here : Belem Monography. Just clic on Belem Monography, you must know that this one is completely in French.
I bought from AAM here : Belem Monography. Just clic on Belem Monography, you must know that this one is completely in French.
I finished my MSFS Flight sim installation and my new PC build. Fireplace renovation is end also. I will continue the Belem soon. Standing rigging will follow.
Thanks for the information. Your building information will be used as a guideline and help me when I am going to start on my kit next year.Hi Christie,
I bought from AAM here : Belem Monography. Just clic on Belem Monography, you must know that this one is completely in French.
I am glad if my thread can help you. I am also native french speaker if I can help for translation too.
Hi everyone and happy new year. I try to return to my benchwork. I received new graphic card, monitor and X-Touch mini and installed software for my new MSFS Simulator setup. So, I loss a lot of time in another hobby than for my ship building.
Here are some pics of the homework concerning the renovation made this automn : 1- Before, then 2- after.
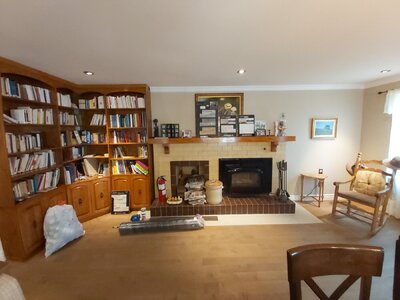
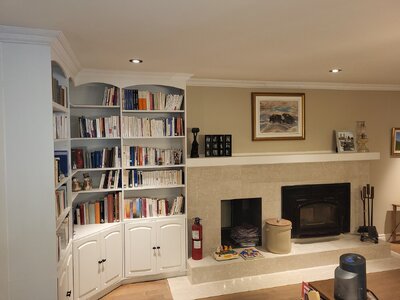
Here are some pics of the homework concerning the renovation made this automn : 1- Before, then 2- after.


Last edited:
And now the work made on the Belem, beginning by the rigging startup :
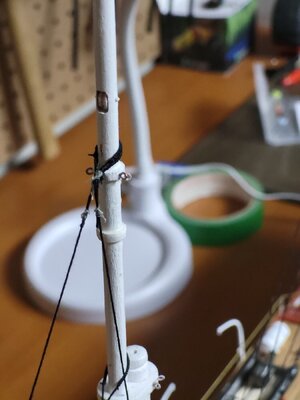
First observation : the CA Glue discolored my thread.
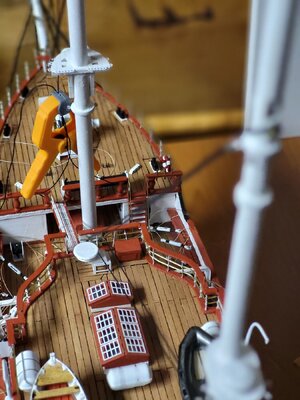
Second observation : I had problem with the rope size. Amati seem's to over-evaluated the size of the threads. ),5 mm seem's to be around 3,5-4 mm. May be you will found the rope too thin for the standing rigging. Do not forget the 1/75 size of the ship.
Third observation : the new turnbuckles are in brass. They are difficult to paint. Maybe I will let them natural on the bowsprite.
Fourth observation : everything are so fragiles and unglued easily. Great care should be done on the manipulation of the thread.
Fifth observation : The second pic show my problem of unpainting the new turnbuckle on the base of the main mast. Impossible to repaint there in this so cramped space. The most difficult manipulation on this ship to date. I am not very happy with the rigging andnot totalentuous on this work.
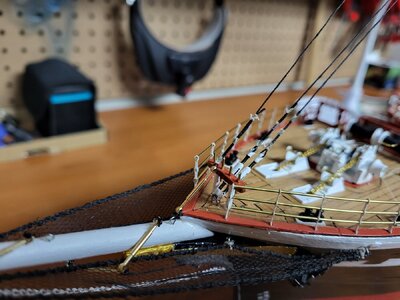
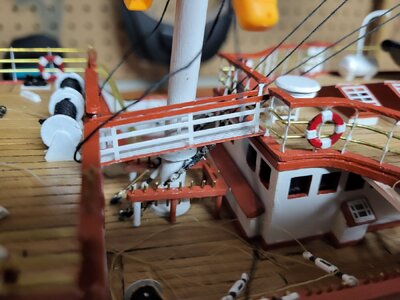


Thank you Nomad.
Hi Michel,
I must say that you are reaching a nice overall result with this build, even with your observations.
- I try to avoid CA glue, especially on ropes. The CA glue tends to turn white, ruining the look of ropes or knots. The method I use is somewhat slower, but it gives far better results. I use Methanol alcohol and wood glue. I thin the wood glue with water (70% glue, 30% water). So when you tie ropes and want to fix them, I first apply the Methanol alcohol to the rope, or knots. This soaks in quickly. Next, I apply the diluted wood glue. The Methanol ensures that the wood glue soaks well into the rope, and you will get a strong bond. It does take longer to dry, but the result is much better since there is no discoloration at all. There are fast-setting wood glues that will make life easier too.
- When I paint brass pieces, I first rub them down with steel wool, or sandpaper. This creates a kind of 'key' to the surface to which the paint will adhere better.
Looking forward to your progress.
Dirk
I must say that you are reaching a nice overall result with this build, even with your observations.
Some comments on your observations:First observation : the CA Glue discolored my thread.
Second observation : I had problem with the rope size. Amati seem's to over-evaluated the size of the threads. ),5 mm seem's to be around 3,5-4 mm. May be you will found the rope too thin for the standing rigging. Do not forget the 1/75 size of the ship.
Third observation : the new turnbuckles are in brass. They are difficult to paint. Maybe I will let them natural on the bowsprite.
- I try to avoid CA glue, especially on ropes. The CA glue tends to turn white, ruining the look of ropes or knots. The method I use is somewhat slower, but it gives far better results. I use Methanol alcohol and wood glue. I thin the wood glue with water (70% glue, 30% water). So when you tie ropes and want to fix them, I first apply the Methanol alcohol to the rope, or knots. This soaks in quickly. Next, I apply the diluted wood glue. The Methanol ensures that the wood glue soaks well into the rope, and you will get a strong bond. It does take longer to dry, but the result is much better since there is no discoloration at all. There are fast-setting wood glues that will make life easier too.
- When I paint brass pieces, I first rub them down with steel wool, or sandpaper. This creates a kind of 'key' to the surface to which the paint will adhere better.
Looking forward to your progress.
Dirk
Thanks Dirk for the tips. The methanol used is the first Time I Heard about IT. Great Idea.
I used Vallejo acrylic on the turnbuckle wich work efficiently on casting. But, may be Tamyia paint should improve the adherence.
I used Vallejo acrylic on the turnbuckle wich work efficiently on casting. But, may be Tamyia paint should improve the adherence.


