Bluenose II Build (Artesania Latina) 1:75 by Nomad [Completed Build]

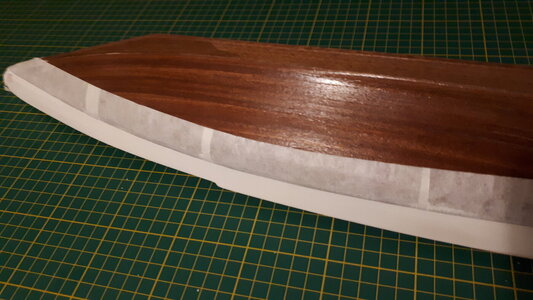
After trying all sorts of combinations on scrap wood, I eventually settled on a sequence of natural wood filler, satin varnish and flat black paint to complete the colouring of the hull above the flotation line. I started by scuffing the bulwarks with sandpaper to provide a better purchase for the filler, smeared the filler on relatively thick and then, once dry, sanded it with 240-grit to within an inch of its life.
0195_20210921_bluenose_II_build.jpg

Once I was satisfied that the filler had elevated the surface of the bulwarks to the same level as the second planking layer, I added a coat of clear satin varnish in the hope that it would secure the filler and add just a very small degree of gloss to the paintwork. Finally, I applied two coats of flat black paint to the varnished surface with a broad, flat brush and was oh so careful not to let it bleed onto the deck or planking.
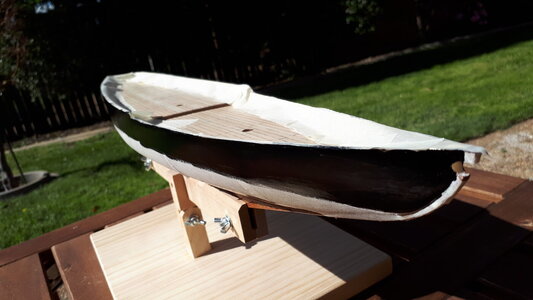
0200_20210921_bluenose_II_build.jpg

I was reasonably satisfied with the outcome. Some of the black paint did seep through to the edges of the planking and required a single-edged razor blade to remove. And after examining AL's photo instructions more closely, I realised that the front section of keel - at the stem, above the flotation line - is also painted black and did not require the painter's tape I had protected it with earlier.
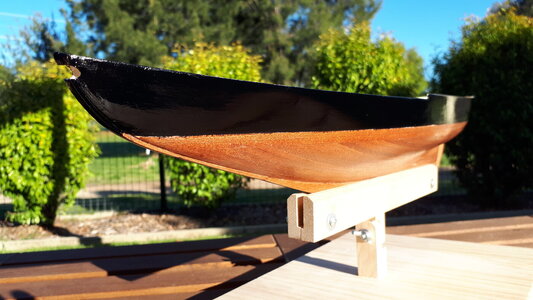
0205_20210921_bluenose_II_build.jpg
 
After trying all sorts of combinations on scrap wood, I eventually settled on a sequence of natural wood filler, satin varnish and flat black paint to complete the colouring of the hull above the flotation line. I started by scuffing the bulwarks with sandpaper to provide a better purchase for the filler, smeared the filler on relatively thick and then, once dry, sanded it with 240-grit to within an inch of its life.

View attachment 257503

Once I was satisfied that the filler had elevated the surface of the bulwarks to the same level as the second planking layer, I added a coat of clear satin varnish in the hope that it would secure the filler and add just a very small degree of gloss to the paintwork. Finally, I applied two coats of flat black paint to the varnished surface with a broad, flat brush and was oh so careful not to let it bleed onto the deck or planking.

View attachment 257504

I was reasonably satisfied with the outcome. Some of the black paint did seep through to the edges of the planking and required a single-edged razor blade to remove. And after examining AL's photo instructions more closely, I realised that the front section of keel - at the stem, above the flotation line - is also painted black and did not require the painter's tape I had protected it with earlier.

View attachment 257505
We are going to have a wide range of BN colors in our fleet which is consistent as the original had several different colors schemes in her life. A white waterline, maybe with auto pinstripe tape will bridge any paint seep overs onto the oiled hull. Just a thought. We'll follow your design track with interest. RIch (PT-2)
 
Artesania did not supply enough Sapele wood for the number of stanchions required on deck and I have been obliged to order some more. Apparently this is a common issue with AL according to other build logs and, knowing that, I probably should have ordered more in anticipation. The model requires 78 stanchions cut from two lengths of 300mm Sapele wood. The maths was never going to add up :confused:

0210_20210923_bluenose_II_build.jpg
 
Artesania did not supply enough Sapele wood for the number of stanchions required on deck and I have been obliged to order some more. Apparently this is a common issue with AL according to other build logs and, knowing that, I probably should have ordered more in anticipation. The model requires 78 stanchions cut from two lengths of 300mm Sapele wood. The maths was never going to add up :confused:

View attachment 257686
Drats ! ! ! Maybe they think that you have a crosscut from the future that adds wood instead of converting the cuts into sawdust. :confused: Rich (PT-2)
 
Artesania did not supply enough Sapele wood for the number of stanchions required on deck and I have been obliged to order some more. Apparently this is a common issue with AL according to other build logs and, knowing that, I probably should have ordered more in anticipation. The model requires 78 stanchions cut from two lengths of 300mm Sapele wood. The maths was never going to add up :confused:

View attachment 257686
I really do hope they'll be able to deliver soon. Current experience in the Netherlands is, that it may take up to two to three weeks to deliver the most simple items (like rope...) Don't know how the situation is Down Under.
Good luck!
My compliments on your model, looks very nice.
 
I really do hope they'll be able to deliver soon. Current experience in the Netherlands is, that it may take up to two to three weeks to deliver the most simple items (like rope...) Don't know how the situation is Down Under.
Good luck!
My compliments on your model, looks very nice.
Thanks for the compliment! I imagine it is worse here though. Hobby shops of this nature seem to be thin on the ground and I'm not sure they would carry this kind of wood either. We are quite reliant on overseas supplies for many things, and given the current mayhem with postal services I'd be happy if I only had to wait three weeks :p
 
Thanks for the compliment! I imagine it is worse here though. Hobby shops of this nature seem to be thin on the ground and I'm not sure they would carry this kind of wood either. We are quite reliant on overseas supplies for many things, and given the current mayhem with postal services I'd be happy if I only had to wait three weeks :p
About two and a half weeks ago, I ordered some 1:65 barrels, buckets and oars. So far nothing yet...
 
Thanks for the compliment! I imagine it is worse here though. Hobby shops of this nature seem to be thin on the ground and I'm not sure they would carry this kind of wood either. We are quite reliant on overseas supplies for many things, and given the current mayhem with postal services I'd be happy if I only had to wait three weeks :p
Keep in mind the stanchions are painted, so it doesn’t matter what type of wood you use, as long as it’s the right size! ;)
 
We are going to have a wide range of BN colors in our fleet which is consistent as the original had several different colors schemes in her life. A white waterline, maybe with auto pinstripe tape will bridge any paint seep overs onto the oiled hull. Just a thought. We'll follow your design track with interest. RIch (PT-2)
I agree with Rich, a thin white line between the wood and the black will look very nice. Ask me how I know…lol. :p
 
Wait, wait, wait. . . not even "in the mail" We may be under the turf before some orders arrive. :mad: Rich (PT-2)
Nope, not even in the mail and it's not a one off.
Funny thing though, anything else one orders online is on average at your doorstep within days...
 
Keep in mind the stanchions are painted, so it doesn’t matter what type of wood you use, as long as it’s the right size! ;)
Good point, although the AL kit's instructions are to apply a clear varnish only. We'll see. If my order takes too long, or arrives in the wrong size (always a possibility), then maybe I'll just go with a paint job :)
 
I agree with Rich, a thin white line between the wood and the black will look very nice. Ask me how I know…lol. :p
Yes, I see that I am to install a thin basswood baton all along the flotation line which should act as something of a white line and separate the two colours quite well. I think when I become a bit more experienced with this whole lark I'll do more research into the history of the actual ship I'm trying to construct, and maybe incorporate some of the real designs and colours into my build. I feel that's still a long way off though ... :p
 
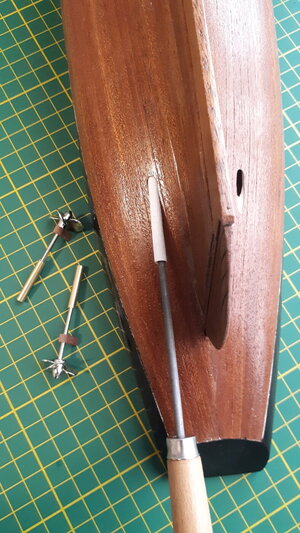
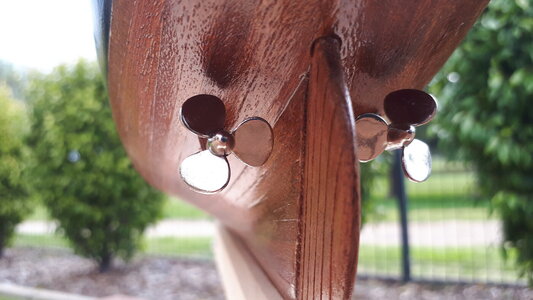
With the stanchions on hold I moved to the next task of installing the two propellers. More holes in the hull that I took such care to assemble. I started the hole with a 2mm drill bit, followed by a needle file to enlarge it, and finally fine-grit sandpaper wrapped around the needle file to finish it off.

0215_20210924_bluenose_II_build.jpg

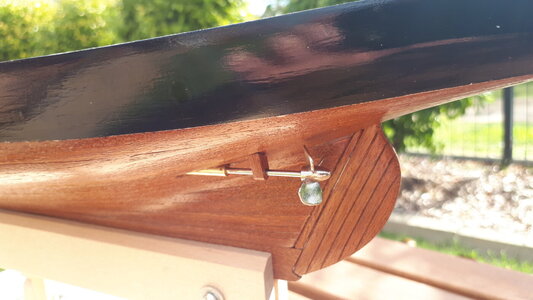
The propeller, axel and housing tube were good quality brass. I followed the advice I read somewhere by polishing all the metal bits first, and coated them with clear varnish afterwards to preserve the shine. The support brackets required a bit of shaping to adjust to the contours of the hull, but I think most of my time was taken up by trying to maintain the symmetry on either side of the rudder.

0220_20210924_bluenose_II_build.jpg

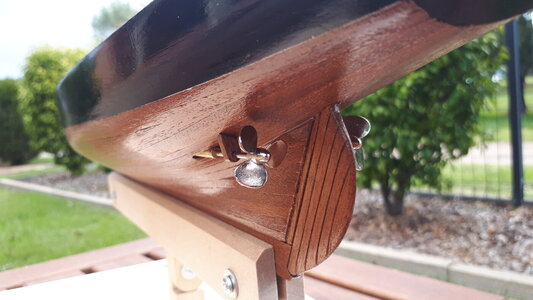
As careful as I thought I was, I still went too big with the housing tube holes and I'm sure my ship would sink immediately if placed in water. All in all I was quite happy with the result though, and particularly pleased that I was able to keep the symmetry and house the propellers in a way that enabled them to rotate without touching the hull.

0225_20210924_bluenose_II_build.jpg

I've a feeling I'm posting too many pictures now. I am already on page 7 and have only finished a hull, a rudder and two propellers! I hope the moderators don't mind me abusing their server space. The next photo adds no real value to the propeller installation described so far. I just liked the look of it :p

0230_20210924_bluenose_II_build.jpg
 
Last edited:
With the stanchions on hold I moved to the next task of installing the two propellers. More holes in the hull that I took such care to assemble. I started the hole with a 2mm drill bit, followed by a needle file to enlarge it, and finally fine-grit sandpaper wrapped around the needle file to finish it off.

View attachment 257837

The propeller, axel and housing tube were good quality brass. I followed the advice I read somewhere by polishing all the metal bits first, and coated them with clear varnish afterwards to preserve the shine. The support brackets required a bit of shaping to adjust to the contours of the hull, but I think most of my time was taken up by trying to maintain the symmetry on either side of the rudder.

View attachment 257838

As careful as I thought I was, I still went too big with the housing tube holes and I'm sure my ship would sink immediately if placed in water. All in all I was quite happy with the result though, and particularly pleased that I was able to keep the symmetry and house the propellers in a way that enabled them to rotate without touching the hull.

View attachment 257839

I've a feeling I'm posting too many pictures now. I am already on page 7 and have only just finished a hull, rudder and two propellers! I hope the moderators don't mind me abusing their server space. The next photo adds no real value to the propeller installation described so far. I just liked the look of it :p

View attachment 257840
If you're dissatisfied with the axle feed through in the hull; in some cases people use a mix of sanding dust with woodglue. Maybe one of the logs will give you some direction, or one of the other members is willing to share his secret recipe. ;)
It does put you back a little bit...
 
I agree with Rich, a thin white line between the wood and the black will look very nice. Ask me how I know…lol. :p
Wholeheartedly agree with Rich and Dean.
Expect to see a beautiful white waterline in one of your next posts (and please, keep those pictures coming).
 
Yes, I see that I am to install a thin basswood baton all along the flotation line which should act as something of a white line and separate the two colours quite well. I think when I become a bit more experienced with this whole lark I'll do more research into the history of the actual ship I'm trying to construct, and maybe incorporate some of the real designs and colours into my build. I feel that's still a long way off though ... :p
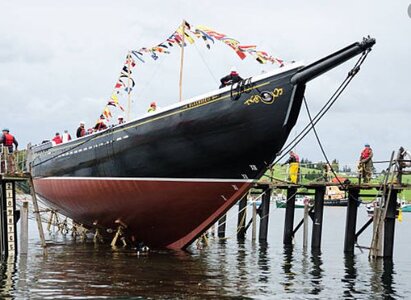
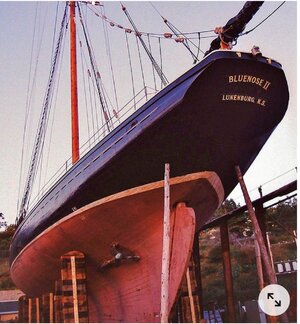
The real ship was painted red below the waterline and black above, with a thin white line between.
Blue-05.JPGblue-08.jpg
 
If you're dissatisfied with the axle feed through in the hull; in some cases people use a mix of sanding dust with woodglue. Maybe one of the logs will give you some direction, or one of the other members is willing to share his secret recipe. ;)
It does put you back a little bit...
You can sand a piece of the same wood you used for the hull planking, and make a small pile of sawdust. Then just use regular pva glue, and mix some with the wood dust and make a filler. But you have to mix a small amount at a time and work fast, as it will cure quickly depending on the glue you use. Spread in or around the hole with a small board or toothpick. Let dry, sand, and touch up clear coat in that area. ;)
 
Last edited:
Back
Top