Bluenose II Build (Artesania Latina) 1:75 by Nomad [Completed Build]

Joined
Jun 1, 2021
Messages
1,190
Points
443

Location
Australia
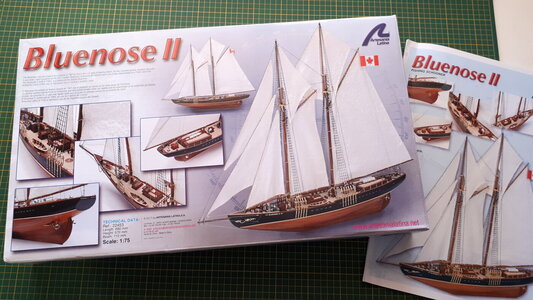
This is my very first ship modelling endeavour, or my first modelling endeavour of any nature really. I ordered the Bluenose II from Artesania Latina as a starting point and it already feels that I'm punching well above my weight. Nonetheless, I was encouraged by other build logs on this forum and thought I'd try the same, so any advice and suggestions are more than welcome. With family and work commitments, and a total lack of experience, it is likely that this build, if successful, will be the slowest build known to man. Still, I am fascinated by sail ships in general, and look forward to the challenge of building the Bluenose II, learning more about modelling in general, not to mention coming to terms with all the nautical terminology with which I am wholly unfamiliar :confused:

0005_20210721_bluenose_II_build.jpg
 
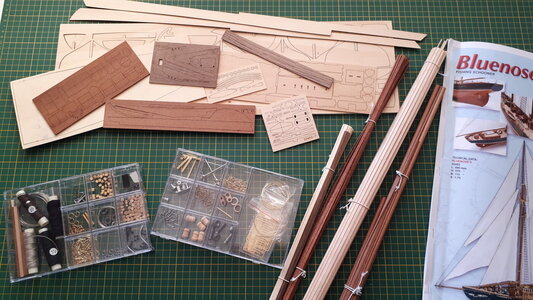
Opening the box was like a few birthdays rolled into one, lots of miniature bits and bobs to admire. The packaging was compact and robust and the parts appear to be of good quality, although this being my first build I had nothing to compare against. This kit is my new normal. The instructions came in disc format and in a myriad of languages, and will use a fair bit of ink to print out. The pictures are colourful and expansive, although I'll bear in mind the advice from other threads that caution against incorrectly referenced ship part names, assembly steps out of sequence, and just simply bad modelling techniques. Either way, it's still game on :)

0010_20210721_bluenose_II_build.jpg
 
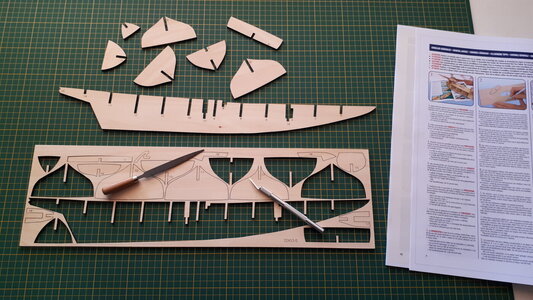
Step one: Remove the laser-cut parts from their sheets and file down any imperfections. My first foray into the unknown with a hobby knife, and it showed. It was a minor injury and a few plasters later before I could continue the process, only now with a bit more respect and a little less blind-minded enthusiasm :p


0015_20210721_bluenose_II_build.jpg
 
Hi Nomad.
Nice to see the build of the BN from another manufacturer. So we can see the difference between different designers.
Regards, Peter
Keep those Band-Aids (plasters) handy Nomad, we all need them sooner or later. I had a proper blood bath when starting planking my "Courier".
 
Hi Nomad.
Nice to see the build of the BN from another manufacturer. So we can see the difference between different designers.
Regards, Peter
Thanks Peter, I'll give it my best (which as a newbie doesn't amount to much yet), and I hope you have the patience to wait a long time ;)
 
Keep those Band-Aids (plasters) handy Nomad, we all need them sooner or later. I had a proper blood bath when starting planking my "Courier".
Ha ha, bloodbath, yes I can well believe it. I should have seen it coming though; small little bits of wood, seriously sharp objects, throw in a bit of impatience and sure enough there'll be blood :confused:
 
Same here. I'll be watching with interest.

EJ
Ok so no pressure then :p

As I said to Peter V though, I hope you have a lot of patience as I believe this is going to take me a while. Happy if I am able to contribute anything to this forum though, good or bad.
 
Ok so no pressure then :p

As I said to Peter V though, I hope you have a lot of patience as I believe this is going to take me a while. Happy if I am able to contribute anything to this forum though, good or bad.
You will be able to find a lot of photos and other resources for BN II on their web site and gallery which will provide details of many things that may not be in your plans and instructions. BN II has been revised/upgraded several times over the years with changes both on deck and below as well as lower topmasts to allow the summer cruises to various places in Nova Scotia where bridges were built lower than allowing passage with the full topmasts. Take your time and look around to get as much background awareness as you can as you proceed. . . That has been my own tack when needing time for the adhesives or paint to dry. Best of luck and enjoy the voyage. Rich (PT-2)
 
You will be able to find a lot of photos and other resources for BN II on their web site and gallery which will provide details of many things that may not be in your plans and instructions. BN II has been revised/upgraded several times over the years with changes both on deck and below as well as lower topmasts to allow the summer cruises to various places in Nova Scotia where bridges were built lower than allowing passage with the full topmasts. Take your time and look around to get as much background awareness as you can as you proceed. . . That has been my own tack when needing time for the adhesives or paint to dry. Best of luck and enjoy the voyage. Rich (PT-2)
Yes, sound advice, thanks Rich. I'm an avid reader and my interest in sailing ships was further enhanced after reading Forester's Hornblower series. I've now started O'Brian's Jack Aubrey collection, which if nothing else has taught - and confused - me a lot about nautical terms and naval commands. Some background on the Bluenose would indeed be interesting, and worth pursuing Thumbsup
 
Just wondering ... can anyone tell me whether it is standard practice to sand the 'burnt' edges of the keel and bulkhead frames? The instructions give no indication, although most images I've seen on the forum suggest that they are. Thanks
 
Just wondering ... can anyone tell me whether it is standard practice to sand the 'burnt' edges of the keel and bulkhead frames? The instructions give no indication, although most images I've seen on the forum suggest that they are. Thanks
This is normal practice. This removes carbon deposits from the laser used to cut out the details. This improves the adhesion of the surfaces and gives the wood a natural look, rather than burnt wood. The cladding will then need to be glued to the frames. And on the bow and in the stern, you also need to remove the edges (small) so that the contours of the hull are smooth. Some instructions do not write this either.
 
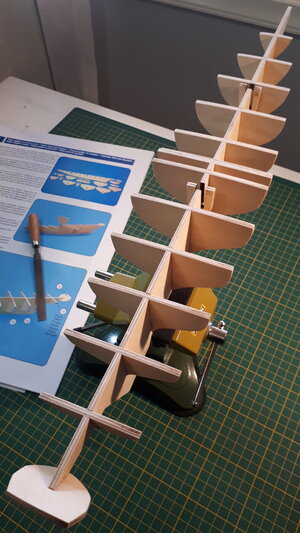
Most of the bulkhead frames were a very tight fit when attached to the false keel. I filed the slots cautiously until a snug fit could be realised, and also sanded the carbon deposits left by the laser cut from the edges as suggested earlier. An initial dry fit gave me a small sense of achievement, although I notice that the tops of some of the bulkhead frames, particularly towards the stern, are not entirely horizontal and have a slight camber to them. It becomes more evident when the stern-end false deck is placed loosely on top and has a small but noticeable 'rocking' motion side to side. Is this a concern? Seems I have a few options; 1) Carry on regardless with the slight curve, 2) Pad the top ends of the faulty frames until they are horizontal, or 3) Sand the top centres of the faulty frames until horizontal. Option 1 doesn't seem right, and the sanding in option 3 might unnecessarily reduce the height of the frame and who knows what knock-on effect that might have? Any suggestions much appreciated :)

0020_20210729_bluenose_II_build.jpg
 
Most of the bulkhead frames were a very tight fit when attached to the false keel. I filed the slots cautiously until a snug fit could be realised, and also sanded the carbon deposits left by the laser cut from the edges as suggested earlier. An initial dry fit gave me a small sense of achievement, although I notice that the tops of some of the bulkhead frames, particularly towards the stern, are not entirely horizontal and have a slight camber to them. It becomes more evident when the stern-end false deck is placed loosely on top and has a small but noticeable 'rocking' motion side to side. Is this a concern? Seems I have a few options; 1) Carry on regardless with the slight curve, 2) Pad the top ends of the faulty frames until they are horizontal, or 3) Sand the top centres of the faulty frames until horizontal. Option 1 doesn't seem right, and the sanding in option 3 might unnecessarily reduce the height of the frame and who knows what knock-on effect that might have? Any suggestions much appreciated :)

View attachment 246635
The decks are cambered across those bulkheads/beams so that water coming aboard drains outwards and through the scuppers along the sides of each station which will appear on your plan elevations. I recommend securing the bulkheads once placed square and plumb with temporary bracing pieces to secure them before you begin your fairing/filing on the outer edges so that the planking runs smoothly and true without sharp crests or hollows between. You are doing well. Rich (PT-2)
 
The decks are cambered across those bulkheads/beams so that water coming aboard drains outwards and through the scuppers along the sides of each station which will appear on your plan elevations. I recommend securing the bulkheads once placed square and plumb with temporary bracing pieces to secure them before you begin your fairing/filing on the outer edges so that the planking runs smoothly and true without sharp crests or hollows between. You are doing well. Rich (PT-2)
Regarding your transom piece, it is different than my own MS2130 kit where I had to fashion the transom/deadwood our of a solid block of wood. Take another look at your plans and instructions to understand how this area will be executed in your kit. I know that it needs to be solid and not moving around. Rich
 
The decks are cambered across those bulkheads/beams so that water coming aboard drains outwards and through the scuppers along the sides of each station which will appear on your plan elevations. I recommend securing the bulkheads once placed square and plumb with temporary bracing pieces to secure them before you begin your fairing/filing on the outer edges so that the planking runs smoothly and true without sharp crests or hollows between. You are doing well. Rich (PT-2)
Ok, that makes sense thanks Rich. A bit like the camber of a motorway, to drain rainwater. So I'll assume that the false deck, when attached, must follow the contours of the bulkheads rather than the other way around. Yes, my next step is to try and make sure that each bulkhead frame is perpendicular to the keel. Thanks again.
 
Back
Top