Bluenose

You are right. I have been prepping them running the thread on my beeswax block and pulling it over my fingers to work it in. That may be part of what is seen but the flame would melt it in better. All of which may work against absorption of the glue into the fibers. I'll give it a try. Thanks.. Rich
Brian,
What sequence would you recommend?
Candle to remove thread fuzz before running it over the beeswax and rubbing it in?
Beeswax and finger rub before the candle flame?
Or another approach. . . .
I also think that the textured striations on the small tweezer points pull up some fibers which were tight before securing the knot.
 
Rich...what size are the printed Model Shipways plans..? some kits are A1 and others seem bigger..?

Many thanks for that
The plans are related to the instruction booklet which is needed for some steps, illustrated, along the way. It is a downloadable pdf separately for those who do not buy the kit where it is provided. Rich
 
Did I thank you for that info...? was just thinking ahead to whether I try to get copies made to cut out parts as required. Been having some loaptop issues so if I had not thanked tyou for the answer...Thanks
 
Did I thank you for that info...? was just thinking ahead to whether I try to get copies made to cut out parts as required. Been having some loaptop issues so if I had not thanked tyou for the answer...Thanks
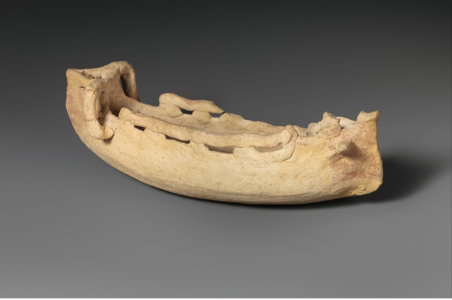
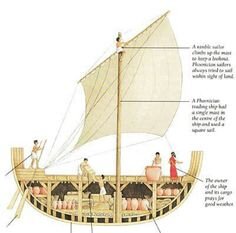
I am not sure how "accurate" scratch parts of many different sizes and complexities transferred from a full sized and therefore accurate as feasible plan sheets would be. The lumber sizes provided were on a separate sheet from the instruction book, as well as the necessary brass strips which as I commented earlier may not be commercially available at that size now. I am too new of a builder to be able to confidently pass by the POB and go straight to scratch. I will have to do that though from plans that I will have to draw to build my own scratch 1,500 BC Phoenician trade boat from as many different images that I can assemble and then create my own draughts and scantlings from the lines that I can draft. It will be much smaller and in many ways less complex of a model with the very primitive sail and rigging. Biggest challenge though will be to draft frame scantlings along the hull that will conform to the rocker keel of what has been generally described as some as a "tub" which is fair with the double ended and very blunt bow frames mirrored in the stern. That will be my next project and cannot call it a dry dock as there are no kits for this type of boat. All of this is mostly assumption as all of the wood from ancient wrecks has mostly been deteriorated and the best artifacts of those are clay models found in tombs and elsewhere that do not prove very much information that is useful.
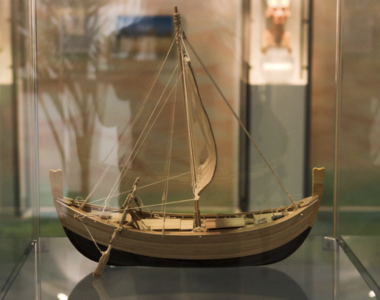
Clay Model Side View Phoenecian Boat.pngClay Model Side View Phoenecian Boat.pngPhoenecian boat museum model.png
His model is a best guess
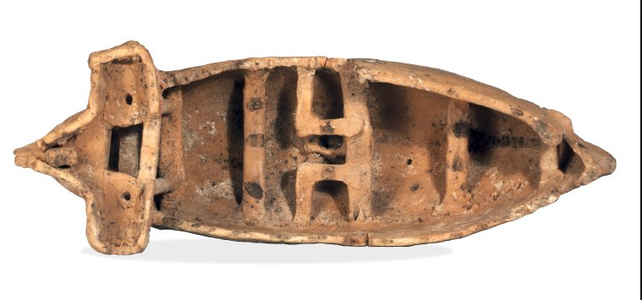
phoenecian_clay_model_top_view.png
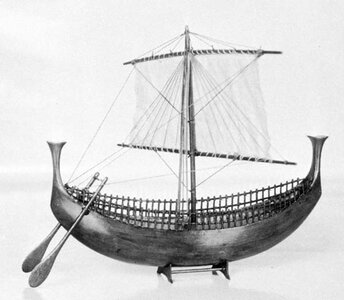
Another clay model artifact and last an artistic concept
Phoenecian Boat Model.jpg
And assumed section for deck framing Phoenecian trade boat framing.jpg
I had hoped to be able to enlarge this last one but have not found a way to do that.

Good luck with how proceed with your second BN.
Rich (PT-2)
 
I am not sure how "accurate" scratch parts of many different sizes and complexities transferred from a full sized and therefore accurate as feasible plan sheets would be. The lumber sizes provided were on a separate sheet from the instruction book, as well as the necessary brass strips which as I commented earlier may not be commercially available at that size now. I am too new of a builder to be able to confidently pass by the POB and go straight to scratch. I will have to do that though from plans that I will have to draw to build my own scratch 1,500 BC Phoenician trade boat from as many different images that I can assemble and then create my own draughts and scantlings from the lines that I can draft. It will be much smaller and in many ways less complex of a model with the very primitive sail and rigging. Biggest challenge though will be to draft frame scantlings along the hull that will conform to the rocker keel of what has been generally described as some as a "tub" which is fair with the double ended and very blunt bow frames mirrored in the stern. That will be my next project and cannot call it a dry dock as there are no kits for this type of boat. All of this is mostly assumption as all of the wood from ancient wrecks has mostly been deteriorated and the best artifacts of those are clay models found in tombs and elsewhere that do not prove very much information that is useful.
View attachment 250669View attachment 250669View attachment 250670
His model is a best guess
View attachment 250671
Another clay model artifact and last an artistic concept
View attachment 250672
And assumed section for deck framing View attachment 250673
I had hoped to be able to enlarge this last one but have not found a way to do that.

Good luck with how proceed with your second BN.
Rich (PT-2)
@Jimsky, I am staggered by all of these posts that you see and react to in some manner. Thanks for your massive and timely support. Rich
 
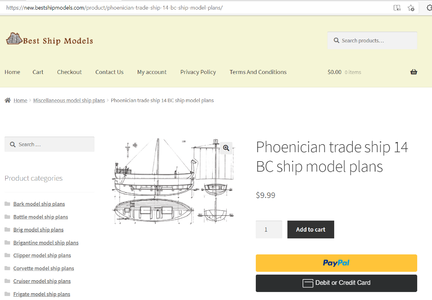
The embed acts like a screen shot and not active so I will Google it up as the price if a deal even if it is only what I see and without scale information here. Thanks for the lead. Rich (PT-2)
It took scrolling through about 7 pages of screens but I found it. Now I'll see what they send. Thanks. Rich
 
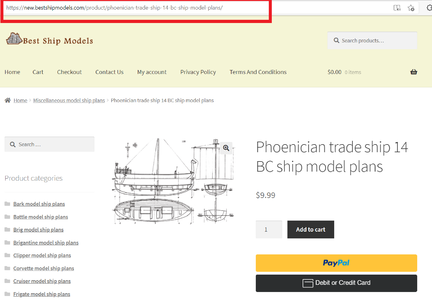
Rich the actual link that you can use is in the red block.

PS.png
 
Rich there is tons of information available.

View attachment 250693

This is the Phoenicia - the only replica ship of the Phoenician vessel in the world. Just type in Phoenicia Replica Ship and you will find a plethora of information, websites., pictures etc.

View attachment 250694

View attachment 250695

View attachment 250696

View attachment 250697

View attachment 250698

This last picture was obviously taken in the Cape Town Harbour (South Africa) with Table Mountain as backdrop).

All these images are from CNN. The link is: http://edition.cnn.com/2013/02/28/world/americas/phoenician-christopher-columbus-america-sailboat/


Then - the company Model Shipyard actually has a model available. It is not a kit, but a fully built model.

View attachment 250699

www.stephensandkenau.com/wp-content/themes/modeShipYardTheme/timthumb.php?w=640&zc=1&q=100&src=https://www.stephensandkenau.com/wp

So there you go my friend - now now more excuses.

And Rich, please open a separate thread on this build - in the Bluenose log, it is not going to get the attention it deserves.
I will do that but had not previously as I was not sure when or if I would actually take the tack. I will now have to figure out how to save your photos as jpg to be able to print them out for my growing collection of images for the model when the lumber is gathered. Thank you for your generous and time consuming support on this matter. Rich (PT-2)
 
I will do that but had not previously as I was not sure when or if I would actually take the tack. I will now have to figure out how to save your photos as jpg to be able to print them out for my growing collection of images for the model when the lumber is gathered. Thank you for your generous and time consuming support on this matter. Rich (PT-2)
Found the site and photos. Interesting to zoom in on the view looking into the hull from aft where the exposed topmost plank shows the mortise slots for the tenon joinery and through "bolts" just like a separate construction detail showed. An ancient form of a strip canoe model as we build them in the SoS group.
I may have to PM to Zoly about transferring my prior photos into a new Phoenician Trade Boat thread as my sources were scattered from many sites and times that I do not recall in total. Rich (PT-2)
 
On the first (big) picture, left click. It will give you the option "Save Image As" . Click and save it to your PICTURES

On the others, RIGHT-CLICK. It will give you the option "Save Image As" . Click and save it to your PICTURES

Once the pictures are saved in your PICTURES folder, transfer them onto a USB stick and take ithat to a printing shop.

They will do the rest.
Yes, that was what I did and have posted a few in a new thread. I made some photo copies from a research paper or explanation of a display that are on my desktop but are not jpg or acceptable format for attaching as files in SoS. I will go back to find that source and try again for those. Rich
 
Long after the prior status photos and work is my rather sorry looking work as of 29 December. In my case as evidenced, slow work is not necessarily good work. It is with some reluctance that I'll put up the current status where I know there are a lot of poorly done items but they are what my hands and poor eye sight (singular to one only) produces. Lots of touchups as I continually see things that I didn't see before.
Here is the hand painted hull and lines with the rough planking that is visible in the old photos. . . not a filled in and smoothed out showcase model:
View attachment 202230
Then some decking photos with the more random plank lengths terminating on some of the frames and fasteners before I knew that they were probably plugged over and not visible as with Bluenose II photos that I recently found:View attachment 202231View attachment 202232View attachment 202233
Transom with YQ's pdf file printed and applied after several runs to get it to scale.View attachment 202234
Next hull wise will be the rudder once can figure out how to hold the 1/16th inch brass strips in place to locate the through rudder fastener rods, all aligned as well as learning how to solder the pintel and a tubular gudgeon. For breaks I can always cut and taper down the masts and booms.
Somewhere in the future this schooner may be completed but I don't know when; just trusting that it will. Rich
Hi Rich, I finally took my eyes away from my own BN build to see how others are fairing with theirs. I came across yours and have enjoyed following your progress, methods and frustrations. It is very helpful and informative especially for first time builders such as me. I've replied to this post early on in your build as I am curious to know how you went about staining and vanishing your deck, which is where I am with my build at the moment. My AL instructions simply advise a satin varnish for the deck, and don't specify anything for the walnut waterways, but your deck looks great, and appears to have been subjected to a stain of some kind. Others have used a cherry or oak stain on the decks, which look good too. Knowing very little (well nothing really) about paints, varnishes and finishers in general, I appreciate any thoughts you have on this subject :)
 
Hi Rich, I finally took my eyes away from my own BN build to see how others are fairing with theirs. I came across yours and have enjoyed following your progress, methods and frustrations. It is very helpful and informative especially for first time builders such as me. I've replied to this post early on in your build as I am curious to know how you went about staining and vanishing your deck, which is where I am with my build at the moment. My AL instructions simply advise a satin varnish for the deck, and don't specify anything for the walnut waterways, but your deck looks great, and appears to have been subjected to a stain of some kind. Others have used a cherry or oak stain on the decks, which look good too. Knowing very little (well nothing really) about paints, varnishes and finishers in general, I appreciate any thoughts you have on this subject :)
My brain has to come about to retrace the path several months ago when I finished the deck. The MS2130 kit wood was not the nice pear but was a cherry or some common type that I did not differentiate between the waterway and decking itself. The inside of the bulwarks were painted white with an acrylic and the waterway a light grey. The deck itself after sanding and scraping to eliminate the high planks as well as I could fair them out with those that were too low (No false sub-deck board but only the spaced out bulkheads in the POB model) I think that I may have applied a thin coat of Minwax pre-stain conditioner before a coat of Golden Mahogany wiped off fairly soon and not letting penetrate very long. To my eye it was too light so I did it again. that was a Varathane Medium Fast Dry wood stain. To finish it I used a Varathane Ultimate Polyurethane Water Based Interior Semi-Gloss which is milky but dries transparent. Not the most sophisticated combination but it was for reasons not recalled what I had seen in SoS back then. Others would possibly take a different path and suggest other combinations.
I think the Dean probably has excellent experience with paints and finishes so you may want to give him a PM (Dean2) for his help.
Thanks for your reaction to my own deck which was my first one also.
Rich (PT-2)
 
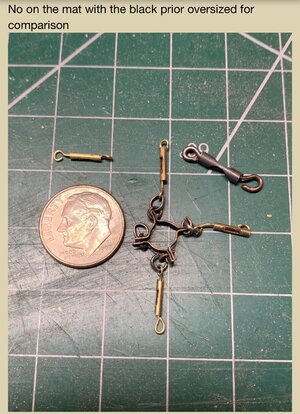
Rich! This is brilliant! I was going to make 4 Individual pieces until I saw this!!!! I’m following your tack on this bowsprit band…thanks! ;)
View attachment 251680
That is actually an assembly of separate pieces as you can see but all pushed onto the bowsprit with the inside band/collar. Not all were to scale but it was what I could produce back then. The test well be to see if anything pulls loose when I try to bend (literally) the twisted wire stays up to the foremast as the sails have had the oval wire hoops through the leach which will have to be threaded onto the stay at the time of mounting. The sail weight will add to the tension and finally the small tubular swedges that I made to secure the ends. I have tested the tube diameter and it just works for the wire to pass through twice, once coming up and then after through the fitting and back down beside itself to be pinched closed. Of course, if the wire stays don't work I will surrender and to back to thread stays which I would like to avoid as the actual stays were wire cables without turnbuckles. In actual 1:1 they were able to do this back then with their own swedging tools.
With your skill your bowsprit fittings should turn out better than mine.
Rich
 
Back
Top