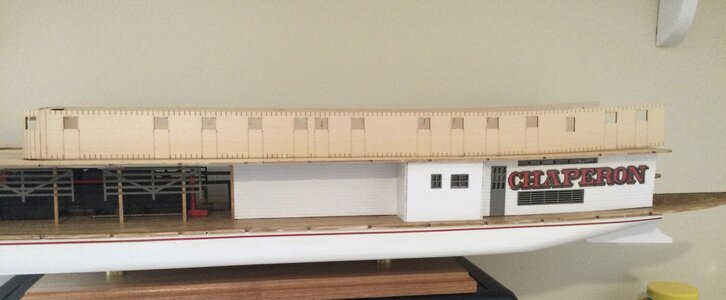
Looking good.Bumblers Notebook:
While working on the various build steps it’s tempting to jump ahead and skip over some of the instructions. BUT I’m finding that to be a quick way to get in trouble. SO…. A note to Self “Don’t do that”!
Cap Strips:
One build step is to bend the “cap strips” to fit the Boiler deck edges. Soaking the 1/16 X 1/8 inch strips in Ammonia or boiling hot water is recommended to bend them into shape. I chose the hot water method and had mixed results. I had success with that method for the forward section of the Boiler deck. But the aft section bend was another story. The bend for that section is almost a 90 degree angle. But with repeated bending and soaking (and breaking a few pieces) I finally managed to bend a strip without it kinking and breaking.
View attachment 268211
A good fit.
View attachment 268212
The bend and kink!! UGH.
The Smoke Stack Covers:
That was an interesting step. Instruction Quote “ There are two 1" diameter dowels, 2-5/8" long in your kit. (Nope, one 6 “ long dowel) These are the smoke stack covers. They were sheet metal cylinders that surrounded the smoke stacks to prevent the crew from coming into contact with the hot stacks. The bottom ends will be beveled to match where they seat on parts 75 ( The Boiler Stacks). Patterns are provided to assist you in shaping these parts. The patterns are on plans sheet 1 as well as on plan sheet 6. Glue the patterns to the ends of the dowels. Draw a line around the circumference of the dowel 5/8" from the end. Carve the bevels as shown. If you have a stationary disc sander it will make this an easy job. The two 5/8" ID rings are on the 1/8" ply sheet in your kit. Glue the rings on center to the other end of the dowel as shown. Sand seal and paint the stack covers a flat black”.
View attachment 268213
The almost final result.
Yup, yes indeed I can do that!! Well, I sanded, carved, fitted, sanded, carved and finally managed to get the dowel to somewhat the right shape and size. Sat the finished pieces on top of the Boiler Stacks, everything looked good. Remembering Barry1’s comments on his build, I dry fitted the forward sections of the Boiler Deck and inserted the Boiler Covers. Almost, close, needs a bit of adjustment, was the result. Oh well, it was back, to fitting, sanding, fitting, sanding, etc.
The Mast:
Instruction Quote: “Note that in photo 12 the mast has been made and fitted. This is the best time to do this as the fitting will become more difficult as construction proceeds. Do not glue in the mast at this time, just get it made and fitted”. Win one for me. I managed to get that part right. Surprisingly the Mast fit just as it should.
View attachment 268214
Wow, a long essay. I’ve learned some more Do’s and Don’ts. The next step is to set in, square and glue down the Boiler Deck.
Jan
-

Win a Free Custom Engraved Brass Coin!!!
As a way to introduce our brass coins to the community, we will raffle off a free coin during the month of August. Follow link ABOVE for instructions for entering.
-

PRE-ORDER SHIPS IN SCALE TODAY!
The beloved Ships in Scale Magazine is back and charting a new course for 2026!
Discover new skills, new techniques, and new inspirations in every issue.
NOTE THAT OUR FIRST ISSUE WILL BE JAN/FEB 2026
You are using an out of date browser. It may not display this or other websites correctly.
You should upgrade or use an alternative browser.
You should upgrade or use an alternative browser.
Chaperon 1884 Stern Wheeler
- Thread starter Pathfinder65
- Start date
- Watchers 35
-
- Tags
- chaperon model shipways
Bumblers Notebook Page 2: The Boiler Deck.
The Boiler Deck comes in four pieces. The build instructions indicate that the Port and Starboard pieces be assembled separately and then glued to the Main Deck structure.
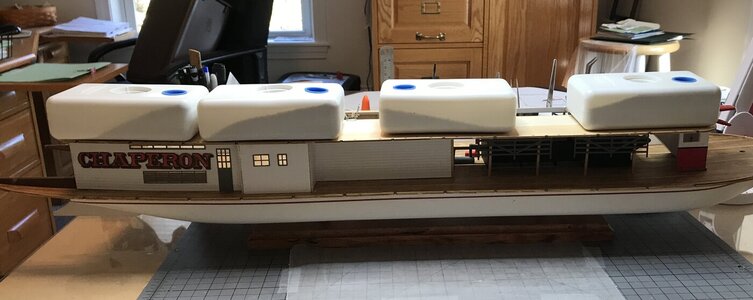
I had no difficulty doing the steps to complete that part of the build. But, again there were the butt joints of the four pieces that join the deck pieces to contend with.
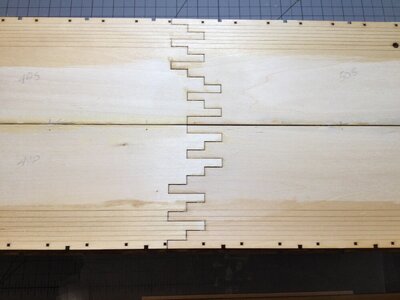
A quick coat of stain had brought out the look of the inscribed planking of the deck, so my thought was to fill in the joints or on the other hand plank the visible area of the deck to match the Main Deck.
I also looked at the number of Stationaries required for support between the Main and Boiler decks. The instructions called for 3/32inch square pieces and later 1/16inch square pieces (for the Boiler Deck and the Hurricane Deck). I had earlier made a note that I would use Mahogany for all the Stationaries,
I consulted the “Clerk of the Works”.
She said, “ If you have to place an order for material do it all at the same time.”
Can’t beat that logic!
So it will be 1/32 X 1/8 inch planking material for the Deck and 3/32 and 1/16 inch Mahogany for the Stationaries.
This part of the build to be continued.
Jan
The Boiler Deck comes in four pieces. The build instructions indicate that the Port and Starboard pieces be assembled separately and then glued to the Main Deck structure.

I had no difficulty doing the steps to complete that part of the build. But, again there were the butt joints of the four pieces that join the deck pieces to contend with.

A quick coat of stain had brought out the look of the inscribed planking of the deck, so my thought was to fill in the joints or on the other hand plank the visible area of the deck to match the Main Deck.
I also looked at the number of Stationaries required for support between the Main and Boiler decks. The instructions called for 3/32inch square pieces and later 1/16inch square pieces (for the Boiler Deck and the Hurricane Deck). I had earlier made a note that I would use Mahogany for all the Stationaries,
I consulted the “Clerk of the Works”.
She said, “ If you have to place an order for material do it all at the same time.”
Can’t beat that logic!
So it will be 1/32 X 1/8 inch planking material for the Deck and 3/32 and 1/16 inch Mahogany for the Stationaries.
This part of the build to be continued.
Jan
That’s the problem with making upgrades. It only leads to more upgrades.
Ha, I can blame others. Especially the "AL-FI" thinkers.That’s the problem with making upgrades. It only leads to more upgrades.
Indeed I do. But as an old F*** I do have my momentsThe Admiral will not be happy being called that! Clearly you like to live dangerously ...

The units are Imperial.Great job !!! Are the kit instructions on Imperial units ? Or metrics too.
Daniel
Jan
The units are Imperial.
Jan
Oh my Gosh I have the kit but didn't open the instructions. I will need to have on my phone all the time open the inches to mm converter.
Thanks !!
Daniel
The Admiral will not be happy being called that! Clearly you like to live dangerously ...
 ...The Admiral will confine you to your quarters away from your shipyard. Severe punishment
 Bumblers Notebook Page 3: The Boiler Deck Structure
The instructions,
“Assemble the bending jig for parts 84 as shown on the plans and let dry. Parts 84 P/S have laser engraved vertical lines forward where a bend is required. Their purpose is so that the basswood will yield at these lines when bent but not break. Because of the variance in hardness of basswood and the settings of the laser machines the engraved lines may or may not be deep enough to allow the wood to yield nicely when bent around the bending jig.”
It took a few passes with a new #11 blade to score the vertical lines enough to allow for the bending of the part in the bending jig. I placed a piece of heavy duty masking tape for backing in that area. (Just in case I got carried away).
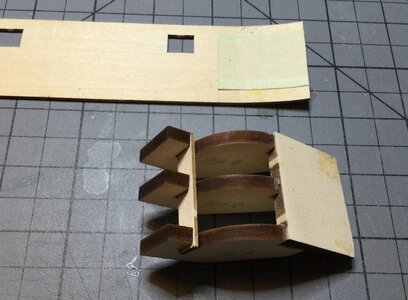
The bending jg.
The first section came out fine, the second was a little problematic but the backing tape held it all together.
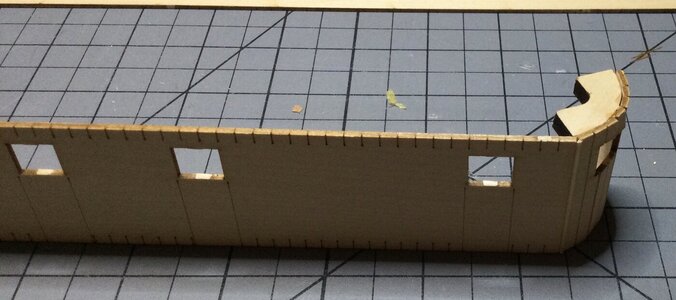
The first section.
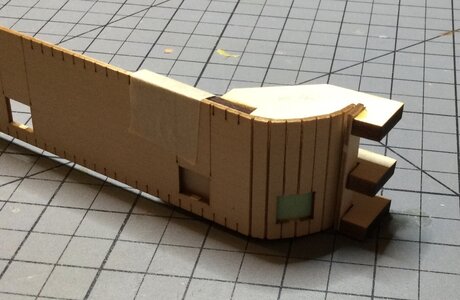
The second section in the bending jig.
The time consuming step is placing the 1/16 inch square Battens. There are a LOT of them.
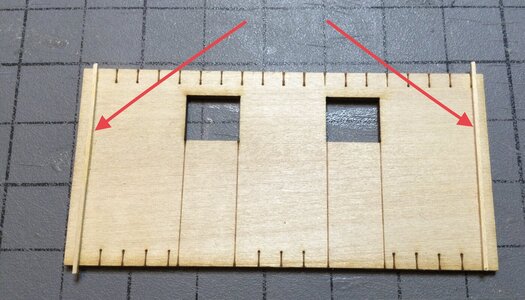
The start of the 1/32 inch square Battens. One per scribed line.
Jan
The instructions,
“Assemble the bending jig for parts 84 as shown on the plans and let dry. Parts 84 P/S have laser engraved vertical lines forward where a bend is required. Their purpose is so that the basswood will yield at these lines when bent but not break. Because of the variance in hardness of basswood and the settings of the laser machines the engraved lines may or may not be deep enough to allow the wood to yield nicely when bent around the bending jig.”
It took a few passes with a new #11 blade to score the vertical lines enough to allow for the bending of the part in the bending jig. I placed a piece of heavy duty masking tape for backing in that area. (Just in case I got carried away).

The bending jg.
The first section came out fine, the second was a little problematic but the backing tape held it all together.

The first section.

The second section in the bending jig.
The time consuming step is placing the 1/16 inch square Battens. There are a LOT of them.

The start of the 1/32 inch square Battens. One per scribed line.
Jan
Yes indeed the jigs worked well. My fear was cutting all the way through the scored lines. But the layer of Masking tape held everything together.The building jig seems to have done its job well - you have two very nice going bends going there. Well done!
Jan
You're welcome, Jan. There is still room for new members in the Club.Ha, I can blame others. Especially the "AL-FI" thinkers.
But.....nice progress with different challenges: bending panels and lots of battens parallel to each other.
Regards, Peter
Thanks to all of you who are following my “Epic”. It’s a very interesting kit and I‘m having a good time building it.
Jan
Jan
Bumblers Notebook Page 4: The Boiler Deck Structure Continued
The Stern section of the structure required the assembly of another “Bending Jig”. (That makes three so far). The ends of this piece need to be bent to fit the end of the Boiler deck.
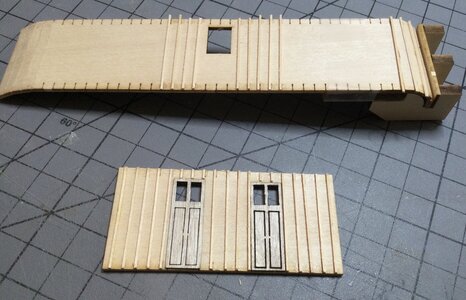
The bend in the jig for the Stern piece is not as pronounced as with the other jigs. The method of placing heavy duty Masking tape as a backing for the section to be bent is working very well. So far I’ve managed to score the bend lines without cutting them all the way through.
Currently the plan is to finish bending the corners and adding the Battens to all four pieces of the structure, paint the pieces and add them to the Boiler deck once that is planked.
Jan
The Stern section of the structure required the assembly of another “Bending Jig”. (That makes three so far). The ends of this piece need to be bent to fit the end of the Boiler deck.

The bend in the jig for the Stern piece is not as pronounced as with the other jigs. The method of placing heavy duty Masking tape as a backing for the section to be bent is working very well. So far I’ve managed to score the bend lines without cutting them all the way through.
Currently the plan is to finish bending the corners and adding the Battens to all four pieces of the structure, paint the pieces and add them to the Boiler deck once that is planked.
Jan
That's a lot of work for the walls, Jan. But the combination of all looks very nice. The investment of time is in order with the result.Bumblers Notebook Page 4: The Boiler Deck Structure Continued
The Stern section of the structure required the assembly of another “Bending Jig”. (That makes three so far). The ends of this piece need to be bent to fit the end of the Boiler deck.
View attachment 268857
The bend in the jig for the Stern piece is not as pronounced as with the other jigs. The method of placing heavy duty Masking tape as a backing for the section to be bent is working very well. So far I’ve managed to score the bend lines without cutting them all the way through.
Currently the plan is to finish bending the corners and adding the Battens to all four pieces of the structure, paint the pieces and add them to the Boiler deck once that is planked.
Jan
Regards, Peter
I agree with Peter. I especially like the look with the battens.That's a lot of work for the walls, Jan. But the combination of all looks very nice. The investment of time is in order with the result.
Regards, Peter
Indeed, it’s a slow process. I do it at odd moments here and there. I do a couple battens working from the middle and then a couple working from the ends. Then it’s off to do something else while the glue dries.That's a lot of work for the walls, Jan. But the combination of all looks very nice. The investment of time is in order with the result.
Regards, Peter
Jan


