Chaperon 1884 Stern Wheeler

INTERMISSION:

There is/will be a short lack of build posting. We have company for the month and the Admiral has suggested that I should not disappear for hours at a time in the shipyard. (Since I‘ve been strongly hinting, dropping suggestion for the “Need” of another ship kit and Christmas is a few weeks away, I’m being very good). Occasionally logging in to SOS is allowed since at my age complete withdrawal would not be a pretty picture in front of our visitors :D:D:D

Jan
 
ROTFROTFROTF Do not think for one moment that the Admiral is not seeing right through your plans! She is merely "allowing" you to entertain those thoughts. That being said, it can certainly not hurt to heed her "suggestions". I just hope that you have made it clear as to which model must grace the Christmas stocking!
 
Fun Day in the shipyard :D

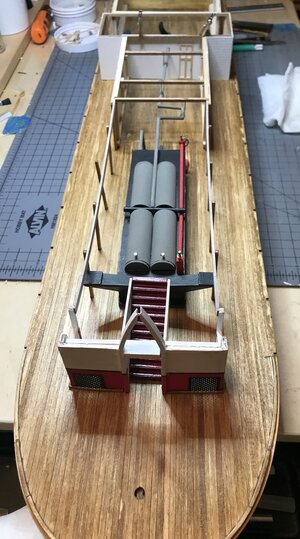
Had some time today to add "Bling" to the square box looking "Dingy" called the boiler. I know the next deck will cover the boiler and it will only be visible from side views "BUT......" it just was to plain.

I took a lot of liberties and scrabbled through my "I might need this someday box" and viola I'm :D:D:D

Terrible view from the front but it shows the general idea of what I did.

9A824EB5-2256-4E80-8FAD-A92920ACF8A8_1_201_a.jpeg

and a side view

4F0F114D-7473-40B6-962C-6DCDDB1C706E_1_201_a.jpeg

So there you have it.

Jan
 
I'm glad that you could find some time for yourself. The additions are all adding value and even if the deck will be covering them, you will still know that they are there!
 
Keep for inspiration. This is completely handmade.

View attachment 246806
Alexander, That is a really beautiful boat you have built. What scale is it & what materials did you use? Your work is flawless.
I grew up in St.Louis & rode on the old wooden riverboat when I was a child in the 1930's. I love & have built a lot of them . I have been to all the riverboat cities & museums, like Marietta Ohio, & Jeffersonville above Louisville, Tn.
You should do a post on your Joseph Henry.
Gene
 
Fun Day in the shipyard :D

Had some time today to add "Bling" to the square box looking "Dingy" called the boiler. I know the next deck will cover the boiler and it will only be visible from side views "BUT......" it just was to plain.

I took a lot of liberties and scrabbled through my "I might need this someday box" and viola I'm :D:D:D

Terrible view from the front but it shows the general idea of what I did.

View attachment 266547

and a side view

View attachment 266548

So there you have it.

Jan
It looks great Jan. I love riverboats too & have built them too.
Gene
 
Alexander, That is a really beautiful boat you have built. What scale is it & what materials did you use? Your work is flawless.
I grew up in St.Louis & rode on the old wooden riverboat when I was a child in the 1930's. I love & have built a lot of them . I have been to all the riverboat cities & museums, like Marietta Ohio, & Jeffersonville above Louisville, Tn.
You should do a post on your Joseph Henry.
Gene
Gene1, this is unfortunately not my building. This is the model of the Russian modeller Vladimir Churilin, the world champion. I posted this model to Pathfinder for inspiration. But I have seen this model live in competition and it is really impressive because it is completely handmade.
 
I'm glad that you could find some time for yourself. The additions are all adding value and even if the deck will be covering them, you will still know that they are there!
Hi Heinrich,

It was good to be able to spend a couple of hours in the boatyard, musing, inventing and glueing bits and pieces. The company we had over the last couple of weeks was also great. It was our first opportunity in two and a half years to get together.

Jan
 
Fun Day in the shipyard :D

Had some time today to add "Bling" to the square box looking "Dingy" called the boiler. I know the next deck will cover the boiler and it will only be visible from side views "BUT......" it just was to plain.

I took a lot of liberties and scrabbled through my "I might need this someday box" and viola I'm :D:D:D

Terrible view from the front but it shows the general idea of what I did.

View attachment 266547

and a side view

View attachment 266548

So there you have it.

Jan
Hi Jan.
Nice to see you build the boiler with the tubes and other ad-on’s. And a good looking matted paint on them.
Now we all know: it’s there and it is great!
Regards, Peter
 
Bumblers Notebook:

While working on the various build steps it’s tempting to jump ahead and skip over some of the instructions. BUT I’m finding that to be a quick way to get in trouble. SO…. A note to Self “Don’t do that”!

Cap Strips:

One build step is to bend the “cap strips” to fit the Boiler deck edges. Soaking the 1/16 X 1/8 inch strips in Ammonia or boiling hot water is recommended to bend them into shape. I chose the hot water method and had mixed results. I had success with that method for the forward section of the Boiler deck. But the aft section bend was another story. The bend for that section is almost a 90 degree angle. But with repeated bending and soaking (and breaking a few pieces) I finally managed to bend a strip without it kinking and breaking.


34752393-CF7B-48E1-B96A-CF884B6296F7.jpeg
A good fit.

6129CE4D-F8B4-4BA4-9A30-05419987AC08_1_201_a.jpeg
The bend and kink!! UGH.


The Smoke Stack Covers:

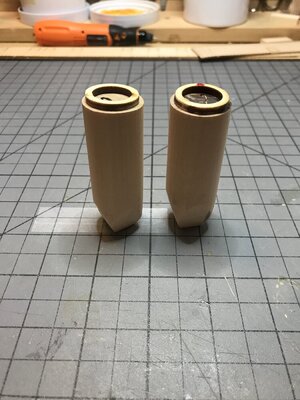
That was an interesting step. Instruction Quote “ There are two 1" diameter dowels, 2-5/8" long in your kit. (Nope, one 6 “ long dowel) These are the smoke stack covers. They were sheet metal cylinders that surrounded the smoke stacks to prevent the crew from coming into contact with the hot stacks. The bottom ends will be beveled to match where they seat on parts 75 ( The Boiler Stacks). Patterns are provided to assist you in shaping these parts. The patterns are on plans sheet 1 as well as on plan sheet 6. Glue the patterns to the ends of the dowels. Draw a line around the circumference of the dowel 5/8" from the end. Carve the bevels as shown. If you have a stationary disc sander it will make this an easy job. The two 5/8" ID rings are on the 1/8" ply sheet in your kit. Glue the rings on center to the other end of the dowel as shown. Sand seal and paint the stack covers a flat black”.


F62D501A-9D05-40AB-AAF7-C00C49539F8C.jpeg

The almost final result.

Yup, yes indeed I can do that!! Well, I sanded, carved, fitted, sanded, carved and finally managed to get the dowel to somewhat the right shape and size. Sat the finished pieces on top of the Boiler Stacks, everything looked good. Remembering Barry1’s comments on his build, I dry fitted the forward sections of the Boiler Deck and inserted the Boiler Covers. Almost, close, needs a bit of adjustment, was the result. Oh well, it was back, to fitting, sanding, fitting, sanding, etc.

The Mast:

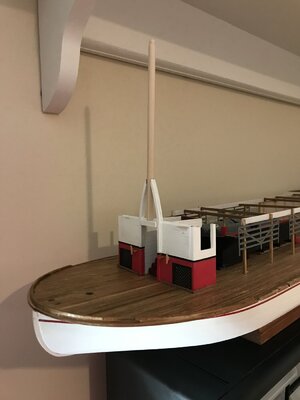
Instruction Quote: “Note that in photo 12 the mast has been made and fitted. This is the best time to do this as the fitting will become more difficult as construction proceeds. Do not glue in the mast at this time, just get it made and fitted”. Win one for me. I managed to get that part right. Surprisingly the Mast fit just as it should.


C7C6FCAB-4538-4E71-97A5-92311C100D97.jpeg


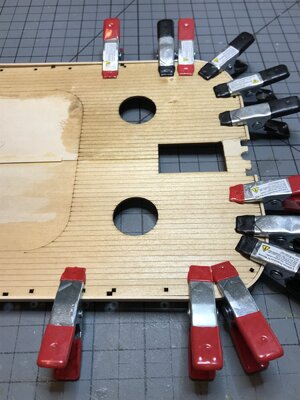
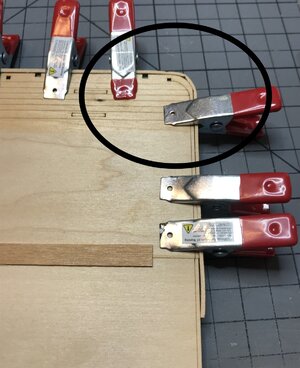
Wow, a long essay. I’ve learned some more Do’s and Don’ts. The next step is to set in, square and glue down the Boiler Deck.


Jan
 
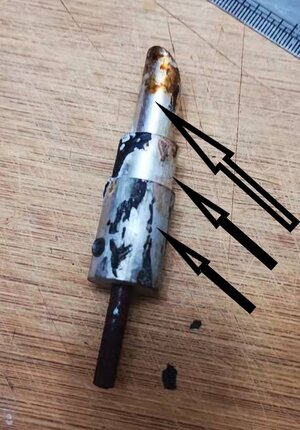
Hello Jan. Good to see you building. A word on that bend and kink. If you look at the pic below, you have three different diameters for small bends/kinks on this fitment of your plank bender. They should work very well for that kink. (PS: please excuse the condition of my plank bender - it has a hard life).

微信图片_20211107233425.jpg

Your deck finish is simply to die for - just beautiful!
 
Hi Jan,
Nice to see the further detailing of you paddle steaming. Looks good!
Regards, Peter
Hi Peter,

Thanks for looking in. As usual I'm just bumbling along, I'm truly enjoying the build. The next set of deck structures should prove interesting, particularly the bends for the curved sections of the structures.

Jan
 
Back
Top